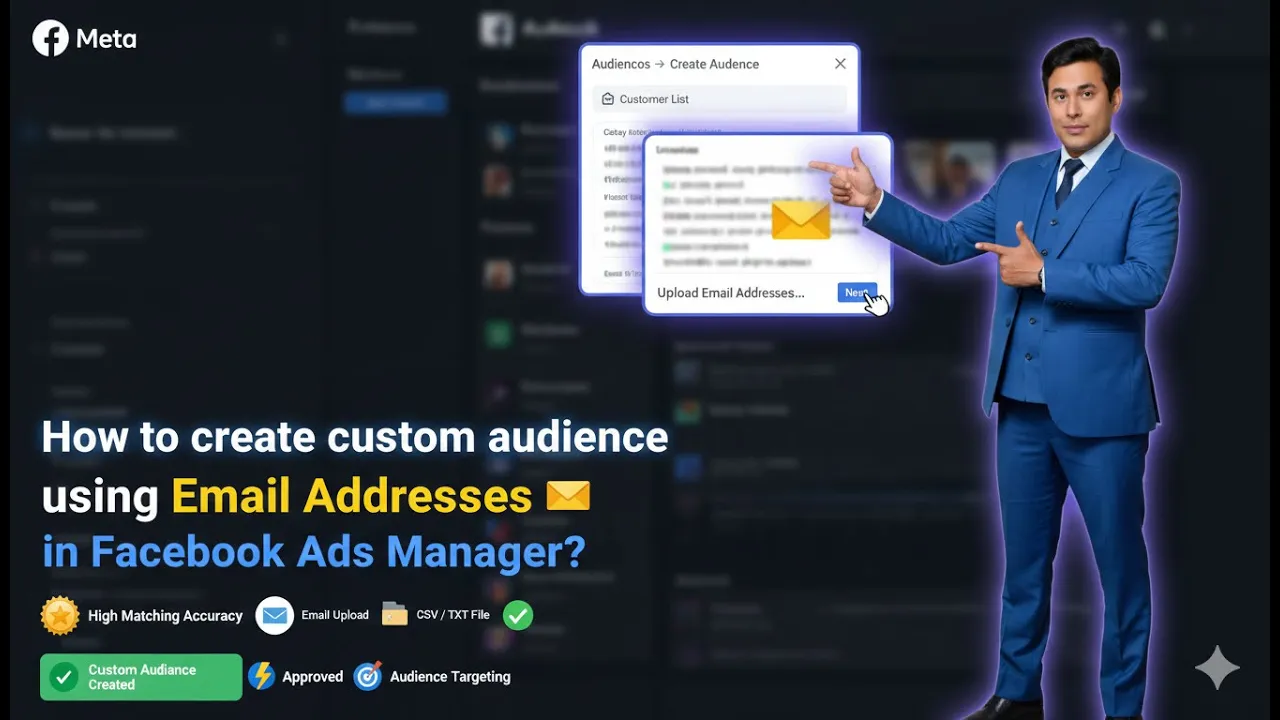
In this article, we are going to learn how to create a custom audience in Facebook Ads Manager using an email list. This method is very useful for businesses that already have email IDs of their existing customers or prospective customers.
If you are running a business and you have collected email IDs through sign-ups, inquiries, or past customers, you can use those email IDs to show your ads directly to those users on Facebook and Instagram. These users have already interacted with your business in some way, which makes them a valuable audience for retargeting.
This article explains the complete step-by-step process of creating a custom audience using a customer email list in Facebook Ads Manager.
Understanding Email List Custom Audience
An email list custom audience allows you to upload email IDs of users you already have and match them with Facebook or Instagram accounts created using those same email IDs.
When Facebook finds a match, it adds those users to your custom audience. After that, you can run retargeting ad campaigns and show your business ads only to those users on Facebook and Instagram platforms.
This method is commonly used to:
- Retarget existing customers
- Retarget leads or prospects
- Increase brand recall
- Improve conversion chances
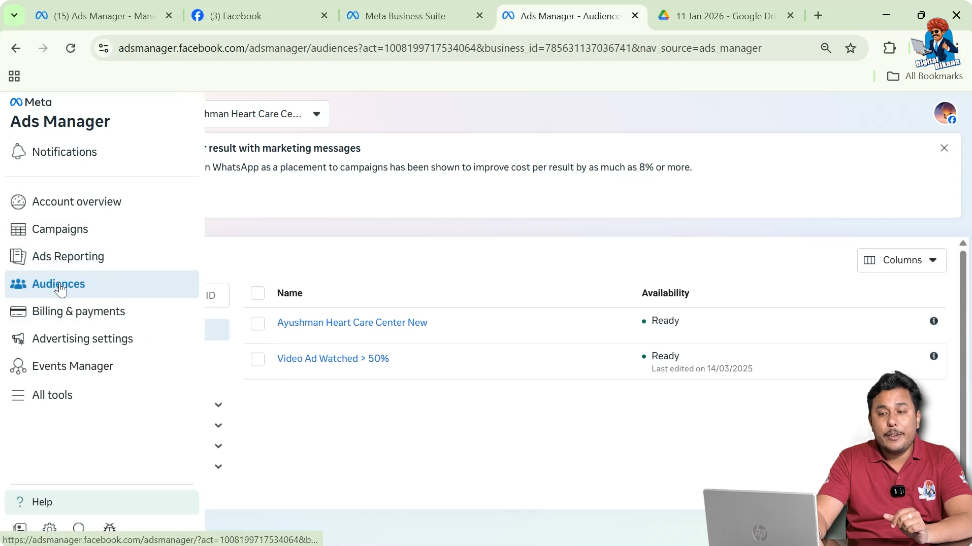
Where to Create Email List Custom Audience in Facebook Ads Manager
To create a custom audience using email IDs, you need to go to the Audiences section inside Facebook Ads Manager.
This is the place where you manage:
From here, you can start creating a new custom audience using your customer list.
How to Create a Custom Audience in Facebook Ads Manager Using Email List?
Step 1: Go to the Audiences Section
Open Ads Manager and Audience Tab
First, log in to your Facebook Ads Manager. Inside Ads Manager, navigate to the Audiences section. This is where audience creation and management happens.
Step 2: Click on Create Audience
Select Custom Audience Option
Inside the Audiences section, click on the Create Audience button. From the available options, select Custom Audience.
This allows you to create an audience based on your own data.

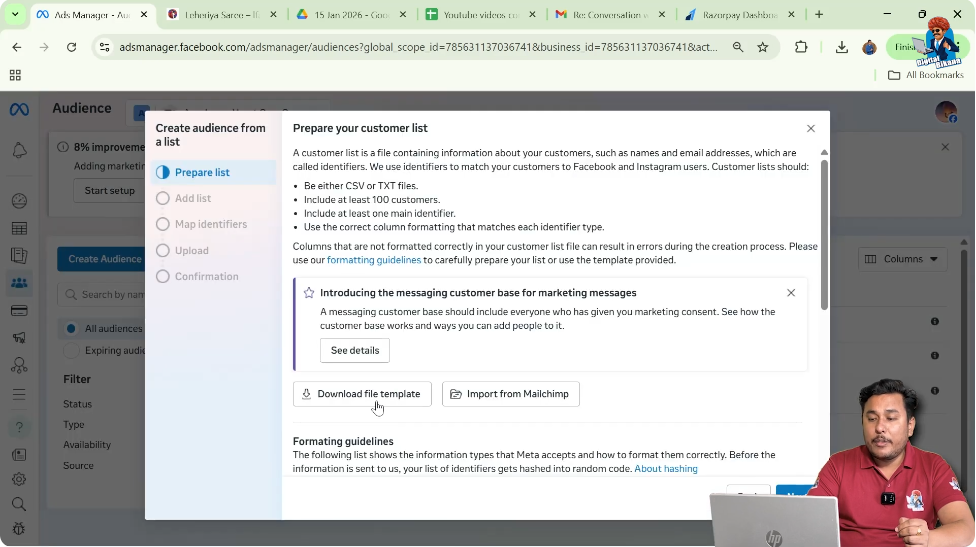
Step 3: Select Customer List as Data Source
Choose Customer List
After selecting Custom Audience, Facebook will ask you to choose a data source. From the list of data sources, select Customer List and then click on Next.
This option is used to upload email IDs or other customer data.

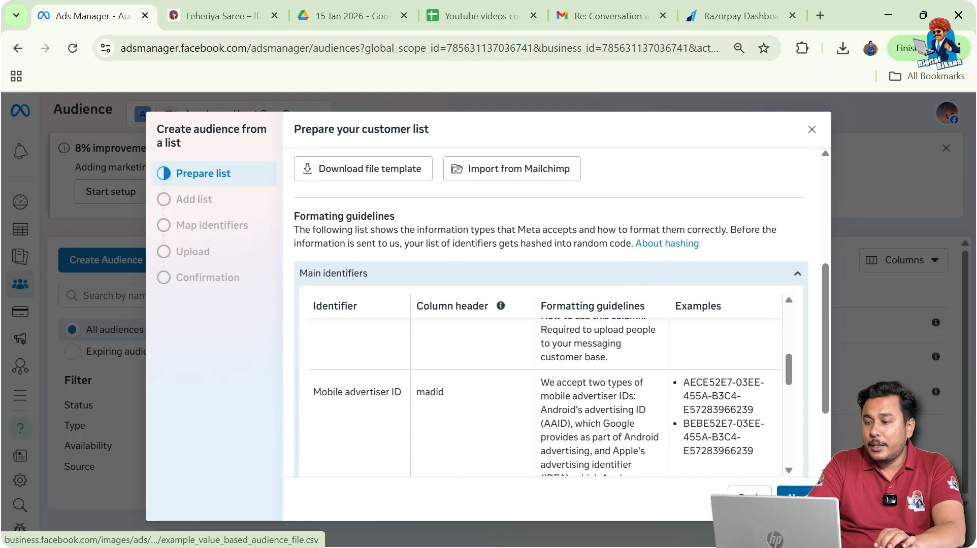
Downloading the Sample File Template
After selecting the customer list option, Facebook provides a sample file template to help you understand the correct format.
Step 4: Download the Sample File
Understand the Email Format
Click on the option to download the sample file template. This file shows how customer data should be entered.
Downloading this file helps you avoid formatting mistakes.
Editing the Email List File
Step 5: Open the Downloaded File
Open Excel or CSV File
Open the downloaded file using Microsoft Excel. Your Excel or Microsoft Office must be activated to edit the file properly. If it is not activated, you may not be able to make changes.

Step 6: Remove Unnecessary Columns
Keep Only the Email Column
The sample file contains multiple columns, but you do not need all of them.
You only need the email column.
- Select all other columns
- Delete them
- Keep only the email column
This keeps the file clean and simple.

Step 7: Enter Email IDs
Add Customer or Prospect Emails
Now, enter the email IDs of users you want to target.
You can:
- Enter your own email ID for testing
- Enter customer email IDs
- Enter prospect email IDs
Add all email IDs one below another in the email column.
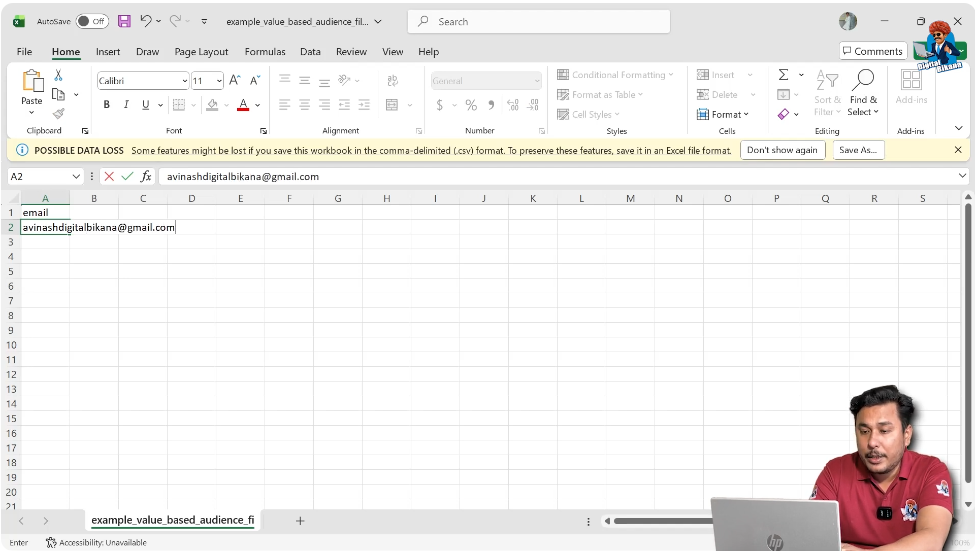
Step 8: Save the Edited File
Save the File Properly
After entering all email IDs, click on the Save button. Make sure the file is saved properly so that it can be uploaded later.
After saving, you can minimize or close the Excel file.
Uploading the Email List to Facebook Ads Manager
Step 9: Go Back to Ads Manager
Return to Browser
Go back to your browser where Facebook Ads Manager is open. Click on Next to proceed with uploading the file.
Step 10: Upload the Edited File
Choose File From Device
Facebook will ask you to choose a file from your device.
- Click on Choose File
- Select the file you edited
- Click on Open
The file will now be uploaded to Facebook Ads Manager.

Naming the Custom Audience
Step 11: Rename the Custom Audience
Use a Clear Audience Name
After uploading the file, Facebook allows you to rename the custom audience.
Give it a clear name such as:
- Email List Audience
- Customer Email List
- Trial Email List
This helps you easily identify the audience later.

Mapping and Creating the Audience
Step 12: Confirm Email Column Mapping
Check Email Mapping
Facebook automatically detects the email column and shows that one column has been mapped as email address.
This confirms that the file has been uploaded correctly.

Step 13: Import and Create Audience
Final Creation Step
Click on Import and Create.
Facebook will now start processing the email list and creating the custom audience.

Custom Audience Creation Status
After clicking import and create:
- The audience gets created
- It shows the number of rows uploaded
- The audience status becomes Populating
This means Facebook is matching the email IDs with user accounts.
Time Required for Audience to Be Ready
The email list custom audience usually takes 24 to 48 hours to become ready.
During this time:
- Facebook matches email IDs
- Audience size gets finalized
Once ready, the status changes and the audience can be used in ad campaigns.
Using Email List Custom Audience for Retargeting Ads
After the audience is ready, you can use it while creating a new ad campaign.
You can:
- Select this custom audience at the ad set level
- Run retargeting ad campaigns
- Show ads only to users from your email list
This helps you reach users who already know your brand.
Benefits of Using Email List Custom Audience
Creating a custom audience using email IDs helps you:
- Retarget existing customers
- Reconnect with old leads
- Improve ad relevance
- Increase conversion chances
These users are more likely to engage because they already have a connection with your business.
Email List Custom Audience Explained in Simple Words
In simple words:
- You already have customer email IDs
- You upload them to Facebook Ads Manager
- Facebook matches them with user accounts
- You show ads only to those users
- You run retargeting campaigns
This makes your advertising more focused and effective.
Common Mistakes to Avoid
While creating email list custom audiences:
- Do not upload unnecessary columns
- Do not upload incorrect email formats
- Do not forget to save the file properly
Following the correct steps ensures smooth audience creation.
Final Conclusion
Creating a custom audience in Facebook Ads Manager using an email list is a powerful retargeting method. It allows you to reach users who have already shown interest in your business by signing up or interacting with you previously.
By downloading the sample file, keeping only the email column, uploading the edited file, and correctly naming the audience, you can easily create an email list custom audience. Once the audience is ready, you can run retargeting ad campaigns and improve engagement and conversions.
This method helps businesses make better use of their existing customer data and build stronger connections through Facebook and Instagram advertising.
Related Posts