Sending a marketing campaign is the final and most important step when working with WhatsApp Business API. After uploading contacts and creating an approved template, the next task is to deliver that message to the right audience in a structured and controlled manner. In this article, we will understand how to create and send a marketing campaign using WhatsApp Business API through the Interakt platform.
This guide explains the entire campaign creation process step by step, starting from accessing the campaign section to making the campaign live.
Understanding the Campaign Flow in WhatsApp Business API
Before sending any campaign, three major steps must already be completed:
- Contacts must be uploaded into Interakt
- A marketing template must be created and approved
- The template must be ready to use inside a campaign
Once these steps are done, the third and final step is sending the campaign. This is the stage where your message actually reaches users on WhatsApp.
How to Send a Marketing Campaign Using WhatsApp Business API?
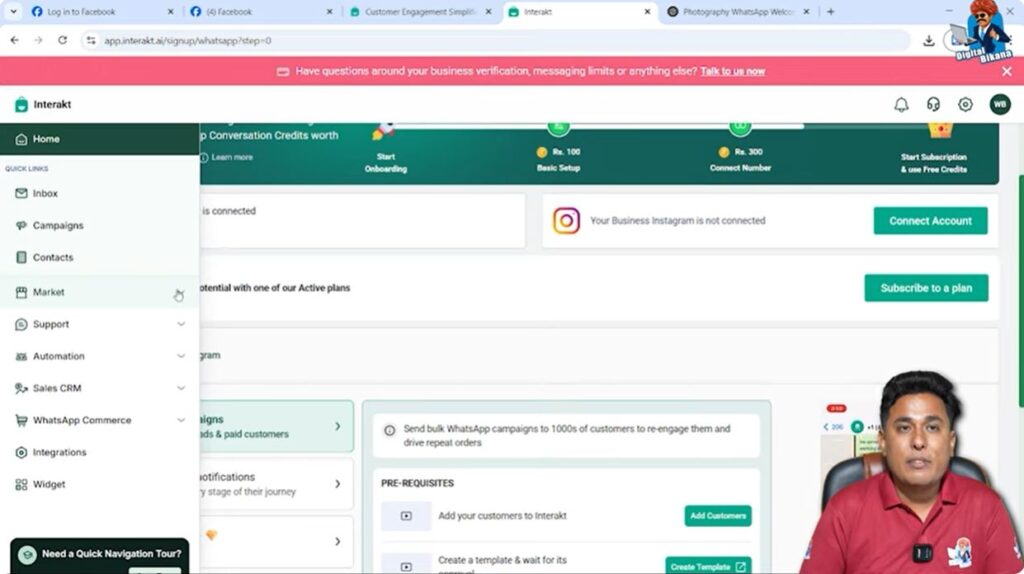
Step 1: Accessing the Campaign Section in Interakt
To begin, log in to your Interakt dashboard, which is connected to your WhatsApp Business API account.
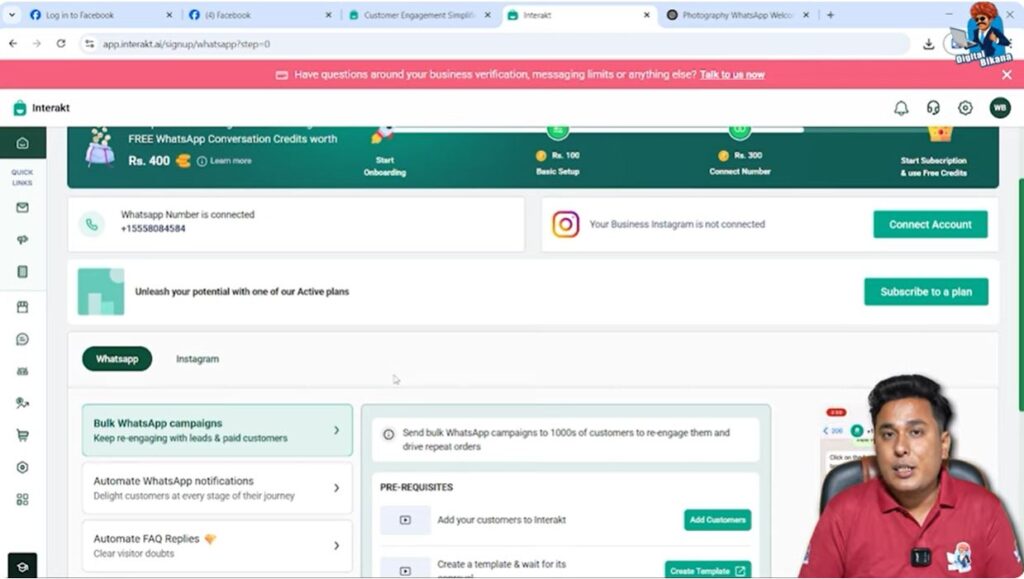
Step 2: Navigating to the Market Section
On the left-hand side of the dashboard, move your cursor to the menu and click on the Market option.
Step 3: Opening the Campaign Area
Inside the Market section, you will find the Campaign option. Click on it to proceed.
Here, you will see an option to Create New Campaign. This is where the campaign creation process starts.

Step 4: Starting a New Campaign From Scratch
Once you click on Create New Campaign, select the option Start From Scratch. This means the campaign will be created entirely from the beginning without using any pre-built flow.

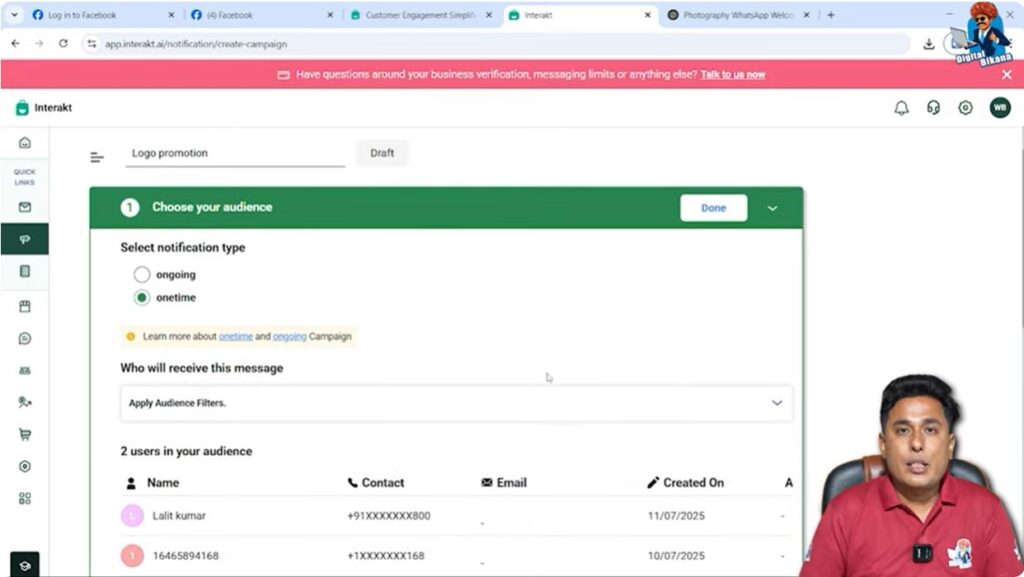
Naming the Campaign
Now, enter a campaign name.
For example, the campaign name can be Logo Promotion.
The campaign name is for internal reference and helps you identify campaigns later in reports and dashboards.
Step 5: Choosing the Audience
The first and most critical step in campaign creation is selecting the audience.
Selecting the Audience Type
Click on Choose Your Audience.
Since this campaign is being sent only once, select One Time.
The Ongoing option is not used here and will be explained in a separate session.
Understanding Why Filters Are Required
By default, all contacts may appear in the list. However, sending messages to everyone is usually not desired. WhatsApp Business API requires precise targeting.
At least one audience filter is mandatory.
If no filter is applied, Interakt will not allow the campaign to proceed.
Applying Audience Filters Using Tags
Click on Add Filter.
Choose Tags as the filtering method.
At the top, you will see existing tags that were created earlier.
Select the Students tag.
This tag was applied earlier when contacts were uploaded using an Excel file. Because of this, the campaign will be sent only to those contacts who have the Students tag applied to them.
Applying the Filters
Scroll down and click on Apply Filters.
Now, the selected audience is finalized.
The system will show how many contacts will receive the message.
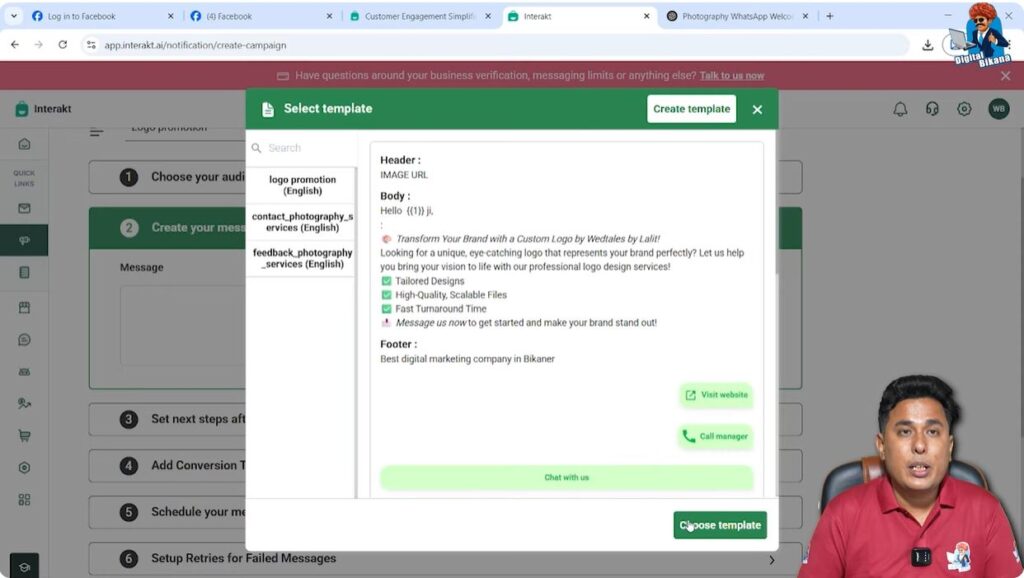
Step 6: Creating the Message Using a Template
After selecting the audience, scroll down to the Create Your Message section.
Choosing an Approved Template
Under Choose Template, select the template that was created earlier.
In this case, select the Logo Promotion template.
Templates ensure that messages comply with WhatsApp policies and maintain a consistent structure.
Step 7: Defining Template Variables
Once the template is selected, scroll down to the variable section.
Assigning Variable Values
If the template contains variables, they must be defined again at the campaign level.
For Variable 1, select Name.
If the value is already selected by default, no changes are needed.
If not, manually select or type Name.
This ensures that each recipient sees their own name in the message.
Enabling Button Click Tracking
Enable Button Click Tracking.
This allows you to track:
- Which users clicked the website button
- Which users clicked the call button
- Which users clicked the quick reply button
Tracking helps analyze campaign performance and user behavior.
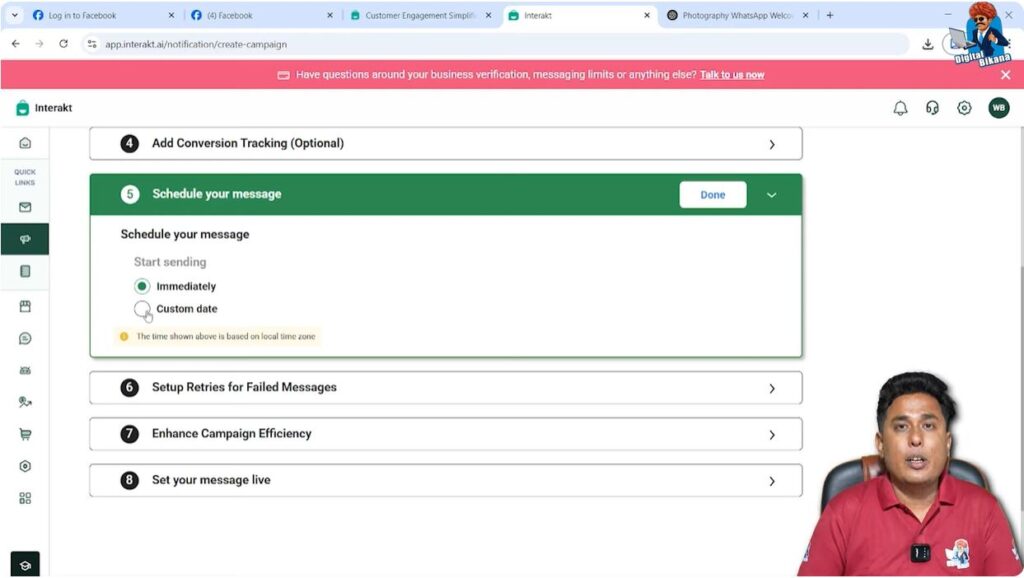
Step 8: Scheduling the Campaign Message
Scroll down to the next step, which is Schedule Your Message.
Understanding Scheduling Options
You have multiple options here:
- Immediate – Sends the message instantly
- Custom Date and Time – Sends the message at a fixed future date and time
When to Use Scheduling
Scheduling is commonly used during festivals or special occasions. For example, festival wishes can be scheduled in advance so that messages are sent automatically on the correct date and time.
Sending the Campaign Immediately
In this case, select Immediate because the message needs to be sent right away.
Click on Done to move to the next step.
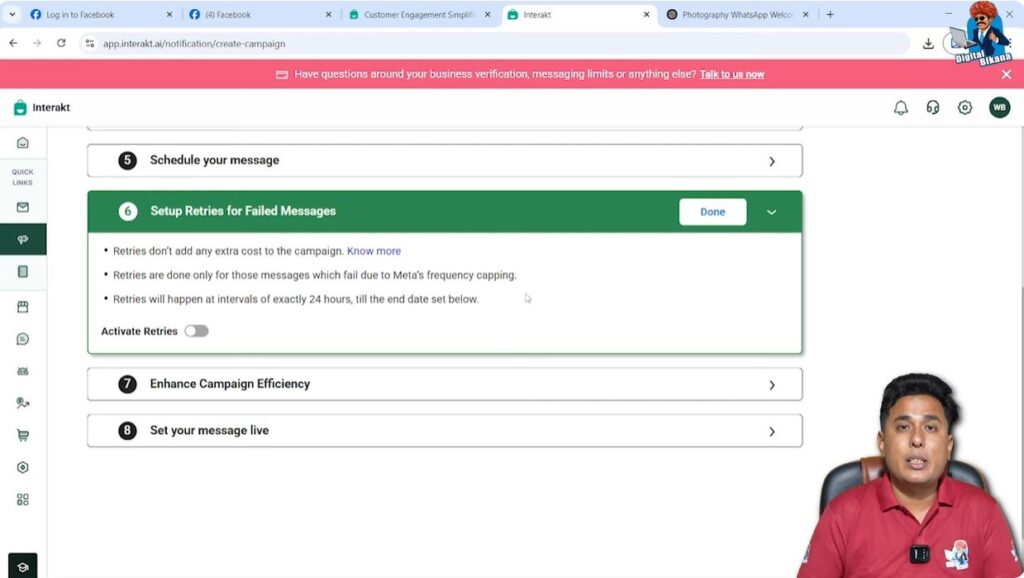
Step 9: Setting Retry for Failed Messages
Now you will see the option Set Up Retry for Failed Messages.
Understanding Message Delivery Failures
When sending messages to a large number of users, it is possible that some messages may fail due to technical reasons such as:
- Network issues
- Device restrictions
- Temporary WhatsApp delivery issues
How Retry Works
If retries are enabled:
- The system retries sending failed messages after exactly 24 hours
- If delivery still fails, another retry happens after the next 24 hours
When to Enable or Disable Retry
Retries are useful for promotional campaigns where timing is flexible.
However, retries are generally not recommended for festival messages.
For example, if a Diwali message is delivered one day late, it loses its relevance.
In this campaign, retries are not enabled.
Click on Done to continue.
Step 10: Making the Campaign Live
This is the final step of the campaign creation process.
Setting the Campaign Live
You will now see the Set Live button.
Click on Set Live.
Sending the Campaign
Click on Send.
Since retries are not enabled, select Set Live Without Retries.
Click on Skip and Set Live.

Campaign Execution and Message Delivery
Once the campaign is set live:
- The system starts sending messages to the selected audience
- Messages are delivered using WhatsApp Business API
- Users receive the message directly on WhatsApp
Within a short time, the message will appear on the recipient’s WhatsApp.
Understanding the Complete Campaign Workflow
The full campaign workflow includes:
- Audience selection using tags
- Template-based message creation
- Variable personalization
- Scheduling or instant delivery
- Optional retry handling
- Final campaign activation
Each step ensures better targeting, compliance, and delivery control.
Common Use Cases for Marketing Campaigns
Marketing campaigns using WhatsApp Business API are commonly used for:
- Promotions and offers
- Announcements
- Festival greetings
- Business updates
- Product or service awareness
By using tags and templates, businesses can send relevant messages to the right audience.
Final Summary
In this article, we learned how to send a marketing campaign using WhatsApp Business API through Interakt.
The complete process included:
- Accessing the campaign section
- Creating a new campaign from scratch
- Selecting a filtered audience using tags
- Choosing an approved template
- Defining template variables
- Scheduling the message
- Managing retry options
- Setting the campaign live
Conclusion
Sending campaigns through WhatsApp Business API becomes simple when each step is followed in the correct order. By uploading contacts properly, creating approved templates, and using filters and scheduling wisely, businesses can run effective and targeted WhatsApp marketing campaigns.
In the next session, the setup of Commerce Manager in WhatsApp Business API will be covered, which will further expand the functionality of WhatsApp-based business communication.
This completes the campaign creation and sending process.
Related Posts