If you are running a business and using Meta ads on Facebook or Instagram, you may already be receiving a large number of inquiries on WhatsApp. Replying to these inquiries manually becomes difficult when the volume increases. Additionally, if you try to send promotional or marketing messages using WhatsApp Business, your WhatsApp account may get banned. This is where WhatsApp Business API becomes necessary. WhatsApp Business API allows businesses to manage high inquiry volumes, send bulk marketing messages, and automate communication safely. In this article, we will understand how to sign up for WhatsApp Business API using Interakt, step by step.
Understanding the Need for WhatsApp Business API
Before starting the signup process, it is important to understand why WhatsApp Business API is required.
Managing High Inquiry Volume
When Meta ads are running, users send messages at all hours. Manually replying to each inquiry is time-consuming and inefficient.
Sending Bulk Marketing Messages
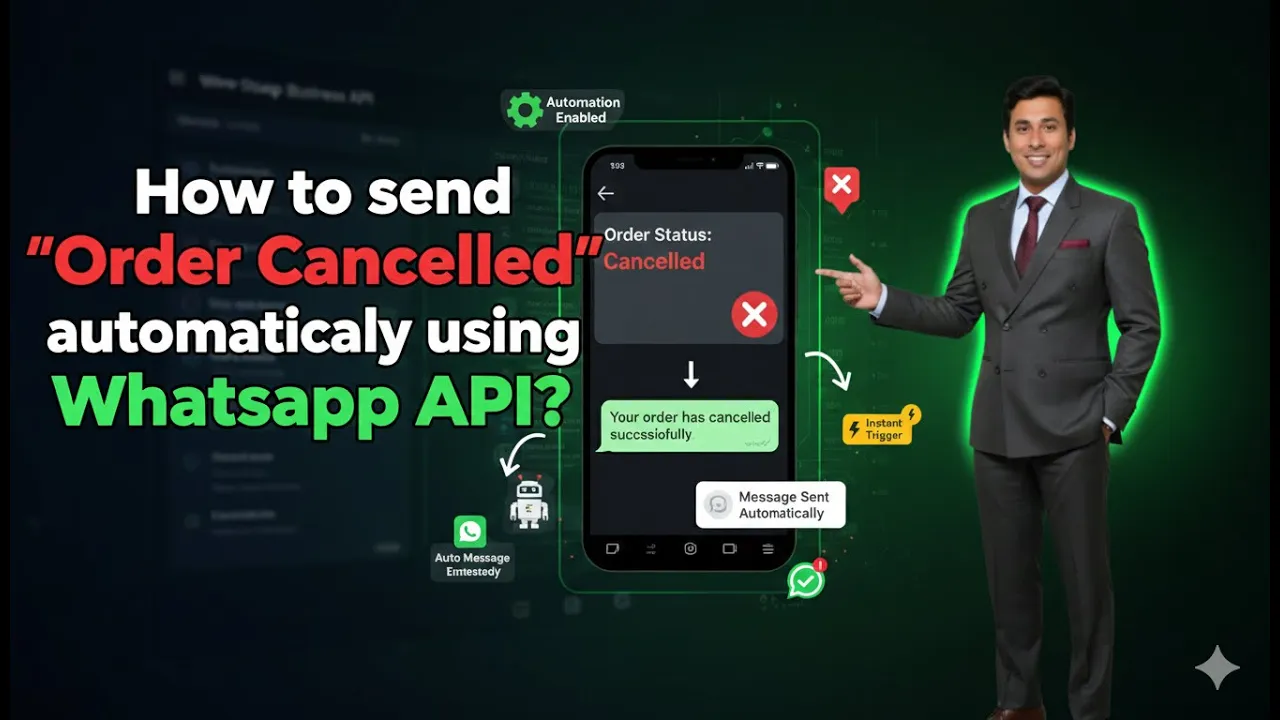
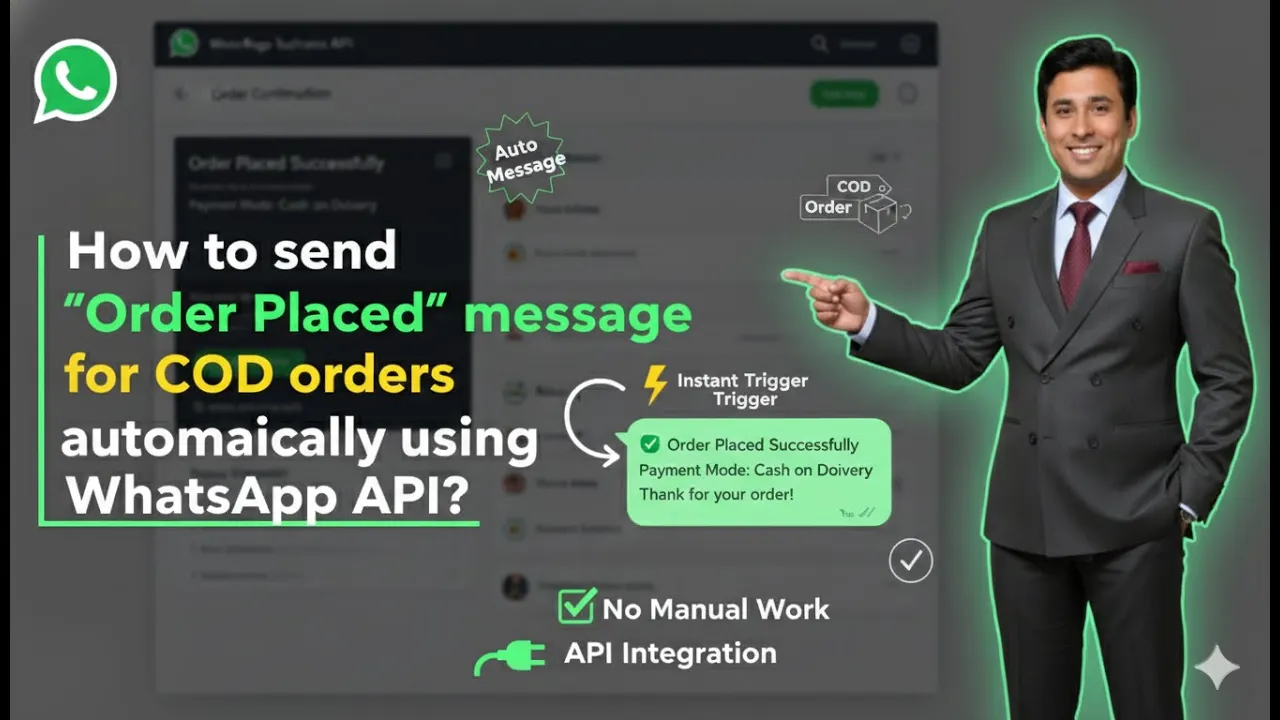
Sending promotional messages using WhatsApp Business often leads to account bans. WhatsApp Business API is designed specifically for bulk messaging.
Using Official WhatsApp Infrastructure
WhatsApp Business API works within WhatsApp’s official policies, making it safer for long-term business communication.
How to create Whatsapp Business API account?
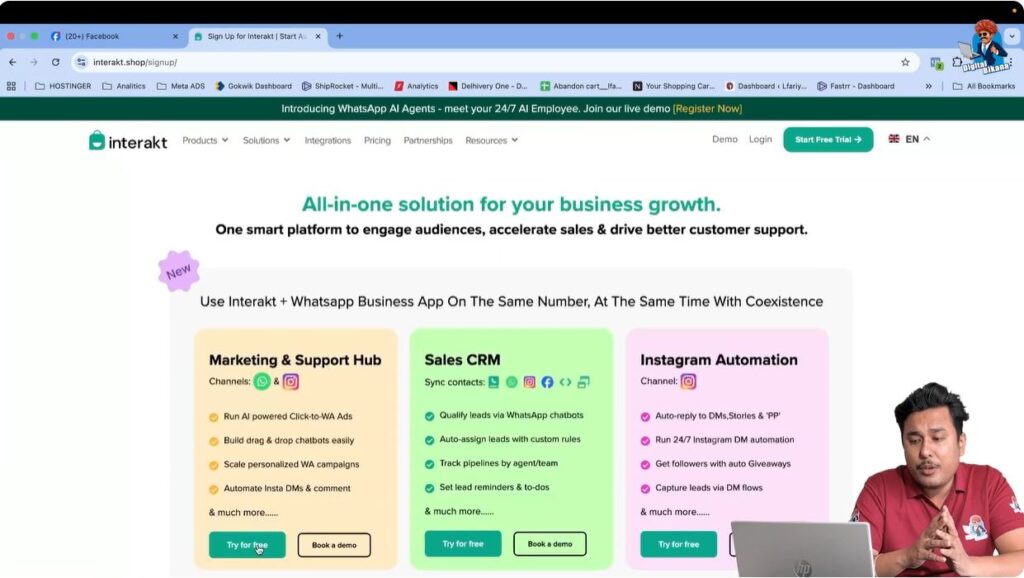
Step 1: Opening the Interakt Website
To start the signup process, open your browser and go to the Interakt website.
Once the website loads, you will see the Start Free Trial option on the homepage.
Click on Start Free Trial to begin.
This will redirect you to the signup and plan selection section.

Step 2: Selecting the Marketing and Support Hub Plan
After clicking on Start Free Trial, Interakt will show multiple plans.
From the available options, select:
Marketing and Support Hub
This plan is suitable for:
- Handling WhatsApp inquiries
- Sending promotional and marketing messages
- Managing customer communication
After selecting this plan, proceed to the signup screen.
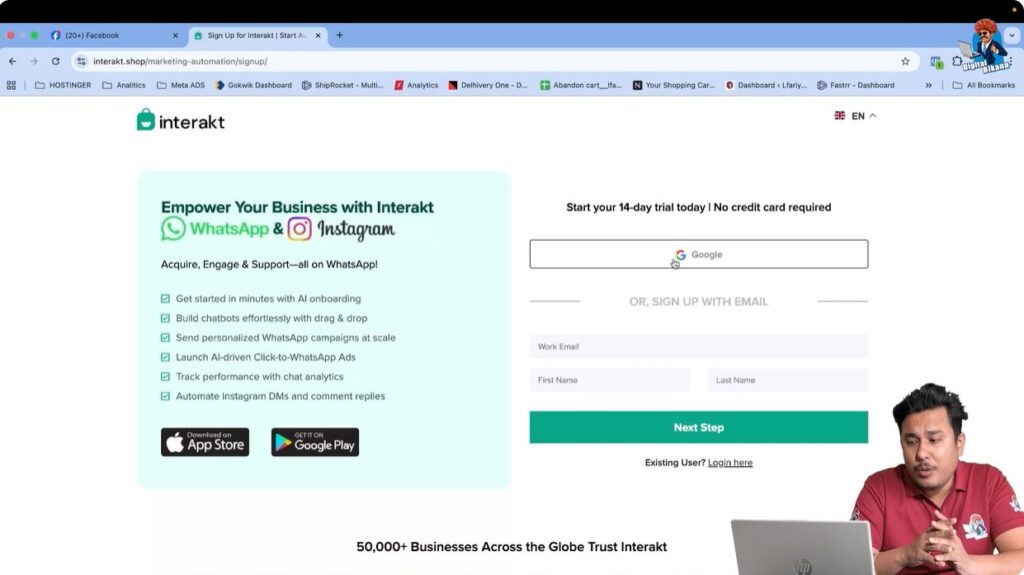
Step 3: Signing Up Using a Google Account
On the signup screen, you will see an option to sign up using Google.
You can:
- Select your Gmail ID
- Log in using your Google account
Most of your basic details will be filled automatically, making the signup process faster and easier.
Step 4: Selecting Channel and Entering Phone Number
After signing up, Interakt will ask you to select a channel and enter a phone number.
Important Clarification About the Phone Number
- This phone number is not your WhatsApp Business API number
- This number is used for:
- OTP verification
- Login authentication
- Receiving Interakt updates
You can use a different phone number from your WhatsApp Business API number if you want.

Step 5: Filling Business Information
Next, you need to enter your business details.
Business Details Required
- Firm or business name
- Business website
- City
- Annual revenue
If you have a website, enter it.
If you do not have a website, you can still proceed by entering any valid value.
The annual revenue field is only a formality and does not affect the signup process.
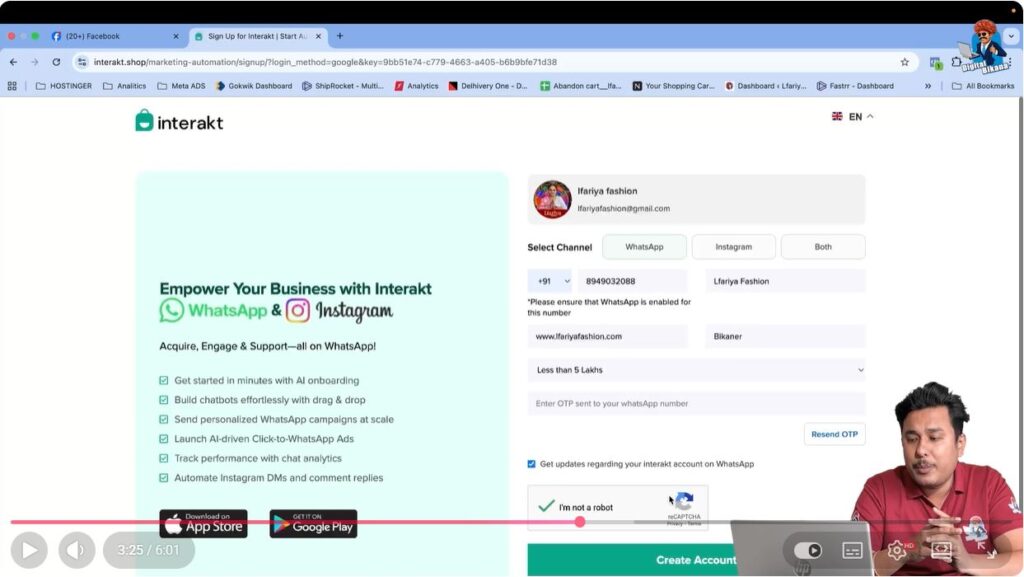
Step 6: OTP Verification
Once you submit your details, Interakt will send an OTP to the phone number you entered.
If OTP Is Not Received
Sometimes OTP delivery may fail due to network issues. In that case:
- Remove the phone number
- Re-enter the number again
- Wait for a few seconds
After receiving the OTP, enter it and click on Create Account.

Step 7: Account Creation Confirmation
After OTP verification, your Interakt account will be created successfully.
At this stage, Interakt may also provide bonus credits, which can later be used for marketing messages.
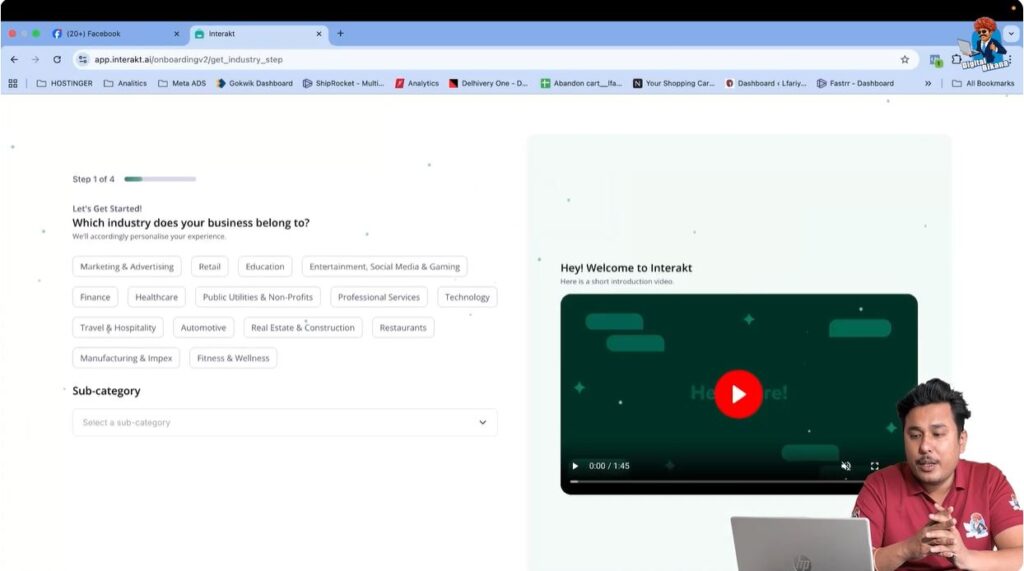
Step 8: Selecting Industry and Subcategory
Now Interakt will ask you to select:
- Your business industry
- The subcategory related to your business
Choose the option that best represents your business type and proceed.
Step 9: Choosing the Purpose of Using Interakt
Interakt will ask how you want to use the platform.
You can select options such as:
- Sending promotional offers
- Sending order updates on WhatsApp
Select the reasons that apply to your business and click Next.

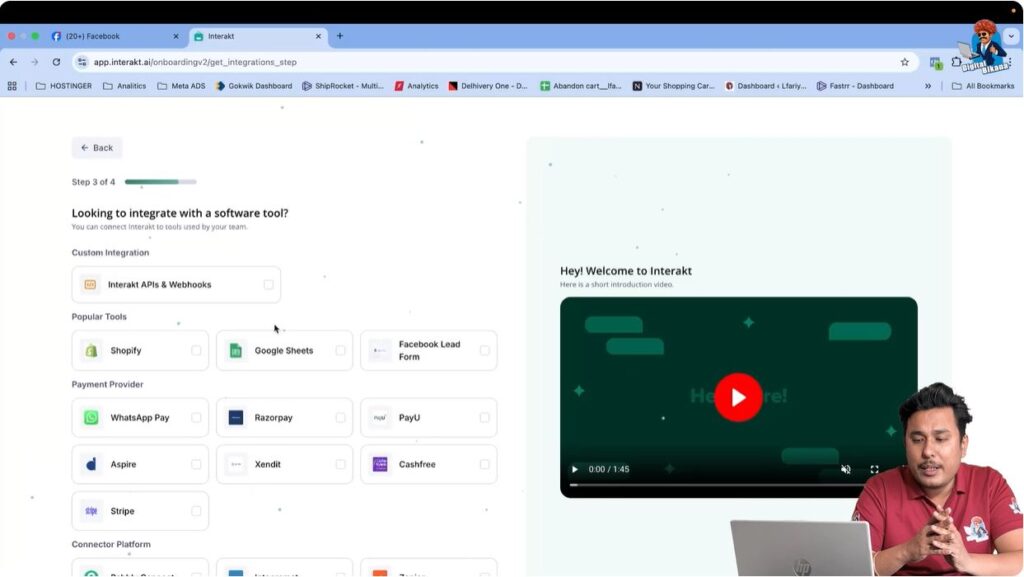
Step 10: Skipping Software Integration (Optional)
Interakt may ask whether you want to integrate it with other software tools.
This step is optional.
If you are not interested at the moment, you can skip it and proceed.
Step 11: Facebook Business Manager Confirmation
Next, Interakt will ask whether you have a Facebook Business Manager (Meta Business Suite) account.
- If you already have one, select Yes
- If not, you can create it separately
A Meta Business Manager account is mandatory for WhatsApp Business API usage.

Step 12: Understanding the Interakt Dashboard
After completing the onboarding steps, you will reach the Interakt dashboard.
Key Sections Available
- Inbox – Where incoming WhatsApp messages appear
- Campaigns – Where marketing campaigns are created and sent
- Contacts – Where contact lists are uploaded and managed
These sections will be used in later steps such as automation, templates, and campaigns.

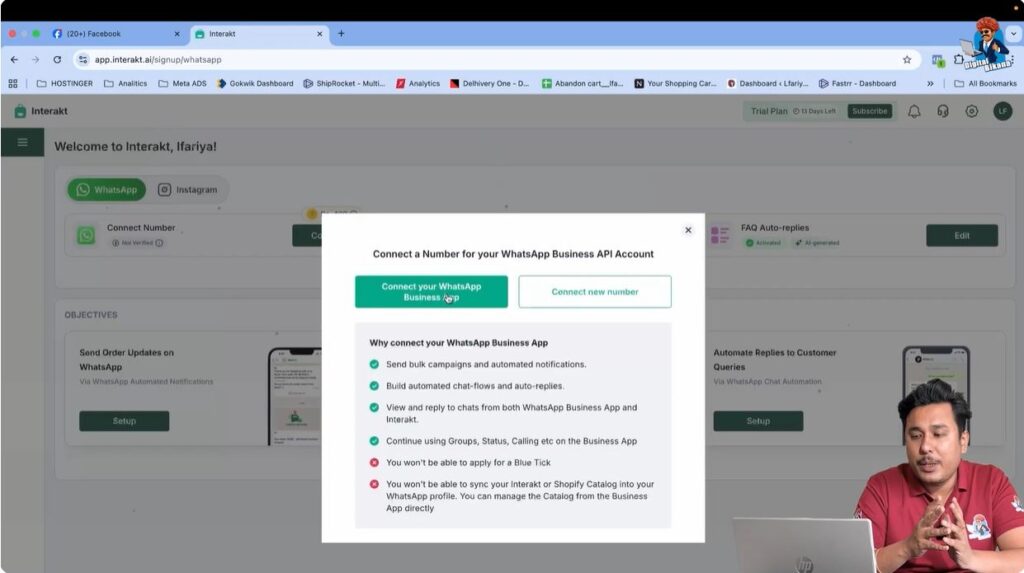
Step 13: Connecting a WhatsApp Business Number
From the dashboard, you can connect your WhatsApp Business number.
You have two options:
- Connect an existing WhatsApp Business number
- Connect a new WhatsApp Business number
Once connected, your WhatsApp Business API setup is ready for further use.
Final Summary
By following these steps, you successfully sign up for WhatsApp Business API using Interakt.
What Is Completed
- Interakt account creation
- Business details setup
- OTP verification
- Dashboard access
- Preparation for WhatsApp Business API connection
Conclusion
Signing up for WhatsApp Business API using Interakt is a structured process when followed step by step. This setup is essential for businesses that want to manage large volumes of WhatsApp inquiries and send marketing messages safely without account bans.
This article completes the WhatsApp Business API signup process using Interakt, forming the foundation for future steps like contact uploads, template creation, automation, and campaign sending.
Related Posts