Connecting a mobile number to WhatsApp Business API is a mandatory step after signing up on Interakt. Without connecting a number, you cannot send messages, run campaigns, or automate conversations. In earlier sessions, the signup process on Interakt was completed. In this session, we will understand how to connect a mobile number to WhatsApp Business API using Interakt in a simple and structured way.
This article explains the entire process step by step, exactly as it happens inside the Interakt dashboard.
Understanding the Number Connection Process
Before starting the number connection process, make sure of the following:
- You already have an active Interakt account
- You are logged in to the Interakt dashboard
- Your Facebook account has a Meta Business account
- The mobile number you want to connect does not have WhatsApp or WhatsApp Business installed
Once these requirements are fulfilled, you can proceed with the number connection.
How to connect Phone Number with Whatsapp API?
Step 1: Accessing the Interakt Dashboard
After logging in to your Interakt account, you will land on the homepage of the dashboard.
On the homepage, you will see a Connect Number button. This button is used to start the WhatsApp Business API number connection process.
Click on the Connect Number button to proceed.
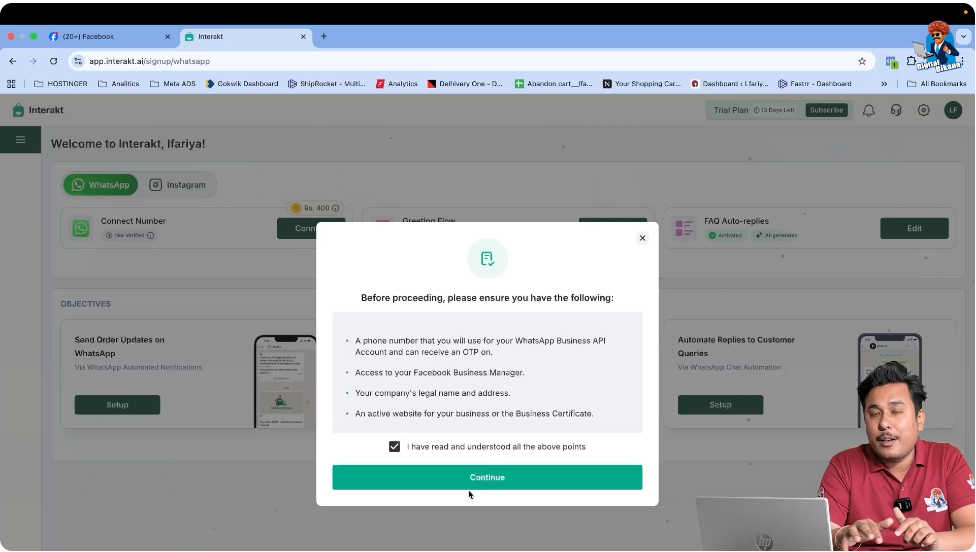
Step 2: Accepting the Terms and Conditions
After clicking on the Connect Number button, Interakt will ask you to accept the terms and conditions.
Carefully review the terms and conditions, select the checkbox to accept them, and then click on Next.
This step is mandatory to continue further.
Step 3: Selecting the Country and Proceeding
In the next step, you need to select your country.
Since the business belongs to India, select India from the list.
After selecting the country, click on Proceed to move forward.
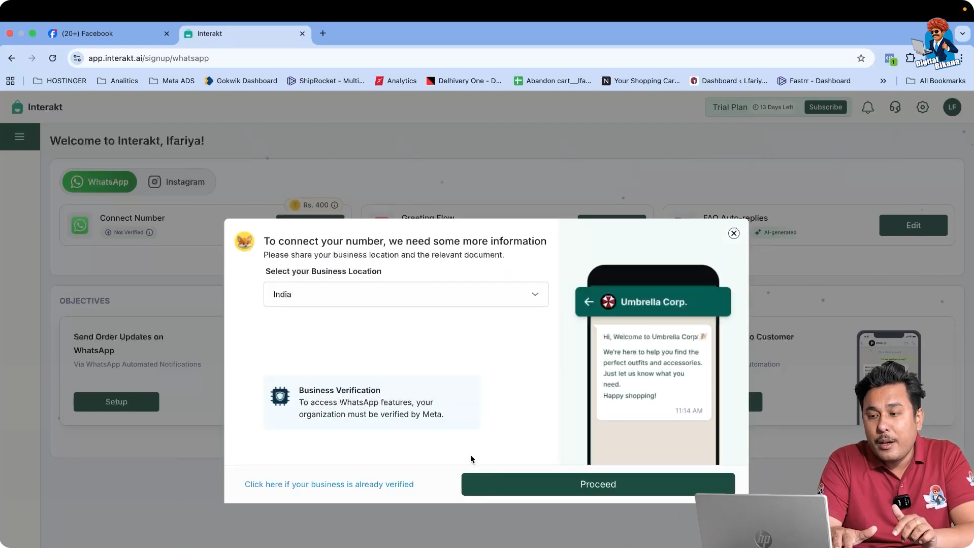
Step 4: Uploading GST or Business Documents
Now, Interakt asks you to upload a GST certificate or any relevant business document.
You can:
- Search for the GST certificate on your system
- Upload the document from your device
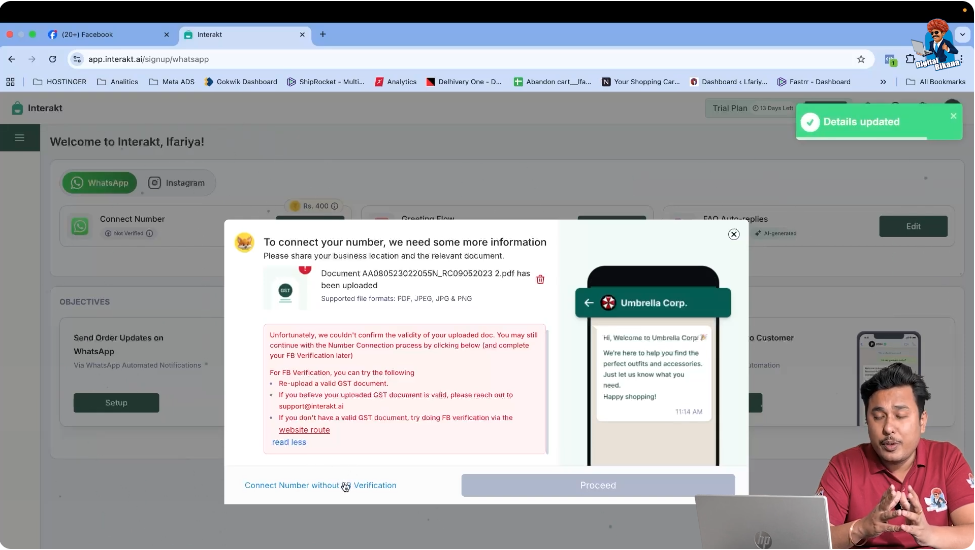
Sometimes, Interakt may not automatically fetch the GST number from the uploaded document. This is a common situation and does not block the process.

Step 5: Proceeding Without Facebook Verification
If the GST number is not fetched from the uploaded document, you will see an option called Connect Number Without FB Verification.
Click on Connect Number Without FB Verification to continue the number connection process.
Such errors are normal, and there is no need to worry if the GST number is not detected automatically.
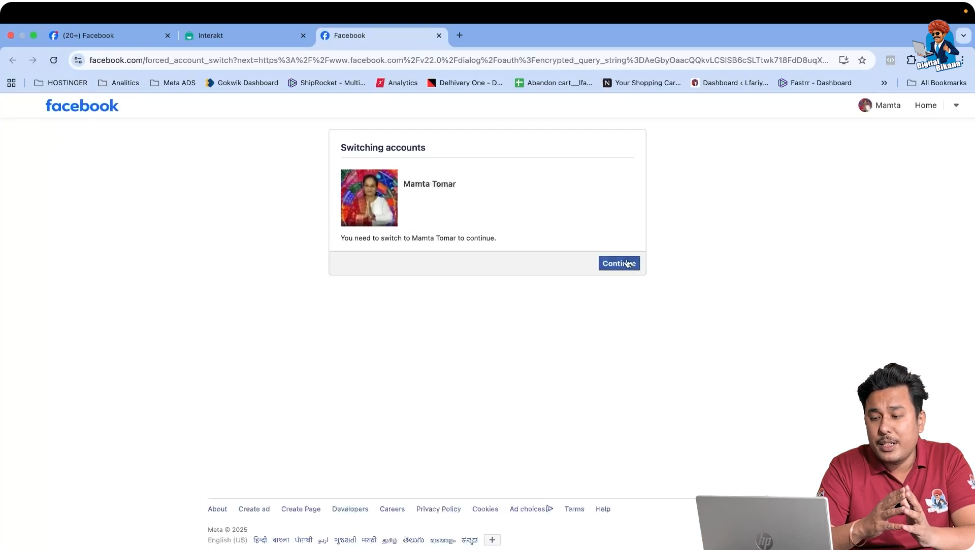
Step 6: Signing In With Facebook Account
After clicking the option to proceed, you will be redirected to Facebook.
Click on Continue and sign in using your Facebook account.
Make sure:
- You are logged into the correct Facebook account
- The account has a Meta Business account already created
WhatsApp Business API requires a Meta Business account for number connection.
Step 7: Creating the WhatsApp Business Account
Once Facebook login is successful, the system starts creating a WhatsApp Business account.

At this stage, you need to enter the following details:
Business Name
Enter your business name carefully and correctly. This name is important because it is associated with your WhatsApp Business profile.
Business Category
Select the category that best describes your business.
Time Zone
Choose the correct time zone for your business operations.
Website (Optional)
You can enter your website URL. This field is optional and can be skipped if you do not have a website.
After entering all the required details, click on Next.
The system will take a few seconds to process the information.

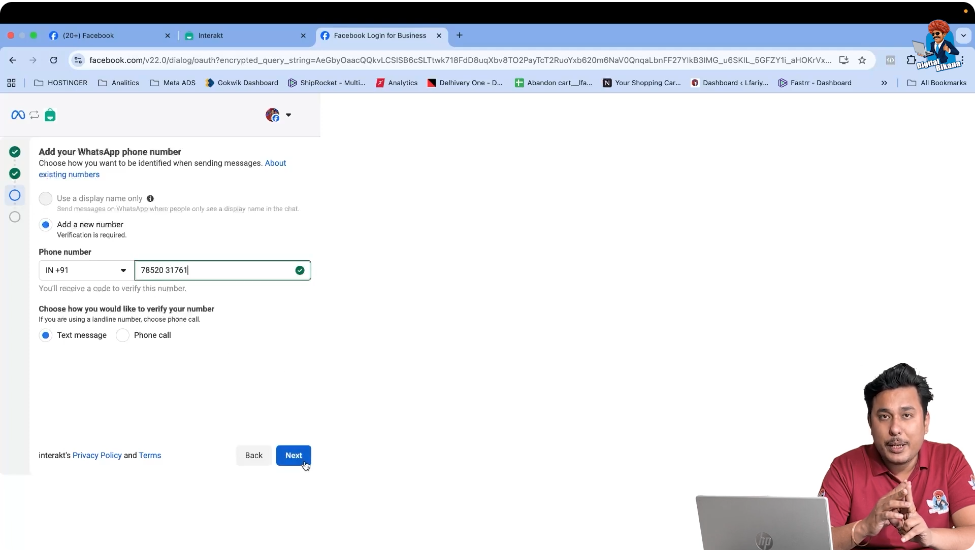
Step 8: Adding a New Mobile Number
Now, you will be asked whether you want to add a new number or use an existing one.
Select Add a New Number.
Then:
- Select your country code
- Enter the mobile number you want to use for WhatsApp Business API
Important Instructions for Mobile Number
- The number must not have WhatsApp or WhatsApp Business installed
- If WhatsApp is already installed, uninstall it
- If an account exists, delete the WhatsApp account
- Wait for 5 to 10 minutes after deletion
- Then enter the number in Interakt
Using the same number for WhatsApp Business and WhatsApp Business API is technically possible, but it is not recommended.
Step 9: Selecting OTP Verification Method
After entering the mobile number, choose Text Message as the verification method.
Click on Next to receive the OTP.
An OTP will be sent to the entered mobile number.
Step 10: Entering the Verification Code
Once you receive the OTP, enter the verification code in the given field.
After entering the code, click on Next.
If you face any issues with OTP delivery, make sure:
- The number is correct
- Network connectivity is stable

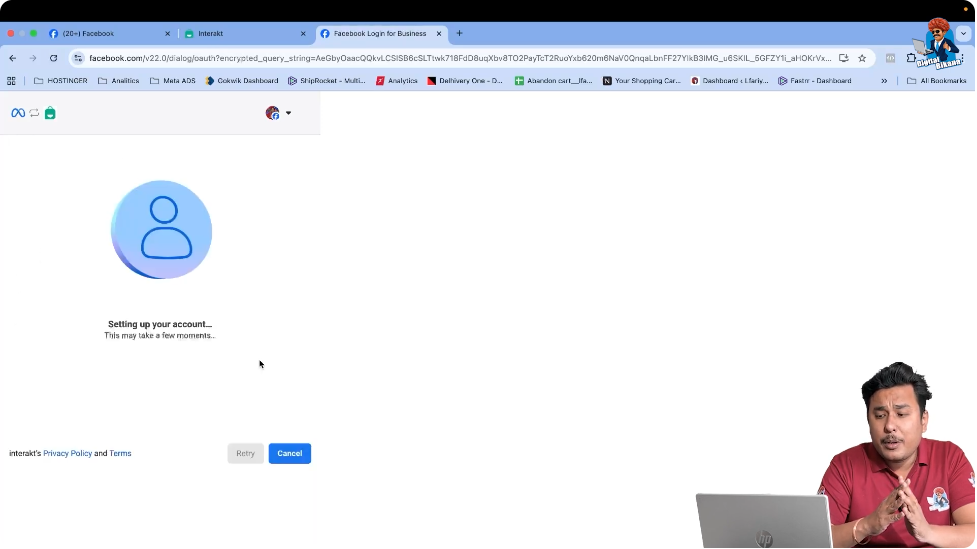
Step 11: WhatsApp Business API Account Setup
After OTP verification, Interakt starts setting up your WhatsApp Business API account.
This process may take a few moments.
Once completed, your WhatsApp Business API account is successfully created, and your mobile number is connected to Interakt.
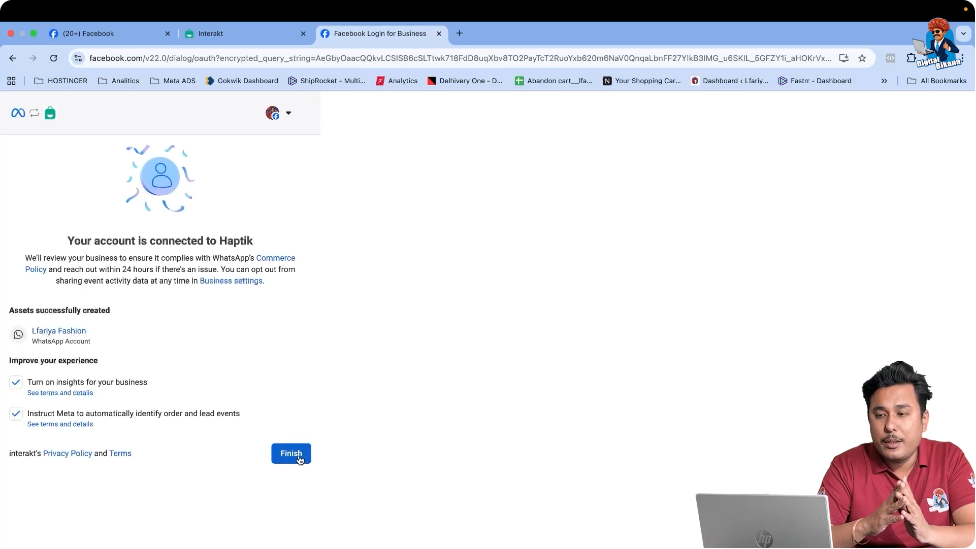
Step 12: Completing the Setup
Click on Finish to complete the setup process.
You will be redirected back to the Interakt dashboard.
Initially, the connected number may take a few seconds to reflect on the dashboard.
Step 13: Verifying Number Connection Status
After a short time, your mobile number will appear as Connected on the Interakt dashboard.
This confirms that:
- The number is successfully linked
- WhatsApp Business API is active on that number

Step 14: Understanding Display Name and Profile Updates
In some cases, the WhatsApp display name may not appear immediately. This usually happens if GST verification was skipped or incomplete.
There is no issue with this.
You can later:
- Update your business logo
- Update your business address
- Update your business bio
These details can be edited from the Interakt dashboard and will be covered in upcoming sessions.

Final Summary
In this article, we learned how to connect a mobile number to WhatsApp Business API using Interakt.
The complete process included:
- Logging in to Interakt
- Accepting terms and conditions
- Uploading business documents
- Signing in with Facebook
- Creating a WhatsApp Business API account
- Adding and verifying a mobile number
- Completing the setup and confirming connection
Once the number is connected, your WhatsApp Business API account is ready for automation, templates, campaigns, and advanced features.
This completes the mobile number connection process using Interakt.
Related Posts