

Creating products properly is one of the most important steps when running an eCommerce store using WooCommerce on a WordPress website. If you are selling products that do not have variations such as size or color options, then you need to create them as simple products.
In this detailed guide, you will learn step by step how to add a simple product in WooCommerce, including product description, images, pricing, inventory management, shipping, linked products, and publishing the product.
Accessing the WordPress Admin Dashboard
To begin, log in to your WordPress admin dashboard.
After logging in, you will see the dashboard interface. On the left-hand side, there is a vertical toolbar containing options such as Posts, Pages, Media, Plugins, WooCommerce, and Products.
Move your cursor to the Products option in the left sidebar. When you hover over it, a submenu appears with the option Add New Product.
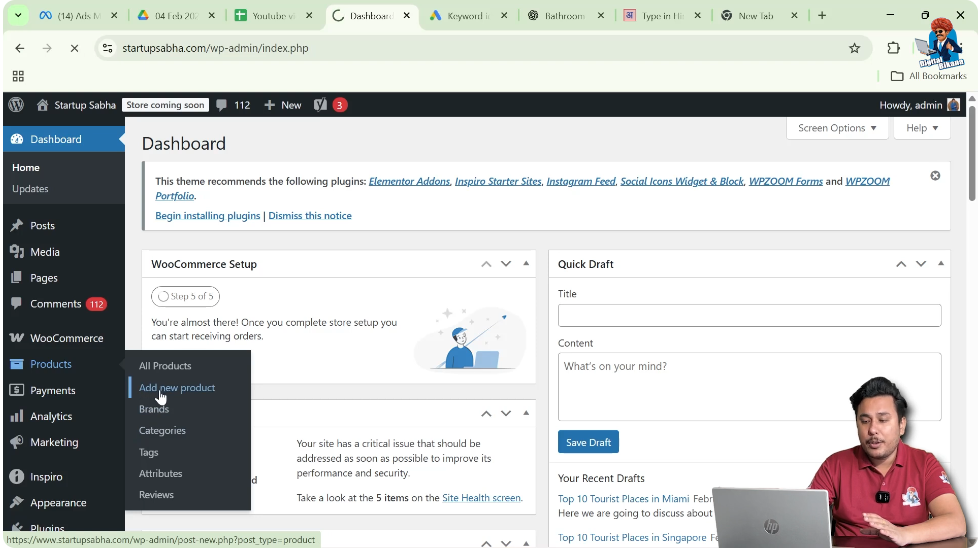
Click on Add New Product to start creating a new product.
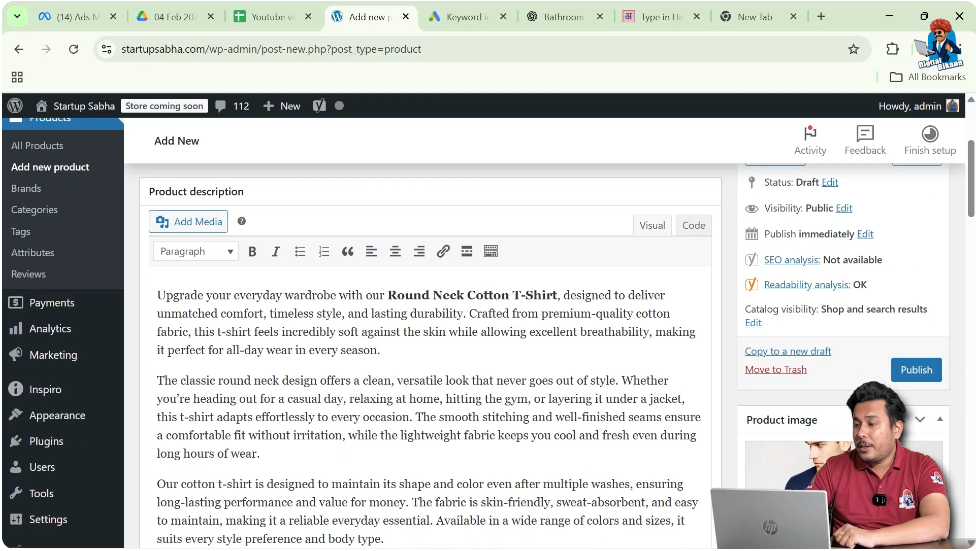
Adding the Product Name and Description
After clicking on Add New Product, you will be redirected to the product creation page.
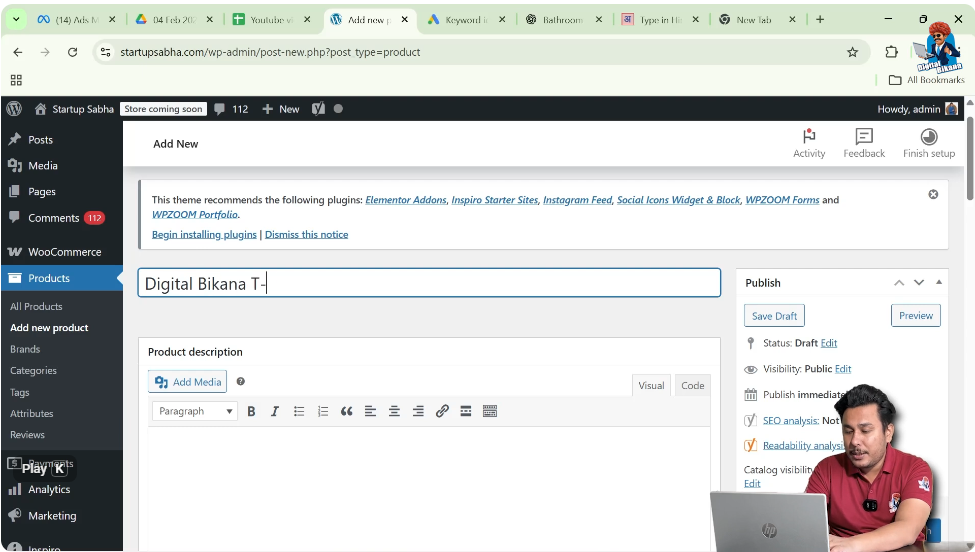
Enter Product Name
At the top of the page, you will see a field asking for the product name.
For example, you can enter:
Digital Vana T-Shirt
Add Product Description
Below the product name field, there is a large text editor where you can write the product description.
You can:
- Write the description manually
- Generate it using an AI tool such as ChatGPT
- Paste a pre-written description
After preparing your description, paste it into the product description box.
Adding Product Image and Gallery Images
On the right-hand side of the screen, you will see the Product Image section.
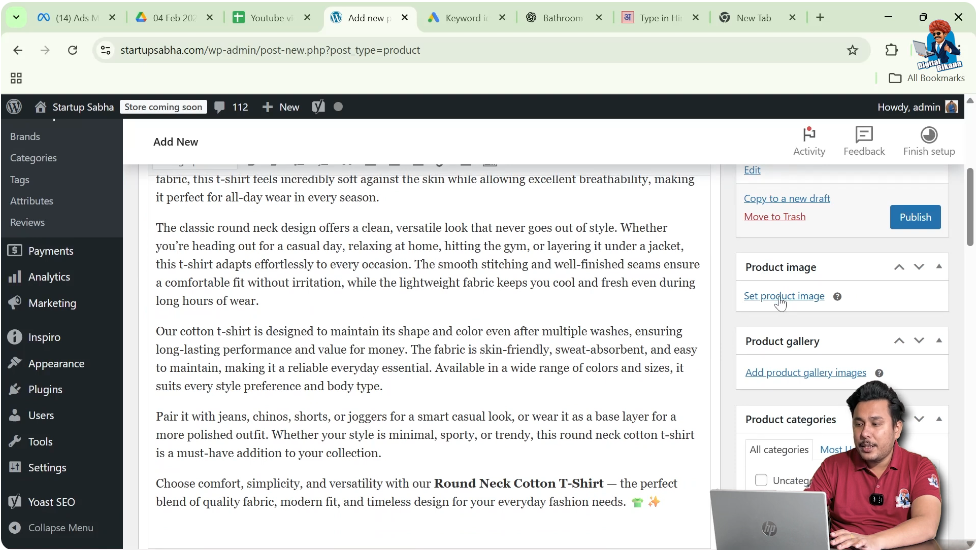
Set Product Image
Click on Set Product Image.
You can either:
- Click on Upload Files to upload from your system
- Choose from the Media Library if already uploaded
Before uploading images, make sure you follow SEO best practices:
- Rename the image file properly
- Add relevant image alt text
- Use optimized image size
After selecting the image, click on Set Product Image.
Add Product Gallery Images
Below the product image section, there is an option to add gallery images.
Click on Add Product Gallery Images.
You can select multiple images by holding the Control key and choosing different files.
These images can show the product from different camera angles.
After selecting the images, click on Add Gallery.
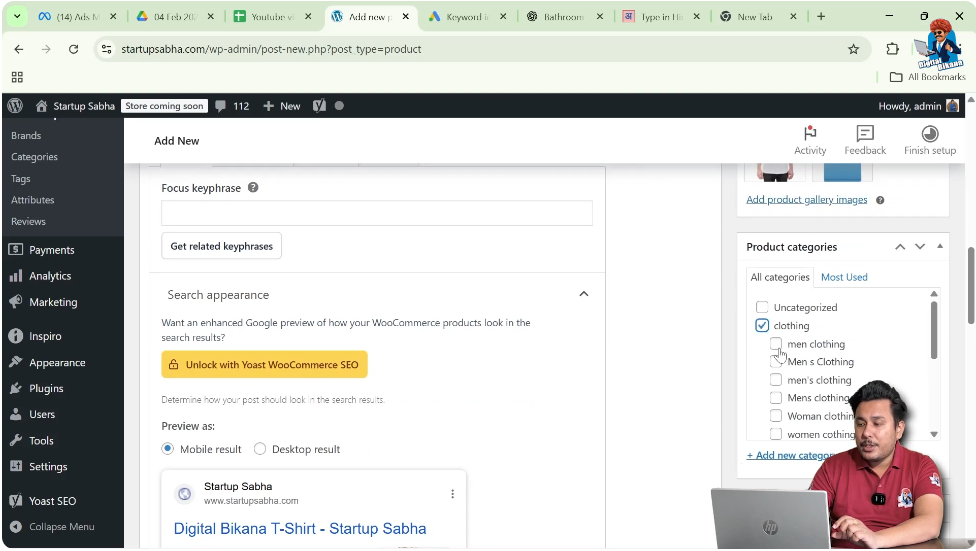
Selecting Product Category and Tags
On the right side, you will see the Product Categories section.
You can:
- Select an existing category
- Choose a subcategory
Product categories help organize your products properly.
You can also add Product Tags. Products with similar tags may appear as related products on the front end.
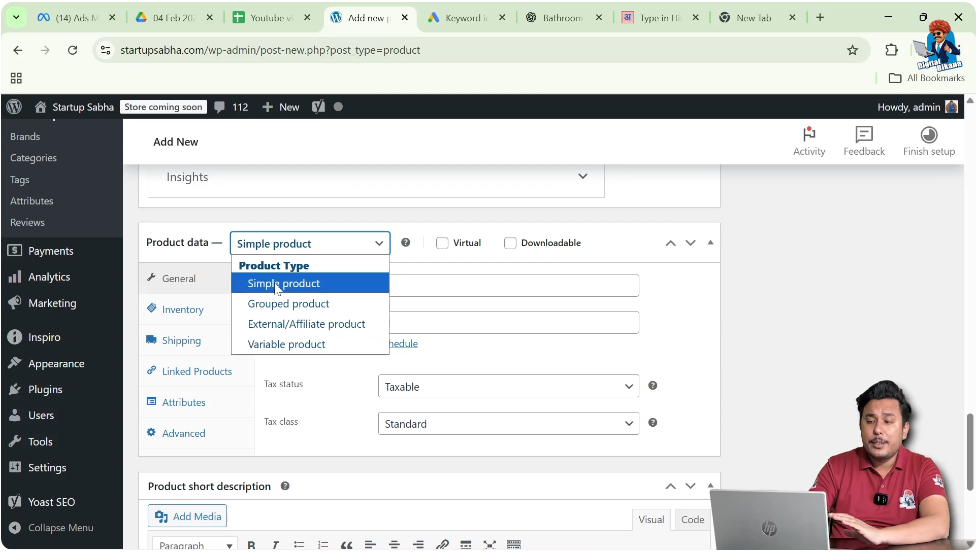
Product Data Section
Scroll down to the Product Data section. This is where most of the important settings are configured.
Since we are creating a simple product, we will select the Simple Product option.
Selecting Simple Product Type
In the Product Data dropdown menu, select Simple Product.
If your product does not have variations like size or color, this is the correct option.
Setting Price in General Tab
Inside the Product Data section, go to the General tab.
Enter Regular Price
For example:
Regular Price: 800
Enter Sale Price
Sale Price: 700
If you want to run a limited-time offer, click on Schedule.
You can:
- Select the start date (for example, tomorrow)
- Select the end date (for example, the 10th of the month)
WooCommerce will automatically apply the sale price within the selected date range.

Configure Tax Settings
You can select:
- Taxable
- None
If the product is taxable, choose Taxable.
You can also select the tax class such as:
- Standard
- Zero Rate
- Any custom tax class created during WooCommerce setup
Managing Inventory
Next, click on the Inventory tab.
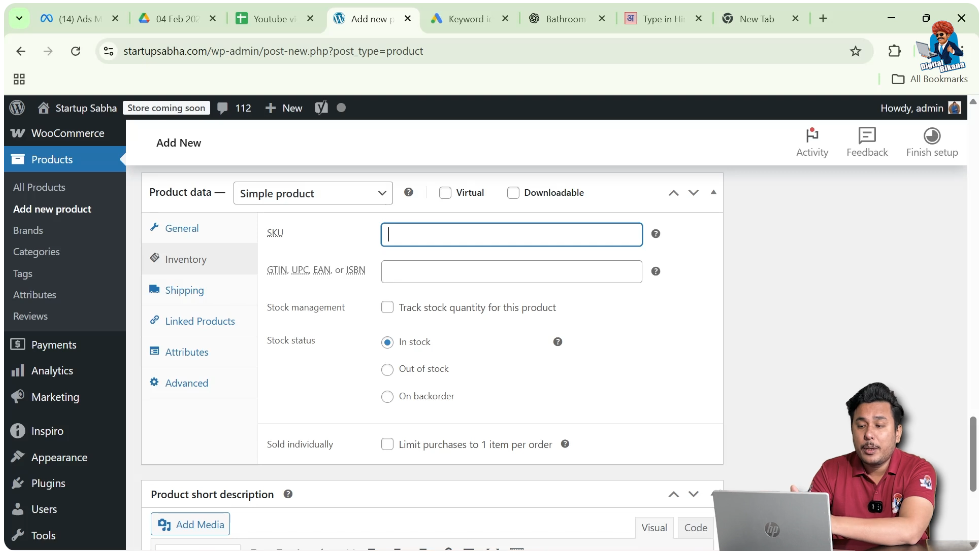
Add SKU
If you have a Stock Keeping Unit (SKU) number, enter it here. If not, you can leave it blank.
Add GTIN, UPC, or ISBN
If available, enter these codes. Otherwise, you can skip this section.
Enable Stock Management
You will see an option asking:
Do you want WooCommerce to track stock quantity for this product?
Check the box to enable stock tracking.
Enter the stock quantity.
For example:
Stock Quantity: 100
This means 100 units are currently available.
Allow Backorders
Backorders allow customers to purchase a product even if it is out of stock.
Options include:
- Do not allow
- Allow but notify customer
- Allow
If you do not want customers to purchase out-of-stock products, select Do Not Allow.
Set Low Stock Threshold
You can enter a low stock threshold number.
When stock reaches this number, the admin will automatically receive a notification.
Sold Individually Option
If enabled, customers can purchase only one item per order.
If you do not want this restriction, leave it unchecked.
Shipping Settings
Click on the Shipping tab.
Here you can enter:
- Weight
- Length
- Width
- Height
You can also select a Shipping Class.
For example, if the product belongs to a light shipping category, select the Light Shipping Class.
Shipping classes help calculate shipping charges correctly.

Linked Products
Click on the Linked Products tab.

Here you can add:
- Upsell products
- Cross-sell products
Upsell Products
For example, you can add a Polo T-Shirt as an upsell product.
Upsell products are displayed on the product page to encourage customers to upgrade or buy premium items.
Cross-Sell Products
For example, you can add Denim Jeans as a cross-sell product.
Cross-sell products are displayed during checkout or in related product sections.
To add linked products, those products must already be created.
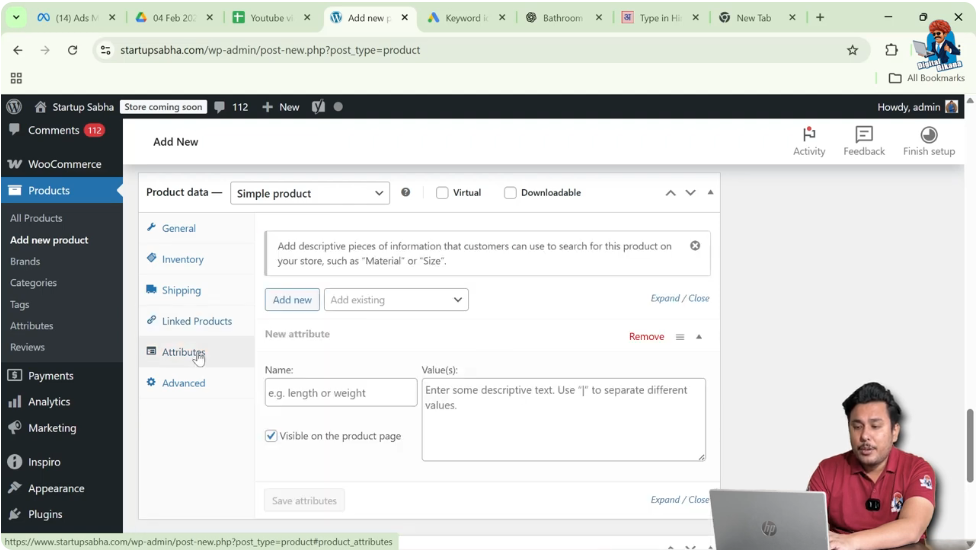
Attributes Section
Since this is a simple product without variations, there is no need to create attributes.
If your product does not have variations, you can skip this section.
Advanced Settings
Click on the Advanced tab.
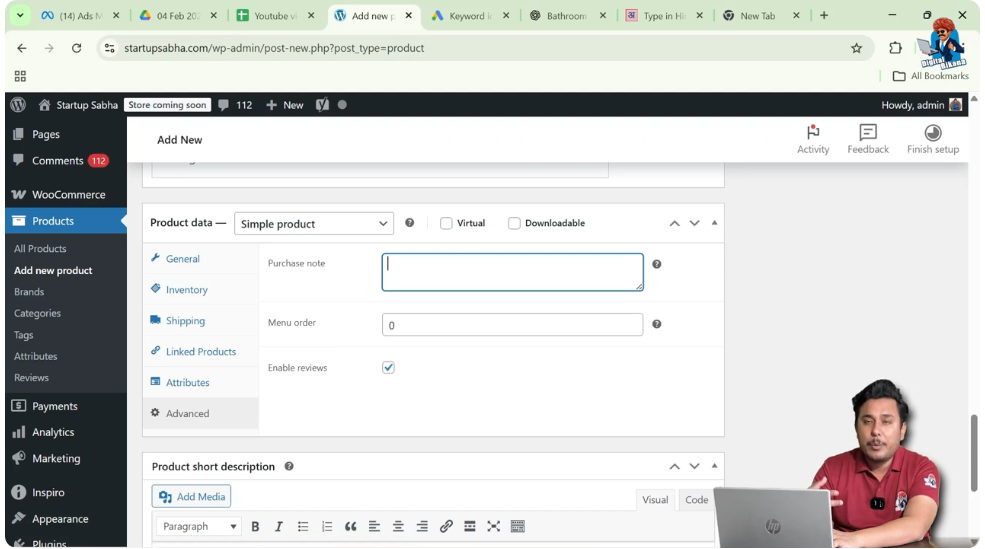
Purchase Note
You can enter a purchase note such as:
Keep away from children
Iron below a specific temperature
This note will be displayed to customers after purchase.
Menu Order
If you want to control product order display, you can enter a number here.
For example:
- If you enter 10, the first order displayed may start from 11
Enable Reviews
If you want customers to review the product, keep the Enable Reviews option checked.
Reviews help build trust and improve conversions.
Adding Short Description
Below the Product Data section, you will find the Product Short Description field.
You can:
- Write it manually
- Generate it using AI
- Paste a prepared short description
This short description appears near the product title on the front end.
Publishing the Product
On the right-hand side, you will see the Publish section.
Click on the Publish button.
Your product will now be live on your website.
Viewing the Product on Front End
After publishing, click on View Product at the top.
On the front end, you will see:
- Product name
- Price
- Stock status
- Category
- Cover image
- Zoom functionality
- Gallery images
- Product description
- Upsell products
- Related products
- Product tags
Products with similar tags appear in the related products section.
Step-by-Step Summary
Step 1: Log in to WordPress Dashboard
Access your admin panel.
Step 2: Go to Products
Click on Add New Product.
Step 3: Enter Product Name
For example, Digital Vana T-Shirt.
Step 4: Add Product Description
Write manually or paste from AI tool.
Step 5: Add Product Image and Gallery
Upload cover image and additional images.
Step 6: Select Category and Tags
Organize your product properly.
Step 7: Select Simple Product Type
Choose Simple Product in Product Data.
Step 8: Set Pricing
Enter regular price and sale price.
Step 9: Configure Inventory
Enable stock tracking and set quantity.
Step 10: Configure Shipping
Enter weight and select shipping class.
Step 11: Add Linked Products
Add upsell and cross-sell items.
Step 12: Publish Product
Click Publish and view the product.
Conclusion
Creating a simple product in WooCommerce on a WordPress website is a structured process that includes adding product details, images, pricing, inventory management, shipping settings, linked products, and publishing.
By carefully following each step, you can successfully create a simple product that is fully optimized, organized, and ready for customers to purchase.
Related Posts


