

Creating tags for blog posts on a WordPress website is a simple process that helps organize content and improve search engine visibility. Tags help users find related blog posts and make it easier for search engines to understand the topics covered on your website. In this article, you will learn how to create tags for blog posts in WordPress using two different methods.
This guide explains the complete process step by step from the WordPress admin dashboard. You will learn how to create tags from the Tags section and how to add tags while writing or editing a blog post.
Accessing the WordPress Admin Dashboard
To create tags in WordPress, you first need to log in to your WordPress admin dashboard. The admin dashboard is the control panel where you can manage posts, pages, categories, tags, and other website settings.
Once you log in, you will see the left-side toolbar where all major options are available. From this toolbar, you can access the Posts section where tags can be created and managed.
Opening the Tags Section
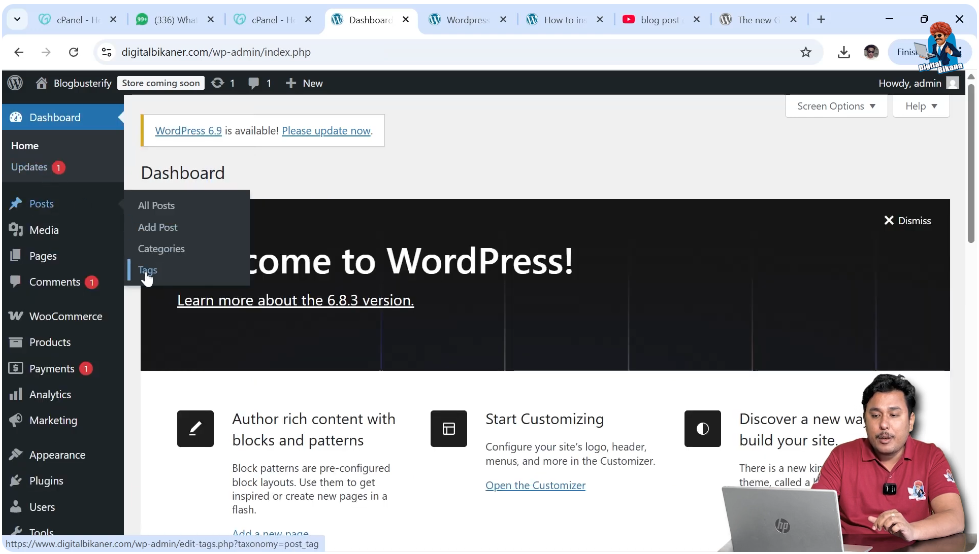
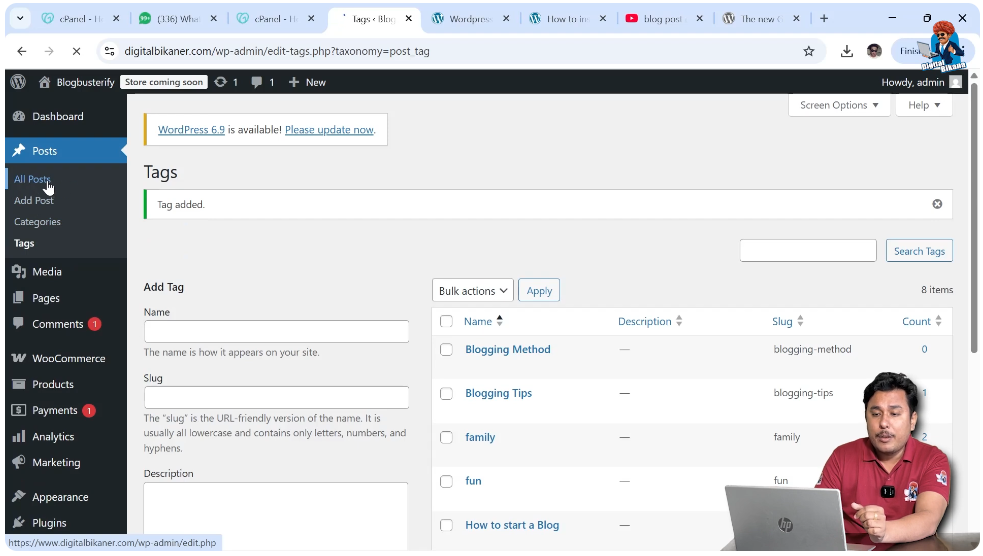
To create tags directly, go to the Posts section in the left-side toolbar. When you click on the Posts section, you will see multiple options such as All Posts, Add Post, Categories, and Tags.
Click on the Tags option to open the tags management screen. This section allows you to create new tags and manage existing tags. The process of creating tags is quite similar to creating categories.
Creating Tags from the Tags Section
Entering Tag Name
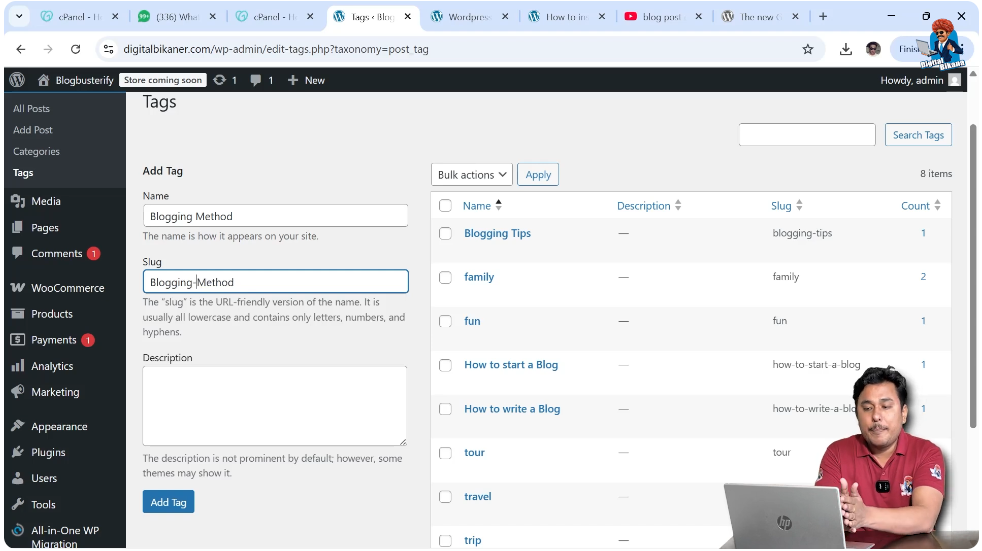
When you open the Tags section, you will see fields where you can create a new tag. The first field is the Tag Name.
For example, you can create a tag called:
Blogging Method
You need to enter the tag name in the Tag Name field. This tag will be used to group related blog posts.

Entering the Slug
After entering the tag name, the next step is entering the slug. The slug is a part of the permalink or URL structure of the tag page.
Whenever a user opens a tag page, the URL contains the slug after the domain name.
One important thing to remember is that slugs should not contain spaces. Instead of spaces, you should use hyphens.
For example:
Blogging Method → blogging-method
This format ensures that the slug is SEO-friendly and easy to read.
Writing Tag Description
After entering the slug, the next step is writing the tag description.
It is important to write an SEO optimized tag description because tags also get indexed in search engines. A well-written description helps your tag page rank in search engine result pages.
When tags rank in search engines, users can discover your blog posts more easily. This helps increase traffic on your website.
The tag description should clearly explain what type of content is included under that tag.
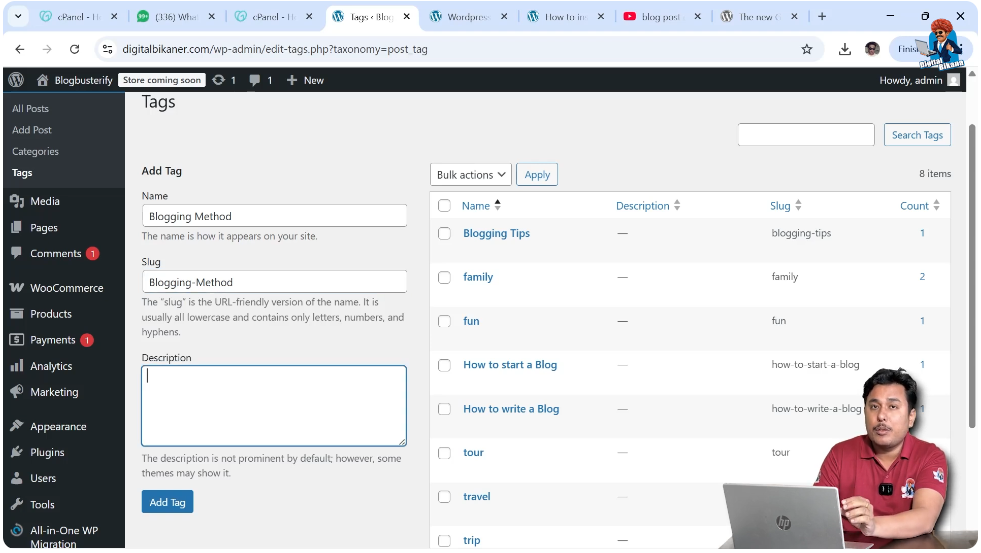
Adding the Tag
After entering the tag name, slug, and description, the final step is to click on the Add Tag button.
Once you click on Add Tag, the tag will be created successfully and will appear in the tag list.
Now your tag is ready to be used in blog posts.

Creating Tags While Posting an Article
Another method to create tags is while writing or editing a blog post. This method is quick and convenient because you can create tags directly from the post editor.
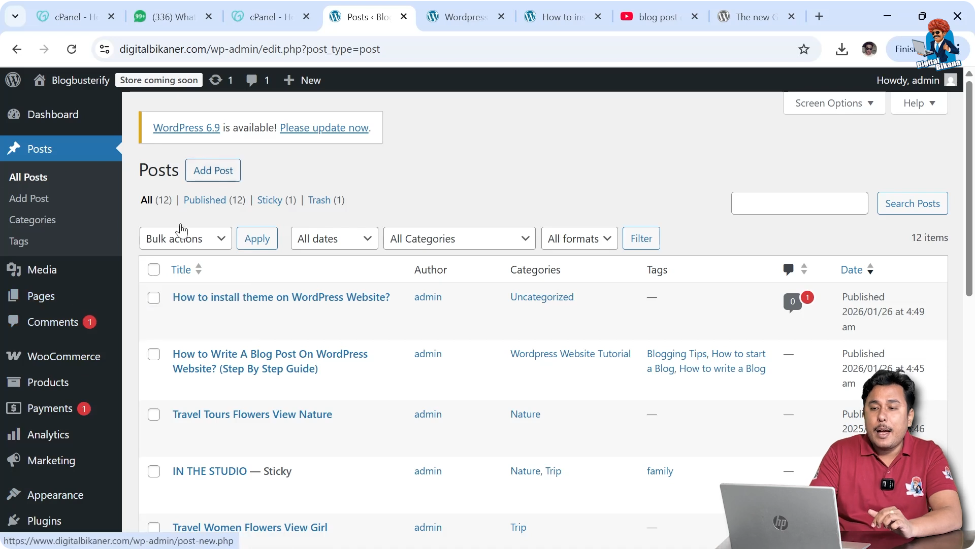
Opening the All Posts Section
To create tags while editing a blog post, go to the Posts section and click on All Posts.
Here you will see a list of all blog posts available on your website.
You can either create a new post or edit an existing post. Both options allow you to create tags.
For demonstration purposes, you can edit an existing article.
Editing a Blog Post
Move your cursor over any blog post title. The Edit option will appear below the title.
Click on Edit to open the blog post editor.
The blog post editor allows you to add content, images, categories, and tags.

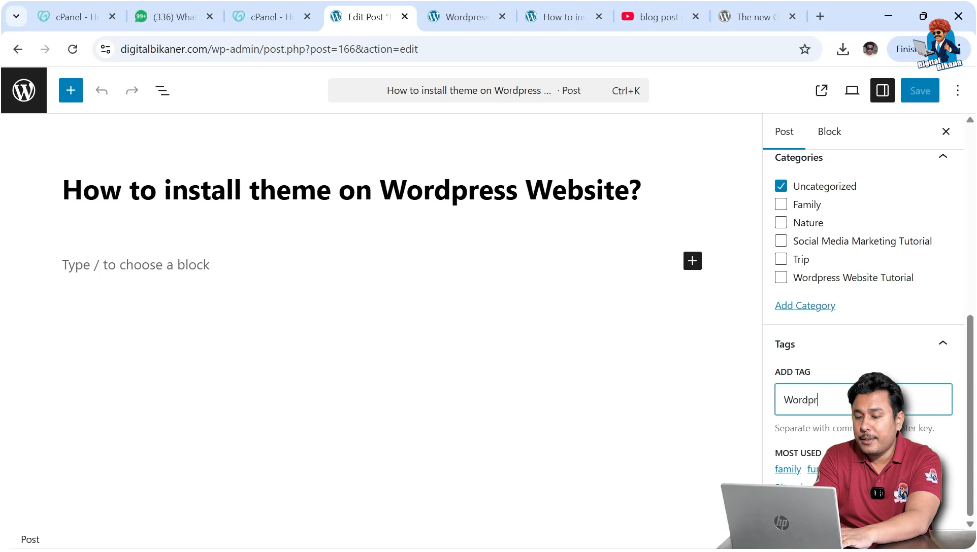
Adding Tags in the Post Editor
Entering Tag Name
In the blog post editor, look at the right-side toolbar. There are two main sections available:
- Post
- Block
You need to stay inside the Post section.
Inside the Post section, you will see the Tags option.
Here you can create a new tag by typing the tag name.
For example:
WordPress Theme Installation
After typing the tag name, press Enter.
The tag will be created automatically and added to the blog post.
Saving the Blog Post
After adding tags, you can save or publish the blog post.
Once the post is published, the tags will become active and users can click on them to see related posts.
How Tags Help Your Website
Tags play an important role in organizing your blog content. They help group related articles under specific topics.
When users click on a tag, they can see all blog posts related to that tag. This improves user experience and helps visitors explore more content on your website.
Tags also help search engines understand your website structure.
Since tag pages get indexed in search engines, they can bring additional organic traffic to your website.
Writing SEO optimized tag names and descriptions can improve the chances of ranking tag pages in search engine results.
SEO Tips for Creating Tags
Before creating tags, it is recommended to think about the keywords related to your blog posts.
Using relevant keywords in tag names increases the chances of search engine visibility.
Make sure the slug is clean and readable by using hyphens instead of spaces.
Always write a meaningful tag description because tag pages can rank in search engines.
Well-optimized tags can help your articles reach more users and improve the overall SEO of your website.
Difference Between Categories and Tags
Although tags and categories look similar, they serve different purposes.
Categories are used to divide blog posts into broad topics.
Tags are used to describe specific topics inside those categories.
For example:
Category: WordPress
Tag: WordPress Theme Installation
Tag: WordPress Plugins
Tag: WordPress SEO
This structure helps organize blog posts properly.
Managing Tags in WordPress
All created tags can be managed from the Tags section inside the Posts menu.
From there, you can edit tags, delete tags, or update tag descriptions.
Managing tags regularly helps maintain a clean and organized blog structure.
Conclusion
Creating tags for blog posts on a WordPress website is a simple and effective way to organize content and improve SEO. Tags help users find related articles and allow search engines to better understand your website topics.
You can create tags directly from the Tags section or while writing a blog post. Both methods are easy to use and require only a few steps.
By using SEO-friendly tag names, proper slugs, and optimized descriptions, you can improve your website visibility and attract more visitors through search engines.
Related Posts


