In this article, we are going to discuss two mandatory things that you must know before creating a Meta Pixel code. If you are planning to create a custom audience using website as a source and want to run ad campaigns on those custom audiences, then Meta Pixel is required.
Meta Pixel is created using the Events Manager inside Meta Business Suite. However, before generating a Meta Pixel code, there are two compulsory steps that must be completed. If these steps are not completed, you may face issues while creating or using the Meta Pixel.
This article explains both mandatory steps in detail and shows how to complete them correctly before generating the Meta Pixel code.
Why These Steps Are Required Before Creating Meta Pixel
If you want to run ads on website-based custom audiences, Meta requires certain security and verification measures. These measures ensure that:
- The business is genuine
- The account is secure
- Tracking permissions are properly assigned
That is why Meta makes it mandatory to complete these steps before allowing pixel creation.
Step 1: Verify Business Email Address in Meta Business Suite
Why Business Email Verification Is Mandatory
The first mandatory step before creating a Meta Pixel code is verifying your business email address in Meta Business Suite.
If your business email is not verified:
- Meta may restrict access to certain tools
- Pixel creation may not be allowed
- Business credibility remains incomplete
That is why email verification is compulsory.
How to Access Meta Business Suite
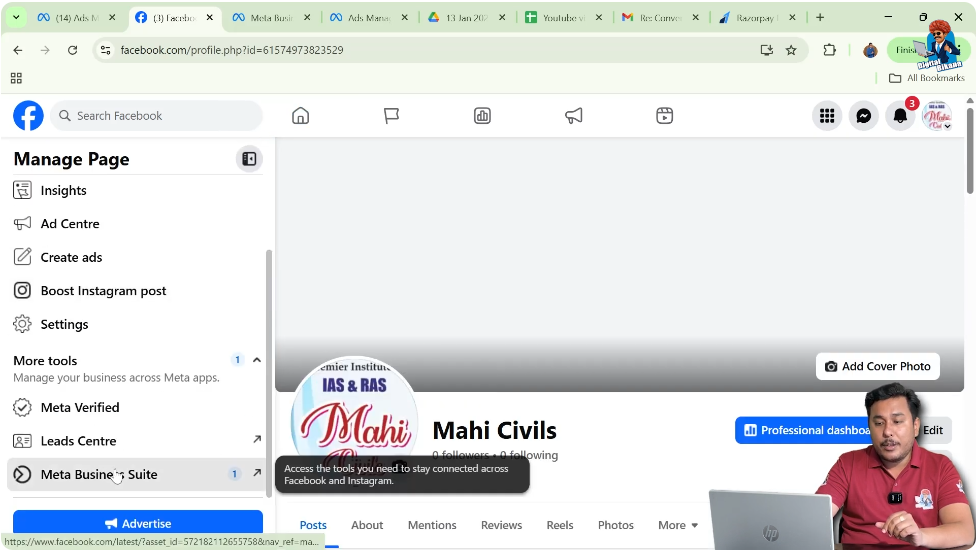
Open Facebook Page Profile
First, log in to your Facebook account and switch to your Facebook Page.
From the page homepage:
- Click on your page name
- This opens the page profile

Open Meta Business Suite
From the page profile:
- Click on Meta Business Suite
If you already know the direct URL, you can also open Meta Business Suite directly using:
- business.facebook.com
Both methods take you to the same place.
Verifying Business Email Address
Step 1.1: Go to Settings
Open Business Settings
Once you are inside Meta Business Suite:
- Click on Settings
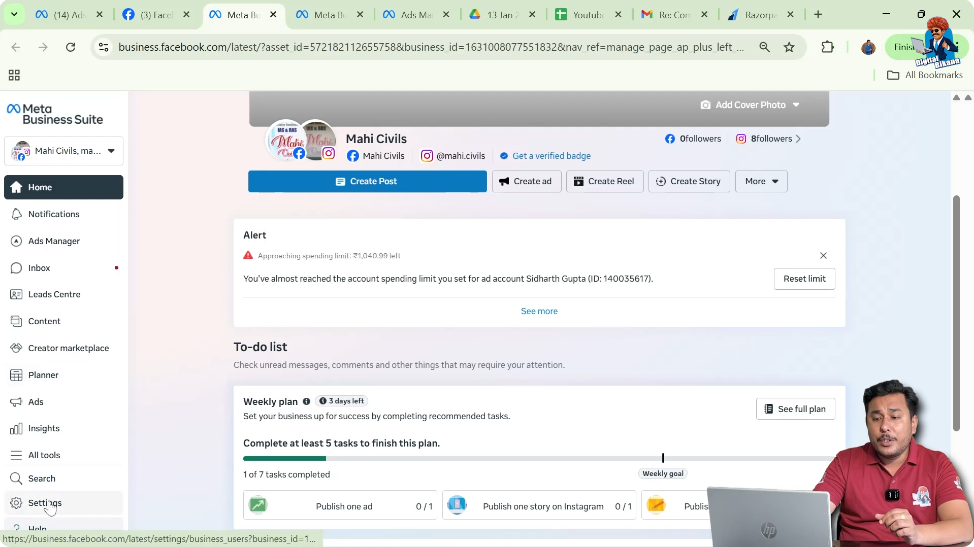
Step 1.2: Open Business Info Section
Locate Business Information
After clicking on settings:
- Go to Business Info
- Scroll down to find the email address section
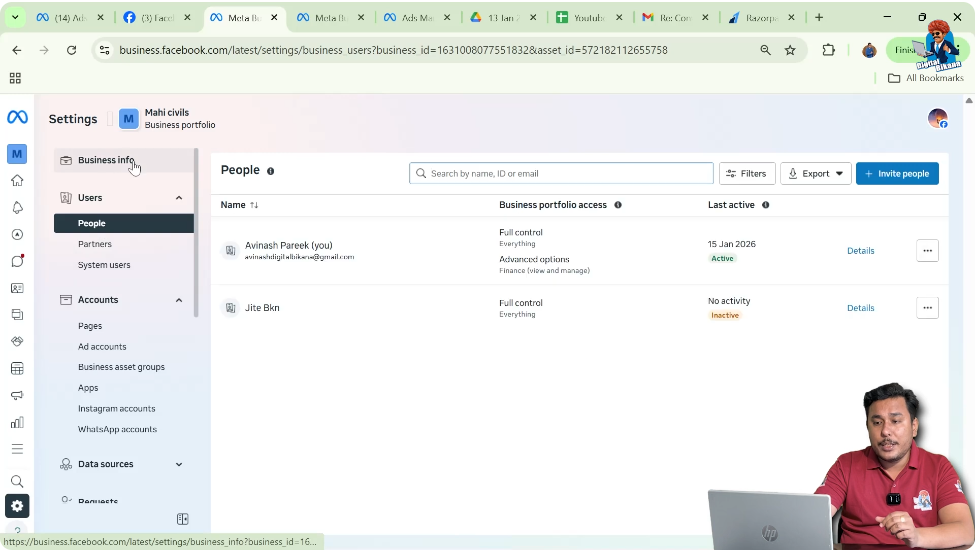
Step 1.3: Check Email Address Status
Verify If Email Is Already Added
If your email address is already visible:
- It means your email is already verified
If the email field is blank:
- It means your business email is not verified

Step 1.4: Add Business Email Address
Enter Email Address
If the email field is blank:
- Click on Edit
- Enter your business email address
- Click on Save

Step 1.5: Verify Email From Inbox
Complete Email Verification
After saving:
- You will receive a verification email
- Open the email
- Click on Verify Business Email Address
Step 1.6: Facebook Login Confirmation
Final Verification
After clicking the verify button:
- Facebook will ask you to log in
- Enter your Facebook login credentials
Once logged in:
- Your business email address gets verified successfully
Completion of First Mandatory Step
After completing this process:
- Your business email is verified
- Meta Business Suite shows the email correctly
This completes the first mandatory step.
Step 2: Enable Two-Step Authentication on Facebook Account
Why Two-Step Authentication Is Required
The second mandatory step before generating a Meta Pixel code is enabling two-step authentication (two-factor authentication) on your Facebook account.
This step is required for:
- Account security
- Protection from unauthorized access
- Safe use of business tools
Meta does not allow sensitive tools like pixel creation without two-step authentication.
How to Enable Two-Step Authentication
Step 2.1: Switch Back to Facebook Account
Exit Page Mode
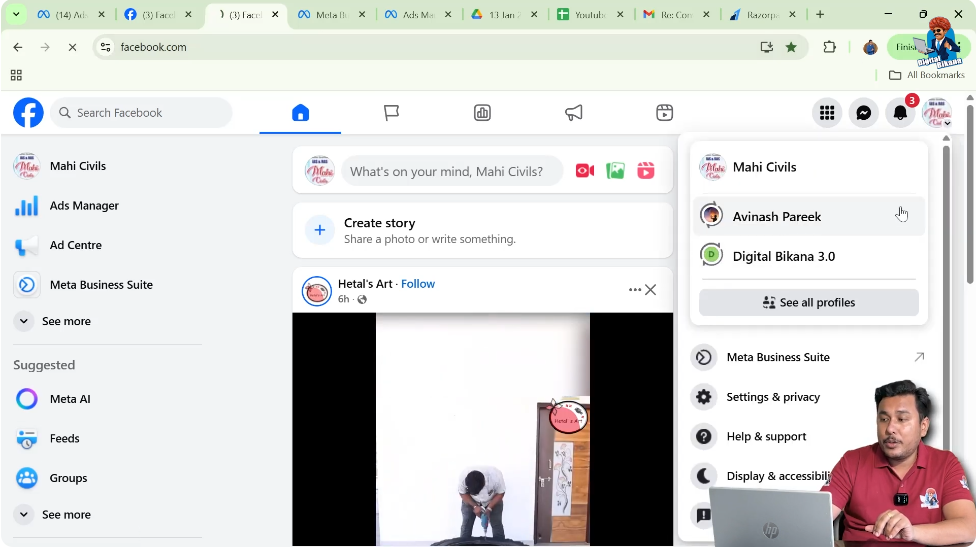
First:
- Switch back from Facebook Page to your personal Facebook account
Step 2.2: Open Settings and Privacy
Access Account Settings
From your Facebook account:
- Click on the top-right corner icon
- Click on Settings & Privacy
- Then click on Settings


Step 2.3: Open Account Center
Go to Security Settings
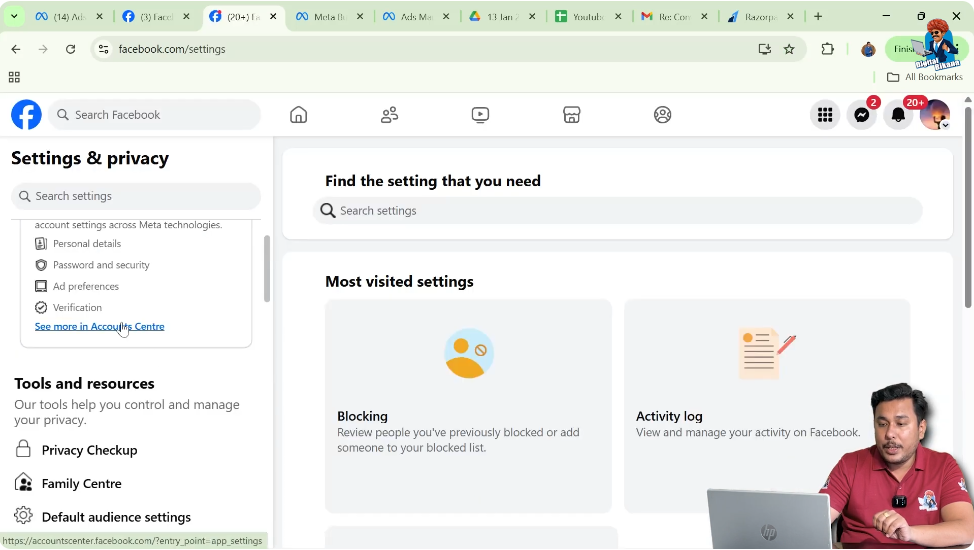
Inside settings:
- Click on See more in Account Center
Step 2.4: Open Password and Security
Locate Two-Factor Authentication
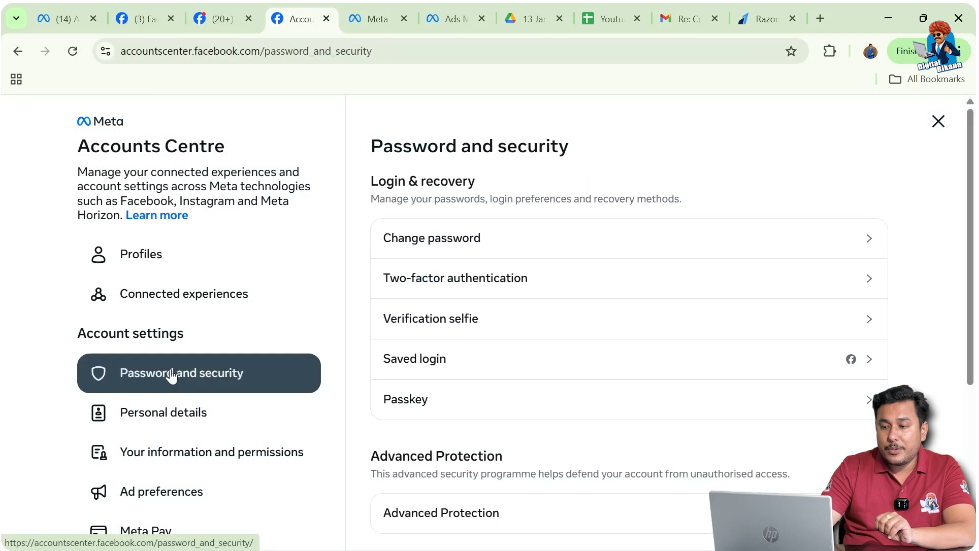
Inside Account Center:
- Click on Password and Security
- Select Two-factor Authentication
Step 2.5: Select Facebook Account
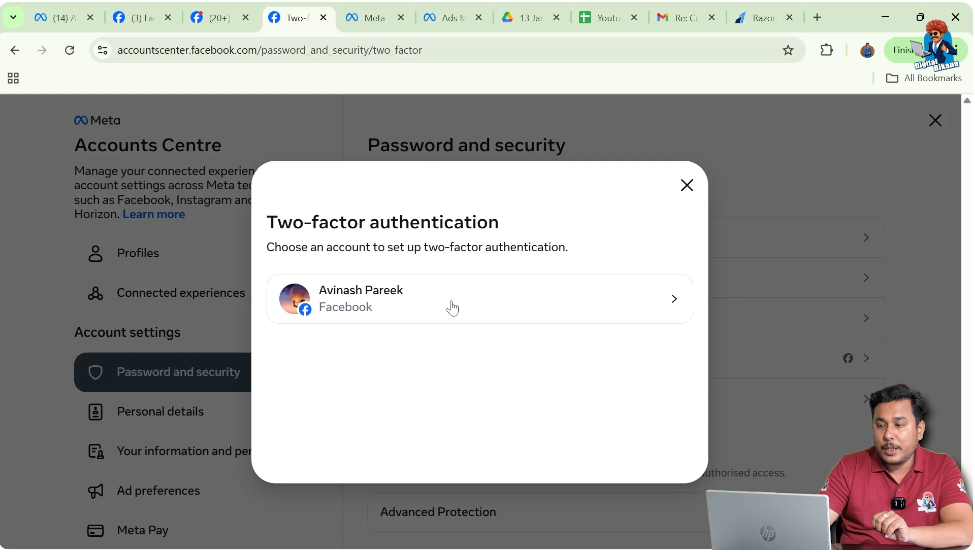
Choose Account for 2FA
You will see a list of accounts:
- Select your Facebook account

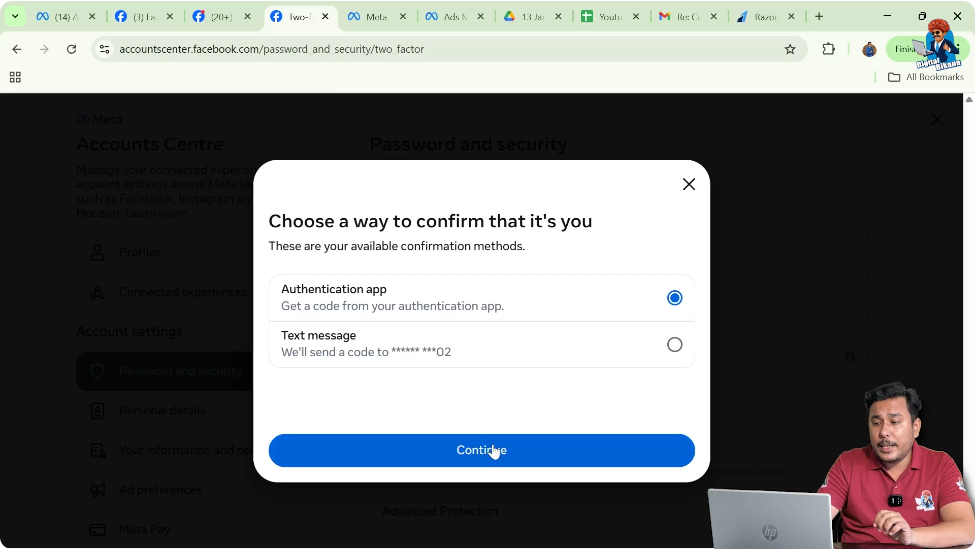
Step 2.6: Enter Authentication Code
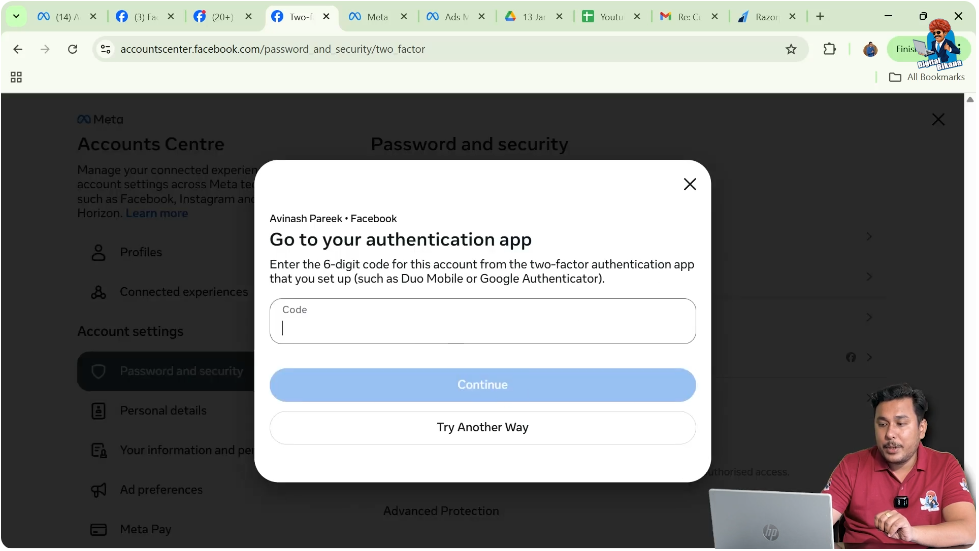
Confirm Identity
If two-step authentication is already enabled:
- Facebook asks for the authentication code
- Enter the code
- Click on Continue
Step 2.7: Set Up Two-Step Authentication (If Not Enabled)
Choose Authentication Method
If two-step authentication is not set up yet, you can enable it using:
- SMS
- Authentication app
Most users prefer:
- Authentication app
- SMS
You can choose any method that suits you.
Completion of Second Mandatory Step
Once two-step authentication is enabled:
- Your account becomes more secure
- Meta allows access to advanced tools
This completes the second mandatory step.
Why Both Steps Are Mandatory Before Meta Pixel Creation
Meta Pixel involves:
- Tracking website users
- Collecting behavioral data
- Managing custom audiences
To ensure data security and business authenticity, Meta requires:
- Verified business email
- Two-step authentication
Without completing these steps:
- Pixel creation may fail
- Access may be restricted
What Happens After Completing These Steps
Once both steps are completed:
- You can go to Events Manager
- You can generate Meta Pixel code
- You can add the pixel to your website
- You can create website-based custom audiences
Summary of Mandatory Steps
Mandatory Step 1
Mandatory Step 2
- Enable two-step authentication on Facebook account
Both steps must be completed before generating Meta Pixel code.
Common Mistakes to Avoid
- Do not skip email verification
- Do not keep two-step authentication disabled
- Do not use unverified business accounts
Skipping these steps can cause delays or restrictions.
Final Conclusion
Before creating a Meta Pixel code, there are two mandatory requirements that must be fulfilled. The first is verifying your business email address inside Meta Business Suite, and the second is enabling two-step authentication on your Facebook account.
These steps ensure account security, business authenticity, and proper access to Meta’s tracking tools. Once both steps are completed successfully, you can proceed to generate the Meta Pixel code using Events Manager and use it for website-based custom audiences and ad campaigns.
Completing these prerequisites helps you avoid errors and ensures smooth setup of Meta Pixel for tracking and retargeting.
Related Posts