Using column blocks in a WordPress blog post allows you to create structured and visually appealing layouts. Instead of displaying all content in a single vertical format, column blocks help you divide your content into multiple sections side by side. This improves readability and makes your blog post look more professional.
In this article, you will learn how to use column blocks in a WordPress blog post step by step. The process includes accessing the post editor, adding a column block, selecting a layout, and inserting elements such as images, headings, and paragraphs inside the columns.
Accessing the Posts Section
Before adding a column block, you need to open a blog post in the WordPress editor.
Step 1: Open the Posts Menu
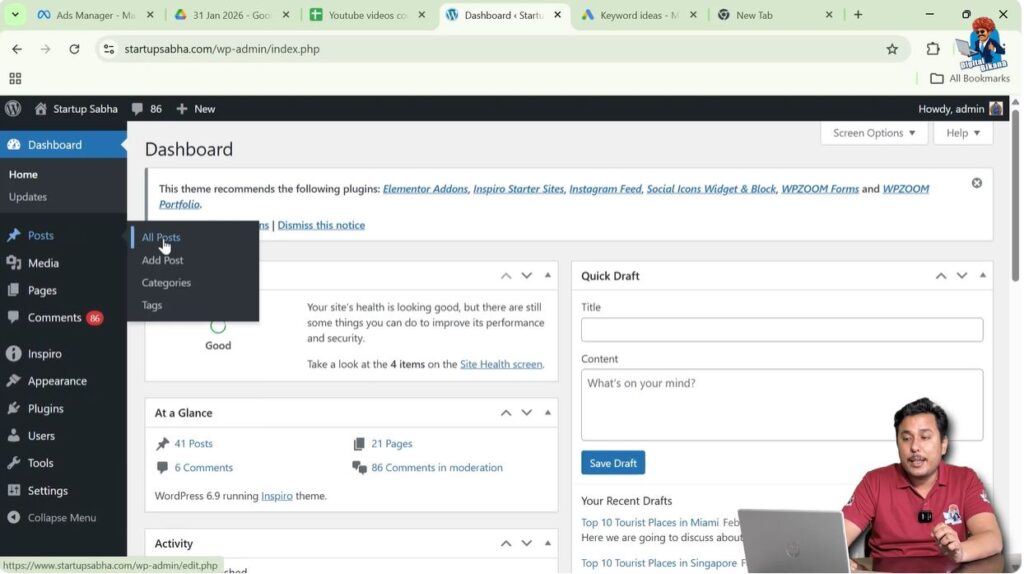
Log in to your WordPress website admin dashboard.
On the left side toolbar, move your cursor over the Posts option.
As soon as you move your cursor over Posts, a submenu appears.
This submenu includes:
- All Posts
- Add Post
If you want to create a new post, click on Add Post.
If you want to edit an existing blog post, click on All Posts.
For this example, we will edit an existing blog post.
Opening an Existing Blog Post
After clicking on All Posts, you will see a list of blog posts written by you.
Step 2: Click on Edit
Move your cursor over the blog post title.
You will see the Edit option displayed below the title.
Click on Edit.
The blog post will open in the WordPress block editor.

Adding a Column Block
Once you are inside the editor, you can add a column block wherever needed.
Step 3: Click on Add Block
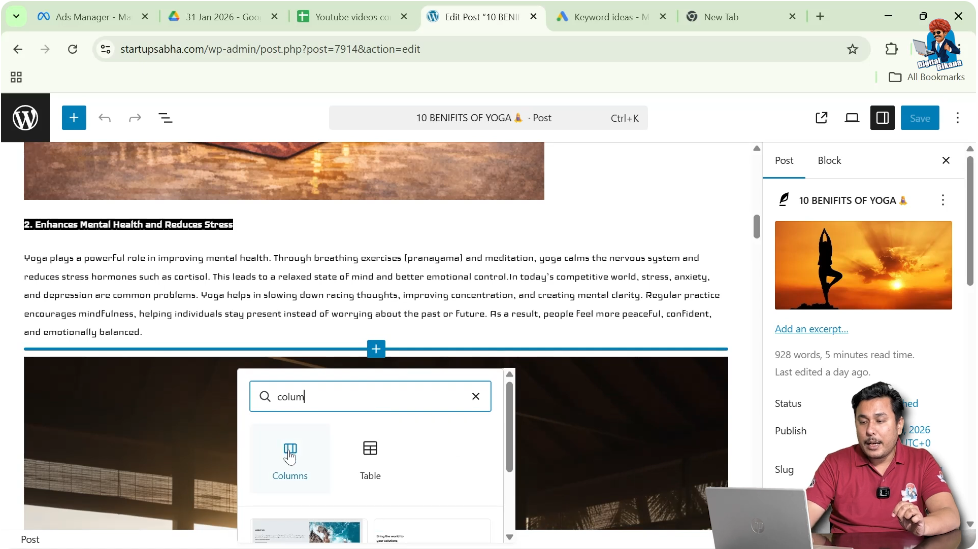
Move your cursor to the location where you want to insert the column block.
When you place the cursor at the end of a block, a blue line appears with a plus icon.
Click on the black Plus (+) icon to add a new block.
In the search bar, type Columns.
Select the Columns block from the list.
Selecting Column Layout
After selecting the Columns block, WordPress will ask you to choose a layout.
You can select:
- One column
- Two columns
- Multiple columns
- Columns with different sizes
For example, you can choose a two-column layout.
When you select the two-column layout, the block will split into two sections side by side.
Now you can add content inside each column separately.

Adding Content Inside the First Column
Once the column layout is created, you can add different elements inside it.
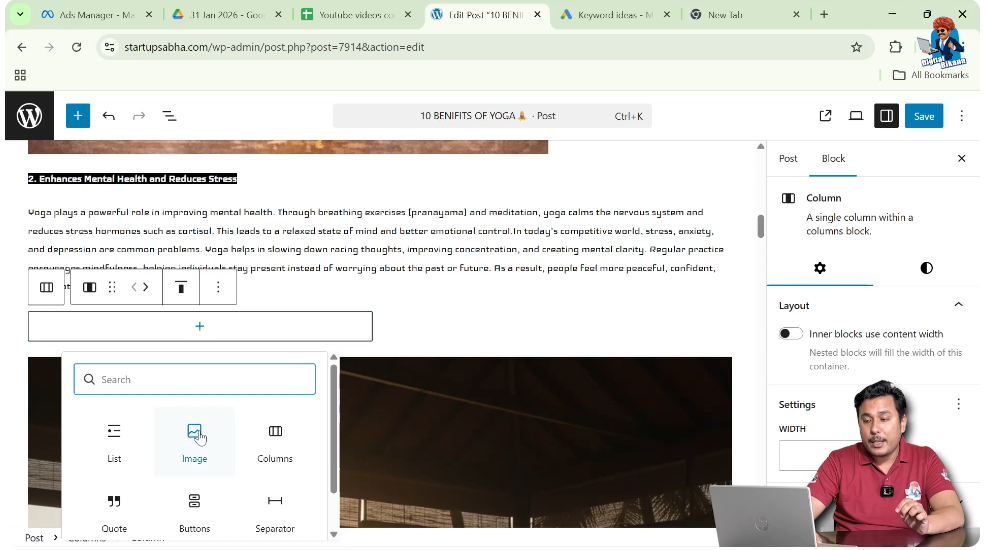
Step 4: Add an Image in the First Column
Click inside the first column.
You will see a plus icon inside that column.
Click on the plus icon.
It will ask what type of element you want to insert.
Search for Image.
Select the Image block.
Choose an image from the media library.
Click on Select.
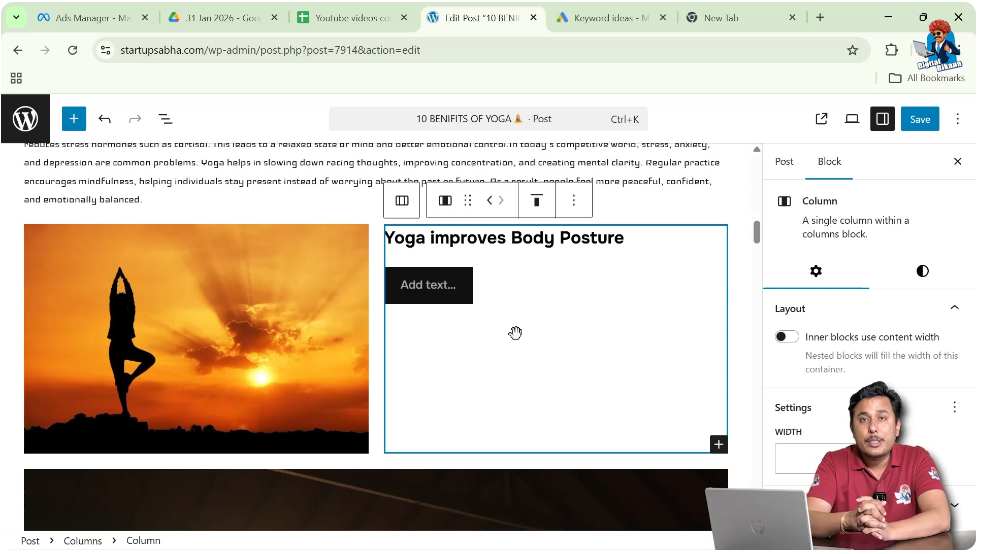
The image will now appear inside the first column.
Adding Content Inside the Second Column
Now you can add content to the second column.
Step 5: Add a Heading in the Second Column
Move your cursor to the second column.
Click inside the second column area.
Click on the plus icon.
Search for Heading.
Select the Heading block.
Type your desired heading.
After typing the heading, press Enter.
WordPress will again display the option to choose another block.
You can now add:
- A paragraph
- A button
- A list
- Any other block element
Simply select the required block and add your content.

Customizing Column Content
You are not limited to only images and headings.
You can add multiple elements inside each column.
For example:
- First column: Image and paragraph
- Second column: Heading, paragraph, and button
Each column works independently, allowing flexible layout design.
Why Use Column Blocks
Column blocks help organize content in a structured manner.
They are useful for:
- Comparing two topics side by side
- Displaying image and text together
- Creating feature sections
- Designing call-to-action areas
Instead of long vertical paragraphs, columns make your content more engaging.
Editing Column Blocks
If you want to modify the column layout later:
Click on the Columns block.
Use the block settings to adjust:
- Column alignment
- Spacing
- Layout
You can also change the column structure if needed.
Adding More Blocks Inside Columns
Inside each column, you can add unlimited blocks.
After pressing Enter below a heading or paragraph, WordPress displays the option to choose another block.
You can continue adding:
- Paragraph blocks
- Buttons
- Lists
- Images
- Other design elements
This flexibility allows you to design your blog post creatively.
Managing Layout Appearance
Column blocks help create a clean and professional layout.
For example:
- Image on the left and text on the right
- Text on the left and image on the right
- Two feature sections side by side
This improves visual structure and user experience.
Saving the Changes
After adding and arranging your column blocks:
Click on Update or Save.
Your blog post will now display the new column layout on the front end.
Conclusion
Using column blocks in a WordPress blog post is simple and effective. By accessing the Posts section, opening an existing blog post, clicking on Add Block, and selecting the Columns block, you can divide your content into multiple sections.
You can choose the desired column layout and add different elements such as images, headings, paragraphs, or buttons inside each column. Column blocks allow you to design structured and visually appealing blog posts.
By following these steps, you can easily use column blocks in your WordPress blog post and improve your content layout.
Related Posts