In this guide, we learn how to create a Google My Business listing or Google My Business profile. This process is useful for any business that wants to appear in Google search results, the local pack, or Google Maps. By creating a Google My Business listing, a business can improve its visibility and allow customers to find it easily online.
If you are running a business and want your business to be visible on Google platforms, then creating a Google My Business listing is an important step. This article explains the complete process in detail, exactly as shown in the video.
Why Create a Google My Business Listing
A Google My Business listing helps a business appear in Google search results and on Google Maps. This allows users to discover the business when they search for related keywords.
Once the listing is created, it becomes easier for customers to locate the business, view details, and interact with it. This is especially useful for local businesses that want visibility in their local area.
Starting the Google My Business Listing Process
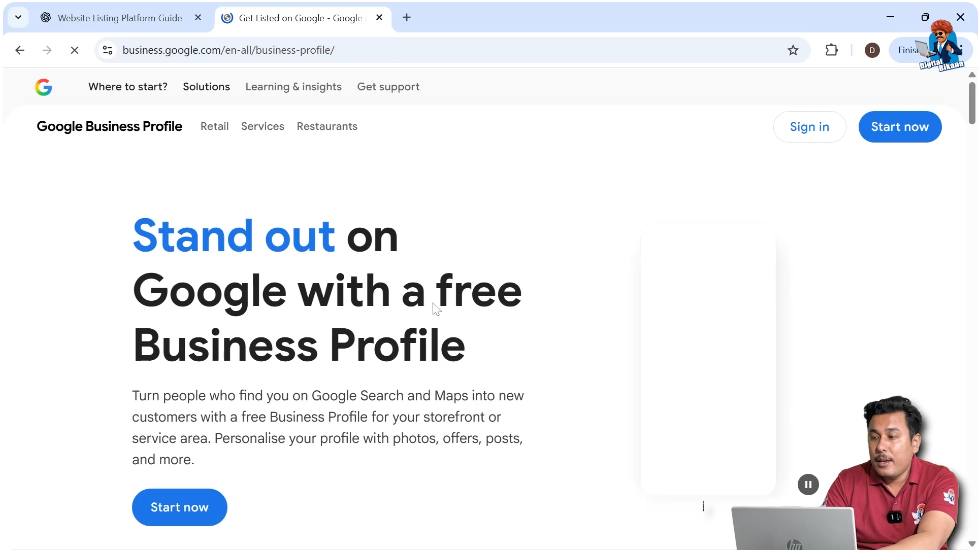
To begin creating a Google My Business listing, the first step is to open a web browser and visit google.com. From there, you need to search for “Google My Business.”
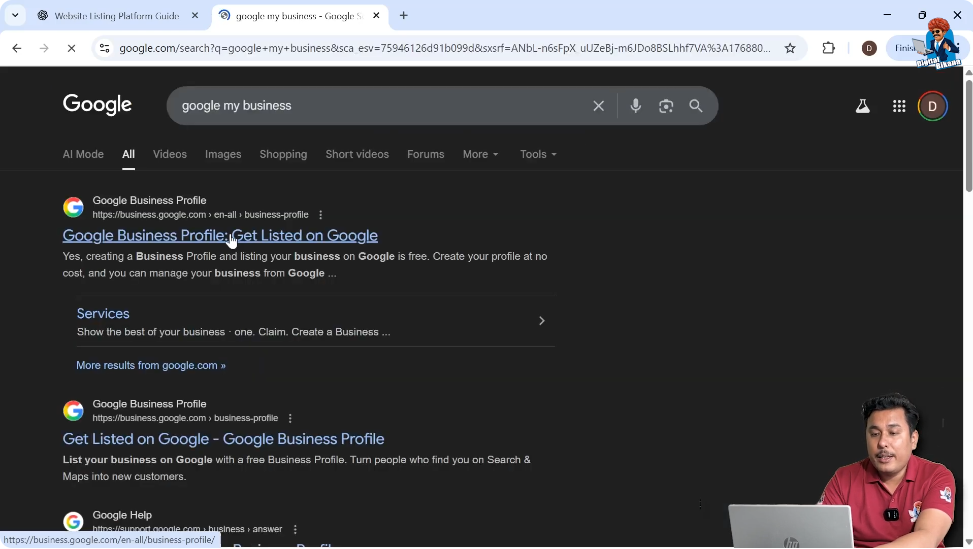
Once the platform appears in the search results, open it and click on the “Start Now” option. This takes you to the business profile creation process.
How to create Google My Business Profile Listing?
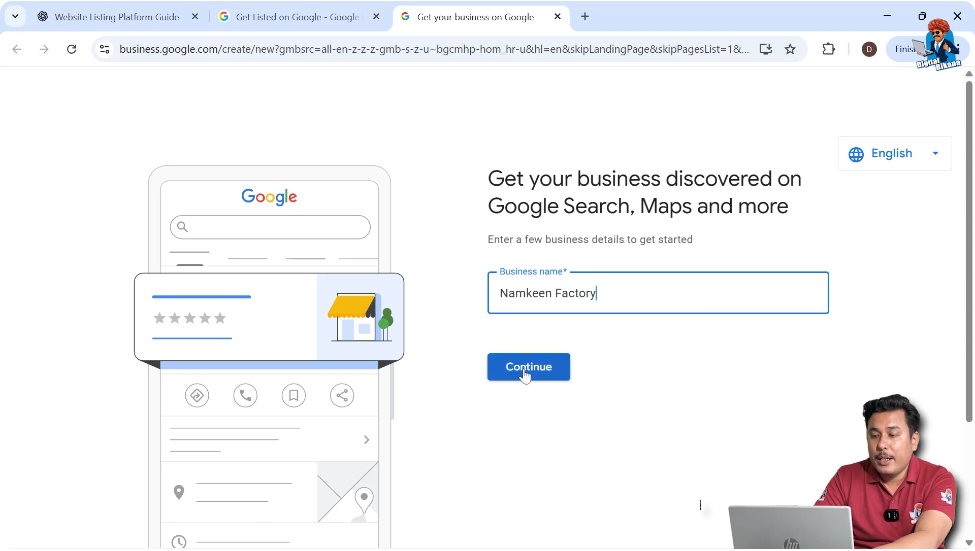
Step 1: Enter Your Business Name
Choosing the Correct Business Name
After clicking on “Start Now,” the platform asks for the business name.
You need to enter the exact name of your business and then click on “Continue.”
This name will be used to identify your business across Google Search and Google Maps, so it should be accurate.
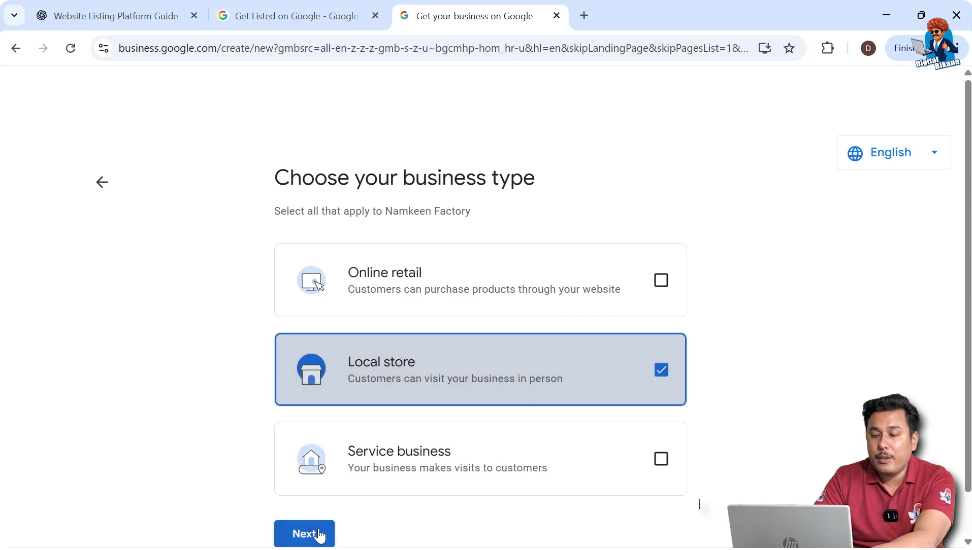
Step 2: Select the Business Type
Choosing Your Business Model
Next, Google asks whether your business is an online retail business, a local store, or a service business. You must select the option that best matches your business model.
This selection depends entirely on how your business operates. Once selected, click on “Next” to continue.
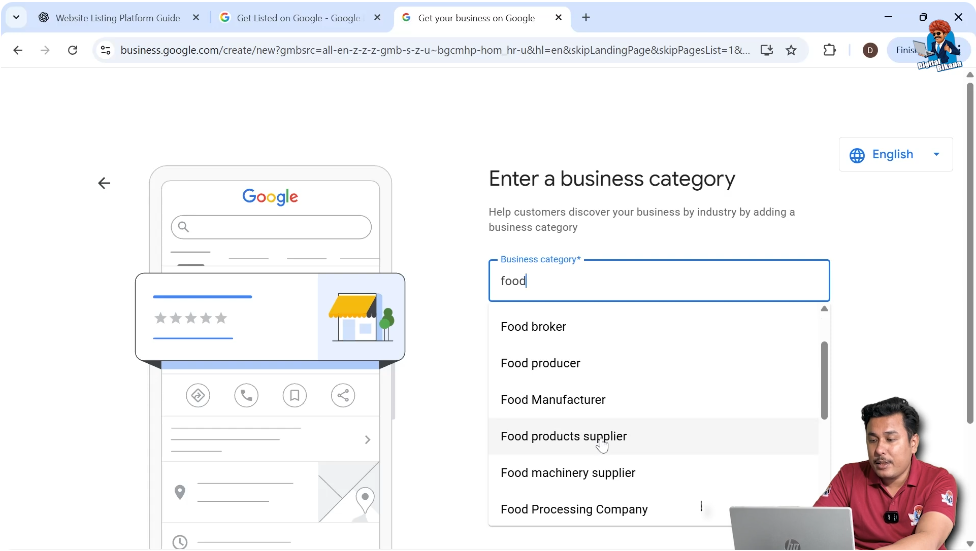
Step 3: Choose the Business Category
Selecting the Most Relevant Category
After selecting the business type, Google asks for the business category. This could be a coaching institute, car garage, car service center, electronic shop, or any other category related to your business.
You need to search for your business category and select the most relevant option from the dropdown list. Only the categories provided by Google can be selected.
Handling Category Limitations
Sometimes, the exact keyword you enter may not be available. For example, if you search for “snack,” no category may appear. In that case, you need to modify the keyword and choose a related category such as food manufacturer or food product supplier.
Once selected, click on “Next.”
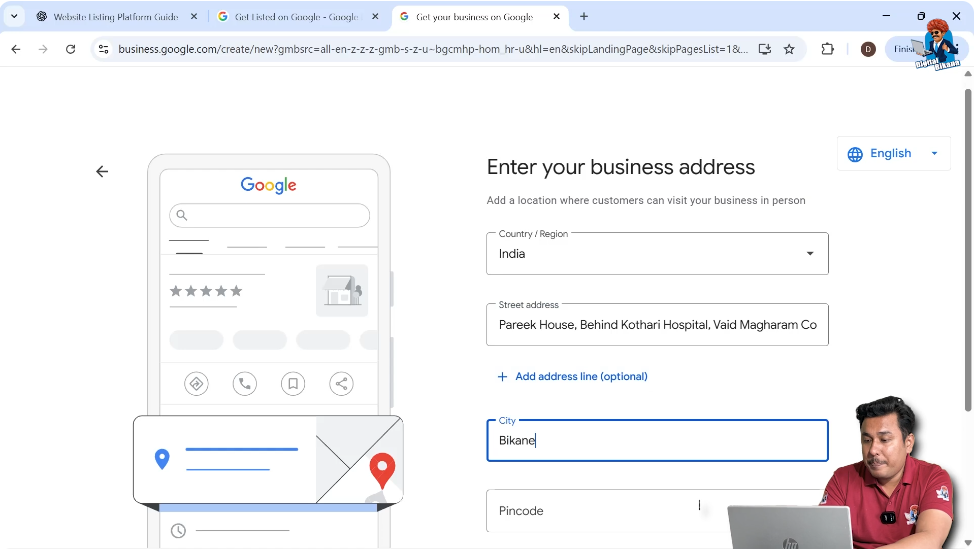
Step 4: Enter the Complete Business Address
Importance of Entering a Complete Address
Google then asks for the business address. It is very important to enter the complete address of your business. If the address is incomplete, your business may not get verified or may not appear in search results.
You should include all address details such as locality, area, city, and other relevant information.
Address and Verification Issues
Many times, businesses remain unverified because the address entered is incomplete. If only the locality name is entered, Google may require verification through a postcard or video verification.
Entering a complete address increases the chances of automatic verification and reduces the need for additional verification steps.
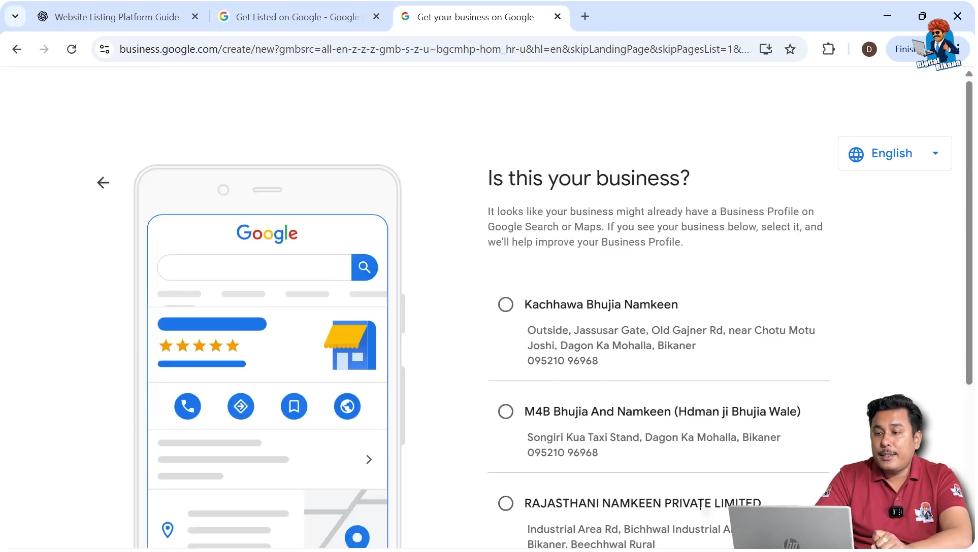
Step 5: Confirm Business Ownership
Selecting Business Ownership Option
After entering the address, Google asks whether the displayed business belongs to you. If none of the shown businesses are yours, you should select “None of these” and click on “Next.”
This step confirms that you are creating a new business listing.
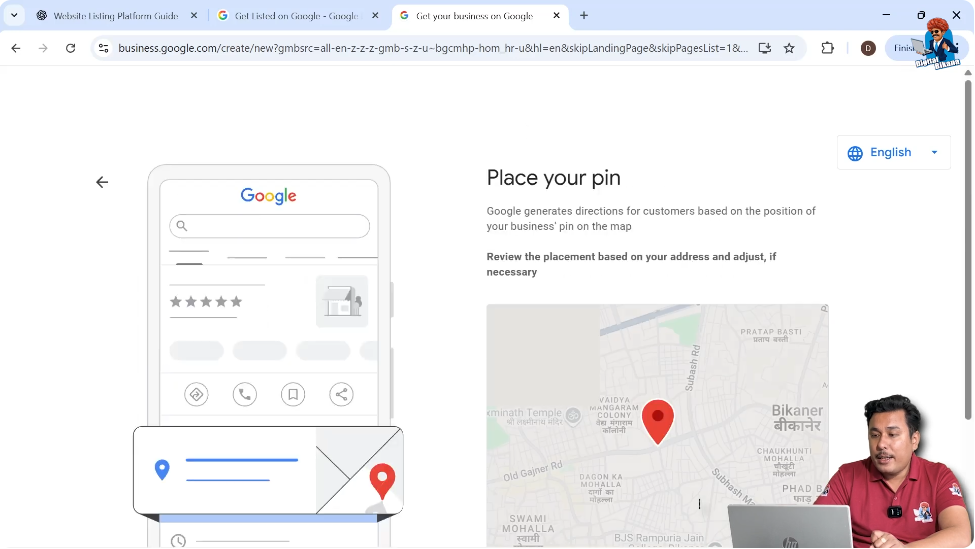
Step 6: Place the Business Location Pin
Pin Placement on the Map
Google then asks you to place a pin on the map to mark your business location. If the pin is already in the correct location, you can simply confirm it.
Adjusting the Pin Location
If the pin is not placed correctly, you can adjust it manually. This can also be done later if required. Once the correct location is selected, click on “Confirm.”
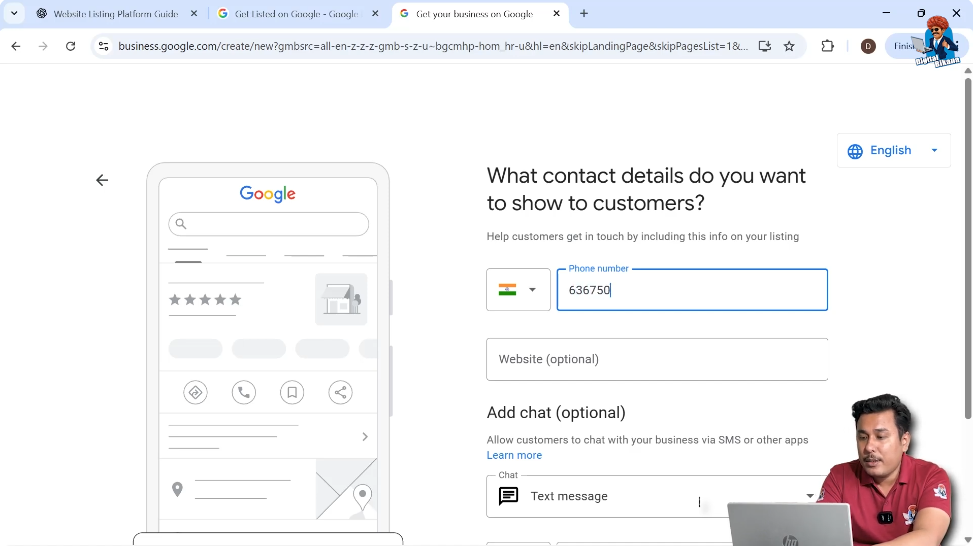
Step 7: Add Contact Details
Entering Phone Number
Next, Google asks for the business phone number. You can enter your contact number so customers can call you directly from your business listing.
Adding Website (Optional)
There is also an option to enter a business website. This field is optional. If your business does not have a website, you can skip this step.
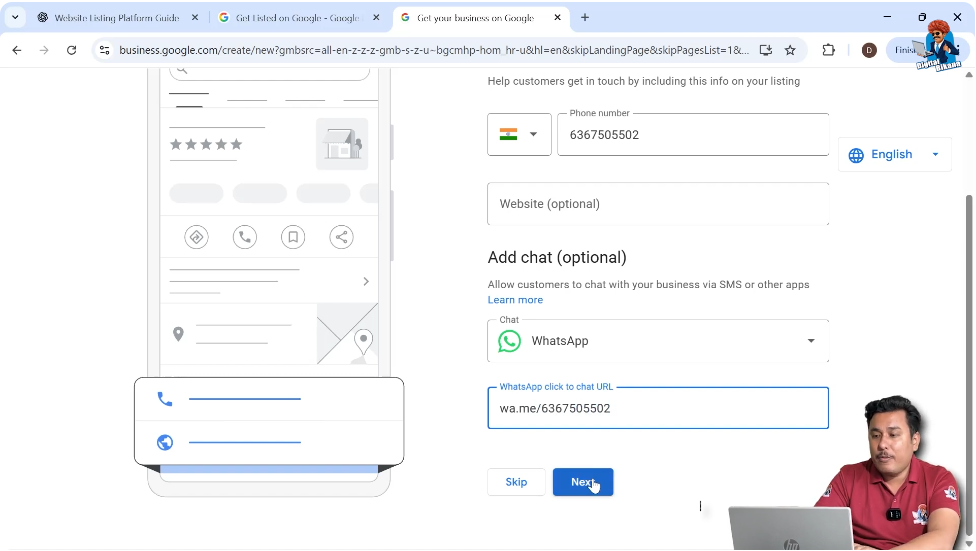
Step 8: Add WhatsApp Chat Option
Using WhatsApp Chat Button
Google My Business allows you to add a WhatsApp chat button. To do this, you need to enter your WhatsApp chat URL.
WhatsApp Chat URL Format
The WhatsApp chat URL follows a specific format:
wa.me/yourmobilenumber
Once the URL is entered, click on “Next” to proceed.
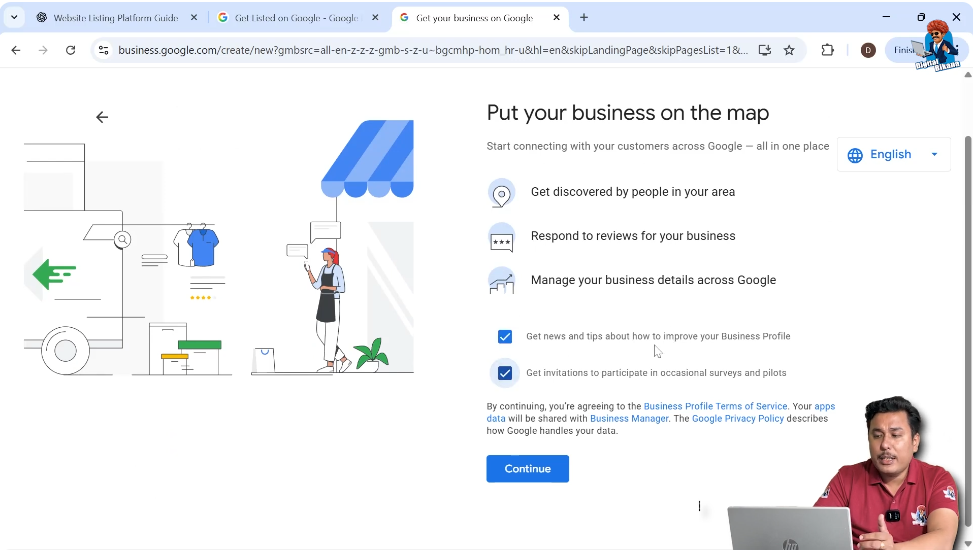
Step 9: Enable Business Updates and Tips
Receiving Updates and Tips
Google asks whether you want to receive updates, news, and tips to improve your business profile. You can choose to receive these and continue.
At this stage, your business profile setup is almost complete.
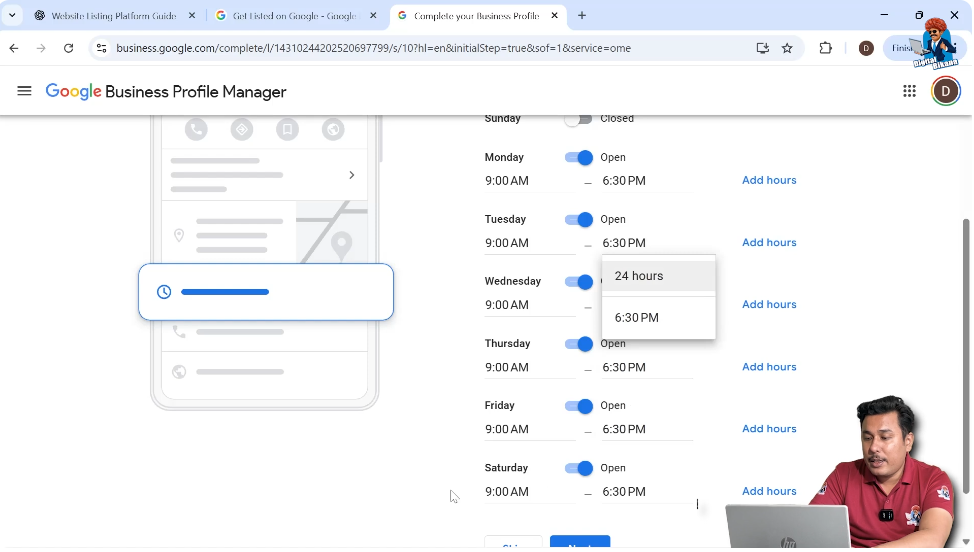
Step 10: Select Business Operational Hours
Setting Working Days
You need to select the days on which your business operates. For example, if your business is closed on Sunday, you can turn off that day.
Setting Business Timings
After selecting the working days, you need to enter opening and closing hours. These timings can be copied and pasted across all selected days for consistency.
Once completed, click on “Next.”
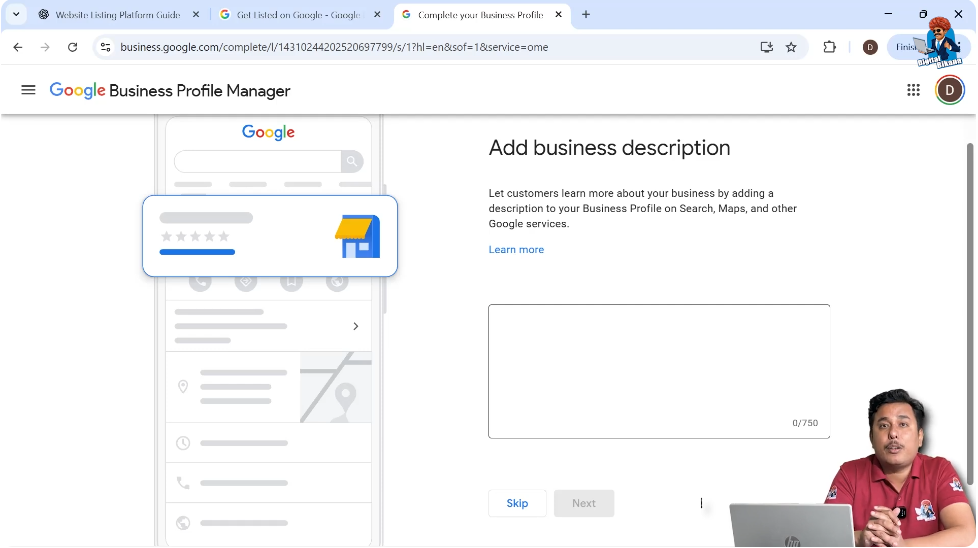
Step 11: Add Business Description
Writing a Relevant Business Description
Google asks you to enter a business description. This description should be relevant to your business and include keywords that users near your location are likely to search for.
Including relevant keywords helps the business profile rank better in Google search results.
Skipping Description Temporarily
You can choose to enter the description later if you want. The description can be written manually or generated with the help of tools, but it must remain relevant.
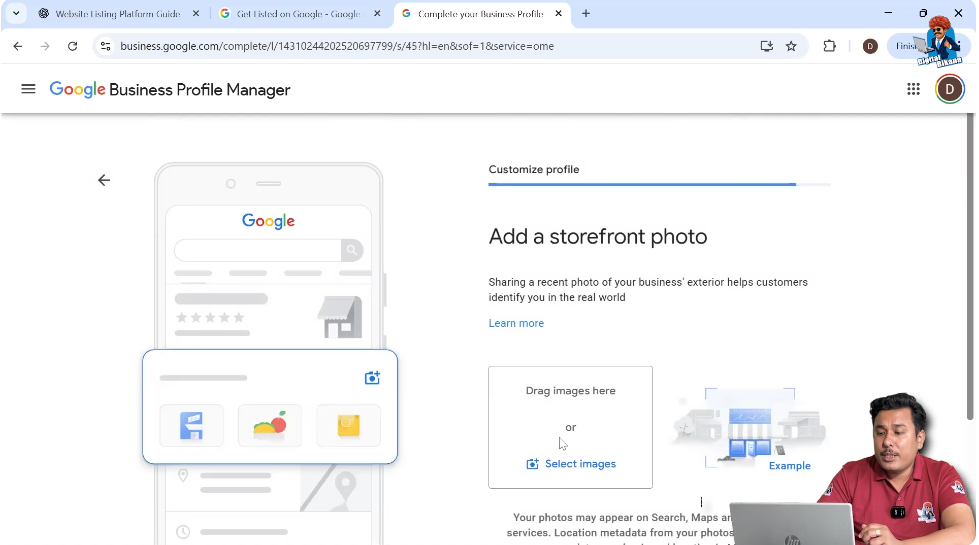
Step 12: Add Business Photos (Optional)
Storefront and Business Photos
Google provides an option to upload storefront photos and other business images. These photos can also be added later.
You can skip this section and continue with the setup.
Completion of Business Profile Creation
Once all required steps are completed, your Google My Business profile is created. You can search for your business on Google using the same Gmail ID to view the profile.
By clicking on “View Profile,” you can see the status of your business listing.
Business Verification Process
After creating the profile, Google starts processing your business verification. This process can take up to five days.
Sometimes verification happens immediately. In other cases, it may take 12 to 24 hours, 48 hours, or even up to a week. The verification timeline depends entirely on Google.
Until verification is complete, the business may not be publicly visible.
Managing the Google My Business Profile
Once the profile is created, multiple management options become available. These include:
- Adding business photos
- Editing profile information
- Checking business performance
- Advertising the business listing
- Adding products
- Enabling bookings
- Managing questions and answers
- Viewing and responding to reviews
All these options help in managing and improving the business profile.
Viewing Other Business Listings
You can also view other business listings created using the same Gmail ID. These listings may belong to your own businesses or your clients.
By selecting any listing, you can manage performance, advertise, read reviews, and add products or services.
Verified Business Listing Indicator
After verification is complete, a blue tick appears on the business listing. This indicates that the business profile is verified.
Once verified, the business becomes fully visible to users on Google Search and Google Maps.
Conclusion
Creating a Google My Business listing involves a structured process that starts with entering business details and ends with verification. Each step plays an important role in ensuring that the business appears correctly in Google search results and on Google Maps.
Simply creating the listing is the first step. After verification, the profile can be managed, updated, and optimized using the available tools. This complete process helps businesses improve their online presence and reach customers more effectively.
Related Posts