Changing the image title in a WordPress website is an important step in managing media files properly. The image title helps identify images inside the media library and can also help with organization and SEO. WordPress allows you to change the image title in multiple ways depending on your workflow.
In this article, you will learn how to change the image title in a WordPress website using three different methods. You can use any method depending on what suits you best.
Opening the Posts Section in WordPress Dashboard
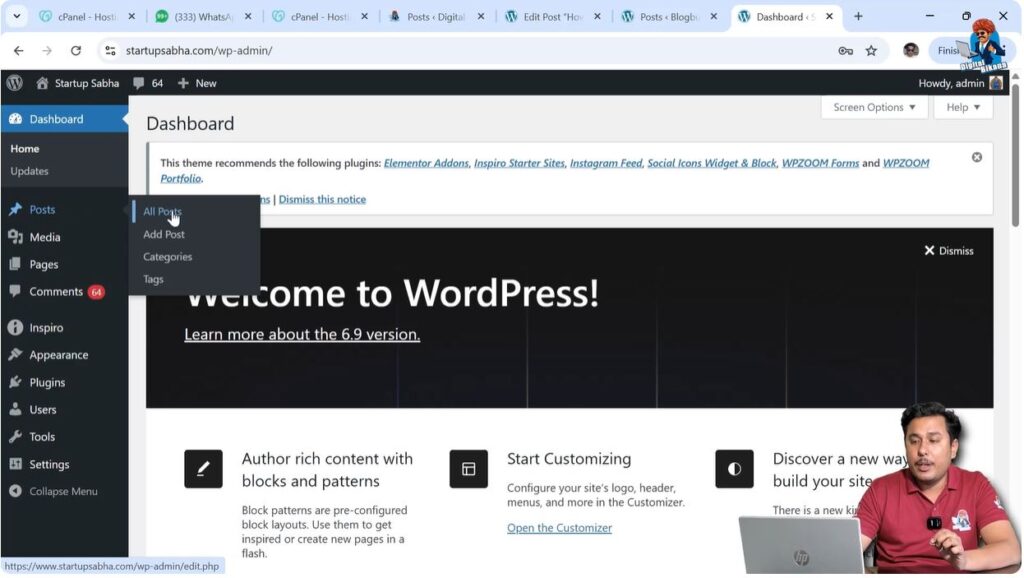
First, log in to your WordPress admin dashboard.
After logging in, go to the left-side toolbar and click on the Posts section. Then click on All Posts to open the list of blog posts.
From the list of posts, you can open any post by clicking on the Edit option. You can also create a new post if required.
In this example, an existing post is edited to demonstrate how to upload an image and change the image title.
After opening the post editor, you can place your cursor where you want to insert the image.
Method 1: Renaming Image Before Uploading
The first method is renaming the image file in your computer before uploading it to WordPress.
When you rename the image file in your system and upload it to WordPress, the image title automatically becomes the same as the file name.
This method is useful when you want the image title to be set automatically at the time of uploading.
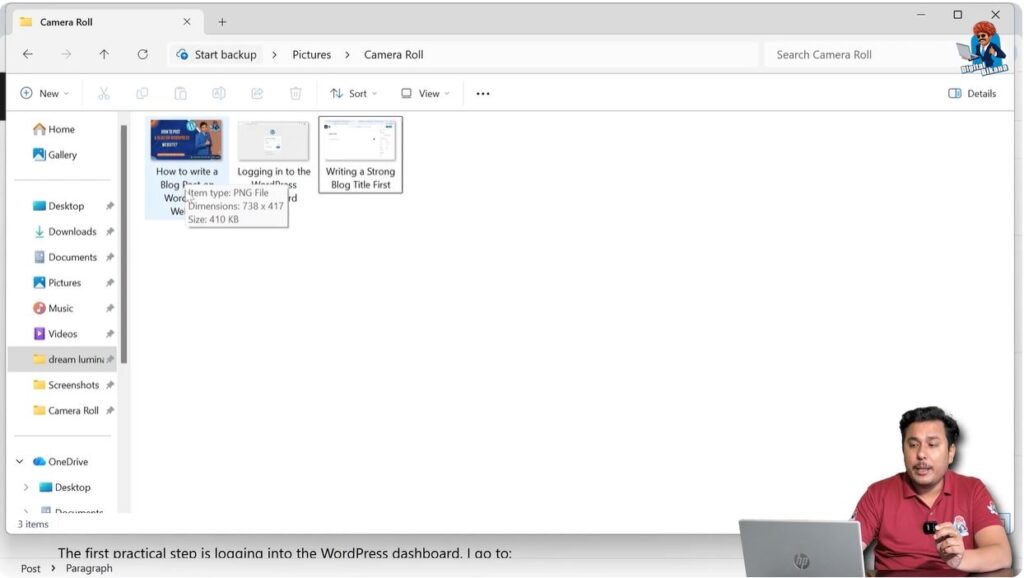
Before uploading the image, open the file explorer on your computer.
Rename the image file with the desired name.
After renaming the image file, go back to the WordPress editor.
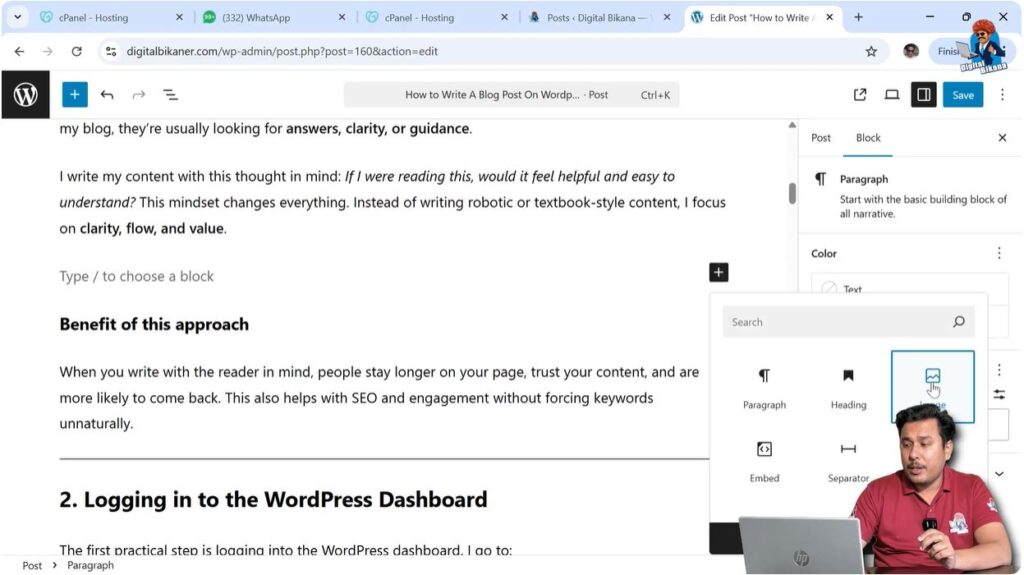
Place your cursor at the end of a paragraph where you want to insert the image.
Press Enter to create a new block.
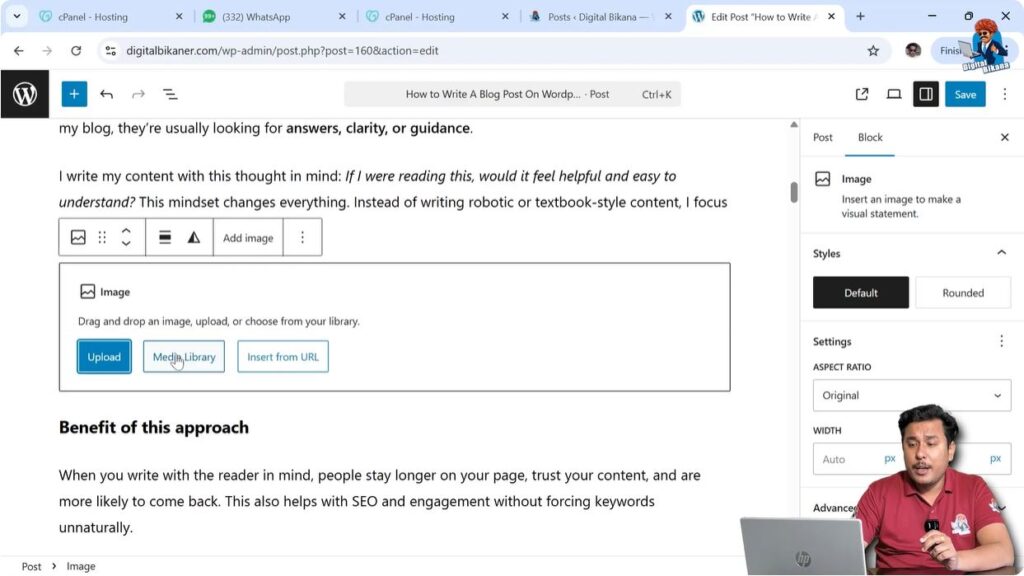
Move your cursor to the new block and click on the plus icon.
Select the Image block.
Open the Media Library.
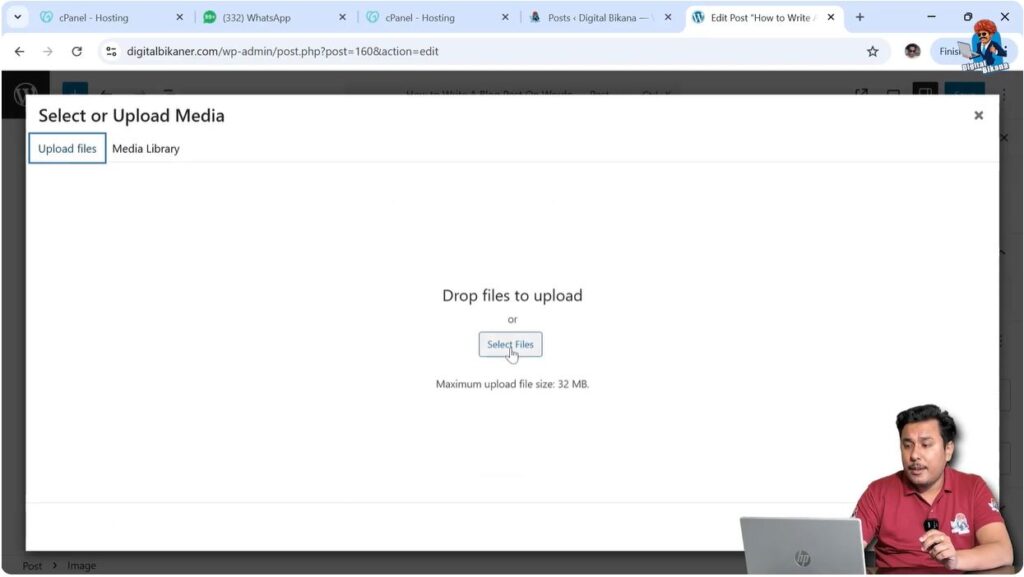
Click on Upload Files.
Click on Select Files.
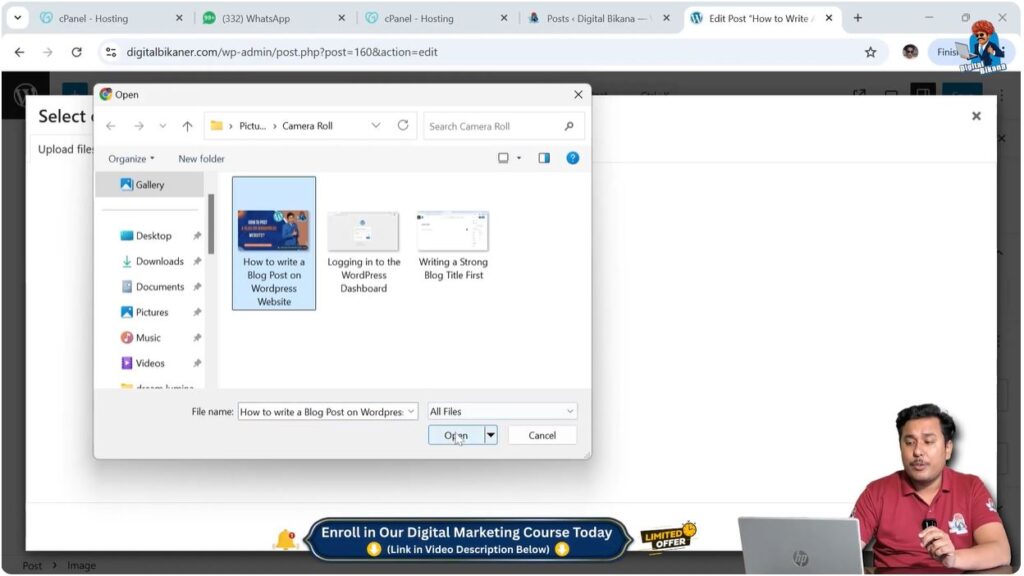
Choose the renamed image file from your computer.
Click Open to upload the image.
After uploading, you will see that the image title matches the file name you selected earlier.
Step 1 – Rename Image in Computer
Open the file explorer on your computer.
Locate the image file.
Rename the image file with the desired name.
Save the changes.
Step 2 – Upload the Image
Open the blog post in WordPress editor.
Place the cursor where you want to insert the image.
Press Enter to create a new block.
Click on the Add Block icon.
Select Image block.
Go to Media Library.
Click Upload Files.
Click Select Files.
Choose the image file.
Click Open.
The image will be uploaded with the new title.
Method 2: Changing Image Title While Adding Image
The second method is changing the image title while adding the image from the media library.
This method is useful when the image is already uploaded in the media library.
You can modify the title before inserting the image into the post.
Open the blog post editor.
Place the cursor where you want to insert the image.
Press Enter to create a new block.
Click on the plus icon.
Select Image block.
Open the Media Library.
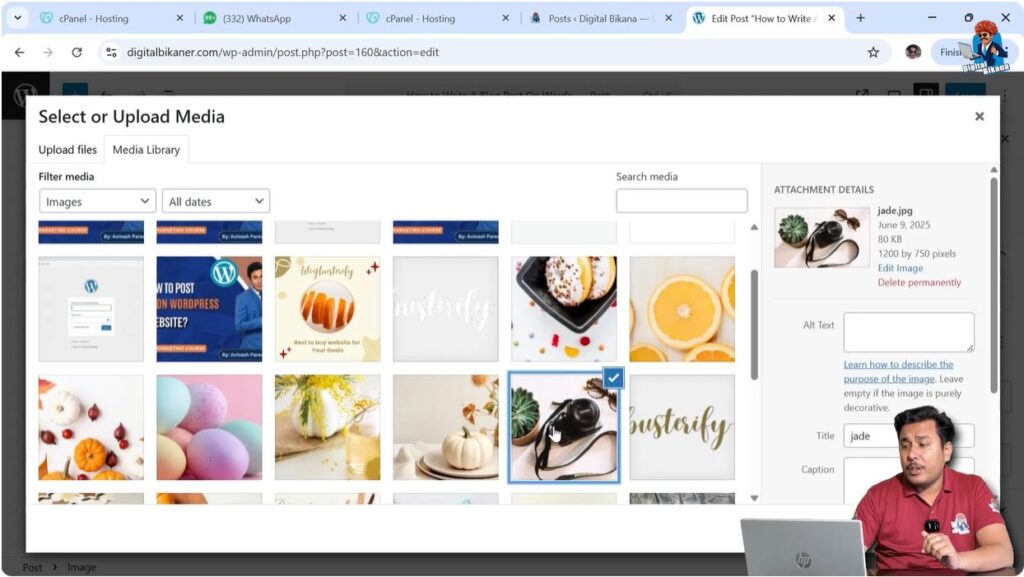
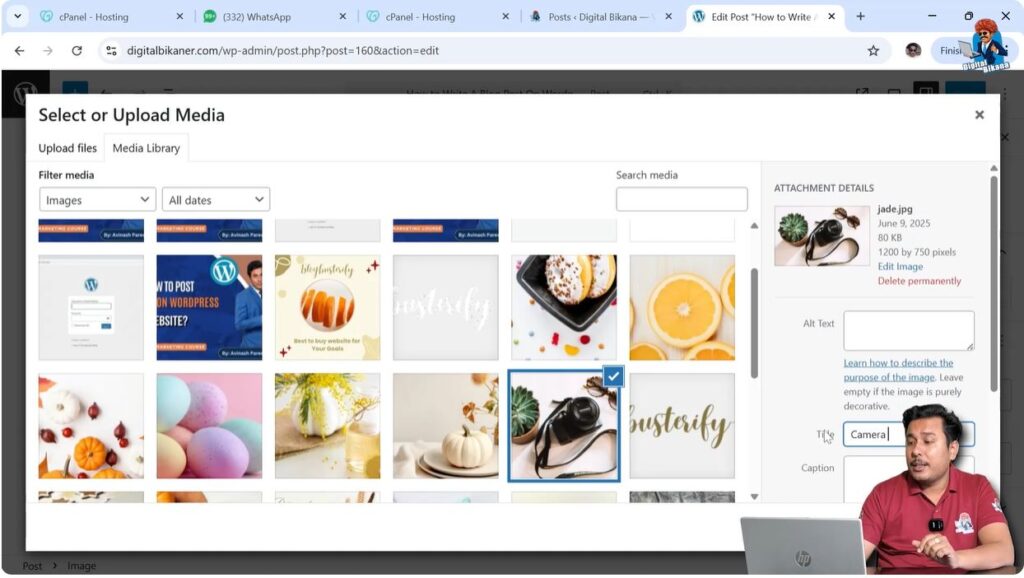
Select the image that you want to use.
On the right side of the media library window, you will see the image details.
Here you will find the Title field.
You can change the image title to the desired name.
After changing the title, insert the image into the post.
The updated title will be saved.
Step 3 – Select Image from Media Library
Open the WordPress editor.
Create a new block.
Click on Add Block.
Select Image block.
Open Media Library.
Select the image.
Step 4 – Change Image Title
Locate the Title field in the media library.
Edit the title.
Enter the desired title.
Insert the image into the post.
The image title will be updated.
Method 3: Changing Image Title from Media Library
The third method is changing the image title directly from the media library.
This method allows you to edit titles of previously uploaded images.
All images, videos, and files uploaded to WordPress are stored in the Media Library.
You can access the media library from the WordPress dashboard.
Go to the WordPress admin dashboard.
Click on Media in the left-side toolbar.
Open the Media Library.
You will see all uploaded images and files.
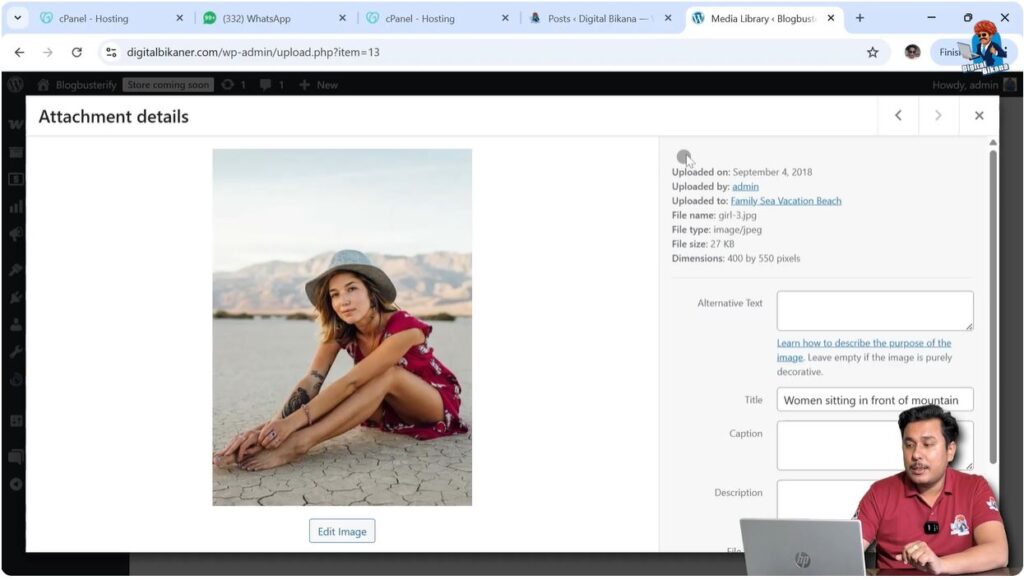
Select the image whose title you want to change.
The image details panel will open.
You will see the Title field.
Edit the title.
Click outside the title box.
The changes will be saved automatically.
Step 5 – Open Media Library
Go to the WordPress dashboard.
Click on Media.
Open Media Library.
All uploaded files will appear.

Step 6 – Edit Image Title
Select the image.
Locate the Title field.
Edit the title.
Click outside the field.
The title will be saved automatically.
When to Use Each Method
Each method can be used in different situations.
The first method is useful when uploading new images and you want the title to be set automatically.
The second method is useful when inserting images that already exist in the media library.
The third method is useful when you want to update titles of previously uploaded images.
All three methods achieve the same result.
You can choose the method according to your workflow.
Importance of Image Titles
Image titles help organize media files inside the WordPress media library.
Proper titles make it easier to find images later.
Descriptive image titles help maintain a structured media library.
Image titles also help in managing large numbers of images.
Using meaningful titles improves content organization.
Conclusion
Changing the image title in a WordPress website can be done using three different methods. You can rename the image before uploading, change the title while inserting the image, or edit the title directly from the media library.
All images uploaded to WordPress are stored in the media library, and their titles can be modified at any time.
By using these methods, you can easily manage image titles in your WordPress website.
Related Posts