
In this article, we will learn how to set up the WooCommerce plugin on a WordPress website. In the previous step, WooCommerce was installed successfully. Now the focus is on understanding the basic settings. Each WooCommerce setting will be explained in separate dedicated tutorials later so that everything can be understood easily without making the process complicated.
This guide explains the basic WooCommerce settings available inside the WordPress dashboard. Before adding products or starting sales, it is important to configure these settings properly so that customers can use the website smoothly.
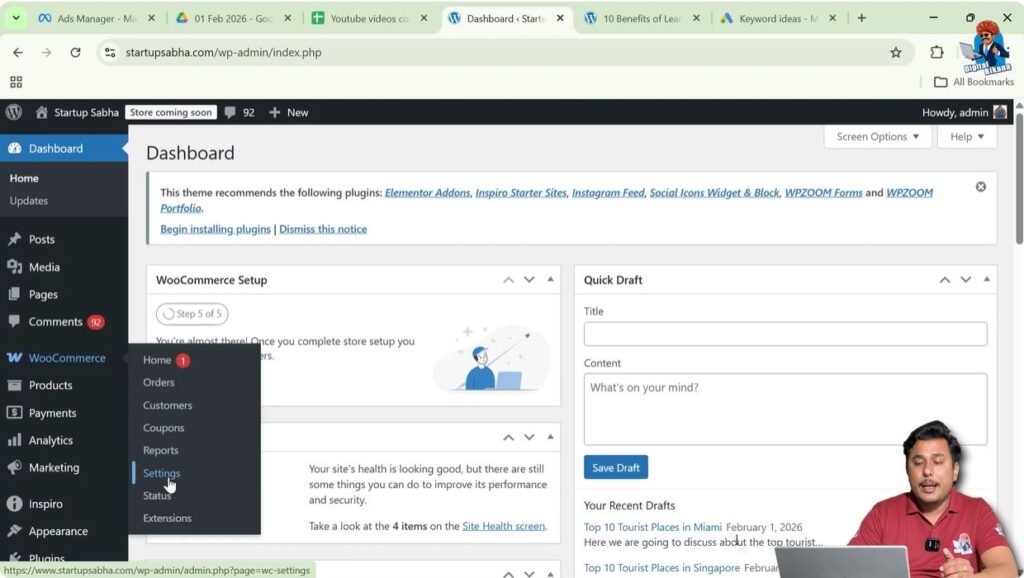
After installing WooCommerce, you will see the WooCommerce option in the WordPress admin dashboard. From there, all the settings can be accessed and configured.
Accessing WooCommerce Settings
Step 1: Open WooCommerce Settings
Go to the WordPress Admin Dashboard.
Move the cursor to the WooCommerce option on the left side menu.
Click on Settings.
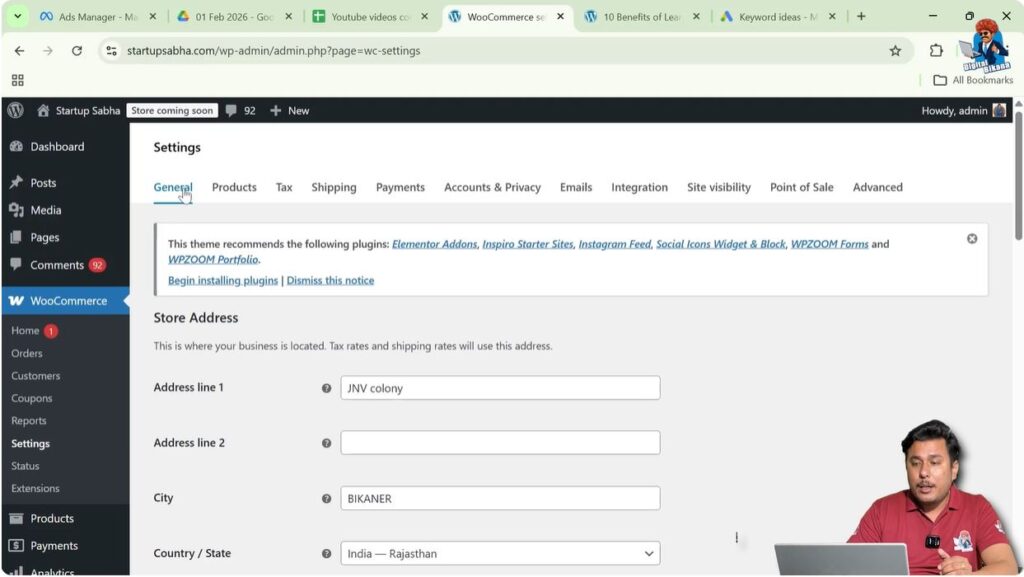
After opening the settings tab, multiple setting sections will appear at the top.
These include:
- General Settings
- Product Settings
- Tax Settings
- Shipping Settings
- Payment Settings
- Accounts and Privacy Settings
- Email Settings
- Integration Settings
- Site Visibility Settings
- Point of Sale Settings
- Advanced Settings
Each section contains different configurations required for running an online store.
General Settings
The General Settings section allows you to configure the basic store information.
Store Address and Selling Location
You can set the address of your shop in this section.
You can also select the countries where you want to sell your products or services.
This helps WooCommerce understand where your store operates and where customers can purchase from.
Shipping Locations
You can select the locations where you want to provide shipping.
Only customers from selected shipping locations will be able to order products.
This helps in controlling delivery areas and managing logistics.
Taxes and Coupons
WooCommerce provides options to enable taxes and coupons.
You can enable tax calculations if your store needs to charge tax on products.
You can also enable coupons if you want to provide discount codes to customers.
These settings can be turned on or off based on your business requirements.
Currency Settings
You can select the currency in which product prices will be displayed on the website.
The selected currency will appear on product pages, cart pages, and checkout pages.
This ensures customers clearly understand the pricing.
Product Settings
Product Settings allow you to configure how products will appear and behave in your store.
This section contains five sub-settings:
- General
- Inventory
- Downloadable Products
- Approved Download Directories
- Advanced
Product General Settings
Step 1: Select Shop Page
You can select the shop page where all products will be displayed.
This page becomes the main product listing page of your website.
Customers will be able to browse all products from this page.
Step 2: Add to Cart Behaviour
You can configure how the Add to Cart button behaves.
These settings control what happens after a customer clicks the Add to Cart button.
Step 3: Placeholder Image
You can set a placeholder image.
This image will be displayed when a product does not have its own image.
Step 4: Weight and Dimension Units
You can change the units for:
- Product weight
- Product dimensions
These settings are useful for shipping calculations.
Step 5: Review Settings
You can configure product reviews and ratings.
You can decide whether customers can leave reviews and ratings on products.

Product Inventory Settings
Inventory settings allow WooCommerce to manage stock levels.
Step 1: Stock Management
You can decide whether WooCommerce should manage stock automatically.
If enabled, WooCommerce will track product quantities.
Step 2: Hold Stock Duration
You can define how long stock should be held for pending orders.
After the selected duration, stock will be released if payment is not completed.
Step 3: Low Stock Notifications
You can set notifications for low stock levels.
The admin will receive alerts when stock becomes low.
Step 4: Out of Stock Notifications
You can also enable notifications for out-of-stock products.
This helps store owners restock products on time.

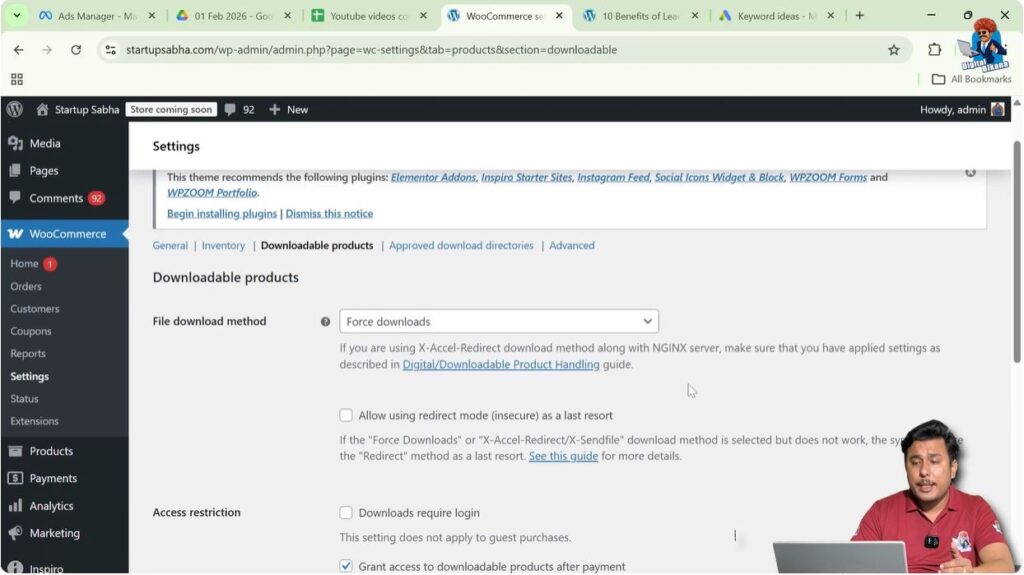
Downloadable Product Settings
These settings apply when selling digital or downloadable products.
Step 1: Configure Download Settings
If you sell digital products, you can configure download settings here.
These settings control how customers download files after purchase.
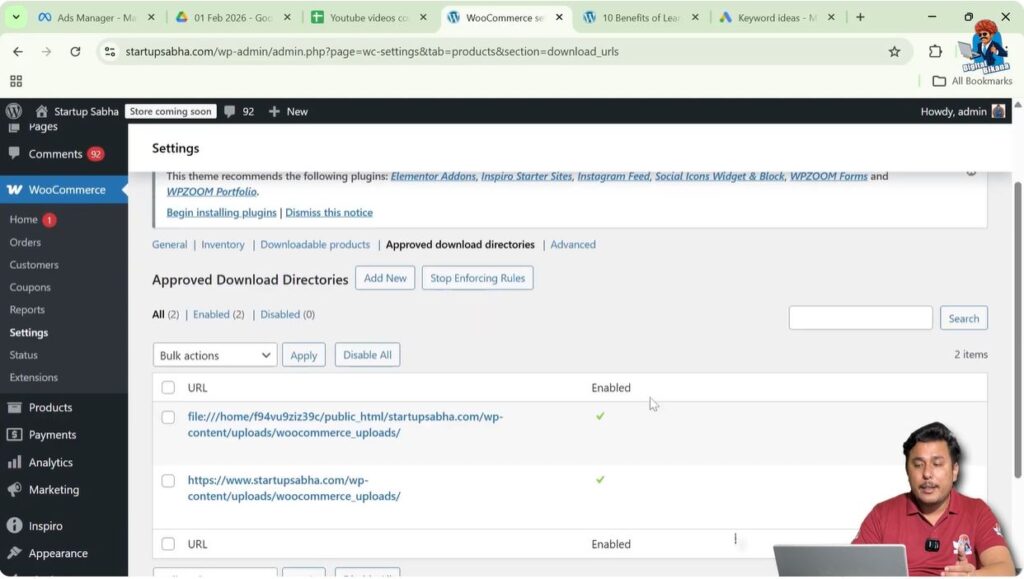
Approved Download Directories
This section contains directories from where digital files can be downloaded.
These directories define the allowed locations of downloadable files.
WooCommerce will only allow downloads from approved directories.
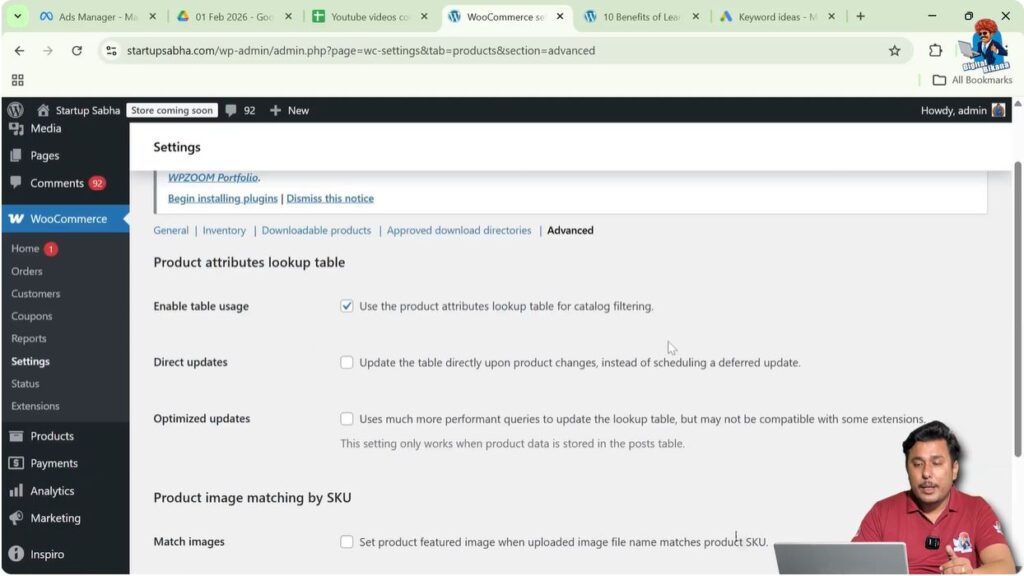
Product Advanced Settings
Advanced settings include technical configurations.
You can configure:
- Product attribute lookup table
- Product image matching by SKU
These settings help WooCommerce manage products efficiently.
Tax Settings
Tax Settings allow you to configure tax rules for your store.
This section contains three main sub-settings:
- Tax Options
- Standard Rates
- Zero Rates
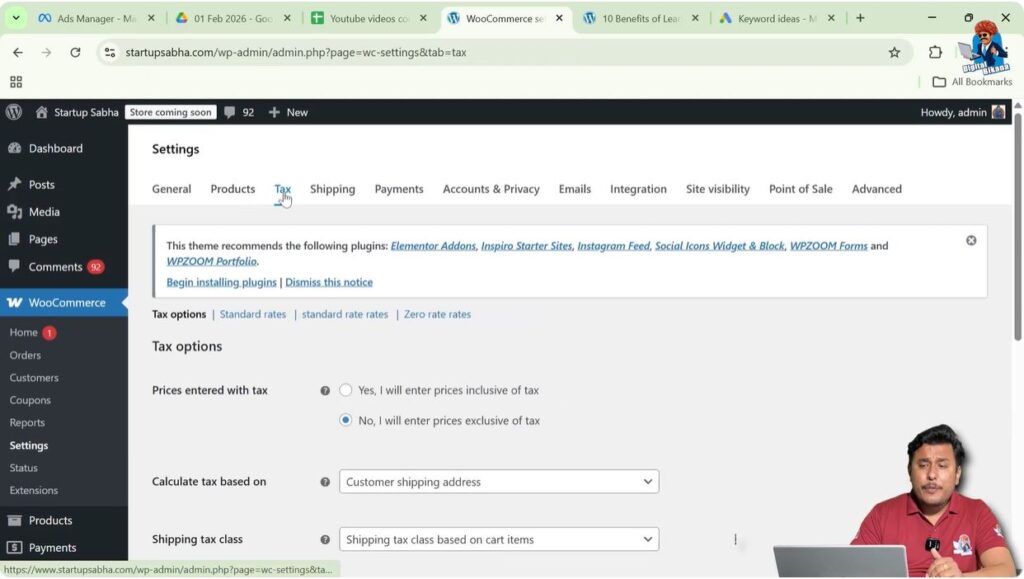
Tax Options
Tax options allow you to control how taxes are calculated.
Prices Entered With Tax
You can decide whether product prices include tax or exclude tax.
Tax Calculation Method
You can choose how tax will be calculated:
- Customer billing address
- Customer shipping address
- Shop base address
Shipping Tax Class
You can define how shipping tax will be calculated.
Rounding Options
You can decide whether tax should be rounded:
- At subtotal level
- At total level
Additional Tax Classes
Different products may have different tax rates.
For example:
Some products may have 18% tax.
Some products may have 10% tax.
You can create additional tax classes to handle different tax rates.
Display Prices in Shop
You can decide whether product prices should display:
- Including tax
- Excluding tax
Display Prices During Cart and Checkout
You can control whether prices should include tax during checkout.
Price Display Suffix
You can add a suffix to show tax information with prices.
Display Tax Total
You can control how tax totals are displayed.
Standard Tax Rates
Standard tax rates allow you to define tax rules.
You can create tax rows based on location.
For example, in India GST is applicable.
Before GST, VAT was used.
You can define tax rates based on customer location.
You can specify how much tax will be charged when customers belong to a specific location.
Shipping Settings
Shipping settings allow you to configure product delivery.
You can create shipping zones and shipping methods.
Shipping costs depend on:
- Product weight
- Delivery location
Shipping settings help calculate accurate delivery charges.
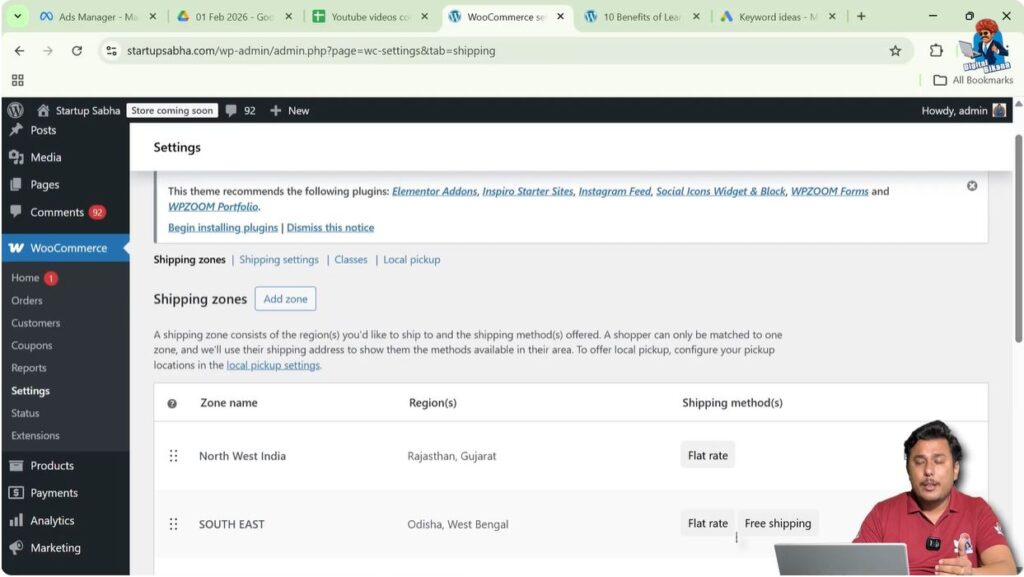
Shipping Zones
Step 1: Create Shipping Zones
You can divide the country into multiple zones.
For example:
- Zone 1
- Zone 2
- Zone 3
Shipping costs may vary depending on the delivery zone.
This makes shipping calculations easier.
Shipping Settings
Shipping settings control shipping behavior.
You can configure:
- How shipping will be calculated
- Where shipping will be available
These settings help manage shipping properly.
Shipping Classes
Step 1: Create Shipping Classes
You can create shipping classes based on product weight.
Different products can have different shipping costs.
Shipping classes help organize shipping rates.
Local Pickup Settings
Step 1: Add Pickup Locations
If you have warehouses in different locations, you can add them here.
Customers can pick up products directly from these locations.
This option is useful for local businesses.
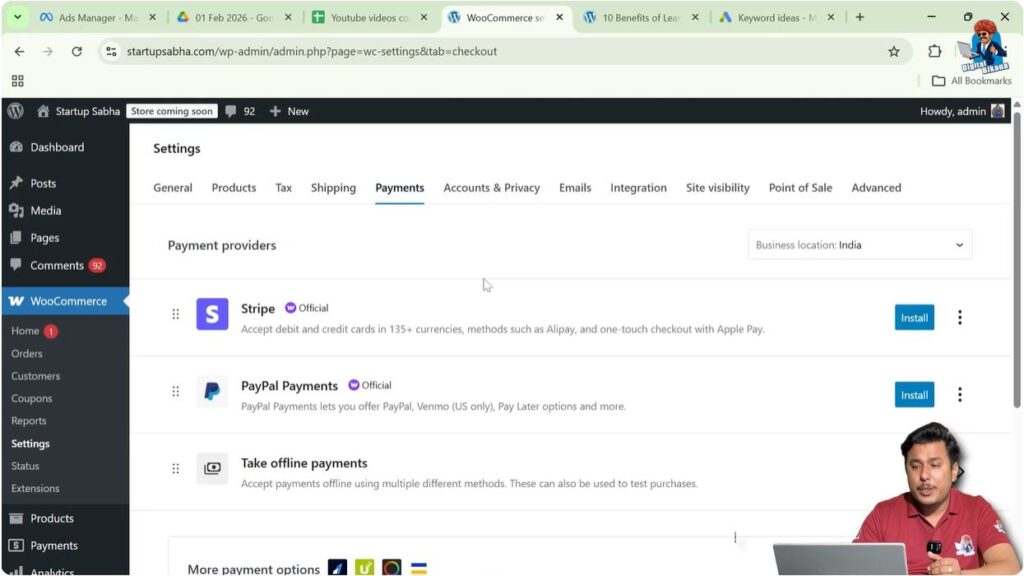
Payment Settings
Payment settings allow you to connect payment methods.
You can integrate payment gateways with WooCommerce.
This allows customers to make payments online or offline.
Online payment methods include payment gateways.
Offline payment methods include cash-based methods.
Proper payment setup is necessary before selling products.
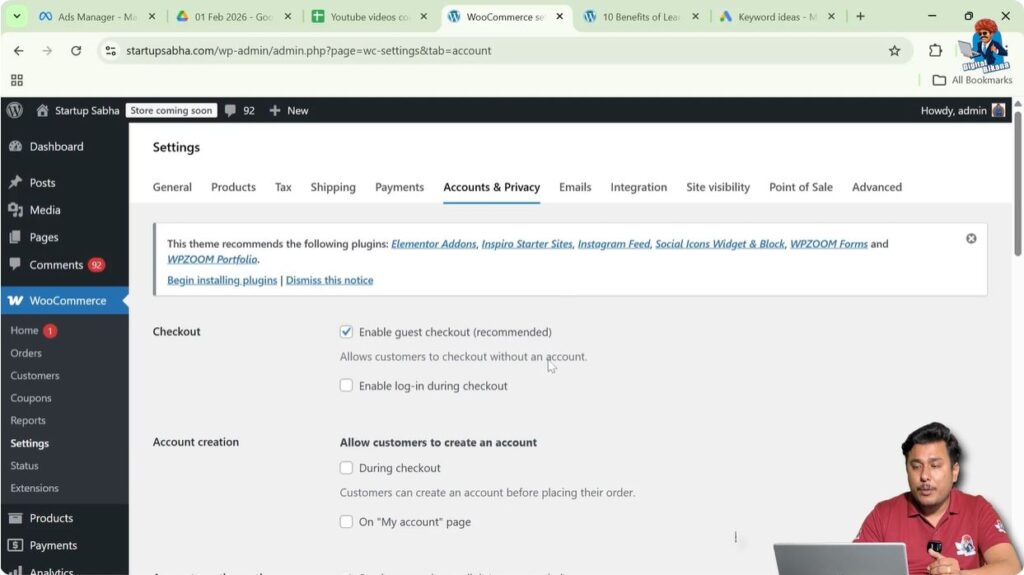
Accounts and Privacy Settings
Accounts and Privacy settings allow you to control customer accounts.
You can decide whether customers can:
- Checkout as guests
- Create an account before purchasing
You can also define how long customer data will be stored.
These settings help manage user information securely.
Email Settings
Email settings control store notifications.
You can define when emails should be sent.
For example:
- New order emails to admin
- Cancelled order emails
- Failed order emails
You can also decide whether customers should receive email notifications.
These settings help maintain communication between store owner and customers.

Integration Settings
Integration settings allow WooCommerce to connect with other software.
If you want to integrate external tools or software with WooCommerce, it can be done here.
This allows expansion of store functionality.

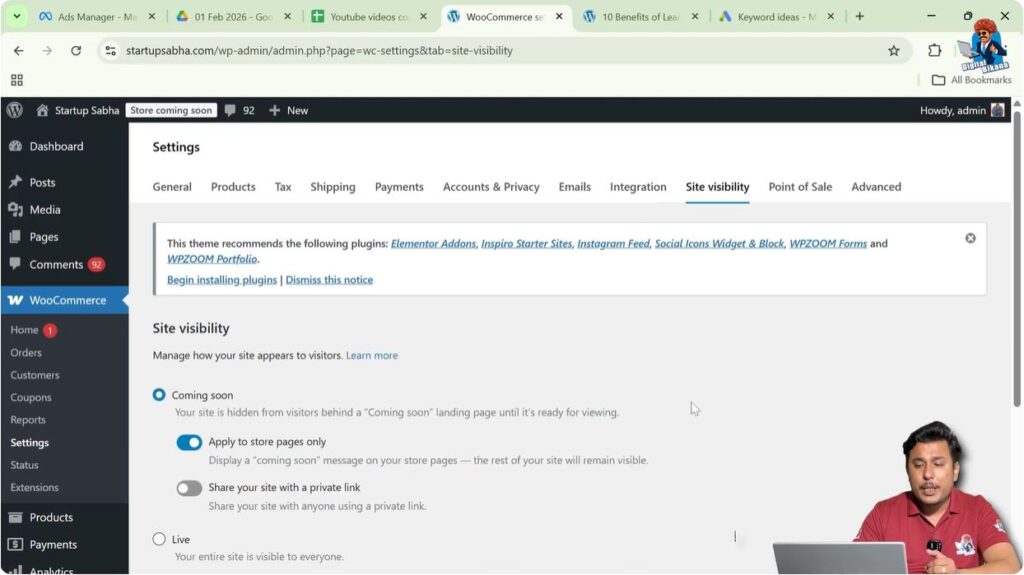
Site Visibility Settings
Site visibility settings allow you to control whether the website is live.
You can:
- Make the website live
- Set it to coming soon
- Keep it under development
This is useful when the store is not ready yet.
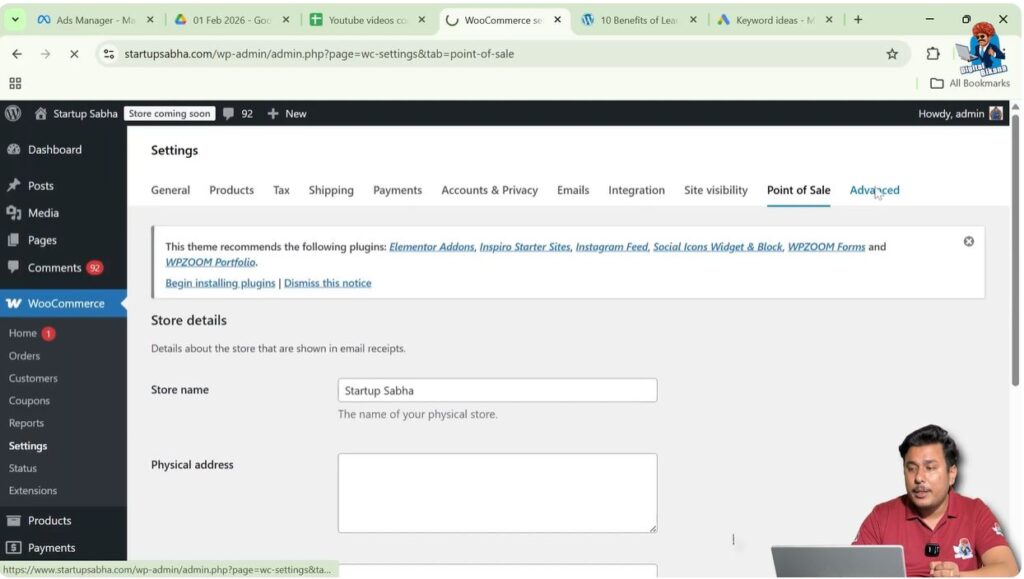
Point of Sale Settings
Point of Sale settings allow you to enter store details.
You can configure:
- Store name
- Physical address
- Phone number
- Email address
- Return policy link
- Refund policy link
These details help customers contact the store.
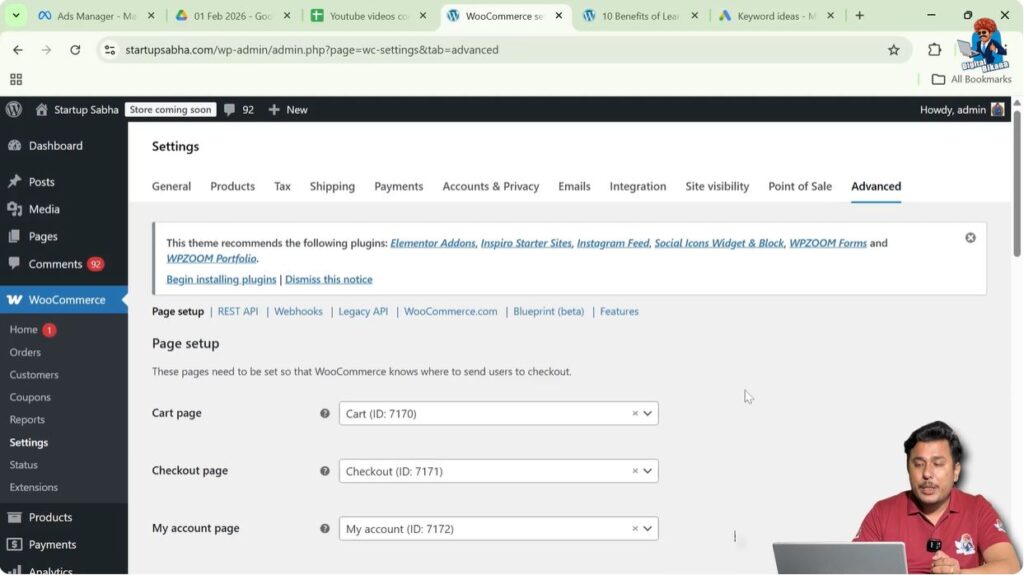
Advanced Settings
Advanced settings allow you to assign important WooCommerce pages.
You can assign:
- Cart page
- Checkout page
- My Account page
- Terms and Conditions page
These pages are necessary for store functionality.
WooCommerce Setup Before Adding Products
WooCommerce settings must be configured before adding products.
Adding products is a separate process and requires a dedicated setup.
Other separate configurations include:
- Coupons
- Payment Gateway
- WooCommerce Setup
Each setup must be completed properly before starting sales.
After completing all settings, customers will be able to use the website smoothly and purchase products or services easily.
Related Posts


