
Adding new blocks in a WordPress website is a simple process. WordPress uses a block editor that allows you to create and arrange content using different types of blocks such as paragraphs, headings, images, columns, and more. By adding blocks, you can organize your content in a structured and flexible way.
In this article, you will learn how to add new blocks in a WordPress website while editing a blog post. You can use the same methods whether you are editing an existing post or creating a new one.
Opening the Post Section in WordPress
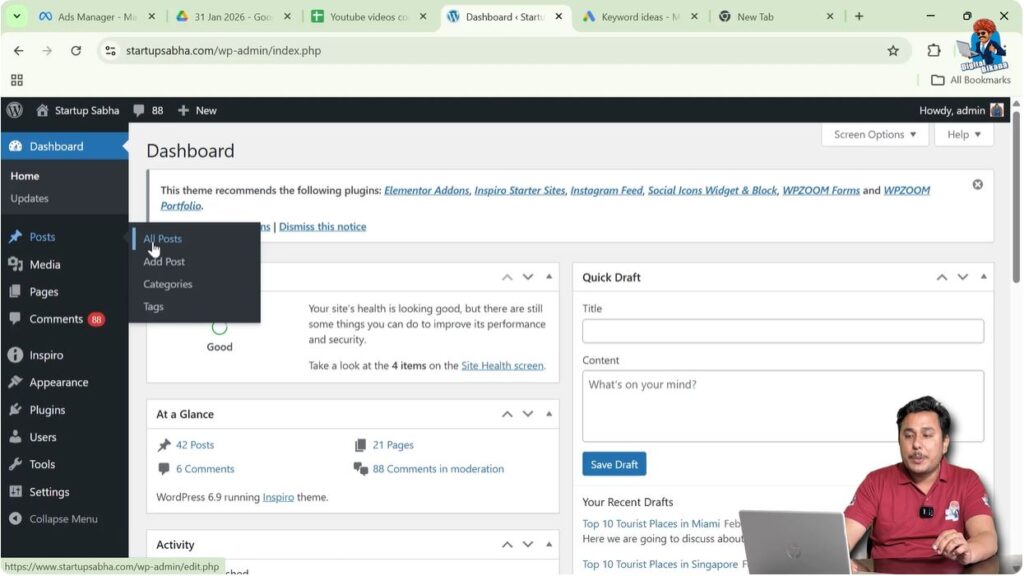
First, log in to your WordPress admin dashboard.
After logging in, look at the left-side menu where you will find the Posts option. When you move your cursor over the Posts option, a submenu will appear.
This submenu includes options such as:
- All Posts
- Add Post
If you want to create a new blog post, you can click on Add Post. If you want to edit an existing blog post, you can click on All Posts.
In this example, an existing post is being edited.
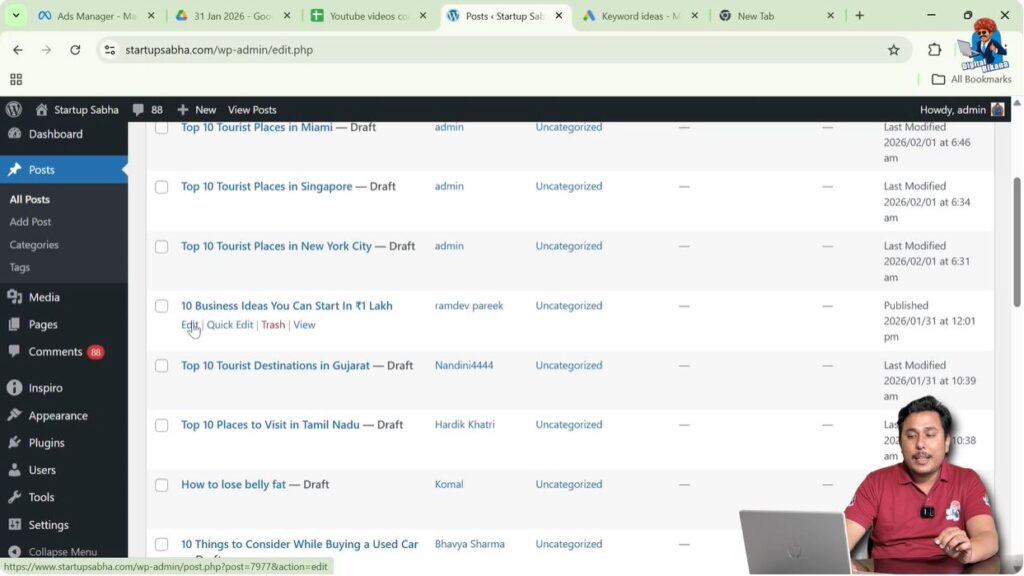
Click on All Posts to see the list of blog posts.
When the list of blog posts appears, move your cursor over the title of the blog post you want to edit. The Edit option will appear below the title.
Click on the Edit button to open the WordPress editor.
Editing an Existing Blog Post
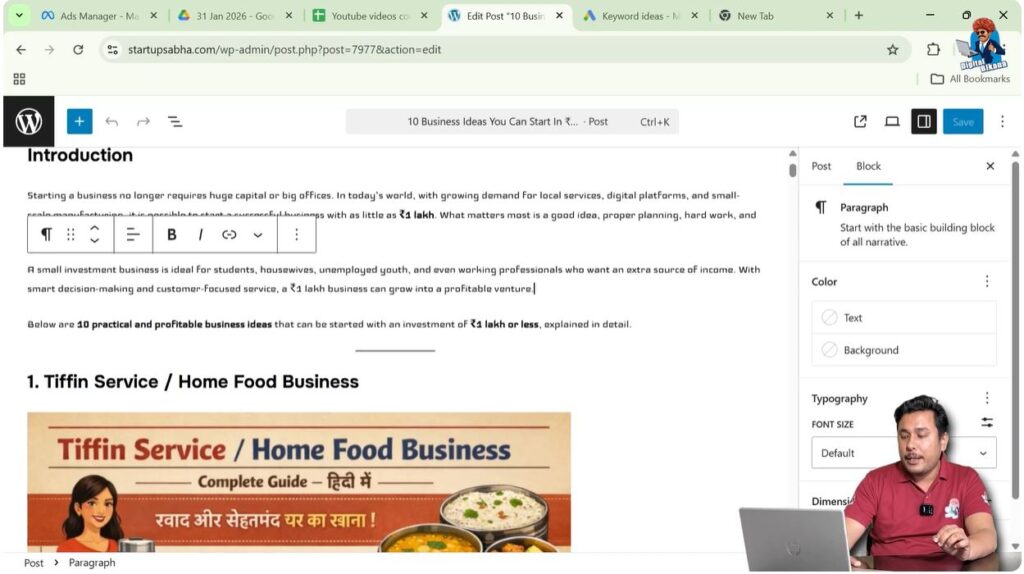
After clicking on Edit, the WordPress block editor will open.
Inside the editor, you will see the content of your blog post arranged in blocks. Each paragraph or element is placed inside a separate block.
If you want to add a new block after a paragraph or between two blocks, WordPress provides simple ways to do that.
There are two methods to add a new block in WordPress.
Method 1: Adding a Block by Pressing Enter
The first method is the easiest way to create a new block.
You simply need to move the cursor to the end of an existing paragraph.
Once the cursor is placed at the end of the paragraph, press the Enter key on your keyboard.
As soon as you press Enter, WordPress automatically creates a new block.
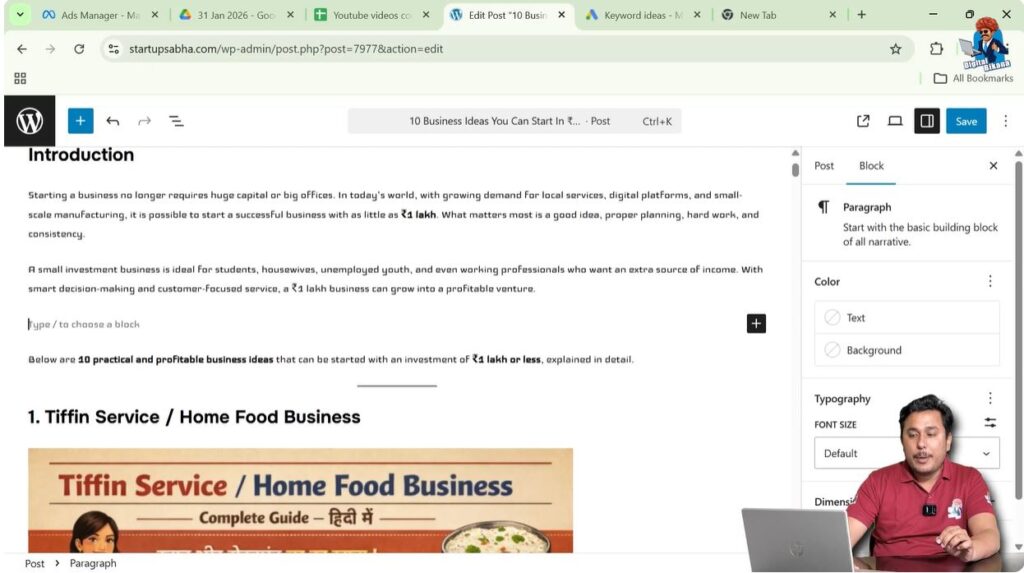
You will see a message that says Type to choose a block, which indicates that a new block has been created.
You can now start typing or select a specific type of block.
Step 1 – Place Cursor at the End of the Paragraph
Open the blog post in the WordPress editor.
Move your cursor to the end of the paragraph where you want to add a new block.
Make sure the cursor is placed at the end of the content.
Step 2 – Press Enter to Create a New Block
Press the Enter key on your keyboard.
After pressing Enter, a new block will be created automatically.
You will see the option Type to choose a block, which confirms that a new block has been added.
You can now start typing or select a block type.
Method 2: Adding a Block Using the Add Block Button
The second method allows you to insert a block between two existing blocks.
This method is useful when you want to add content between two paragraphs or sections.
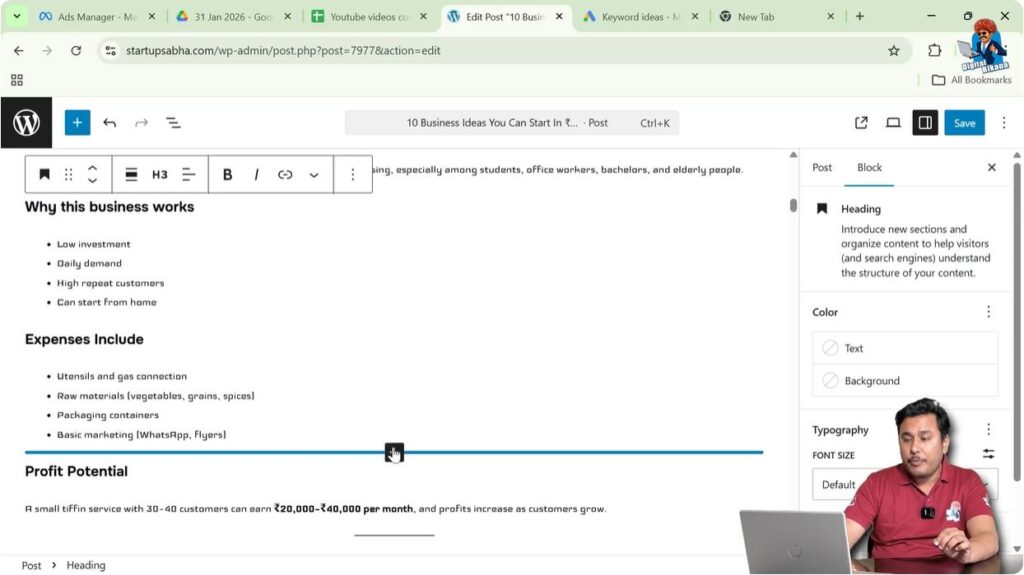
Move your cursor into the blank space between two blocks.
As soon as you move your cursor into the blank space, a blue line will appear.
This blue line indicates where the new block will be inserted.
Along with the blue line, you will see an Add Block button represented by a plus icon.
Click on the plus icon to add a new block.
Step 3 – Move Cursor Between Two Blocks
Open the blog post in the WordPress editor.
Move your cursor between two existing blocks.
When the cursor is positioned correctly, a blue line will appear.
This blue line shows the position where the new block will be added.

Step 4 – Click the Add Block Icon
Click on the plus icon that appears on the blue line.
After clicking the icon, WordPress will ask you to select the type of block you want to insert.
You can choose from different types of blocks depending on your requirement.
Selecting the Block Type
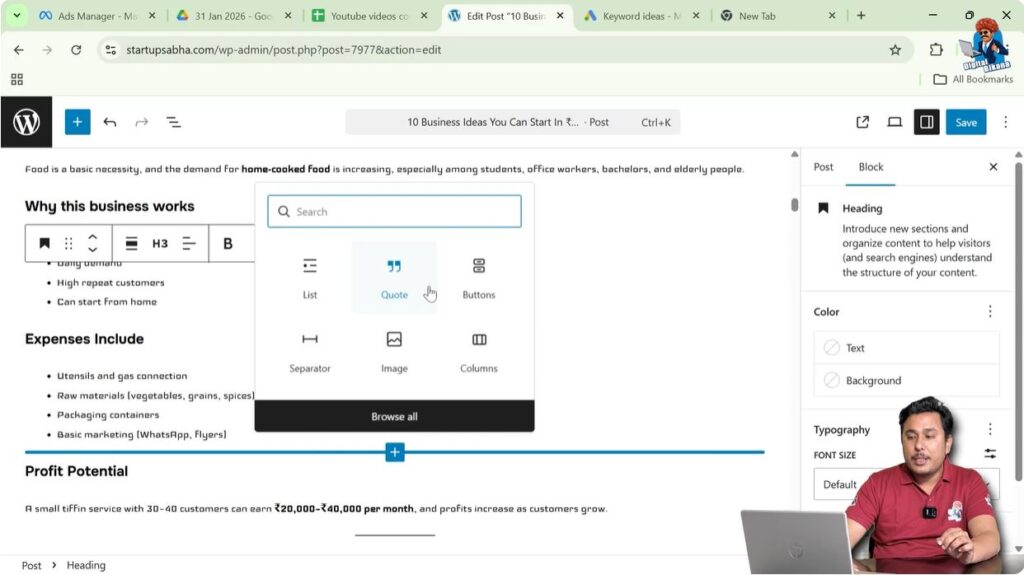
After clicking the Add Block button, a block selection panel will appear.
This panel allows you to choose the type of block you want to add.
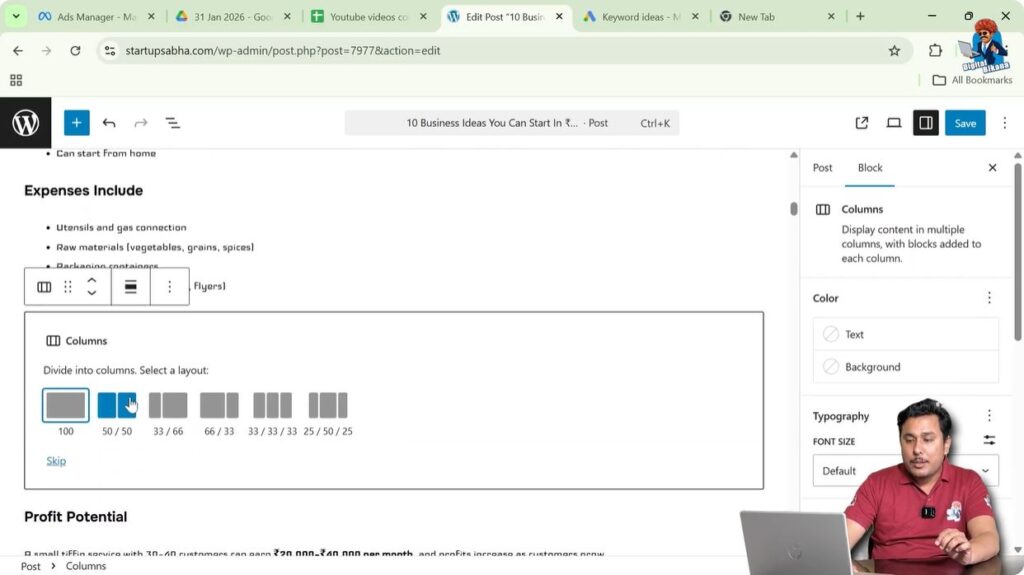
For example, you may want to add a column block.
When you select the column block, WordPress will ask you to choose the layout.
Different layout options will be displayed.
Select the layout that you want.
After selecting the layout, the new block will be created.
You can then start adding content inside the block.
Step 5 – Choose the Block Layout
Select the block type from the block selection panel.
For example, choose the Columns block if you want to create columns.
After selecting the block, choose the layout option.
Once selected, the block will be inserted into your post.
Adding Blocks Between Sections
Sometimes you may want to add a block between two sections such as between two headings or paragraphs.
This can be done using the Add Block button method.
When you place your cursor between two blocks and click the plus icon, the new block will be inserted exactly at that position.
This helps you maintain the structure of your content.
Creating Different Types of Blocks
WordPress allows you to create different types of blocks such as:
- Paragraph blocks
- Heading blocks
- Image blocks
- Column blocks
- List blocks
Each block serves a different purpose.
You can select the block type according to your content requirement.
After inserting the block, you can customize it as needed.
When to Use Each Method
Both methods of adding blocks are useful in different situations.
The Enter key method is useful when you want to continue writing after a paragraph.
The Add Block button method is useful when you want to insert a block between existing content.
Using both methods together makes content editing faster and easier.
Conclusion
Adding new blocks in a WordPress website is very easy. You can either press Enter at the end of a paragraph to create a new block or use the Add Block button to insert a block between existing blocks.
By moving the cursor to the correct position and selecting the required block type, you can easily add and organize content in your WordPress blog post.
These methods allow you to create structured and flexible content using the WordPress block editor.
Related Posts


