
Scheduling a blog post on a WordPress website is very useful when you are writing multiple blog posts and do not want to publish them on the same day. Instead of publishing everything at once, you can schedule blog posts for future dates and times so that they are automatically published on your website.
This feature is especially helpful when you want to maintain consistency in publishing blog posts. Instead of logging in every day to publish articles manually, you can schedule them in advance and WordPress will automatically publish them at the selected time.
In this article, you will learn how to schedule a blog post on a WordPress website step by step using two different methods.
Opening the Post Section in WordPress Dashboard
To schedule a blog post, first you need to log in to your WordPress website admin dashboard.
After logging in, you will see the WordPress dashboard. On the left side toolbar, you will find different options related to your website.
Here you need to click on the Post section.
After clicking on the Post option, you will be redirected to the All Posts section where all your blog posts are displayed.
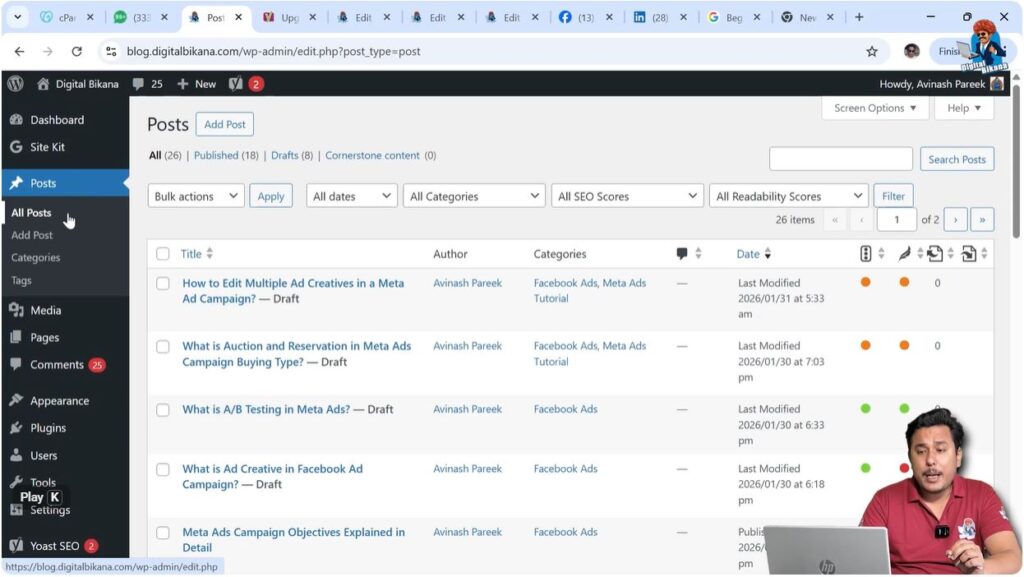
In this section, you will be able to see all your blog posts, including published posts and draft posts.
As you can see, there may be multiple blog posts that are saved in draft mode. Any of these blog posts can be scheduled for future publishing.
Method 1 – Scheduling Blog Post Using Quick Edit
The first method to schedule a blog post is by using the Quick Edit option. This method is fast and allows you to schedule blog posts directly from the All Posts section.
1. Open Quick Edit Option
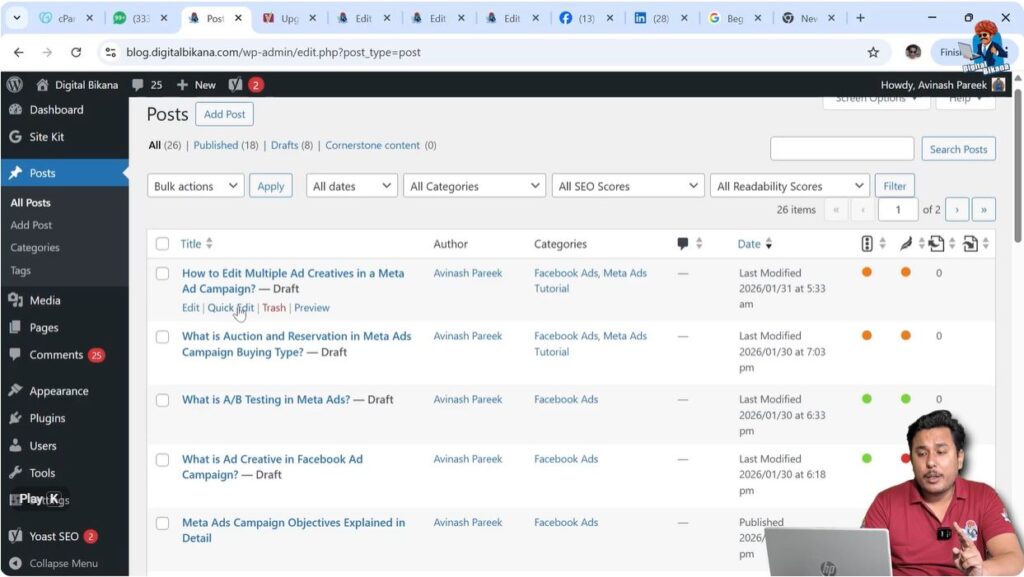
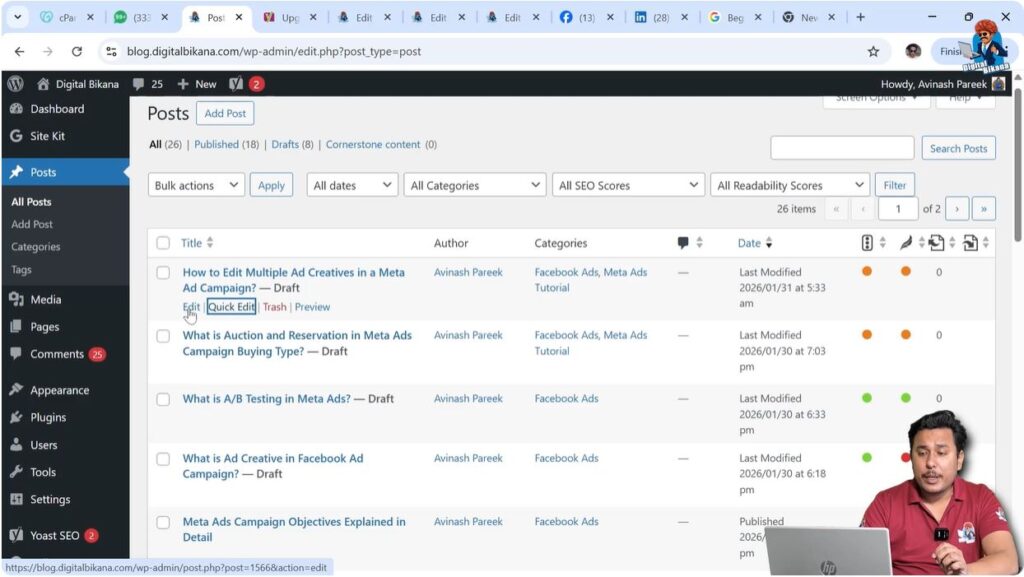
First, go to the All Posts section.
Move your cursor over the blog post that you want to schedule. Below the blog post title, you will see several options.
One of these options is Quick Edit.
Click on the Quick Edit option.
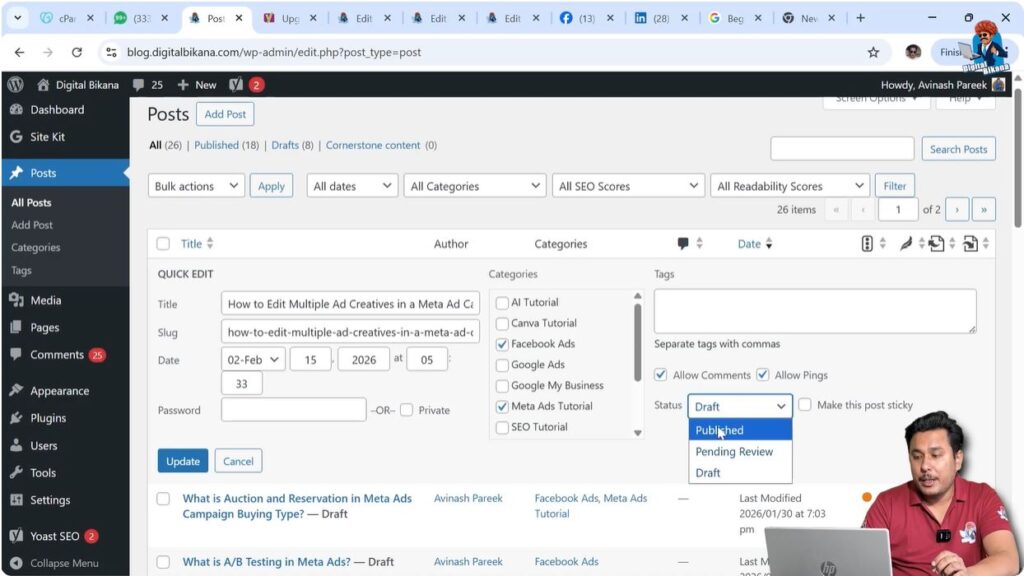
After clicking on Quick Edit, a small editing panel will appear.
2. Change Date and Time
Inside the Quick Edit panel, you can change the publishing date and time.
First, select the month.
Then you can change the date.
For example, you can select any future date such as the 15th of the month.
After selecting the date, you can set the time at which you want the blog post to be published.
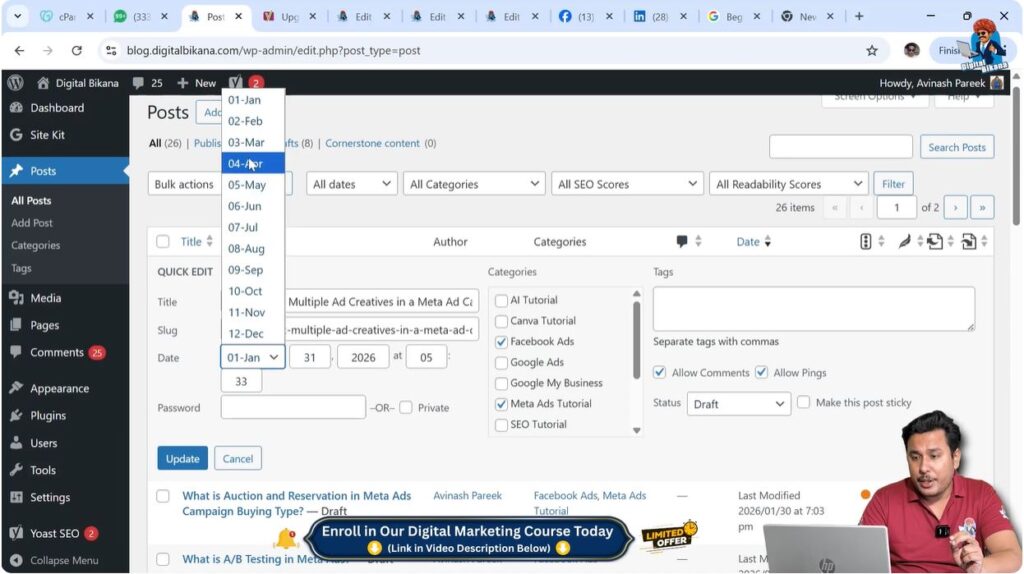
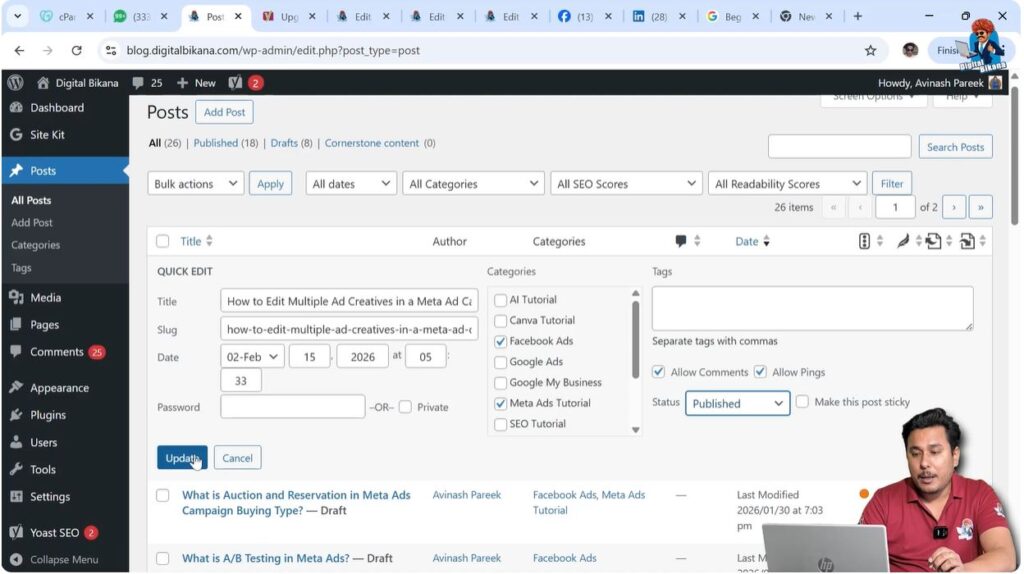
3. Change Status to Published
After setting the date and time, you need to change the status to Published.
Once you select Published and update the post, the blog post will be scheduled automatically.
4. Update the Blog Post
After setting the date and time, click on the Update button.
Once you update the blog post, WordPress will automatically publish the blog post at the selected date and time.
This method allows you to schedule blog posts quickly without opening the editor.
Method 2 – Scheduling Blog Post Using Editor Mode
The second method to schedule a blog post is by using the Editor Mode. This method allows you to schedule a blog post while editing the article.
1. Open Blog Post Editor
Go to the All Posts section.
Move your cursor over the blog post that you want to schedule.
You will see the Edit option next to the Quick Edit option.
Click on the Edit option.
After clicking Edit, the WordPress editor will open.
2. Locate Publish Settings
Inside the editor, look at the right-side toolbar.
In the Post settings section, you will find the Publish Immediately option.
This option allows you to select the date and time for publishing the blog post.
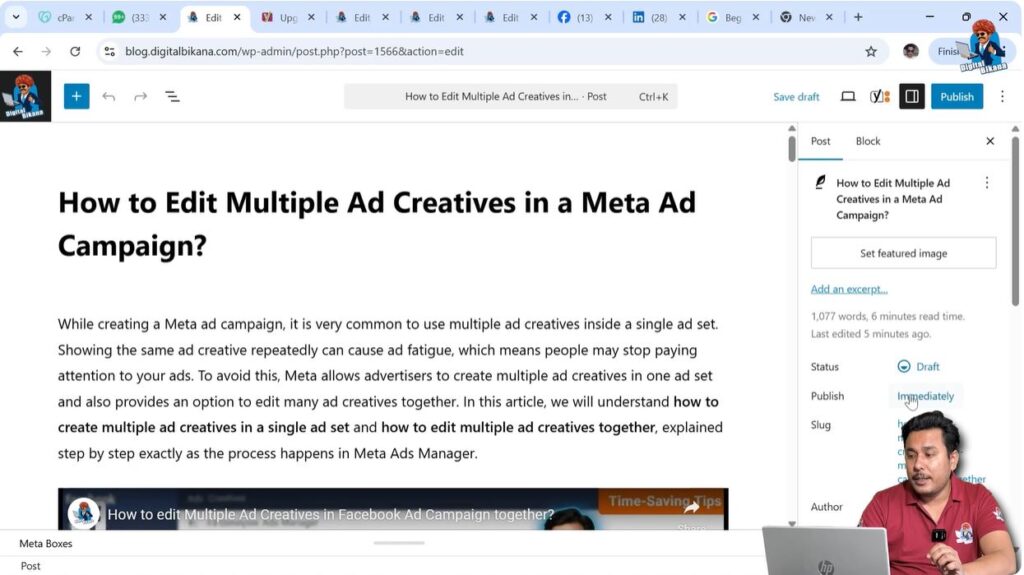
3. Select Date and Time
Click on the Publish Immediately option.
After clicking on it, a calendar and time selection panel will appear.
From here, you can select the future date on which you want the blog post to be published.
You can also select the exact time when the blog post should be published.
Once you select the date and time, WordPress will prepare the blog post for scheduling.

4. Click on Schedule Button
After selecting the date and time, you will notice that the Publish button changes into a Schedule button.
This indicates that the blog post is now ready to be scheduled.
Click on the Schedule button.
After clicking Schedule, your blog post will be scheduled successfully.

Automatic Publishing of Scheduled Blog Posts
Once a blog post is scheduled, WordPress automatically publishes it at the selected date and time.
You do not need to log in to your website to publish the blog post manually.
WordPress will handle the publishing process automatically.
This feature is useful when you want your website to stay active with regular content updates.
Benefits of Scheduling Blog Posts
Scheduling blog posts allows you to manage your content more efficiently.
If you write multiple blog posts at once, you can schedule them for different dates instead of publishing everything on the same day.
This helps maintain a regular publishing schedule.
It also saves time because you do not need to log in every day to publish blog posts.
Scheduling blog posts makes content management easier and more organized.
Difference Between Quick Edit and Editor Scheduling
Both methods allow you to schedule blog posts.
The Quick Edit method is faster and useful when you only need to change the publishing date and time.
The Editor method is useful when you want to make changes in the blog post and schedule it at the same time.
Both methods work effectively and you can use either method depending on your requirement.
Conclusion
Scheduling a blog post on a WordPress website is very simple and can be done in just a few steps.
You can schedule blog posts using the Quick Edit option or by using the Editor mode.
Once scheduled, WordPress automatically publishes the blog post on the selected date and time.
This feature helps you manage multiple blog posts efficiently and maintain consistency in publishing content on your website.
Related Posts


