Many advertisers manage multiple Facebook ad accounts under the same business or even across different businesses. In such situations, there are times when a custom audience created in one ad account needs to be used in another ad account.
Instead of recreating the same custom audience again, Facebook allows you to share an existing custom audience with another ad account. This makes campaign management easier and avoids duplication of work.
In this article, we will clearly explain how to share a Facebook custom audience from one ad account to another ad account using Facebook Ads Manager.
Why You May Need to Share a Custom Audience
There are various practical situations where sharing a custom audience becomes necessary:
- You manage multiple ad accounts.
- One ad account has collected valuable audience data.
- You want to run ads from another ad account using the same audience.
- Different team members manage different ad accounts.
In such cases, sharing a custom audience saves time and ensures that the same audience can be used across accounts.
Accessing Facebook Ads Manager
To begin the process, log in to Facebook Ads Manager.
Once inside Ads Manager:
- Go to the Audiences section.
- Locate the custom audience that you want to share.
- Ensure that the custom audience is active and available.
In this example, we already have some custom audiences created in the current ad account.
Important Requirement Before Sharing
Before you share a custom audience, there is one important requirement.
You must have the Ad Account ID of the target ad account where you want to share the custom audience.
Without the correct Ad Account ID, you cannot complete the sharing process.
Step 1: Identify the Target Ad Account ID
Find the Ad Account ID of the Receiving Account
To share a custom audience, you first need to identify the Ad Account ID of the ad account that will receive the audience.
- Go to the target ad account.
- Locate the Ad Account ID displayed inside Ads Manager.
- Copy or note down that ID.
This Ad Account ID will be required during the sharing process.

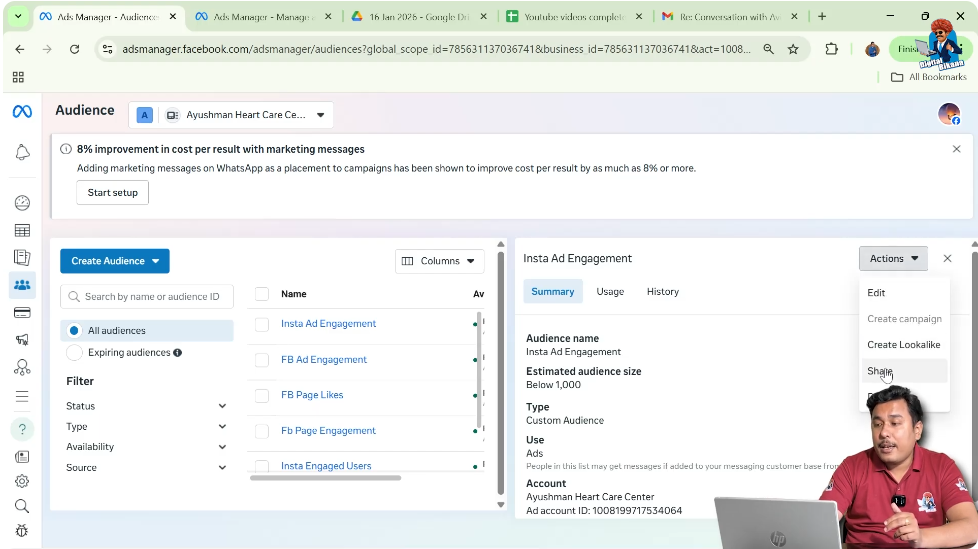
Step 2: Select the Custom Audience
Click on the Custom Audience You Want to Share
Now return to the ad account that currently owns the custom audience.
- Go to the Audiences section.
- Click on the specific custom audience you want to share.
- Make sure the correct audience is selected.
This ensures that you are sharing the right custom audience.

Step 3: Click on the Actions Button
Choose the Share Option
After selecting the custom audience:
- Click on the Actions button.
- From the dropdown menu, select Share.
This opens the sharing window where you can enter the target Ad Account ID.
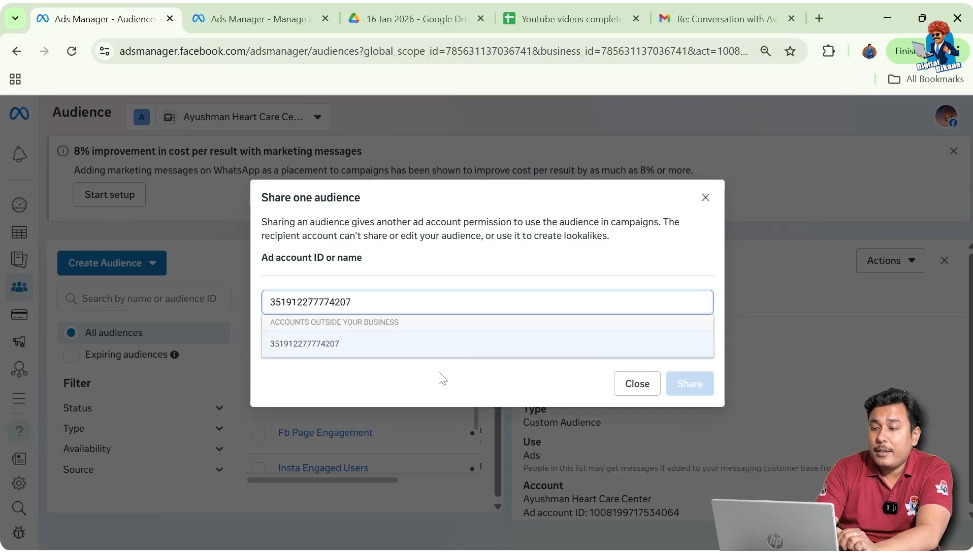
Step 4: Enter the Target Ad Account ID
Paste the Ad Account ID
In the sharing window:
- Enter the Ad Account ID of the target account.
- Select the correct account when it appears.
- Confirm that the ID matches the intended ad account.
This step connects the custom audience to the receiving ad account.
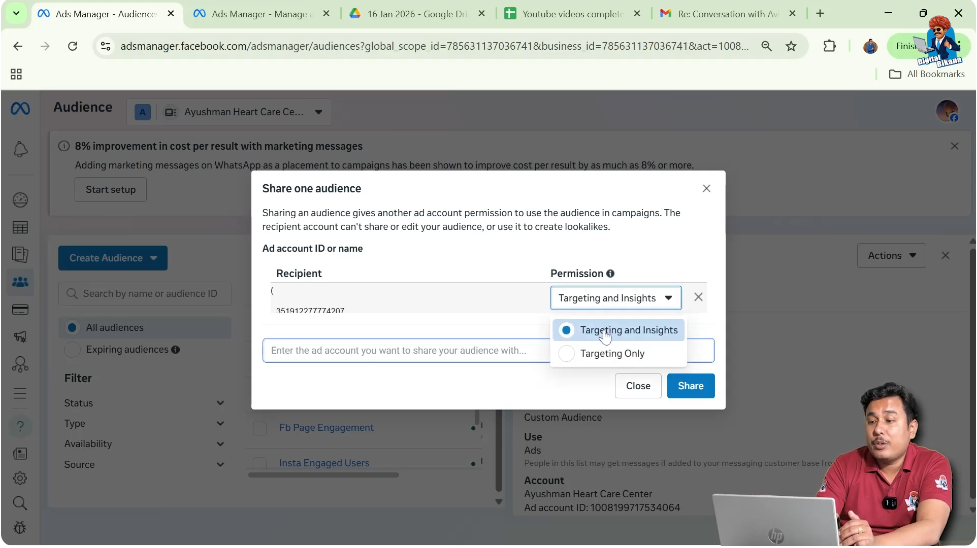
Step 5: Choose Permission Level
Select the Access Type
After entering the Ad Account ID, Facebook asks you to choose the permission type.
You can choose between:
- Allowing the target account to only run ads and view insights.
- Allowing the target account to run ads using the custom audience.
Select the appropriate permission based on your requirement.
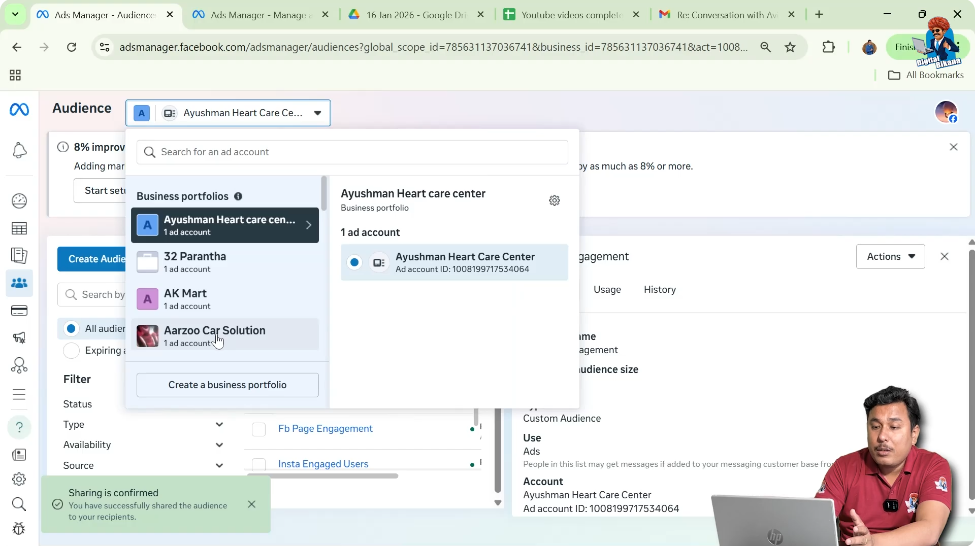
Step 6: Click on Share
Confirm Audience Sharing
Once you have selected the permission level:
- Click on the Share button.
- A confirmation popup will appear.
- The system will display a message indicating that the custom audience has been shared successfully.
This confirms that the process is complete from the original ad account.

Step 7: Switch to the Target Ad Account
Verify Audience Sharing
Now switch to the target ad account.
- Change the ad account from the account dropdown.
- Go to the Audiences section.
- Check whether the shared custom audience appears in the list.
If the audience is visible, it means the sharing process has been completed successfully.
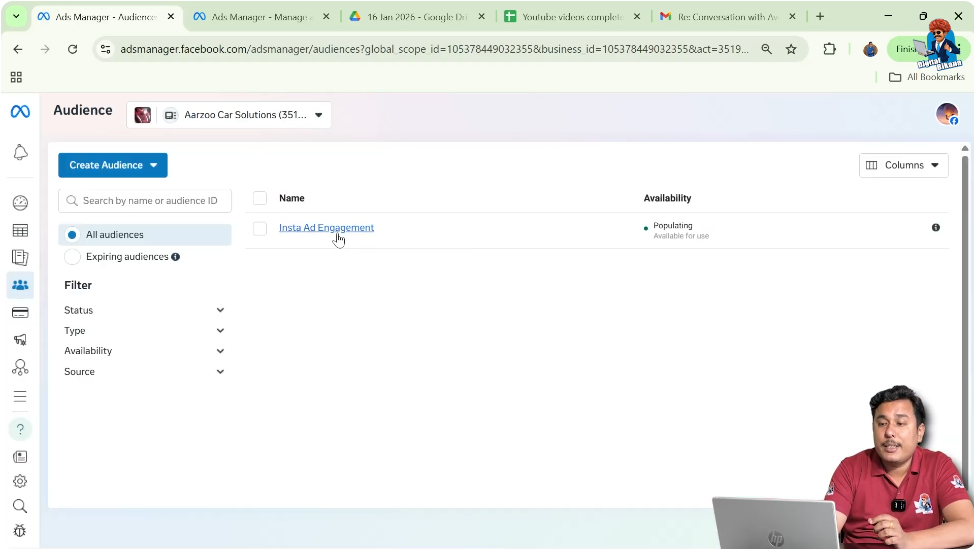
Confirmation of Successful Sharing
After switching to the target ad account and checking the audiences section:
- The shared custom audience should now be visible.
- It can now be used to run ad campaigns from that account.
- No need to recreate the audience again.
This confirms that the sharing process has worked properly.
Understanding Permissions While Sharing
When sharing a custom audience, choosing the correct permission is important.
Permissions control:
- Whether the receiving account can only run ads.
- Whether they can also view insights related to that audience.
Always select permissions carefully depending on how you want the audience to be used.
Common Mistakes to Avoid
While sharing custom audiences, avoid these common mistakes:
- Entering the wrong Ad Account ID.
- Sharing the wrong custom audience.
- Forgetting to verify sharing in the target account.
- Selecting incorrect permission settings.
Careful attention during each step ensures a smooth sharing process.
Benefits of Sharing Custom Audience
Sharing custom audiences offers several advantages:
- Saves time by avoiding duplication.
- Allows centralized audience management.
- Enables multiple ad accounts to use the same data.
- Improves campaign flexibility.
This feature is especially useful for agencies and businesses managing multiple ad accounts.
When Should You Share Custom Audiences?
You should consider sharing custom audiences when:
- You want to run campaigns from another ad account.
- You are managing campaigns for multiple brands.
- You are working with different team members.
- You want to maintain consistency in targeting.
Sharing eliminates the need to rebuild the same audience multiple times.
Final Explanation in Simple Words
To share a Facebook custom audience:
- Get the Ad Account ID of the target account.
- Select the custom audience.
- Click on Actions and choose Share.
- Enter the target Ad Account ID.
- Select permission level.
- Click Share.
- Verify in the receiving ad account.
That’s all that is required.
Conclusion
Sharing a Facebook custom audience with another ad account is a simple and effective process inside Facebook Ads Manager. The most important requirement is having the correct Ad Account ID of the receiving account.
By selecting the custom audience, using the share option, entering the correct Ad Account ID, choosing the appropriate permission level, and verifying in the target ad account, you can successfully share your custom audience.
This feature helps advertisers manage campaigns efficiently across multiple ad accounts without recreating audiences repeatedly.
Related Posts