
Creating a business ad account on Facebook is an essential step for running professional advertisements for your brand, service, or organization. Facebook allows businesses to manage ads separately from personal accounts through Meta Business Suite, making ad management more organized, secure, and scalable.
How to create Ad account in Facebook Business Manager?
In this detailed guide, you will learn how to create a business ad account on Facebook step by step and how to switch from a personal ad account to a business ad account inside Ads Manager. The entire process is done using your Facebook page and Meta Business Suite.
1. Switching from Facebook Account to Facebook Page
Before creating a business ad account, you must first ensure that you are logged into your Facebook account. Business ad accounts are created and managed through Facebook pages, not directly from personal profiles.
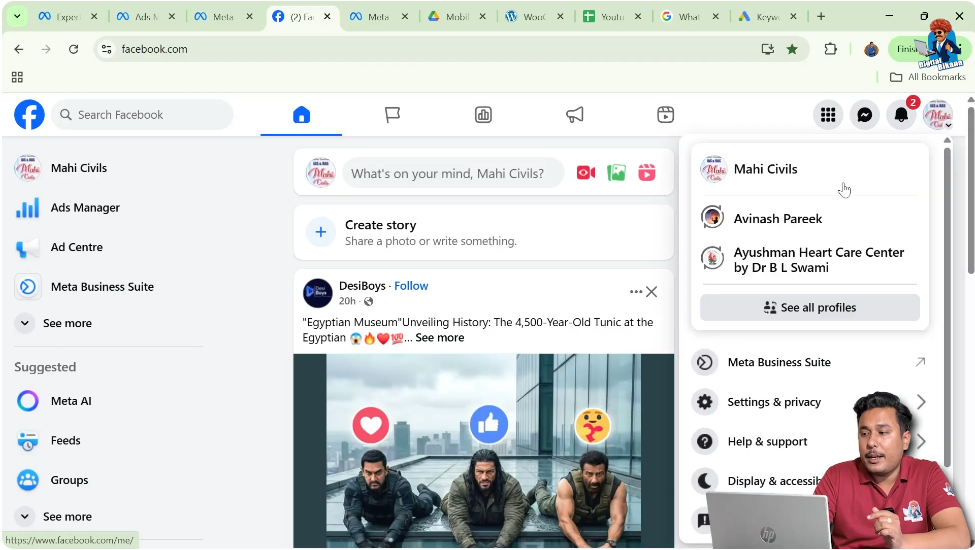
Once logged in, look at the top-right corner of your Facebook screen. Here, you will see a small profile icon. Click on this icon to open the account switch menu.
In this menu, Facebook displays both your personal Facebook account and the Facebook pages you manage. If you click on your Facebook account name, you will remain on your personal profile. However, if you click on your Facebook page name, you will automatically switch from your personal account to your Facebook page.
After clicking on the page name, Facebook will redirect you to your Facebook page homepage. This confirms that you are now operating Facebook as your page, which is required to continue with the business ad account setup.
2. Opening the Facebook Page Profile
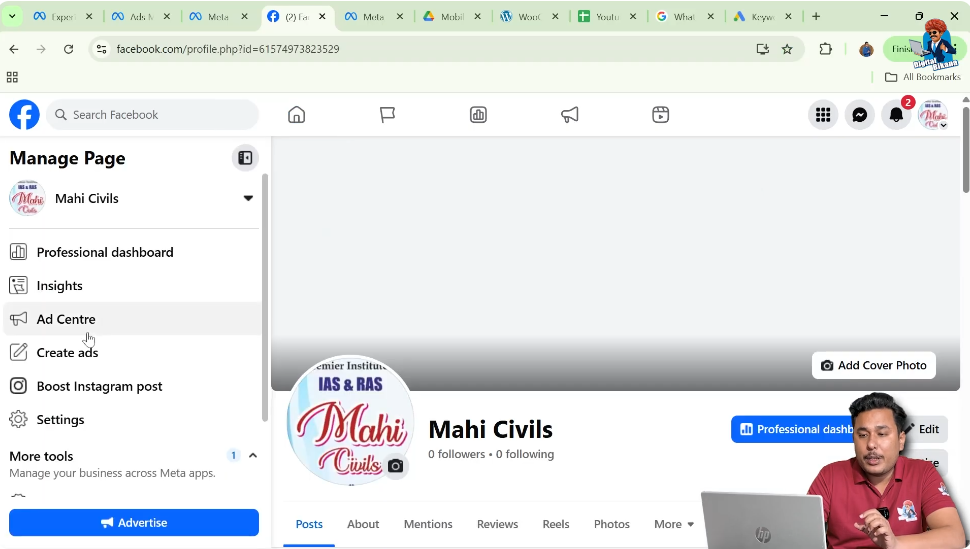
Once you are successfully switched to your Facebook page, the next step is to open the page profile settings.
Again, go to the top-right corner of the screen and click on the profile icon. At this stage, the profile icon represents your Facebook page, not your personal account.
Now, you are inside your Facebook page profile environment. From here, your focus should be on the left-side menu, which contains various tools and options related to page management.
3. Opening Meta Business Suite
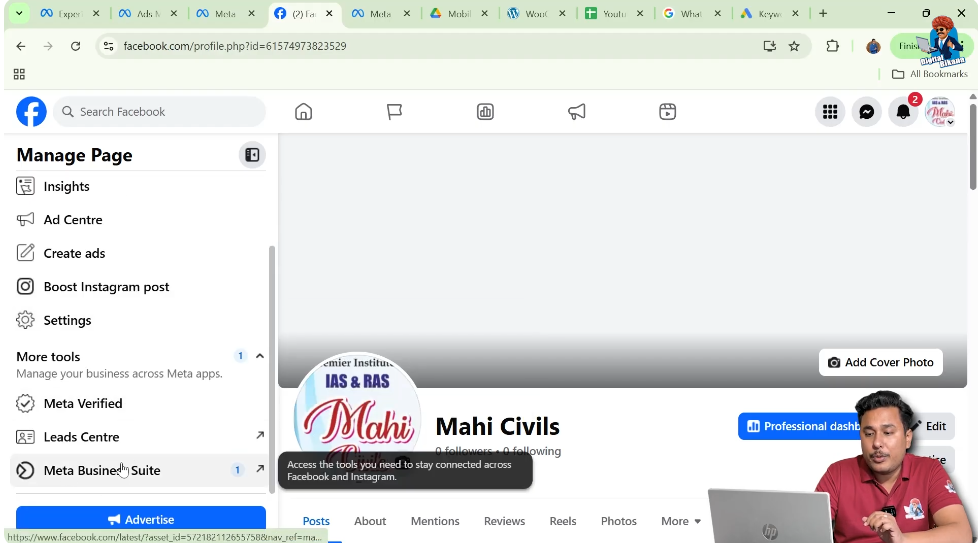
On the left-hand side of the screen, scroll down slowly until you find Meta Business Suite. This is the central platform provided by Meta to manage Facebook pages, Instagram accounts, messages, insights, ads, and business settings.
Click on Meta Business Suite. This tool is automatically connected to your Facebook page and, if linked, your Instagram account as well.
Meta Business Suite is where all business-related activities are managed, including the creation of business ad accounts.
4. Opening Meta Business Suite Settings
Once Meta Business Suite opens, look for the Settings option. This option is usually available within the Meta Business Suite interface.
Click on Settings to access the configuration and management options for your business portfolio.
This action will open the Meta Business Suite settings page, where you can manage assets such as pages, Instagram accounts, ad accounts, people, and permissions.

5. Accessing the Ad Accounts Section
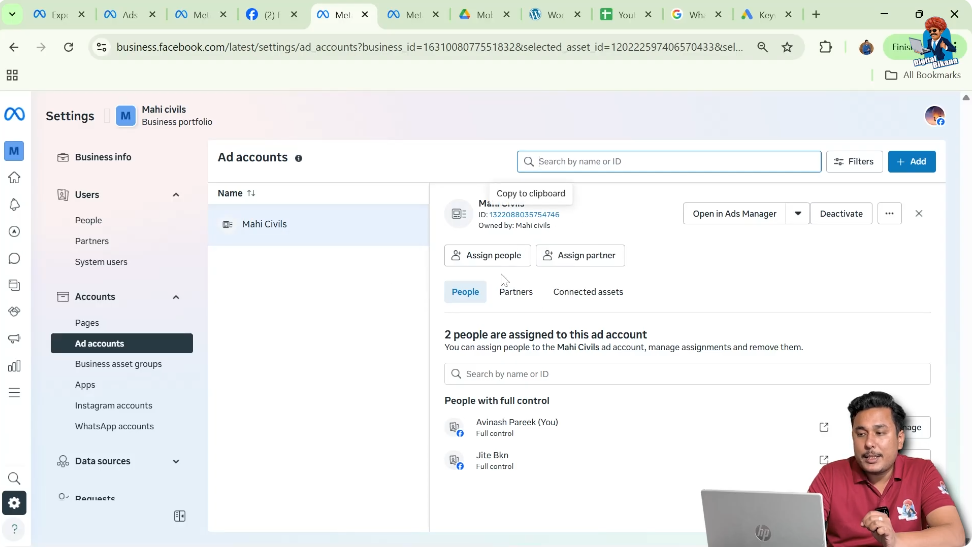
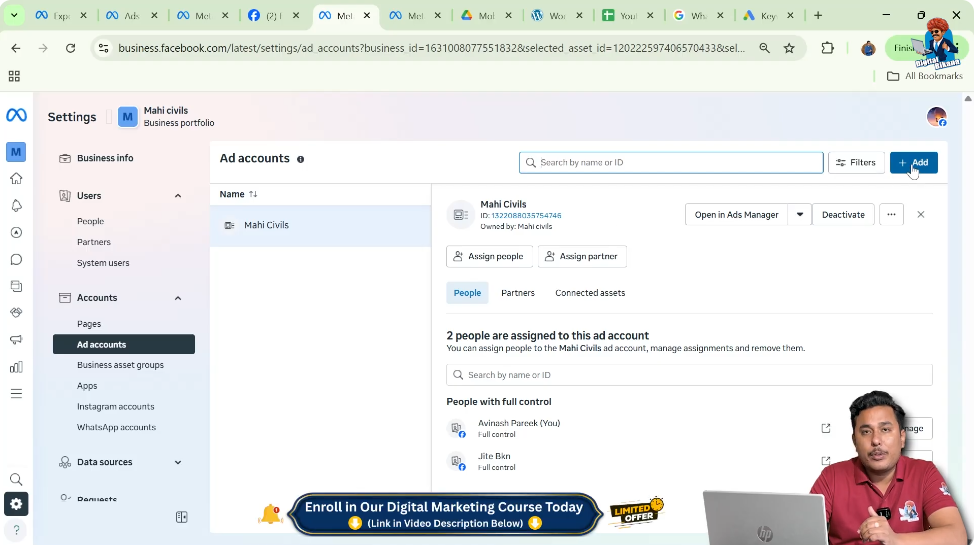
Inside the settings page, find and click on the Ad Accounts section.

In this section, you may already see one or more ad accounts listed under your business portfolio. These could be previously created ad accounts associated with your business.
Even if an ad account already exists, Facebook allows you to create a new business ad account, which is useful if you want to manage different brands, projects, or advertising purposes separately.
6. Creating a New Business Ad Account
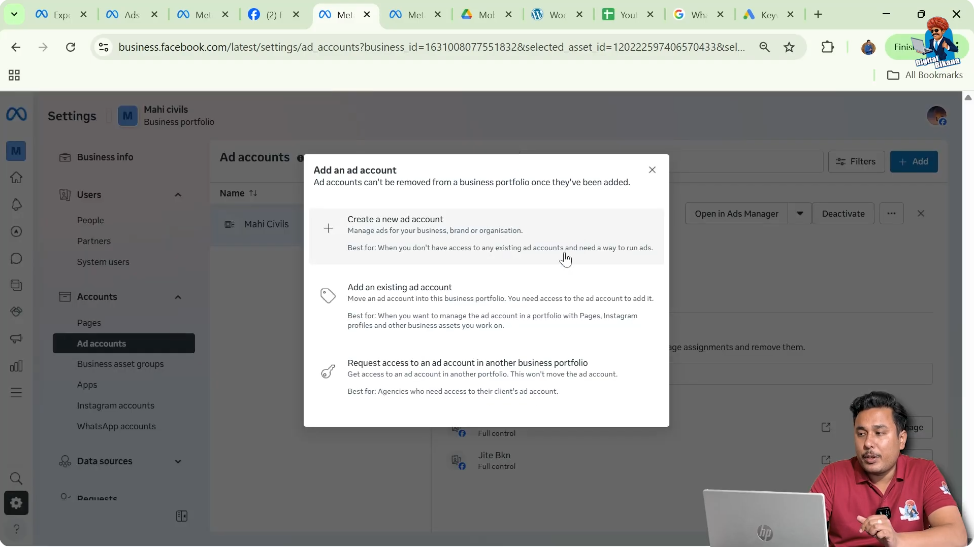
To create a new ad account, click on the Add button inside the Ad Accounts section. From the available options, select Create a new ad account.
Facebook will now ask you to enter basic details for the new ad account.
First, enter the ad account name. This name is for your internal identification. For example, the ad account name used here is Mahi Civils 2.
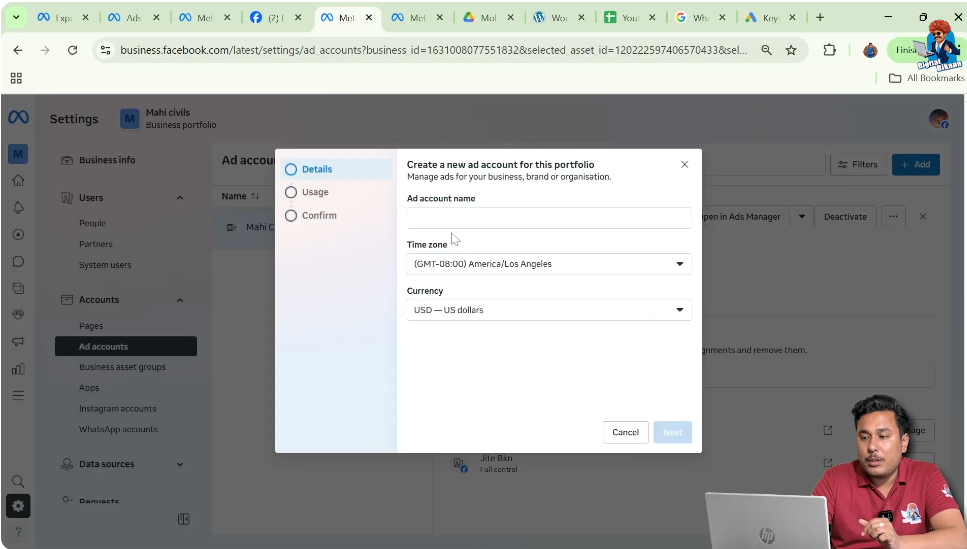
Next, select your time zone. It is important to choose the correct time zone because all reporting, scheduling, and billing activities will follow this time zone.
After selecting the time zone, choose the currency in which you want to make payments for your Facebook ads. This currency cannot be changed later, so it should be selected carefully.
Once all details are filled correctly, click on Next to proceed.

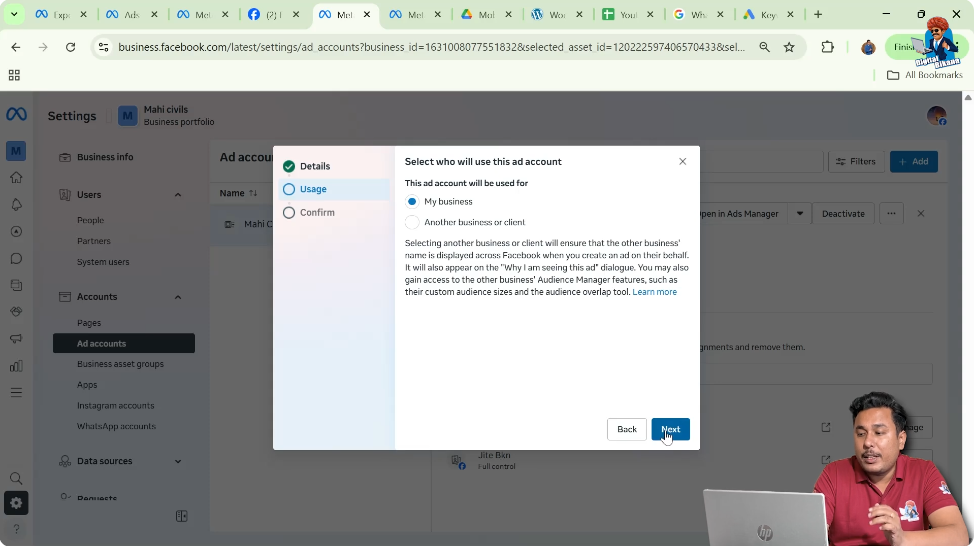
7. Selecting Business Type
After clicking Next, Facebook will ask you to specify whether the ad account is being created for your own business or for a client’s business.
In this case, the ad account is being created for your own business. Select the option that indicates the ad account is for your business.
After selecting the appropriate option, click on Next.
Once this step is completed, Facebook will automatically create the business ad account under your Meta Business Suite.
Opening Ads Manager
After creating the business ad account, the next step is to access Ads Manager, where ad campaigns are created and managed.
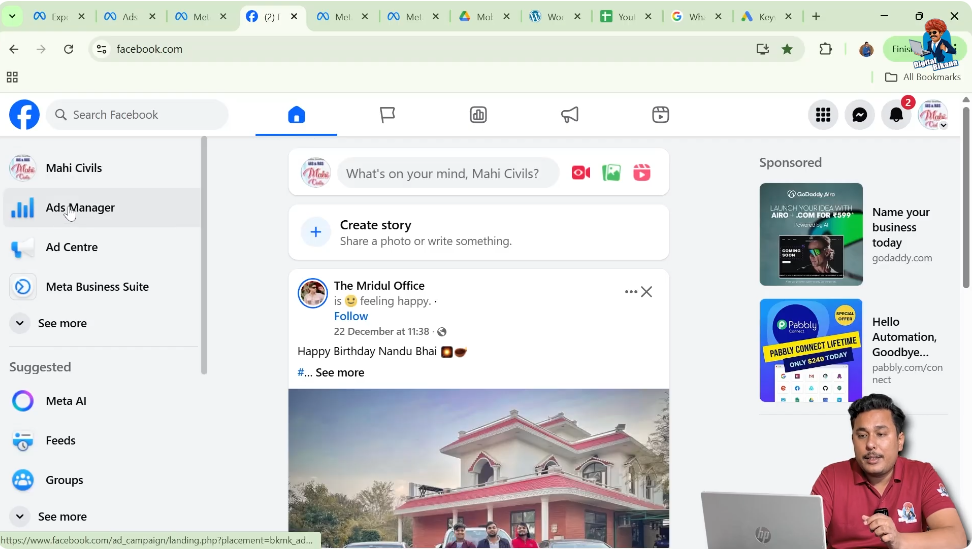
Go back to your Facebook homepage. On the left-side menu, you will see an option called Ads Manager. Click on Ads Manager to open it.
By default, when Ads Manager opens, it usually shows the personal ad account, not the business ad account.
Identifying the Personal Ad Account
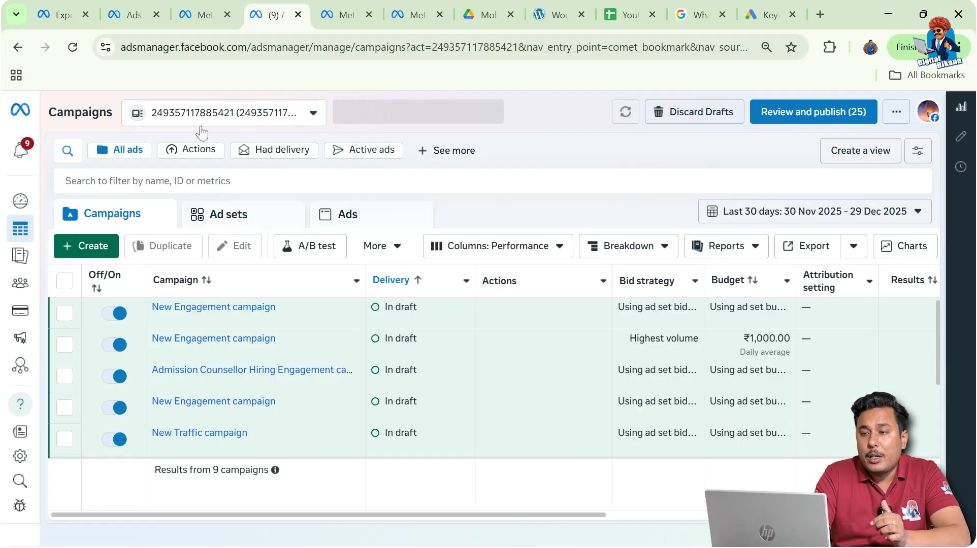
When Ads Manager opens, look at the top area of the screen. You will see a number displayed instead of a business name.
This number represents your personal ad account. If you click on this account selector, you will notice that no business name is shown, which confirms that Ads Manager is currently set to the personal ad account.
This is an important step because many users unknowingly run ads from their personal ad account instead of the business ad account.
Switching to the Business Ad Account
To switch to the business ad account, click on the ad account dropdown at the top of Ads Manager.
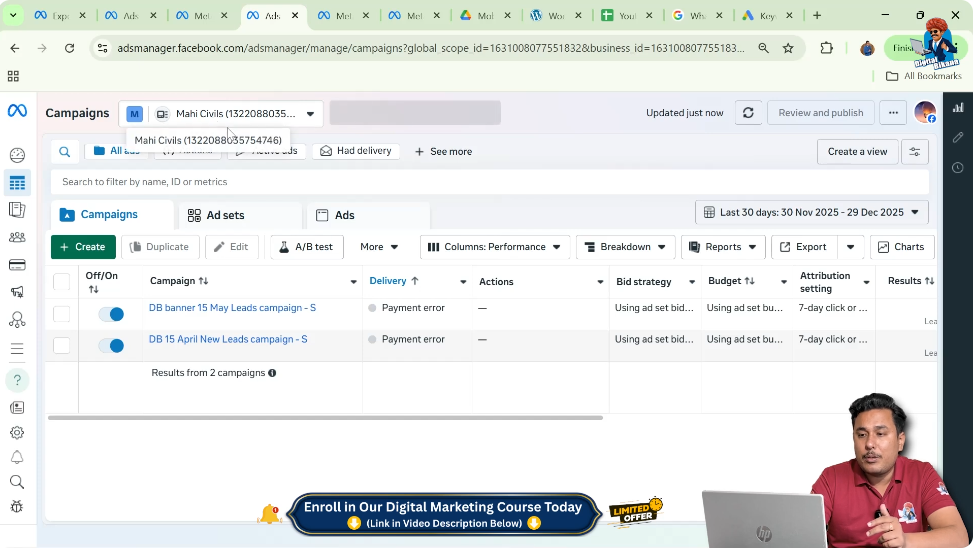
If you have access to multiple ad accounts, you can use the search option to quickly find the correct one. In this case, search for the business ad account name, such as Mahi Civils.
Once the business ad account appears in the list, click on it.

Ads Manager will now switch from the personal ad account to the business ad account.
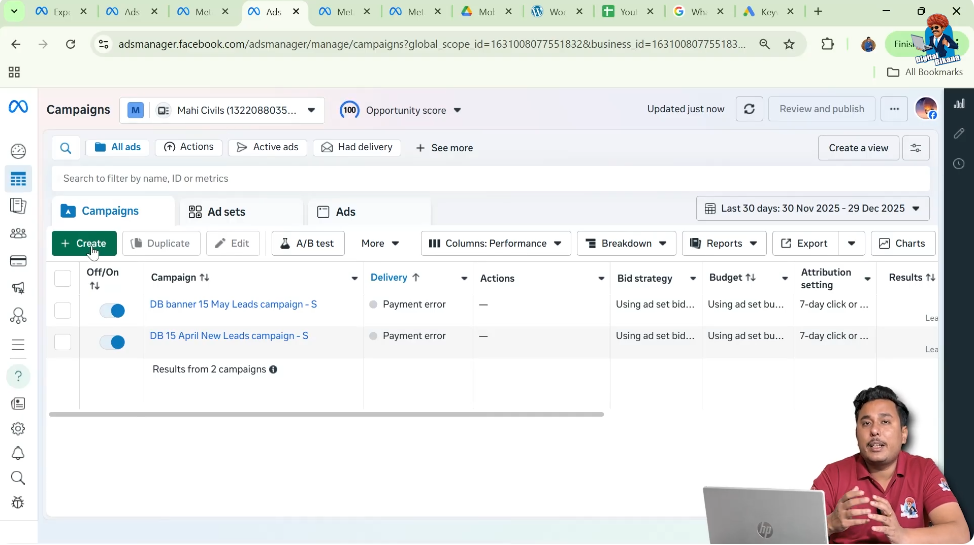
You can confirm the switch by checking the top section of Ads Manager. If the business ad account name is displayed, the switch has been completed successfully.
Creating Ad Campaigns
After switching to the business ad account, you are now fully prepared to create ad campaign.
Whenever you want to start a new advertising campaign in Meta Ads Manager, simply click on the Create button.
From here, you can proceed with campaign setup, targeting, budgeting, and ad creation using the business ad account.
Conclusion
This guide explains the complete process of creating a Facebook business ad account using Meta Business Suite and switching it correctly inside Ads Manager. By following these steps, you can ensure that your ads are managed professionally through a dedicated business ad account rather than a personal one.
Using a business ad account helps maintain better organization, control, and scalability for Facebook advertising activities, making it an essential setup for any business running ads on Meta platforms.
Related Posts