In this article, you will learn how to write a blog post on a WordPress website step by step. Writing a blog post in WordPress includes entering a title, writing content, formatting headings, adding images and videos, creating categories and tags, and finally publishing the article.
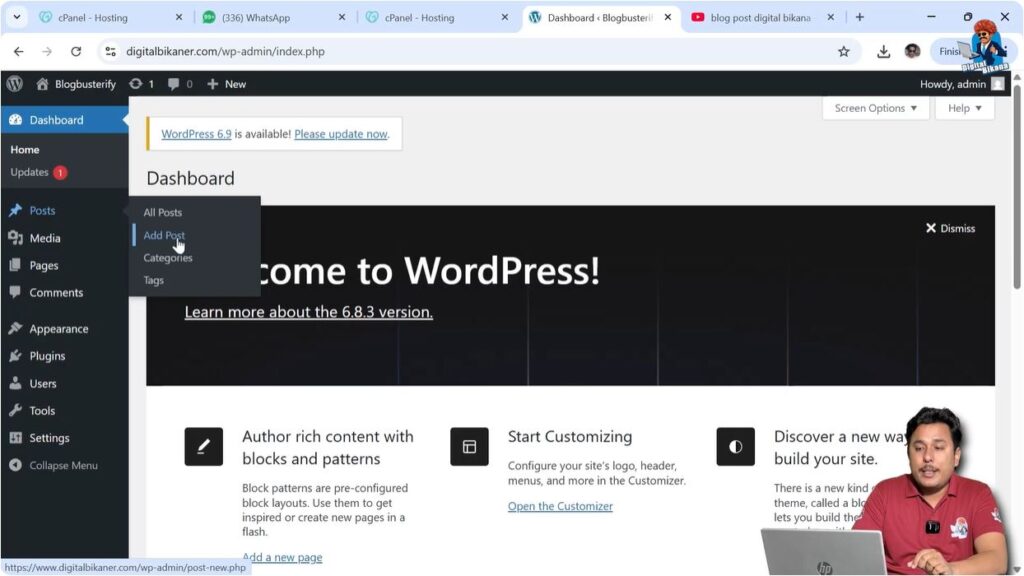
As you can see, we are inside the WordPress dashboard. On the left side of the dashboard, there is a Posts section. When you move the cursor over the Posts section, you will see the option Add New Post. To create a new blog post, you need to click on Add New Post.
After clicking Add New Post, the blog editor will open where you can start creating your article.
Opening Add New Post
1. Click Add New Post
Inside the WordPress dashboard, move the cursor over the Posts option. Then click on Add New Post.
After clicking Add New Post, WordPress will open the blog editor where you can write your article.
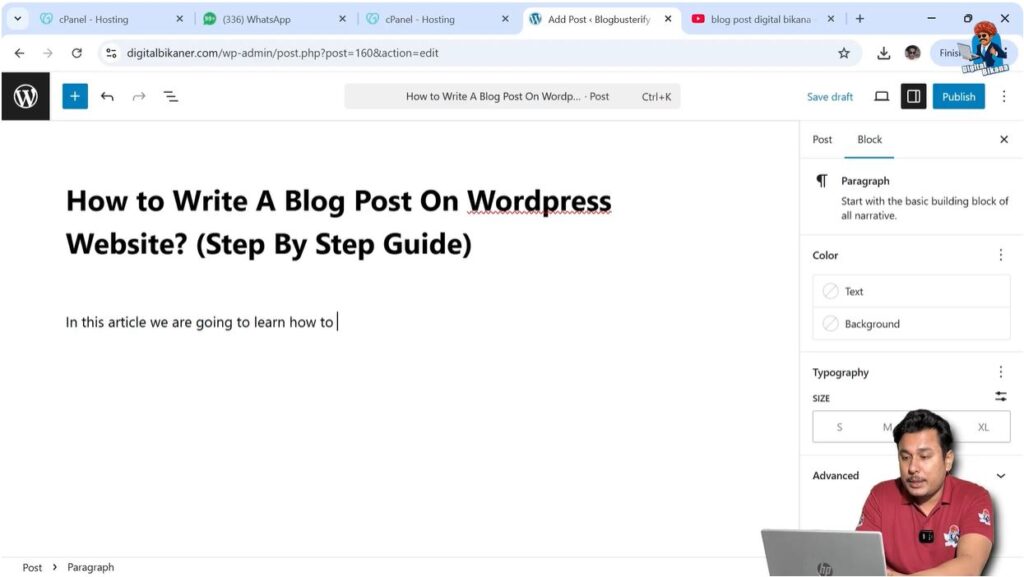
The editor first asks you to enter the title of your blog post.
Writing Blog Post Title
2. Enter Blog Post Title
You can write the title of your blog post in the title section.
For example, you can write a title such as:
- How to Make Pizza
- Top 10 Places to Visit in the World
- How to Write a Blog Post on WordPress Website
Whatever topic you are writing about, you can simply enter the title in the title field.
After entering the title, you can move to the content section where you will write the article.

Writing Blog Content
3. Write Article
Below the title section, there is an option that says Type to choose a block. In this section, you can start writing your article.
You can either type the article manually or paste the article if you have already written it somewhere else.
In this example, the article has already been written and pasted into the editor.
Writing the article directly in the video would take a long time, so the article was pasted instead.
After pasting the article, the complete content appears in the editor.
Using Headings Properly
4. Add Headings
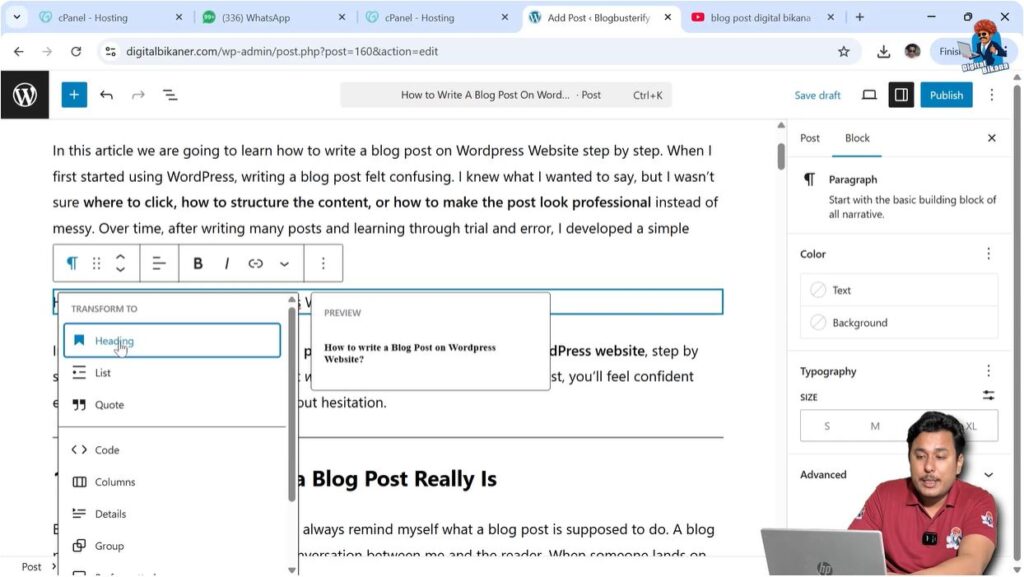
After writing or pasting the article, the next step is to format headings properly.
Some headings are written in H2, and subheadings are written in H3.
For example:
- Main heading → H2
- Subheading → H3
This is how the article structure is created.
If you want to create a new heading, you need to click on a line and press Enter to create a new line.
Then write the heading text.
Initially, the text appears in paragraph format.
When you move the cursor over the text, you will see the Paragraph (P) icon.
Click on the Paragraph icon and change the format to Heading.
Then select the heading level such as H1, H2, or H3.
For example, the heading can be changed from paragraph to H1.
This is how you create headings and new lines in a WordPress article.
Preparing Images for Blog Post
Renaming Images
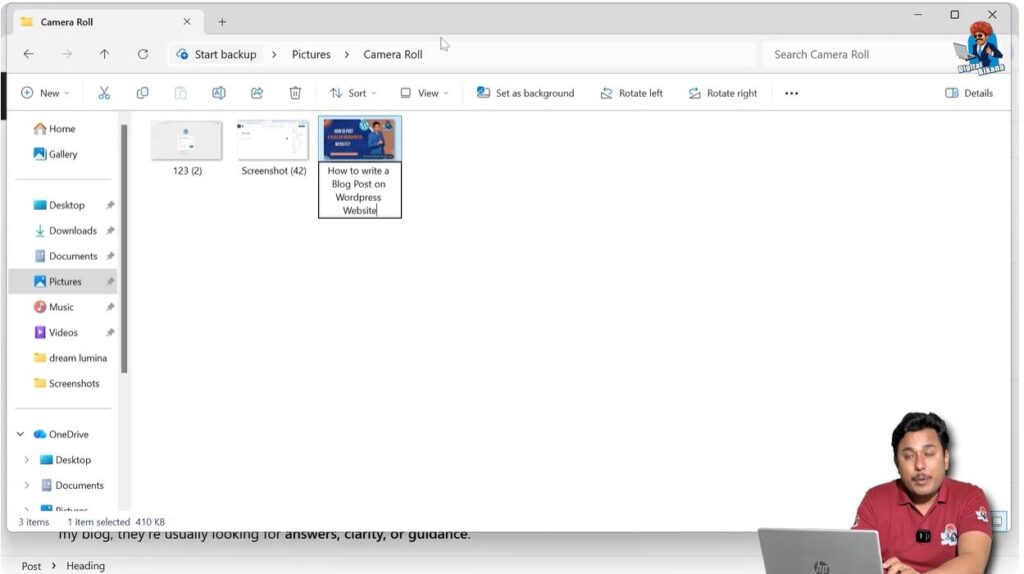
Before uploading images, you should rename the images on your computer using keywords.
Image names such as:
- Screenshot43
- Screenshot42
- Image123
do not help in any way.
If images are renamed with keywords, they can rank in Google Image Search.
This may bring additional traffic from image searches.
Renaming images also makes it easier for Google crawlers and robots to understand the content of the web page.
It increases the relevancy of the blog post for the target keyword.
This can help the web page rank higher in search engine results.
You should also avoid uploading heavy image files because large images reduce page loading speed.
Images should be optimized by reducing their size, but not too much.
Uploading Images
5. Upload Images
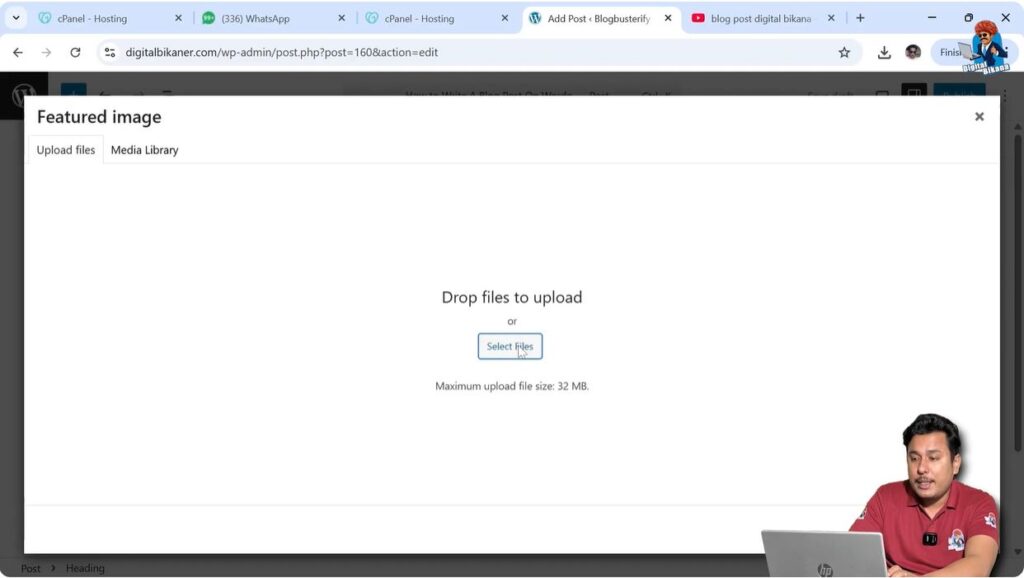
If you want to add a featured image, go to the right side and click on Post.
Then click on Set Featured Image.
Click on Select Files and upload images from your computer.
You can select multiple images at once and upload them together.
Uploading all images together saves time because you do not need to upload them again and again.
Adding Alt Text
Importance of Alt Text
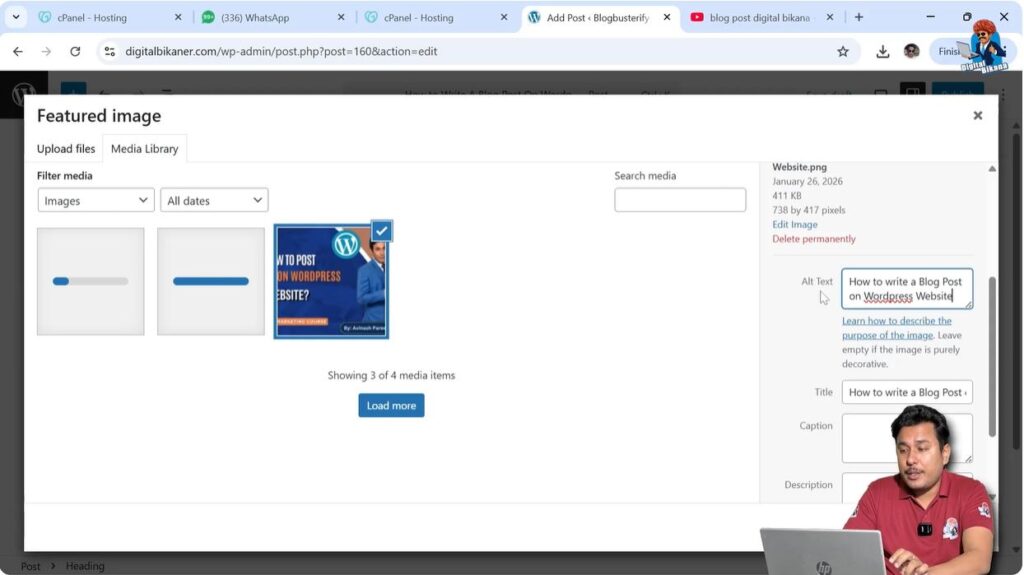
After uploading images, you need to enter Alt Text.
Alt text is very important for good SEO practice.
Alt text also helps blind users who use screen readers.
Screen readers read the alt text and help users understand what the image represents.
You can write the alt text manually or copy the title and paste it as alt text.
You can also add captions and descriptions, but they make images look larger.
It is recommended to add at least title and alt text.
After adding alt text, select the image and click Set Featured Image.
The featured image becomes the cover image of the article.
Adding Images Inside Article
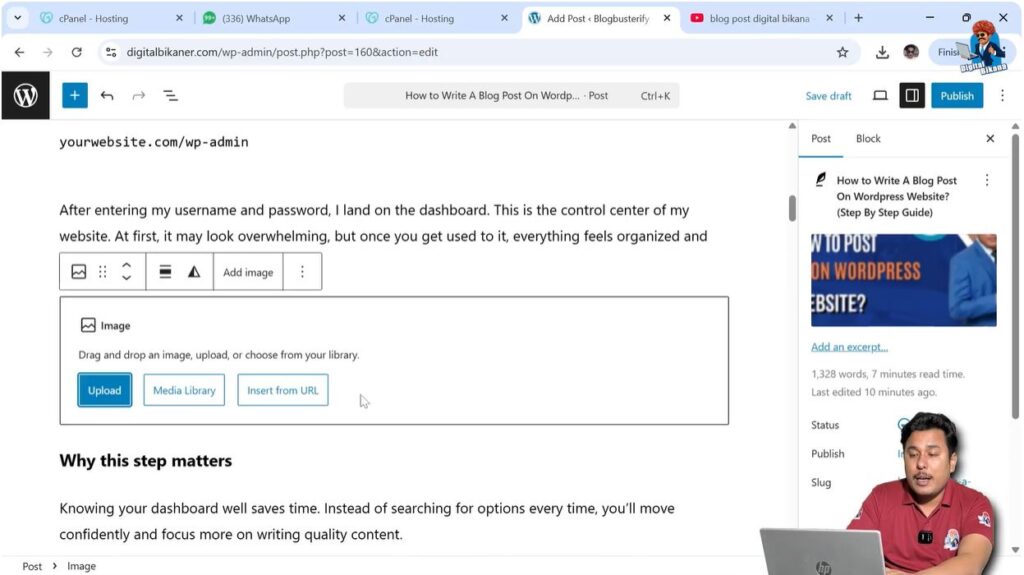
6. Insert Images in Content
To add images inside the article, place the cursor at the end of a line.
Press Enter to create a new line.
Click on the Plus icon.
Select Image.
Do not select Gallery because gallery displays images in a grid pattern.
Select Media Library if images are already uploaded.
Add alt text and select the image.
The image will appear inside the article.
Uploading all images together makes this process easier.
Adding Video in Blog Post
7. Embed Video
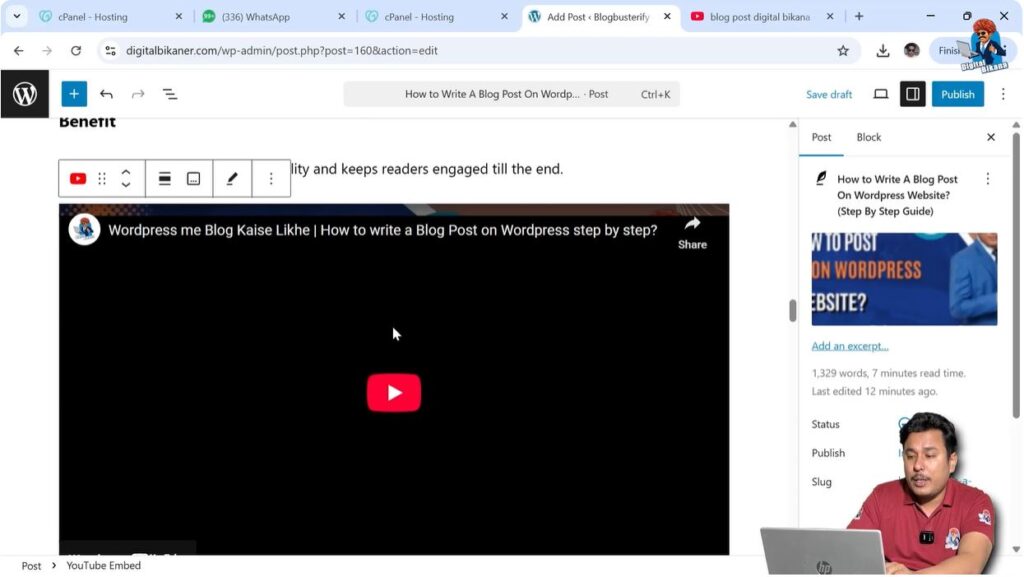
You can also add videos inside the blog post.
It is not recommended to upload video files directly because videos increase page size and create heavy load on the web page.
Instead, upload videos on video platforms such as YouTube and embed them.
Adding a video increases user engagement.
Users may watch the video and spend more time on the page.
This increases average watch time and may help the page rank higher.
To add a video:
- Copy the video URL
- Paste the URL in the editor
The video will appear automatically.
The video will play on the same page without redirecting users to YouTube.
Adding Categories
8. Create Category
On the right side, open the Post settings.
Go to Categories.
If no category exists, click Add New Category.
Enter the category name.
If it is a parent category, leave the parent option empty.
Click Add Category.
Select the category where the article should appear.

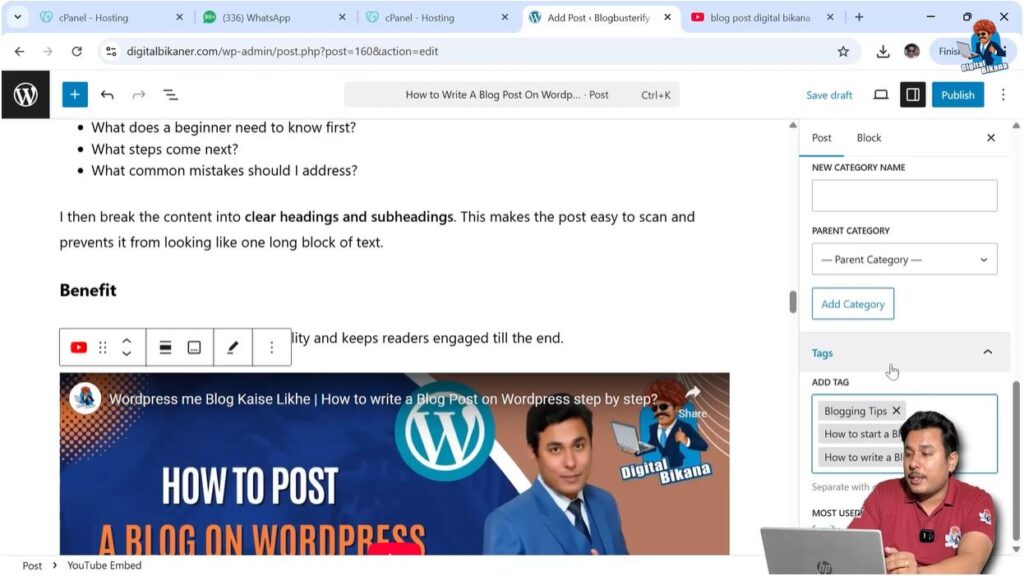
Adding Tags
9. Add Tags
Tags also rank in search engines.
You can add tags such as:
- Blogging Tips
- How to Write a Blog
- How to Start a Blog
It is recommended to add a maximum of three tags.
Tags help articles appear in related posts.
If multiple articles use the same tags, those articles appear together.
This helps generate additional traffic.
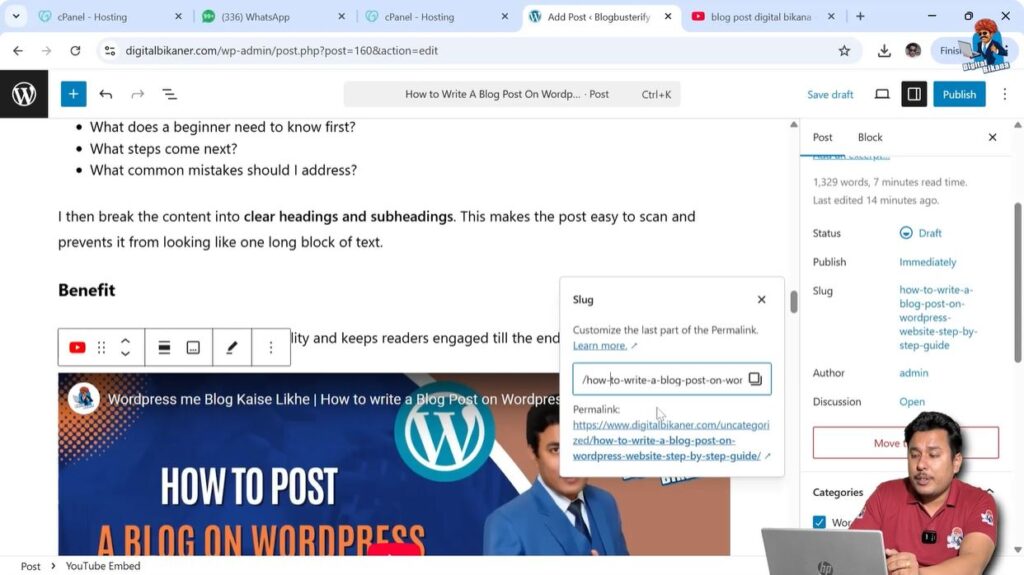
Editing URL Slug
10. Customize Slug
The slug is the URL part of the article.
You can customize the URL according to your requirement.
Unnecessary words can be removed.
You can type the URL in the slug section.
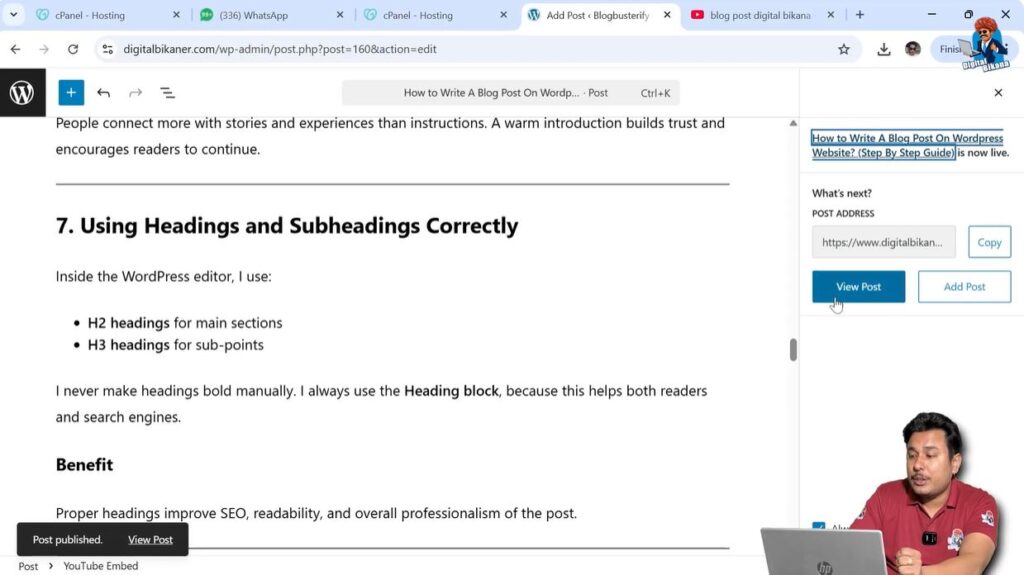
Publishing Blog Post
11. Publish Article
If you want to publish the article immediately, click Publish.
You can also:
- Save draft
- Mark pending review
- Make article private
- Schedule article
- Password protect article
- Make article sticky
After publishing, click View Post.

Viewing Blog Post
12. View Post
After clicking View Post, the article will appear on the front end.
You will see:
- Heading
- Featured image
- Author name
- Tags
- Publish date
- Content
- Images
- Video
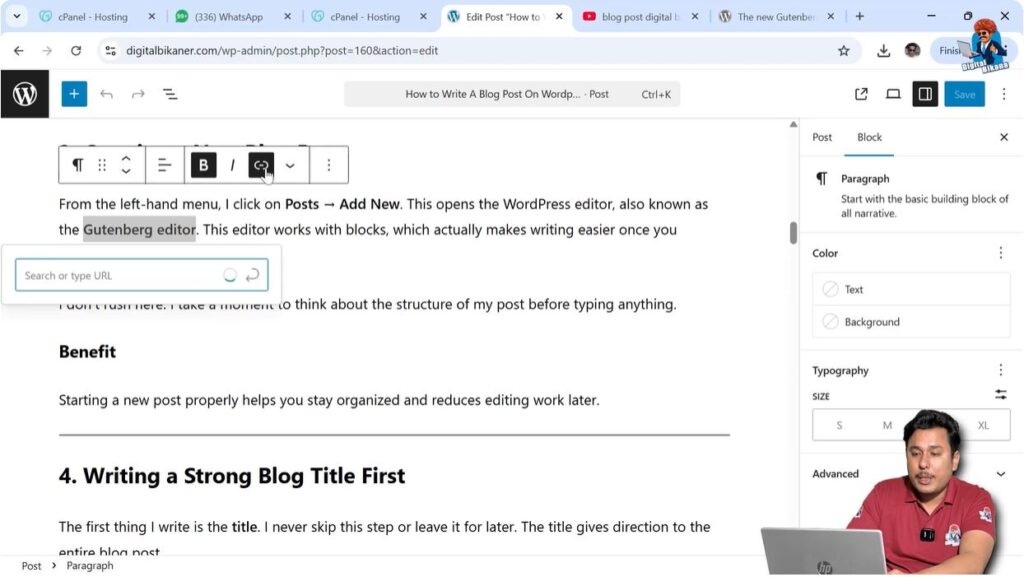
Adding External Links
External Hyperlinks
External links connect your website to another website.
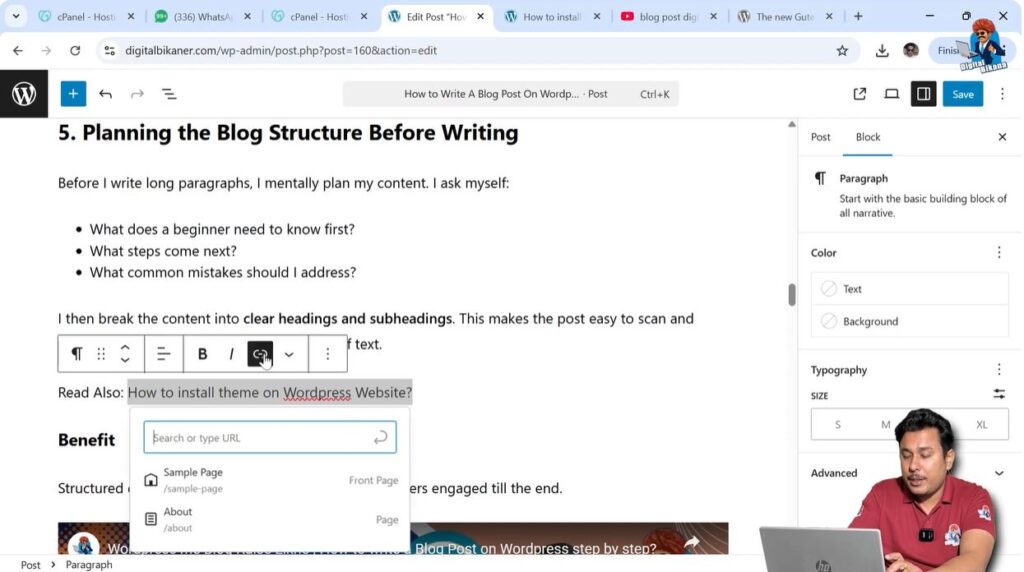
Select the text.
Click the link icon.
Paste the link.
The text becomes anchor text.
External links are also called outbound links.
Users clicking external links move to another website.
Adding Internal Links
Internal Hyperlinks
Internal links connect pages within the same website.
Create another article.
Copy the article URL.
Select text.
Click link icon.
Paste URL.
Users stay on the same website but move to another page.
Conclusion
Writing a blog post in WordPress includes entering a title, writing content, formatting headings, adding images and videos, creating categories and tags, adding links, and publishing the article.
This is how you can write a blog post on a WordPress website step by step.
Related Posts