Lead ads in Facebook Ads Manager are designed to collect information from users directly on Facebook and Instagram. These ads are mainly used when the objective is to get users to submit their details through a form instead of sending them to a website or landing page. The entire process happens within the Facebook platform, which makes it easy and convenient for users to share their information. In this article, we will explain in detail how to create and run lead ads using Facebook Ads Manager. The explanation follows the exact process, settings, and logic required to set up a lead ad campaign properly.
Understanding the Purpose of Lead Ads in Facebook Ads
Lead ads are primarily used when businesses want:
- Customers to fill out a form
- Users to share contact details
- Inquiries for services, appointments, or registrations
Facebook lead ads help reduce friction because users do not need to leave Facebook or Instagram to submit their information.
How to Run Lead Ads in Facebook Ads Manager?
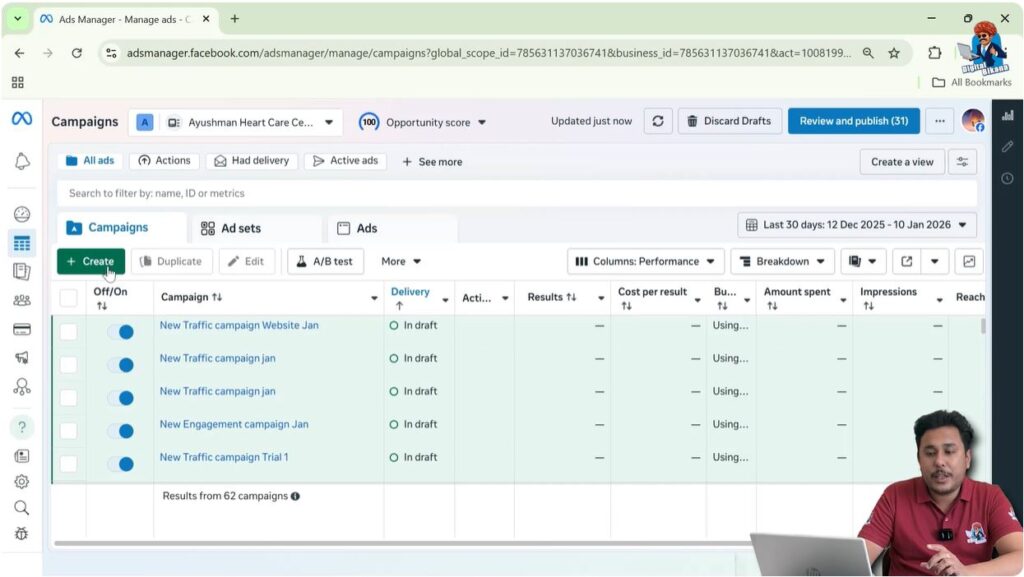
Step 1: Creating a New Lead Campaign in Facebook Ads Manager
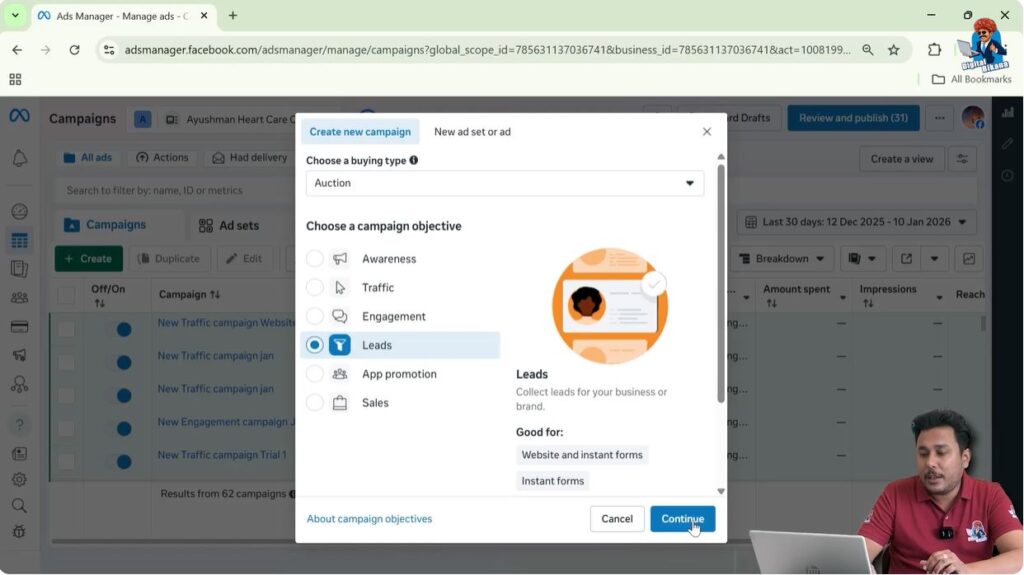
To begin, open your Facebook Ads Manager account. On the dashboard, you will see a Create button. Click on it to start a new campaign.
Selecting the Campaign Objective
From the list of objectives, select Leads. This objective is used when you want users to submit forms. After selecting the Leads objective, click on Continue to proceed.
Step 2: Naming the Campaign and Budget Configuration
Campaign Naming
You can enter any ad campaign name you want. This name is only for your internal reference and will not be visible to users who see your ads.

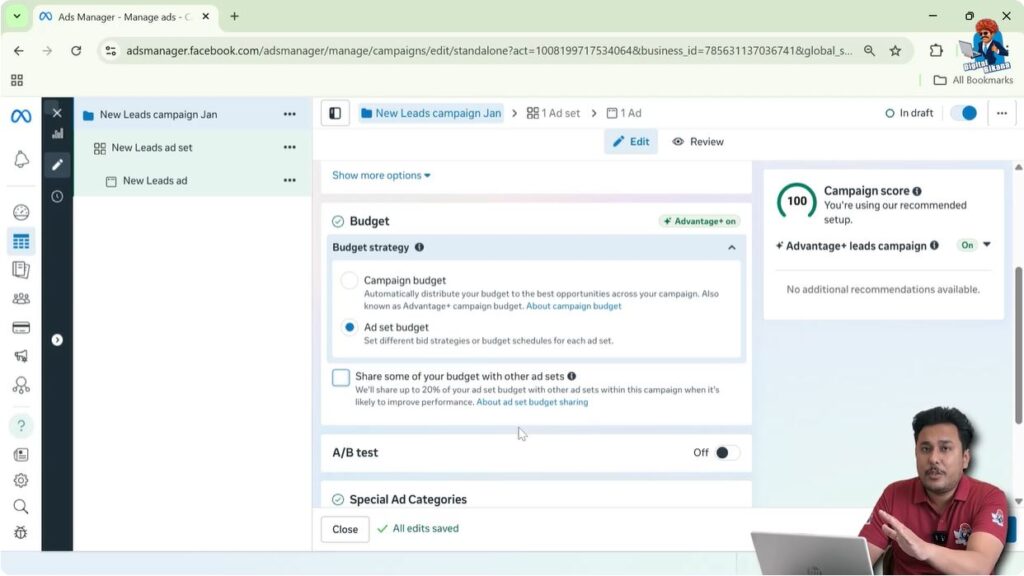
Budget Settings in Facebook Ads
In the budget section:
- Select Budget at the Ad Set Level
- Uncheck the option to share your budget with other ad sets
- Keep A/B Testing turned off
- Do not select any Special Ad Category unless your ad falls under one
Click Next to continue.
Step 3: Ad Set Naming and Conversion Location
Ad Set Name
Rename the ad set according to your preference. This name is only for your reference.

Conversion Location
Under conversion location, select Instant Form. This ensures that users will fill out a form directly on Facebook or Instagram.
Make sure your Facebook Page is selected. If Facebook asks you to accept instant form terms, simply accept them.

Step 4: Choosing the Performance Goal in Facebook Lead Ads
Facebook Ads Manager provides two performance goals:
- Maximum number of leads
- Maximum number of conversion leads
Which One to Choose
- For small local areas: Maximum number of leads
- For larger targeting areas: Maximum number of conversion leads
Facebook automatically optimizes ad delivery based on the selected goal.

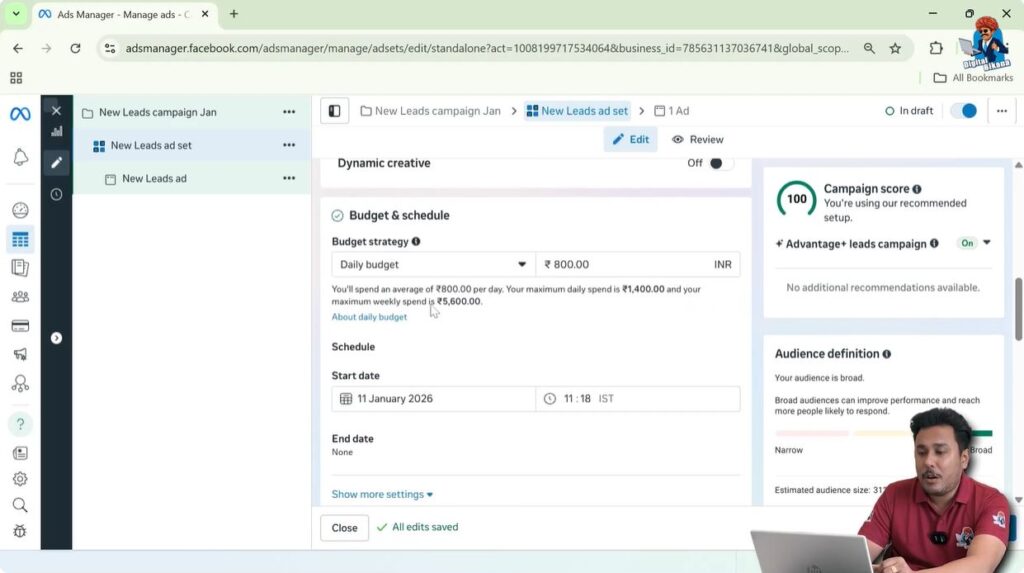
Step 5: Daily Budget and Ad Schedule
Set your daily budget (for example, ₹1,000 per day).
Select the start and end dates if you want the campaign to run for a fixed period.
Dynamic creative remains turned off.
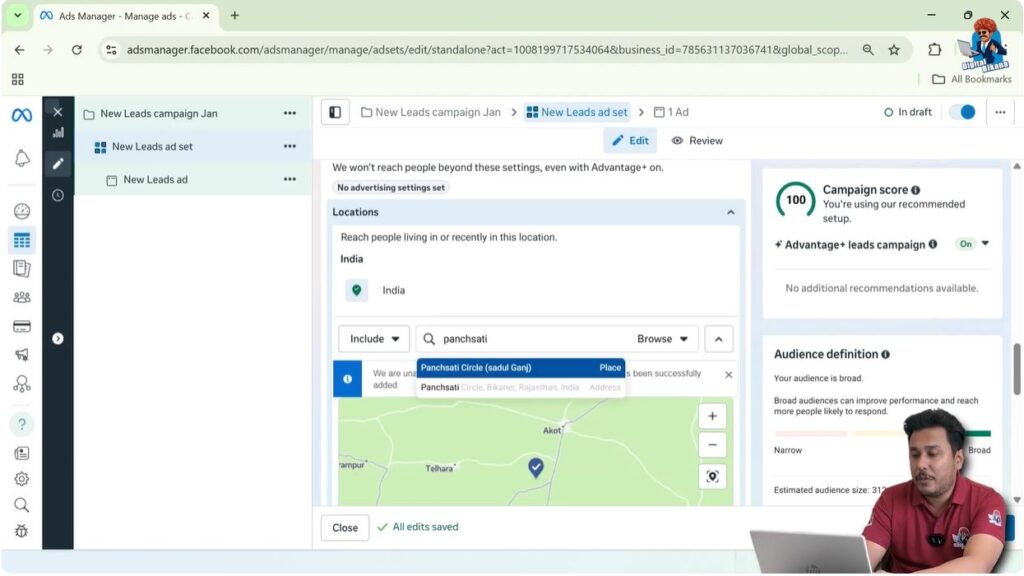
Step 6: Audience Targeting in Facebook Ads Manager
Location Targeting
Select the location where you want to show your ads. You can:
- Search for a place
- Set a radius (such as 5–6 km)
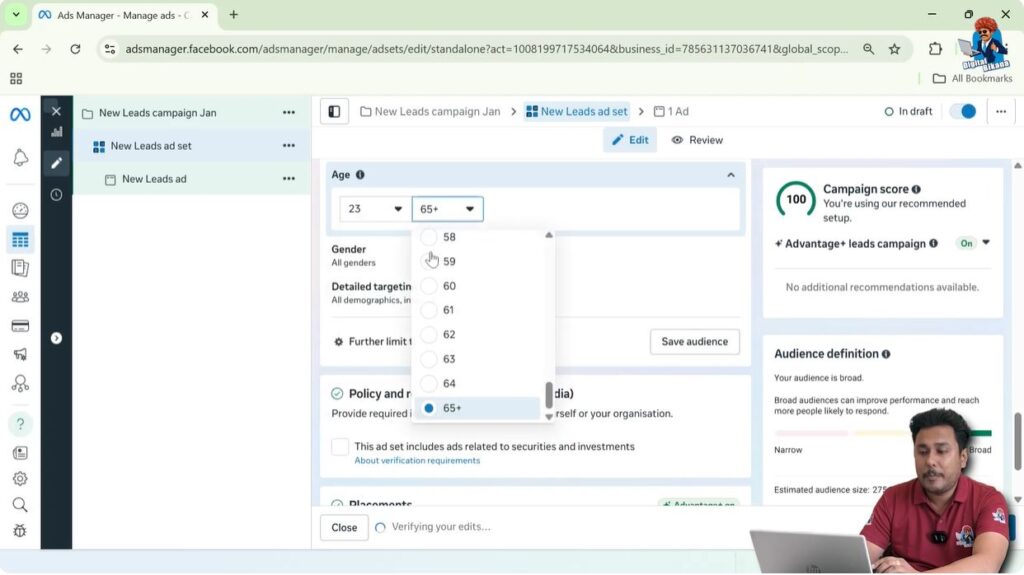
Age and Gender Targeting
- Set minimum age if required
- Select an age range
- Keep gender as All if targeting everyone
Step 7: Detailed Targeting Options
Facebook Ads allow detailed targeting based on:
You can select targeting filters according to your business type.

Step 8: Placement Settings in Facebook Ads
Choose Manual Placement and:
- Enable Feeds, Stories, and Reels
- Disable In-stream ads, Search Results, Apps, and Sites
These placements generally do not perform well for lead generation.

Step 9: Ad Creative Setup in Facebook Ads Manager
Choose Create Ad since the creative is not already published.
Ad Format
- Select Single Image or Video
- Turn off Multi-advertiser ads

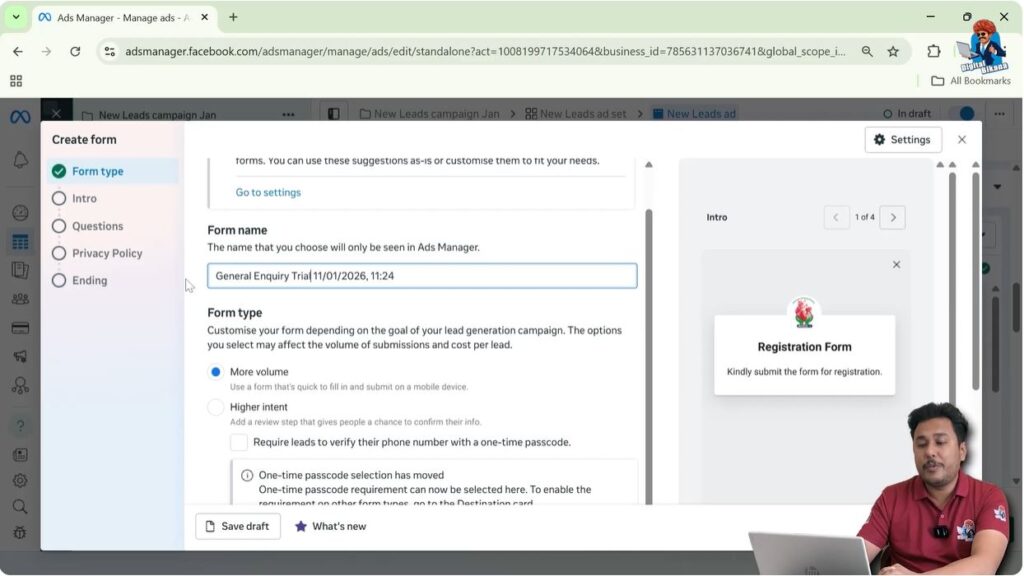
Step 10: Creating an Instant Lead Form
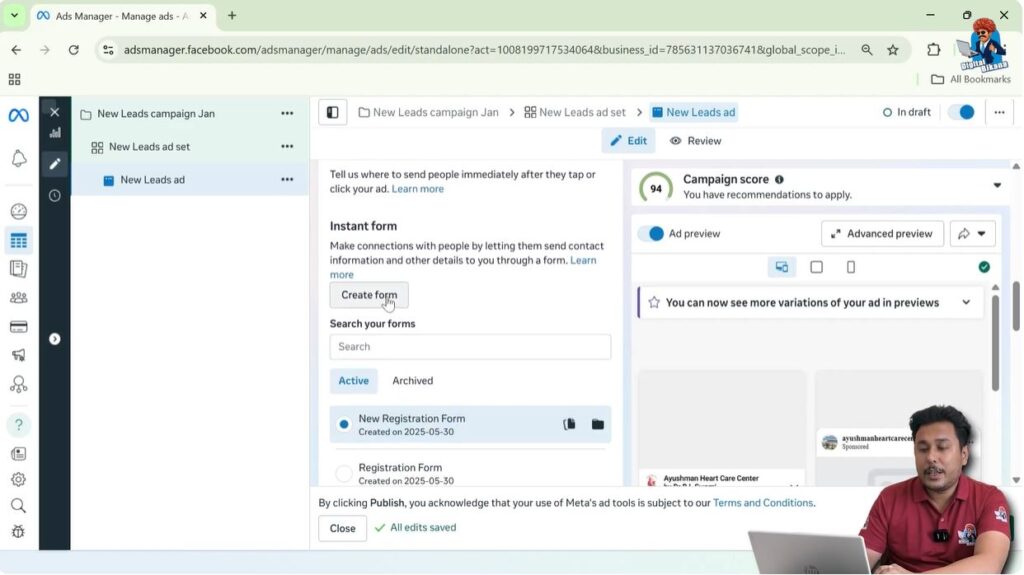
Click Create Form and:
- Enter a form name (internal use)
- Select More Volume as the objective
- Do not enable OTP phone verification to avoid drop-offs
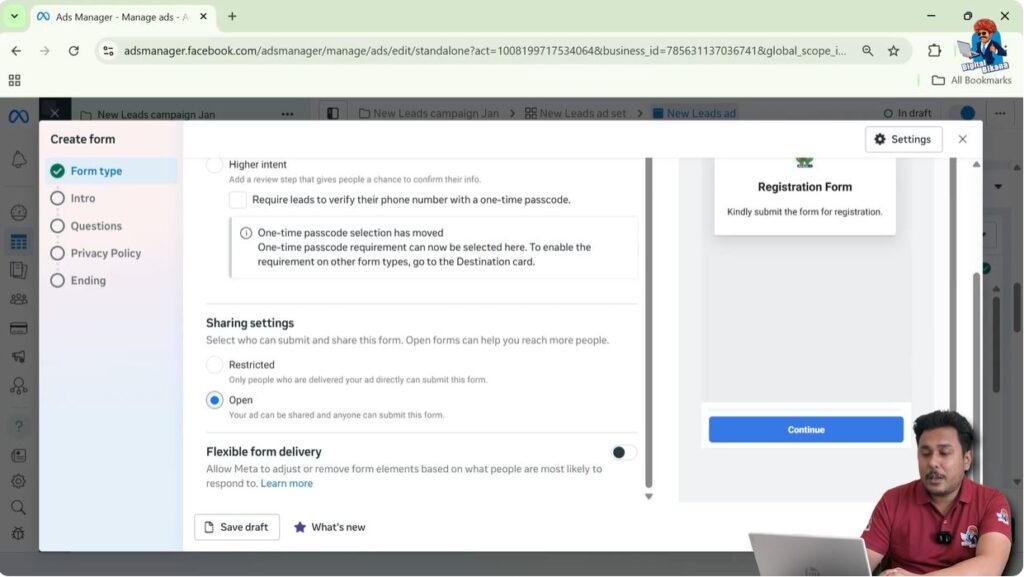
Step 11: Form Sharing and Delivery Settings
- Keep the form Open so it can be shared
- Turn off flexible form delivery so all questions must be answered
Step 12: Form Design and Greeting Section
Use Image from your ad as the background.
Add a headline and short description encouraging users to submit the form.

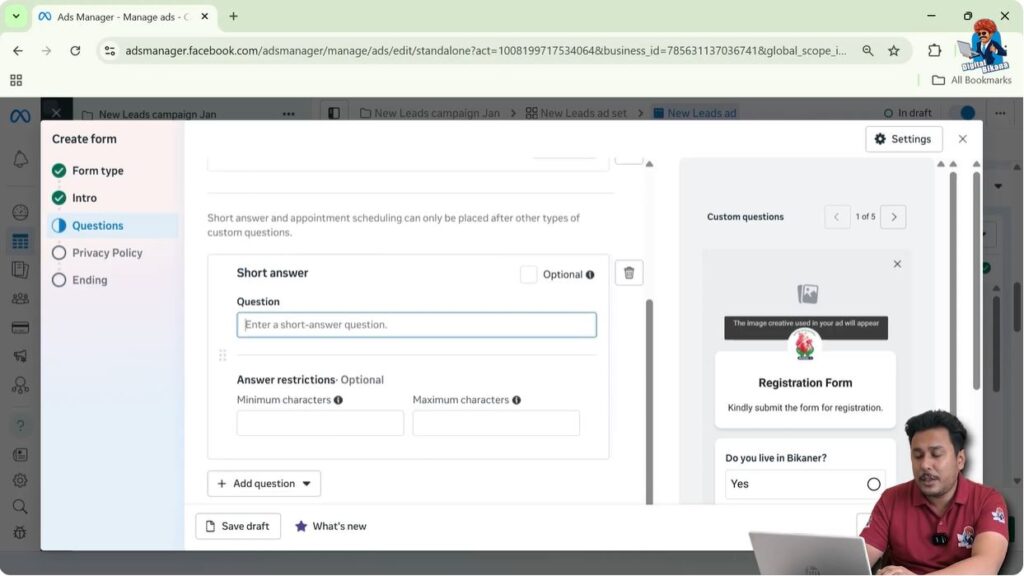
Step 13: Questions and Contact Information
Add:
- Multiple-choice questions
- Short-answer questions
Keep required fields such as:
- Phone number
- City
Remove unnecessary fields like email if not needed.
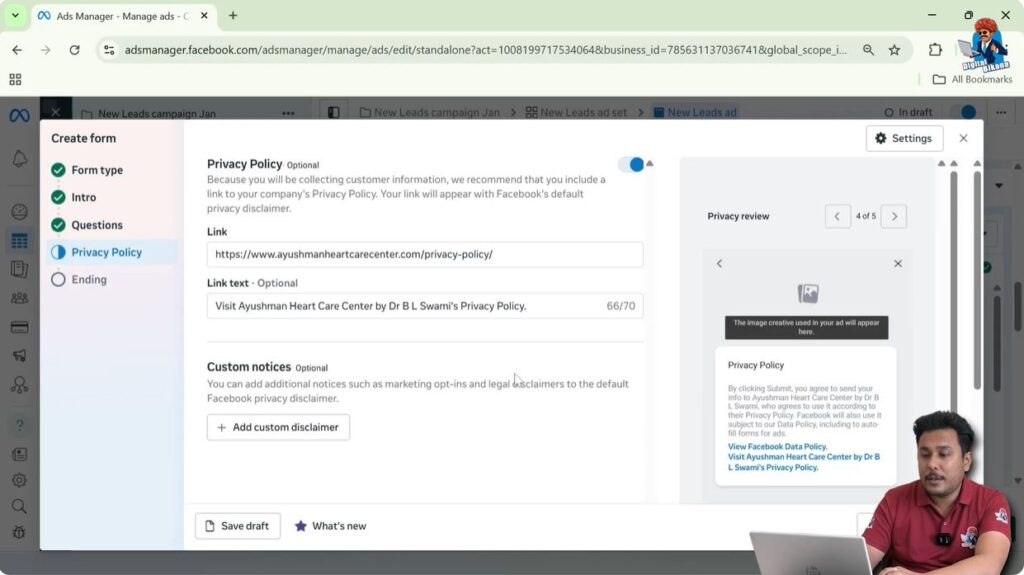
Step 14: Privacy Policy and Thank You Screen
Add a privacy policy link if available.
Customize the thank-you screen with:
- Confirmation message
- Call business button if required
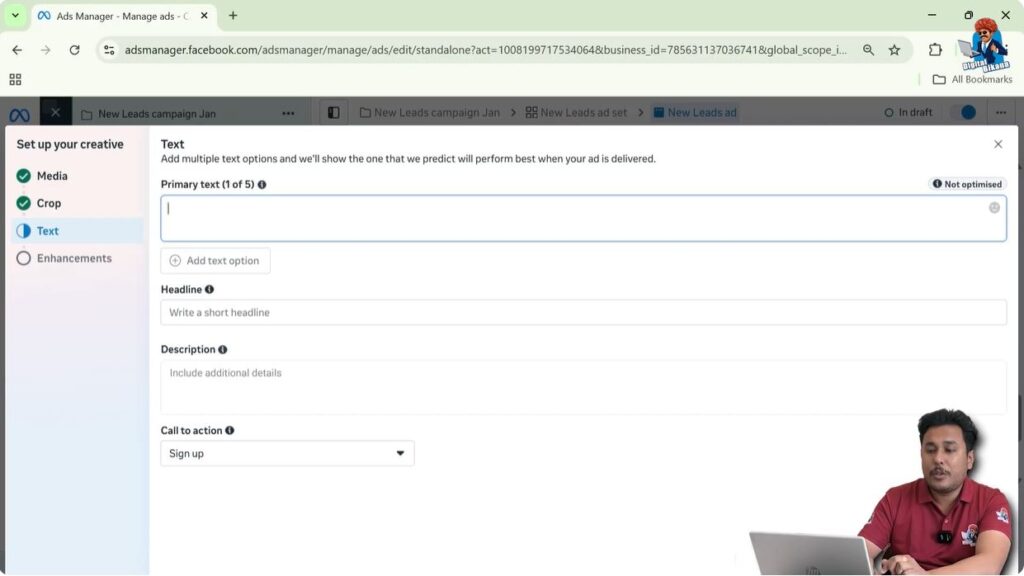
Step 15: Writing Ad Copy and CTA
- Write primary text manually or using AI
- Add a relevant headline
- Choose Book Now as the CTA button
Step 16: Adjusting Creatives for Stories and Reels
Use:
- Square or 4:5 creatives for feeds
- 9:16 creatives for Stories and Reels
Preview placements to ensure proper display.

Step 17: Publishing the Facebook Lead Ad Campaign
After reviewing everything, click Publish.
Your Facebook lead ad campaign will go live based on your selected schedule.
Conclusion
Facebook lead ads are one of the most effective ways to collect inquiries directly on Facebook and Instagram. By using Facebook Ads Manager correctly and following the steps explained above, you can generate high-quality leads while keeping the user experience simple and smooth. You can Download Leads from a Facebook Ad Campaign by following this.
Related Posts