In this article, you will learn how to install WordPress in cPanel on your domain name step by step. Installing WordPress is an important step in building a website after purchasing a domain name and hosting plan and connecting them together. Once WordPress is installed, you will be able to design and manage your website easily.
Before installing WordPress, you should already have purchased a domain name and hosting plan and connected the domain name with the hosting plan. If you have completed these steps, then you are ready to install WordPress on your domain name connected with your hosting plan.
Requirements Before Installing WordPress
Before starting the WordPress installation process, make sure you have already purchased a domain name and a hosting plan and connected the domain name with hosting. After completing these steps, the next step is to install WordPress so that your website can be created and managed easily. Once WordPress is installed, you can start designing your website and adding content.
Opening GoDaddy Website
1. Sign in to GoDaddy Account
First, open your browser and visit GoDaddy by searching GoDaddy on Google and opening the first website. Sign in to your GoDaddy account. After signing in, you will land on the GoDaddy homepage where you can access your purchased products and services.

Accessing My Products
2. Go to My Products
On the GoDaddy homepage, click on the profile icon and then click on My Products. In the My Products section, you will see all the products you have purchased in your GoDaddy account. This includes domain names and hosting plans. From here you can manage your hosting plan and domain names.

Opening Hosting Plan
3. Manage Hosting Plan
In the My Products section, scroll down and find your hosting plan. Once you locate your hosting plan, click on Manage to open your hosting dashboard. You may need to sign in again to your GoDaddy account. After signing in again, you will reach the hosting management page.

Opening cPanel
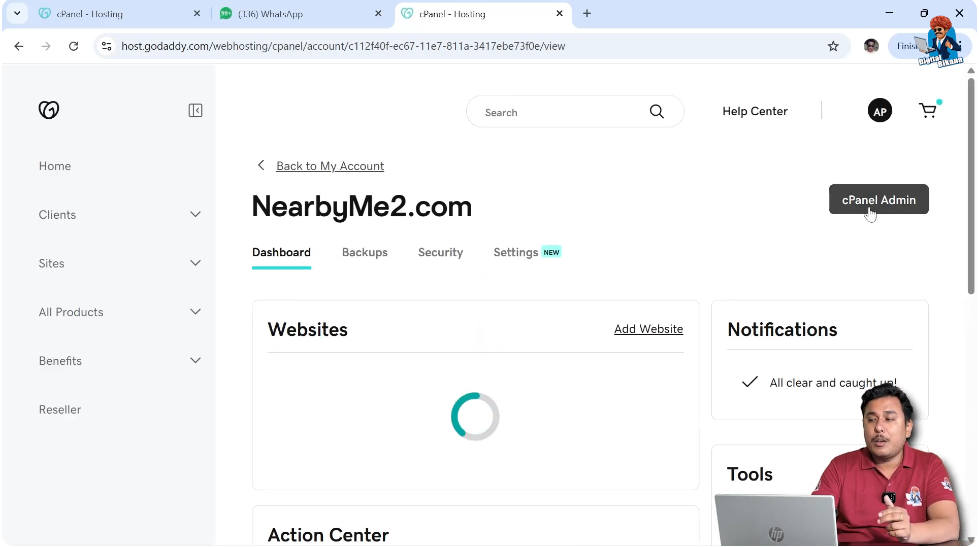
4. Open Control Panel Admin
In the hosting dashboard, you will see an option called Control Panel Admin or cPanel Admin. The control panel is the place where you can manage all the resources of your hosting plan. Control panel works in a similar way to the control panel in a computer system where you manage programs and settings. In the same way, hosting has its own control panel where you can manage hosting settings and resources. Click on Control Panel Admin to open cPanel.
After clicking Control Panel Admin, the cPanel dashboard will open where you can manage domains and applications.
Finding WordPress Application
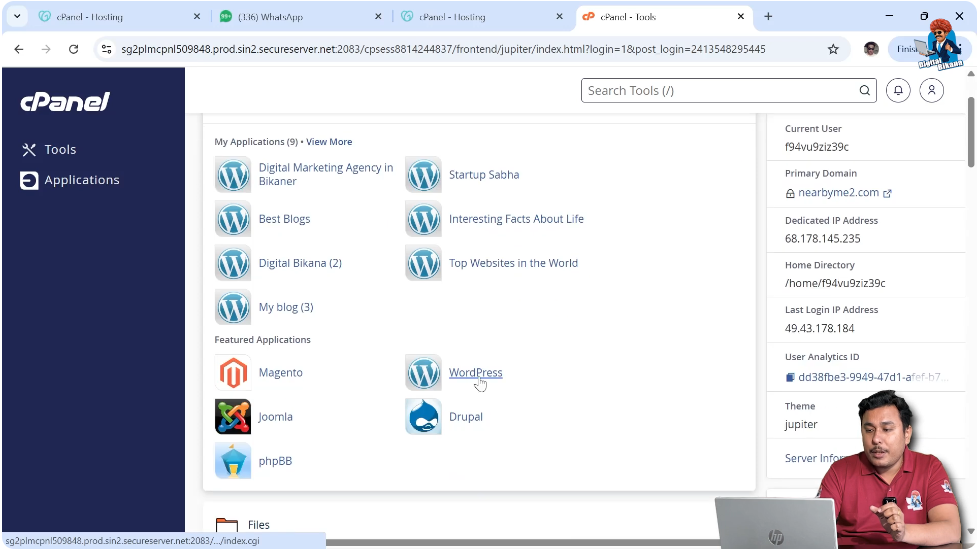
5. Go to Applications Section
Inside cPanel, scroll down and look for the Applications Section where different applications are available. In the Applications section, you will find the WordPress application. Click on the WordPress application because we want to install WordPress on our domain name.
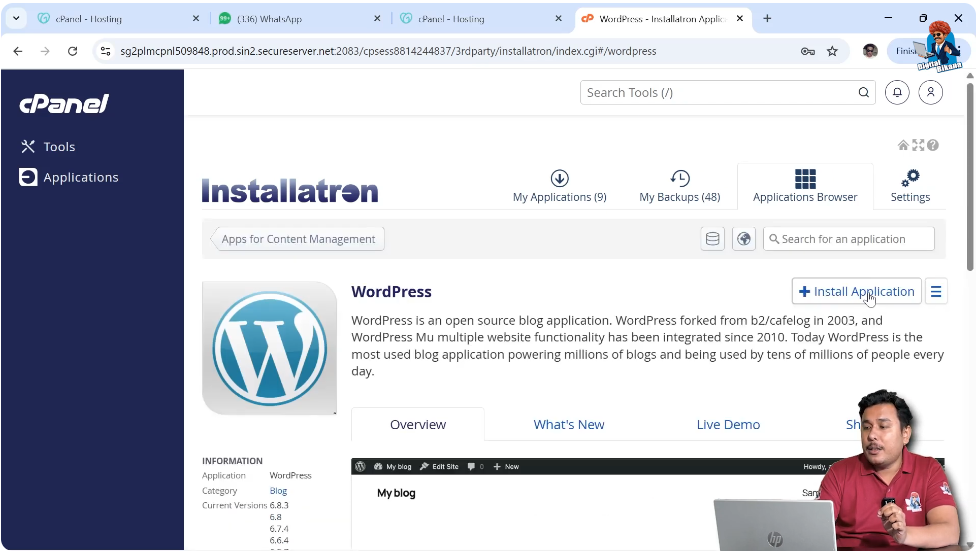
Installing WordPress
6. Click Install Application
After opening the WordPress application page, click on Install Application. Installing WordPress is similar to installing an application from the Play Store or App Store, and the process is very easy. After clicking Install Application, the WordPress installation setup page will open.
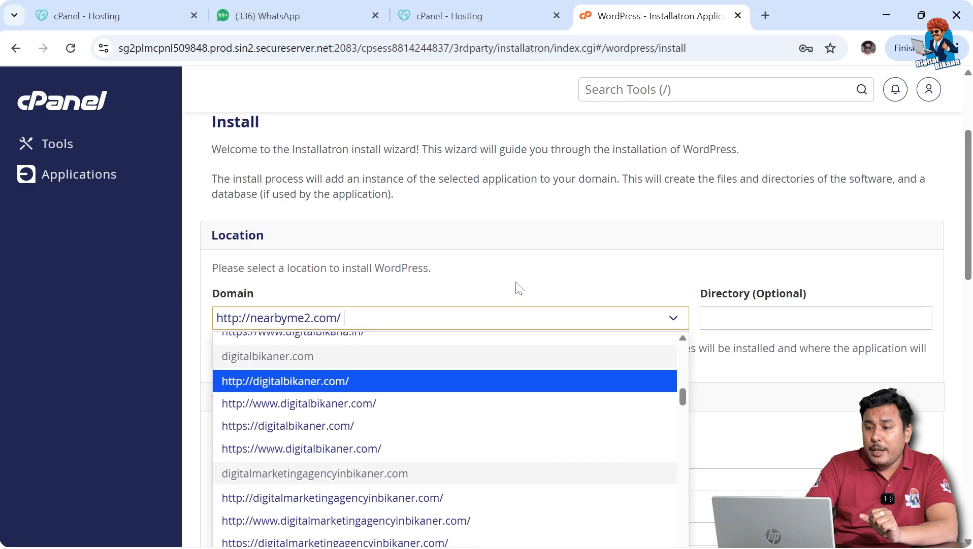
Selecting Domain Name
7. Choose Domain Name
After clicking Install Application, you will be asked to select the domain name where you want to install WordPress. All domain names connected with your hosting plan will be displayed. You need to select the domain name on which you want to install WordPress.
You may see multiple versions of the same domain name. Some versions may not include HTTPS, which means SSL certificate is not installed on those versions. Other versions include HTTPS, which means SSL certificate is installed on those versions. If your hosting plan includes free SSL certificate, then it is better to select the HTTPS version.
You may also see domain versions with www and without www. Both versions work properly and it does not matter which one you select. Some users prefer selecting the www version because it looks more familiar to visitors.
WordPress Installation Settings
8. Select WordPress Version and Language
After selecting the domain name, you will see the WordPress version that will be installed. You can also select the language for WordPress installation. WordPress supports many international languages, but some regional languages may not be available.
Even if WordPress is installed in another language, you can still create your website content in your regional language while designing the website.

Admin Login Details
9. Enter Administrator Details
Next, you need to enter the administrator details. You need to enter the administrator username, password, and email address. Make sure you enter the correct username, password, and email address because these details will be required whenever you log in to the admin dashboard of your website.
Whenever you log in to the backend of your website, the system will ask for the administrator username and password that you set during installation.

Website Information
10. Enter Website Title and Tagline
Next, you can enter the website title and tagline. Entering the website title and tagline is optional because you can change them later when designing your website. However, you can enter them at this stage if you want.

Installing WordPress
11. Click Install
After entering all the required details, scroll down and click on Install. WordPress will start installing on your domain name in cPanel. After the installation is completed, WordPress will be available on your domain name.

Conclusion
Installing WordPress in cPanel on your domain name is a simple process. You need to sign in to your GoDaddy account, open your hosting plan, access cPanel, select the WordPress application, and complete the installation process.
After installing WordPress successfully, your website will be ready for further design and customization. You can then start building your website and adding content.
Related Posts