Many advertisers know how to create a custom audience in Facebook Ads Manager, but they often get confused when it comes to actually using that custom audience in an ad campaign. Creating a custom audience is only the first step. The real performance comes when you correctly select and apply that custom audience while creating a Facebook ad campaign.
In this article, we will clearly explain how to create Facebook ads using a custom audience. The entire explanation is based on practical steps inside Facebook Ads Manager and focuses only on how to select and use an already created custom audience while launching a new ad campaign.
Understanding Custom Audience Before Running Ads
Before running ads using a custom audience, it is assumed that the custom audience has already been created. Custom audiences are usually created from sources such as website visitors, engagement, or other data collected in previous campaigns.
If you do not know how to create a custom audience, you should first learn that process separately. In this explanation, the focus is only on using an existing custom audience in a Facebook ad campaign.
Accessing Facebook Ads Manager
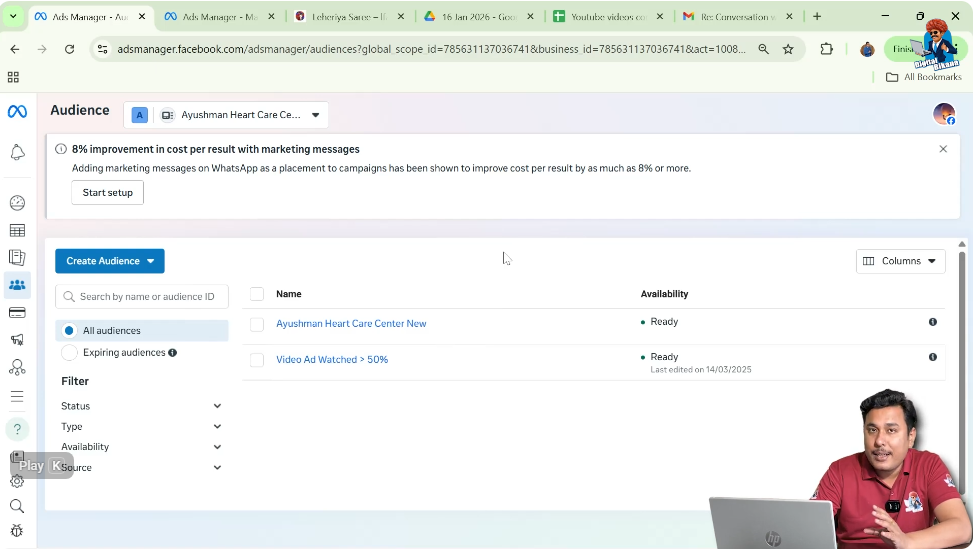
To begin, you need to open Facebook Ads Manager.
Once inside Ads Manager:
- Navigate to the Audiences section
- Verify that your custom audiences are already created
- Confirm that the audiences are available and not in an error state
In the example scenario, two custom audiences are already visible inside the Audiences section.
Purpose of This Setup
The purpose of this setup is not to explain how to create a campaign from scratch, but to explain where and how custom audiences are selected while creating a Facebook ad campaign.
Campaign creation basics such as objectives, creatives, and placements are not covered here.
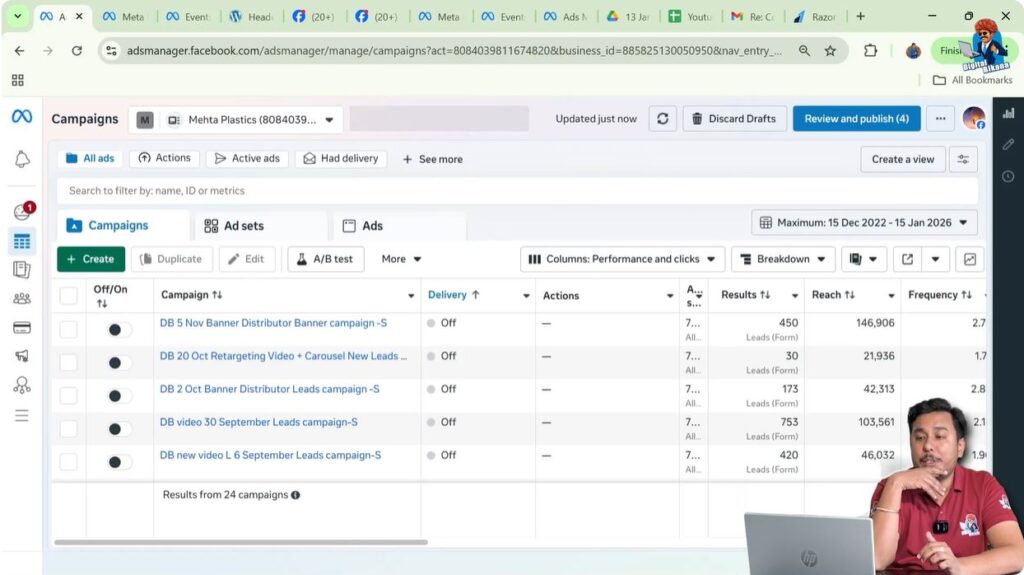
Moving to the Campaign Section
After confirming the custom audiences are ready, the next step is to create a new ad campaign.
From Ads Manager:
- Go to the Campaigns section
- Click on Create to start a new campaign
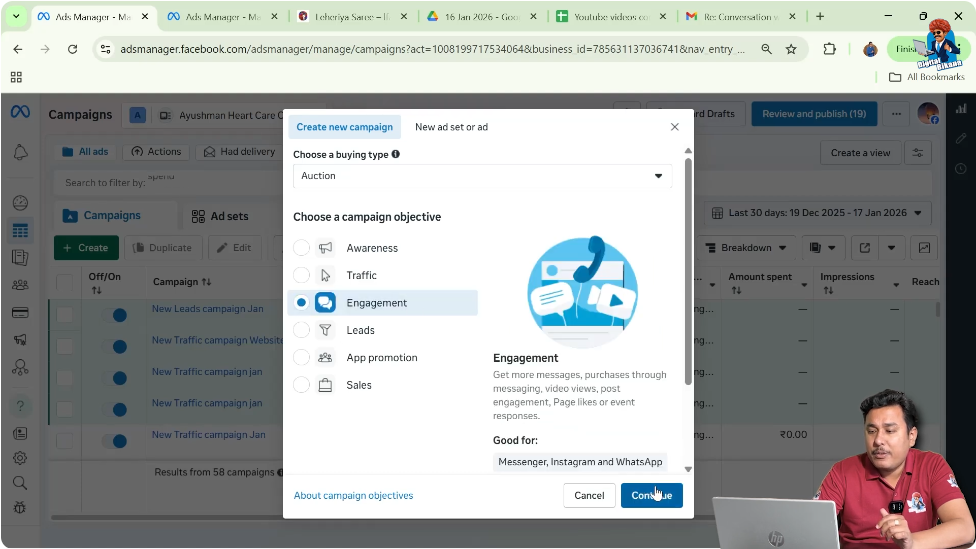
At this stage, Facebook asks you to select a campaign objective.

Selecting a Campaign Objective
For demonstration purposes, any campaign objective can be selected. The objective choice does not affect where custom audiences are selected.
In this example:
- A manual engagement campaign is selected
- The purpose is only to show the placement of custom audience selection
Once the objective is selected, click Continue.
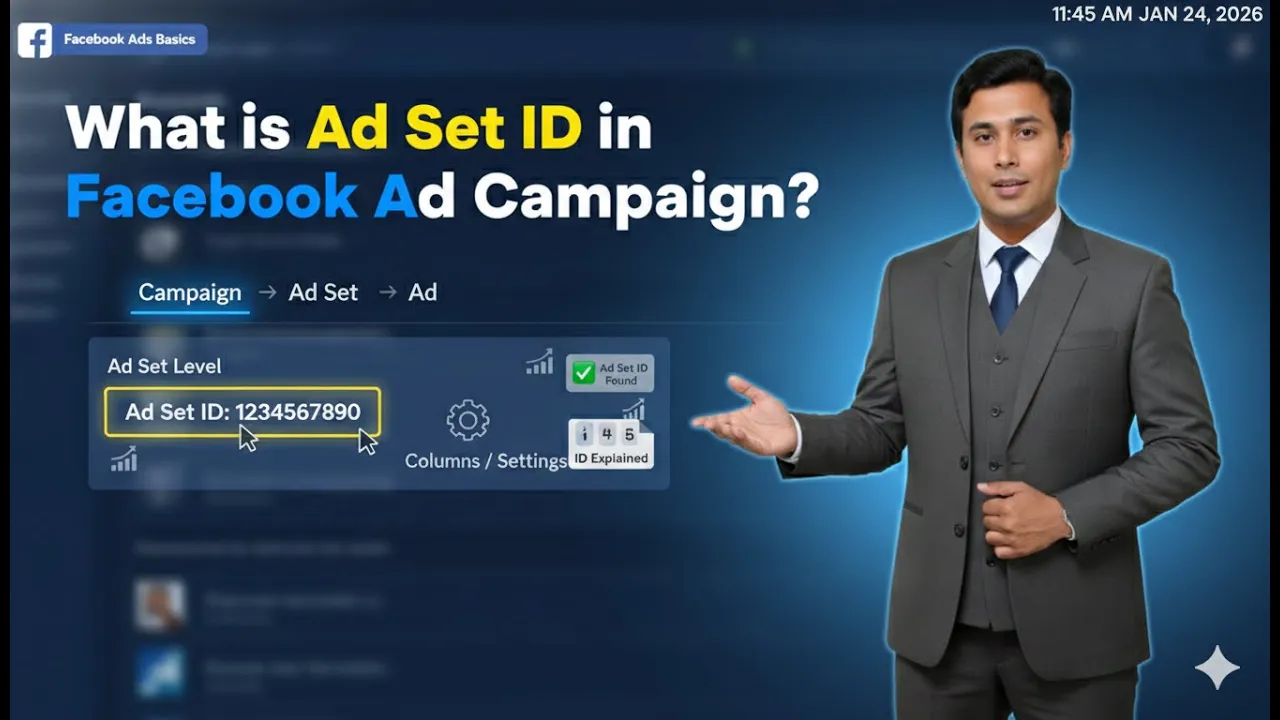
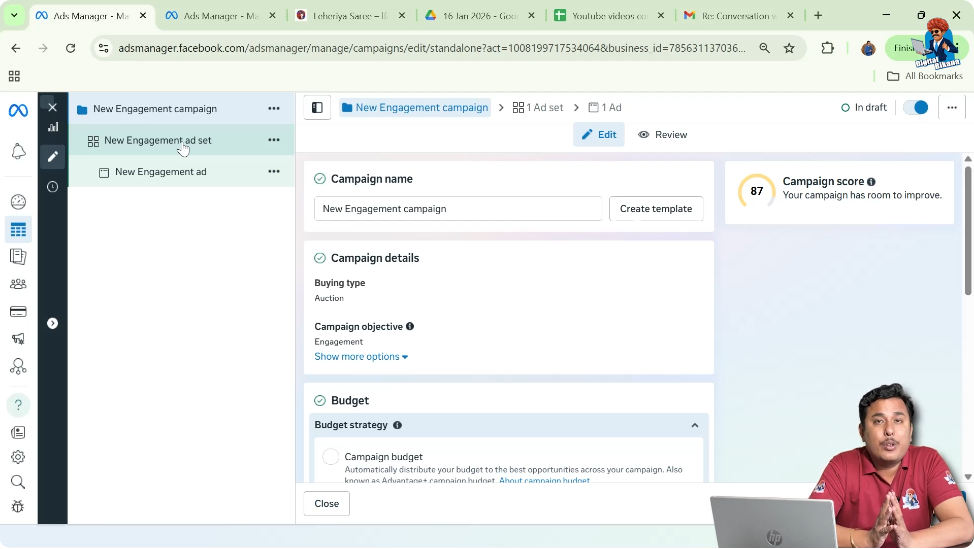
Understanding Campaign Levels in Facebook Ads
Facebook ad campaigns are structured into three levels:
Custom audience selection always happens at the ad set level, not at the campaign or ad level.
This is an important point to remember.
Step 1: Open the Ad Set Level
Navigate to Audience Settings
After selecting the campaign objective, Facebook automatically moves you to the ad set level.
At the ad set level:
- Budget
- Schedule
- Placements
- Audience
are configured.
To select a custom audience, you must scroll to the Audience section.
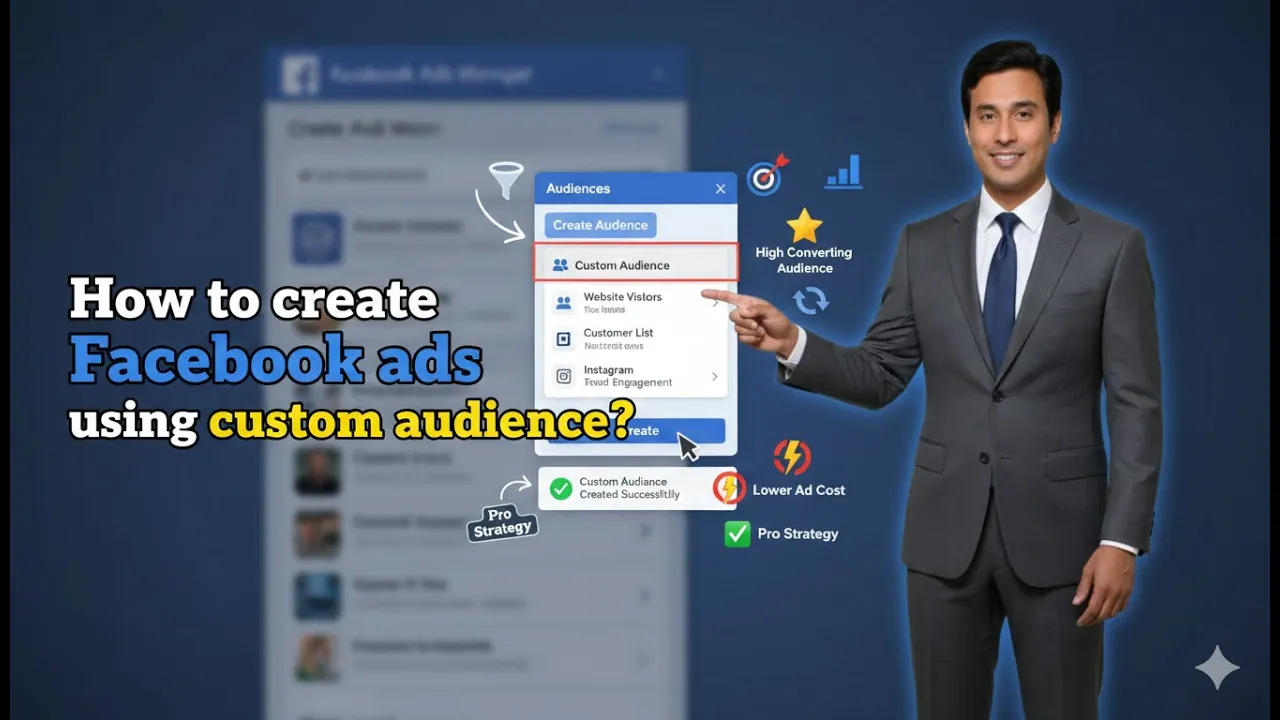
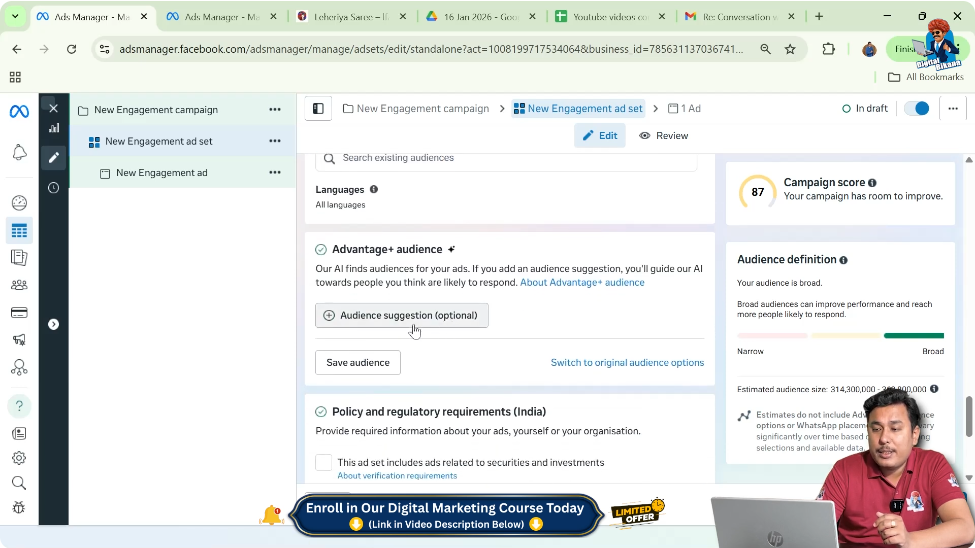
Audience Control Section in Ad Set Level
Inside the ad set level, there is a dedicated section called Audience Control.
This section allows advertisers to decide:
- Who will see the ad
- Which audience type will be targeted
This is where custom audiences are selected.

Step 2: Scroll to Advantage+ Audience Section
Locate Audience Suggestions Option
While scrolling down the audience control section, you will see an option related to Advantage+ audience.
Within this section, there is an option called Audience Suggestions (Optional).
This is where custom audiences can be added to the campaign.
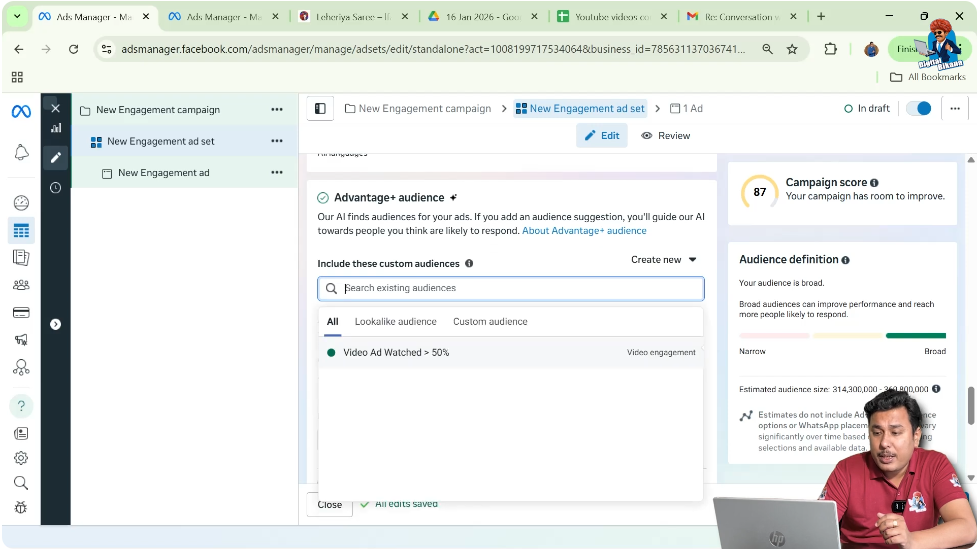
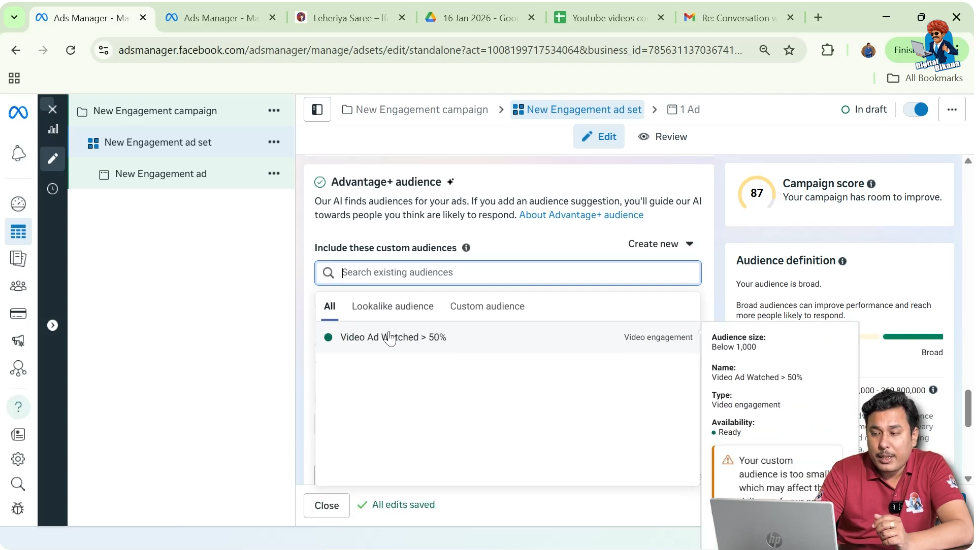
Understanding “Include These Custom Audiences”
When you click on the audience suggestion option, Facebook asks you to include custom audiences.
This means:
- You can tell Facebook which specific custom audiences you want to target
- Facebook will prioritize showing ads to these audiences
This step is crucial for running ads using custom audiences.
Step 3: Click on the Search Bar
Select the Desired Custom Audience
Inside the custom audience selection field:
- Click on the search bar
- A list of all available custom audiences appears
You can now select the custom audience you want to target.
In the example scenario:
- Only one custom audience is available
- That audience is selected
Selecting Multiple Custom Audiences
If you have created multiple custom audiences, you are not limited to selecting just one.
You can:
- Select multiple custom audiences
- Combine them in the same ad set
When multiple custom audiences are selected, Facebook delivers the ad to all selected audiences.
Step 4: Confirm Custom Audience Selection
Ensure Correct Audience Is Added
After selecting the custom audience:
- Double-check that the correct audience name is visible
- Ensure no unintended audience is selected
Once selected, the audience setup for the ad set is complete.
What Happens After Selecting Custom Audience
After the custom audience is selected:
- Facebook uses that audience for ad delivery
- Ads are shown only to people who are part of that custom audience
- No additional setup is required at this stage
You can now continue with the remaining steps of campaign creation.
Importance of Ad Set Level Selection
Many beginners look for custom audience selection at the campaign level or ad level, but it is always done at the ad set level.
Understanding this structure helps avoid confusion and mistakes during campaign creation.
Step 5: Proceed With Campaign Setup
Complete Remaining Ad Set and Ad Details
After selecting the custom audience:
- You can set budget and schedule
- Choose placements
- Create ad creatives at the ad level
These steps are standard and independent of custom audience selection.
Why Custom Audience Selection Is Simple
Selecting a custom audience in Facebook Ads Manager is a simple process once the audience is already created.
The key steps are:
- Open ad set level
- Go to audience section
- Select custom audience from the list
No advanced configuration is required beyond this.
Common Mistake While Using Custom Audience
A common mistake advertisers make is:
- Forgetting to select the custom audience
- Leaving the audience section unchanged
- Assuming Facebook will automatically use the custom audience
Custom audiences must always be manually selected in the ad set level.
Verifying Audience Selection Before Publishing
Before publishing the campaign:
- Recheck the ad set audience section
- Confirm that the custom audience is selected
- Ensure no unintended targeting is applied
This verification helps prevent incorrect ad delivery.
Why Custom Audience Ads Perform Better
Custom audience ads usually perform better because:
- They target people who already interacted with the business
- They are more relevant
- Engagement and conversion chances are higher
Correct selection ensures these benefits are achieved.
Final Explanation in Simple Words
To run Facebook ads using a custom audience:
- Go to Ads Manager
- Create a new campaign
- Open the ad set level
- Scroll to the audience section
- Select your custom audience from the list
That’s all that is required.
Final Conclusion
Creating Facebook ads using a custom audience is a straightforward process once the custom audience is already created. The most important part is understanding that custom audiences are selected at the ad set level, inside the audience control section.
By navigating to the campaign section, selecting an objective, opening the ad set level, and choosing the desired custom audience, advertisers can easily deliver ads to their custom audience. Multiple custom audiences can also be selected if needed.
Once the audience is selected, the rest of the campaign setup follows the standard Facebook Ads process. Proper selection of custom audiences ensures that ads are delivered to the right people and helps improve campaign performance.
Related Posts