Changing the URL of a blog post in a WordPress website is a simple and straightforward process. In WordPress, the URL of a blog post is controlled by something called a slug. By editing the slug, you can easily update the URL of any blog post.
In this article, you will learn two different methods to change the URL of a blog post in WordPress. Both methods are easy to follow and can be used depending on your preference.
Opening the Posts Section in WordPress Dashboard
To begin, log in to your WordPress admin dashboard.
Once you are inside the dashboard, look at the left-side toolbar. You will see a section called Posts. Click on Posts, and then click on All Posts.
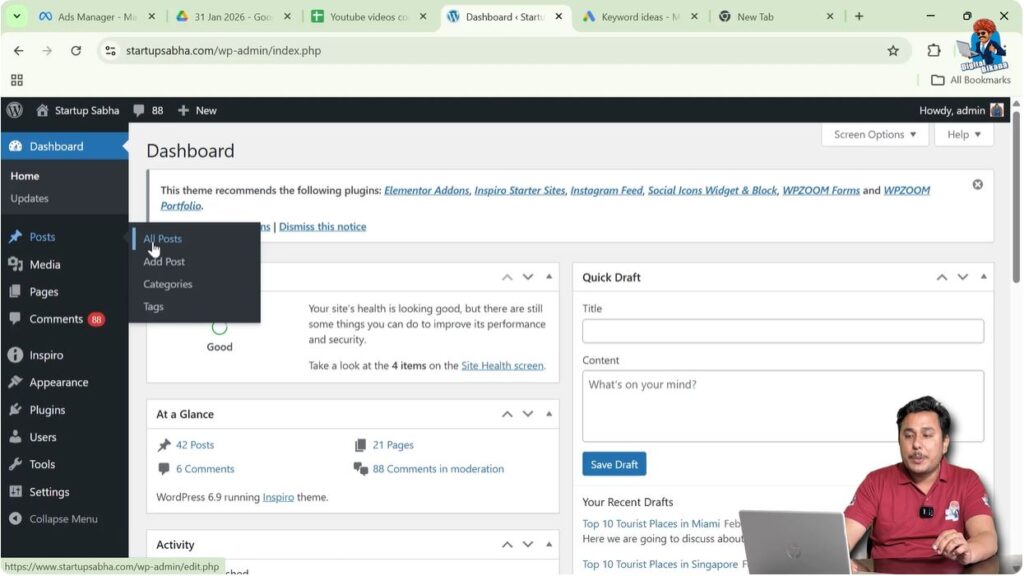
Now you will see a list of all your blog posts.
From this list, choose the blog post whose URL you want to change.
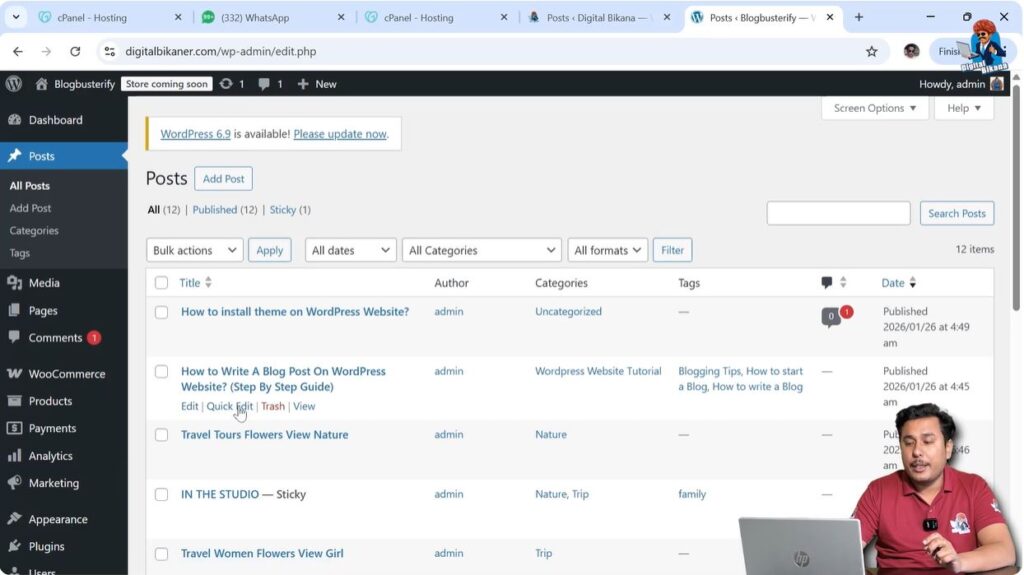
When you move your cursor over the title of any blog post, you will see two options:
- Edit
- Quick Edit

Both of these options can be used to change the URL of a blog post. Let us understand each method one by one.
Method 1: Changing the URL Using Quick Edit
The first method is using the Quick Edit option. This is a faster way to change the slug without opening the full editor.
When you move your cursor over the title of the post, click on Quick Edit.
As soon as you click on Quick Edit, several options will appear, including an option called Slug.
The slug is the part of the URL that comes after your domain name or category.
Step 1 – Click on Quick Edit
Go to Posts → All Posts.
Hover over the blog post title.
Click on Quick Edit.
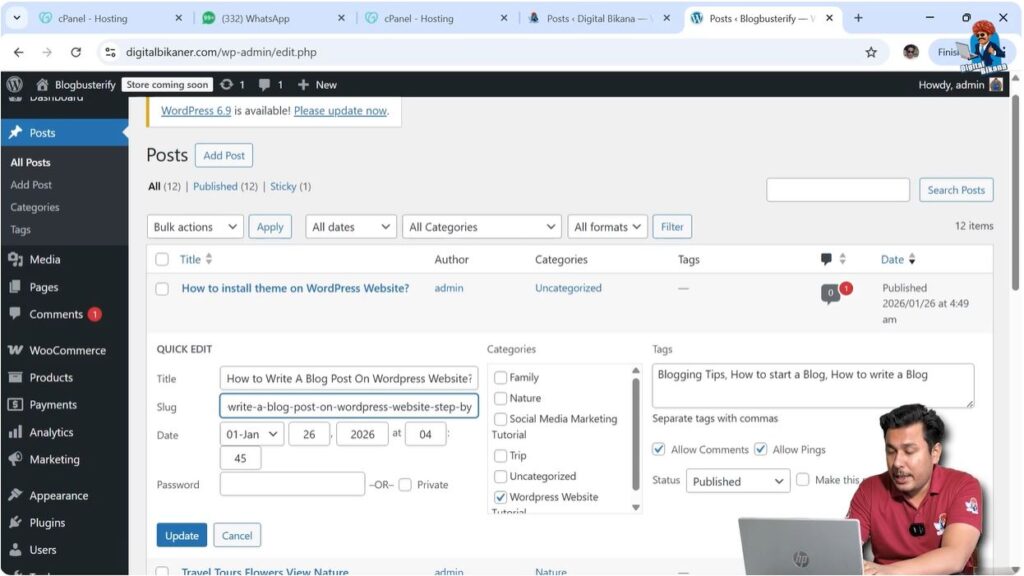
Step 2 – Change the Slug
In the Quick Edit panel, locate the Slug field.
Here you can modify the URL of your blog post.
While editing the slug, remember that spaces are not allowed in URLs. Instead of spaces, you must use dashes (-).
For example, instead of writing:
how to write blog post
You should write:
how-to-write-blog-post
Using dashes makes the URL readable and correct.
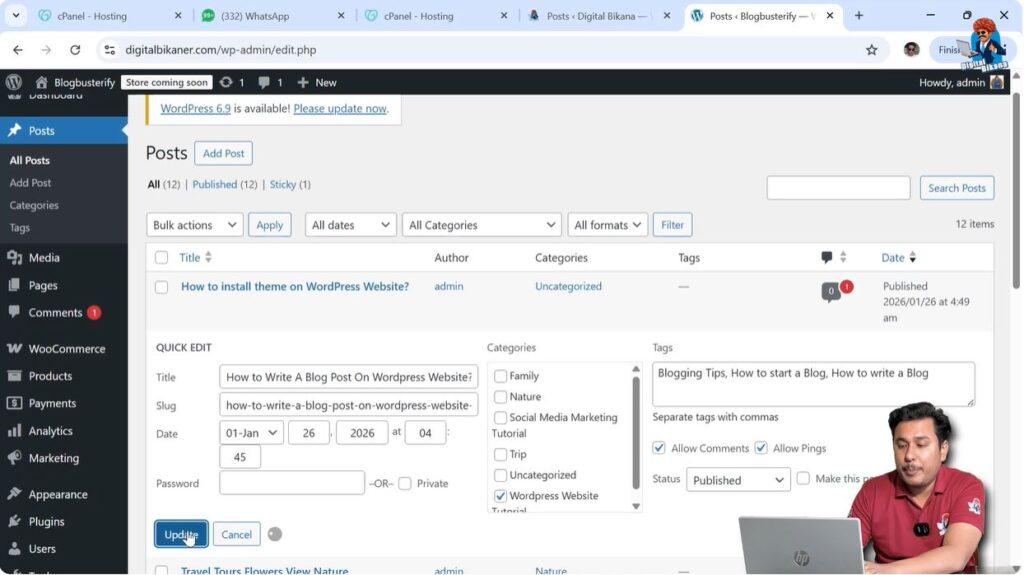
After entering the new slug, click on Update.
Step 3 – Check the Updated URL
After clicking Update, the URL of your blog post will be changed.
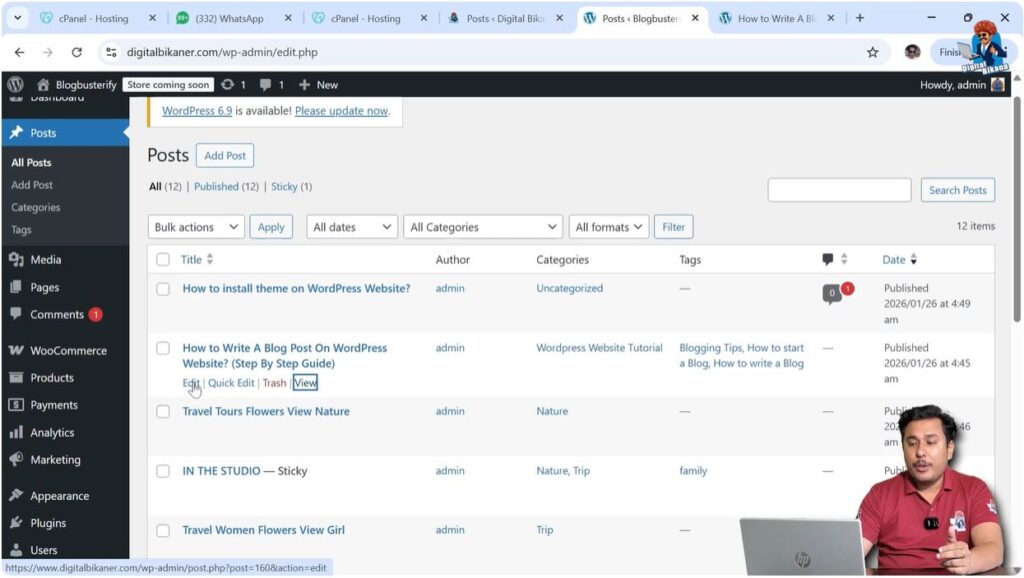
To verify the change, right-click on the View option under the post title.
Click on Open link in new tab.
When the page opens in a new tab, check the URL in the address bar. You will see that the slug has been updated according to the changes you made.
This completes the first method of changing the URL.

Method 2: Changing the URL from the Post Editor
The second method involves editing the blog post directly from the WordPress editor.
Go back to Posts → All Posts.
Hover over the blog post title and click on Edit.
This will open the full WordPress editor.
Understanding the Post and Block Sections
Inside the editor, look at the right-side toolbar. You will see two options:
- Post
- Block
Make sure you are in the Post section.
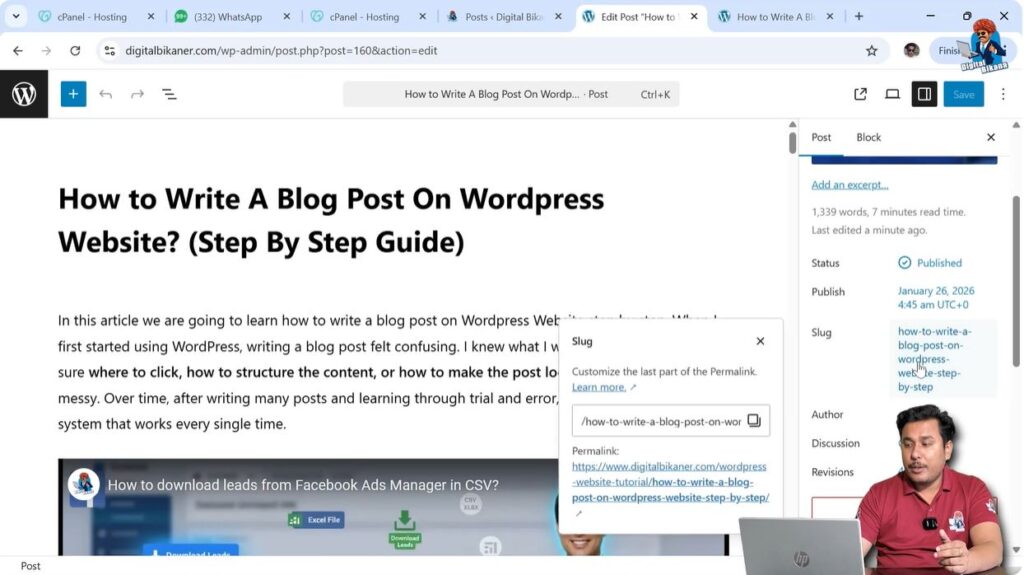
Scroll down in the Post settings panel until you find the Slug option.
When you click on the Slug field, you will see the permalink of your blog post.
The permalink is the full URL of your page.
Step 1 – Open the Post Editor
Go to Posts → All Posts.
Click on Edit under the blog post title.
Open the Post settings panel on the right side.
Step 2 – Modify the Slug
Scroll down and locate the Slug field.
Click on the slug and edit it as needed.
For example, if your URL previously included:
how-to-write-blog-post-on-wordpress-website-step-by-step
You can remove certain words such as:
step-by-step
After editing the slug, the URL will automatically update in the permalink preview.
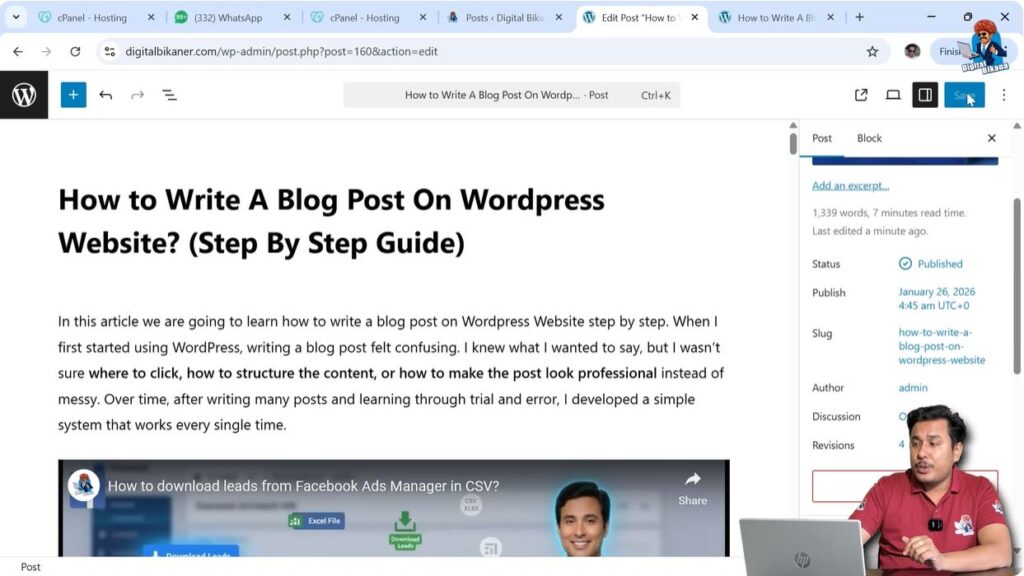
Step 3 – Save the Changes
After making changes to the slug, click on Save or Update.
This will apply the changes to your blog post.
To verify the updated URL, click on the View Post icon available in the top right corner.
When the page opens, check the address bar to confirm that the URL has been updated.
Why Category Appears in the URL
Sometimes students ask why a category name appears in the URL before the slug.
For example:
yourdomain.com/wordpress-website-tutorial/how-to-write-blog-post
The reason is the permalink structure settings.
If your permalink structure is configured to include the category in the URL, then WordPress automatically displays the category before the slug.
This setting can be modified from the permalink settings in WordPress.
If you want the category to appear before the slug, you can configure your permalink structure accordingly.
If not, you can change the permalink structure so that only the post name appears in the URL.
Understanding Permalink Structure
The permalink structure determines how URLs are formatted on your WordPress website.
Depending on your settings, the URL may include:
- Category
- Post name
- Date
- Custom structure
If your permalink includes the category, then it will always appear before the slug.
Changing the slug only modifies the last part of the URL, not the entire structure.
Important Points to Remember
While changing the URL of a blog post, keep the following points in mind:
- Do not use spaces in the slug.
- Always use dashes instead of spaces.
- Keep the slug short and meaningful.
- Avoid unnecessary words.
- After updating the slug, always verify the new URL.
Changing the URL properly ensures that your blog post remains organized and readable.
Verifying the Updated URL
After making changes using either method, always verify that the URL has been updated correctly.
You can do this by:
- Clicking on View Post
- Opening the post in a new tab
- Checking the address bar
If the slug is correct, the URL will reflect the changes you made.
Conclusion
Changing the URL of a blog post in a WordPress website is very easy. You can do it using two methods: Quick Edit or the full Post Editor.
In the Quick Edit method, you can directly modify the slug from the post list section. In the second method, you can open the post editor and change the slug from the Post settings panel.
Always remember that spaces are not allowed in URLs, so you must use dashes instead. After updating the slug, click on Update or Save and verify the changes by viewing the post.
By following these simple steps, you can easily update the URL or change the URL of any blog post in your WordPress website.
Related Posts