Adding tags in a WordPress blog post is an important step while creating content. Tags help organize blog posts and improve the search visibility of your website. Proper use of tags makes it easier for users and search engines to understand the topic of your blog post.
In this article, you will learn how to add tags in a WordPress blog on a WordPress website step by step. The process is simple and can be done while creating a new blog post.
Accessing the WordPress Admin Dashboard
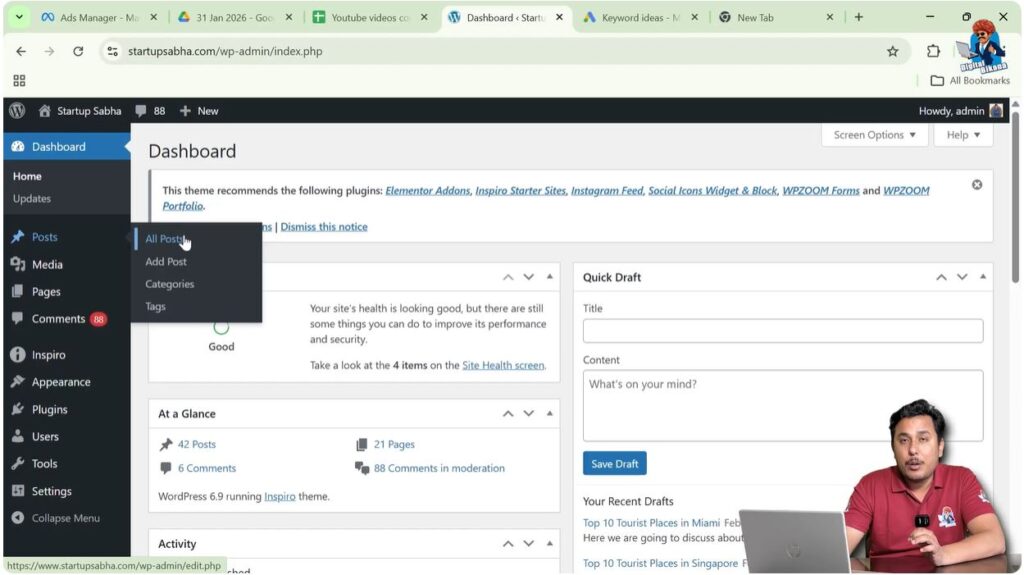
To add tags to a WordPress blog post, first you need to log in to your WordPress admin dashboard. The dashboard allows you to manage posts, pages, media, plugins, and settings of your website.
After logging into your WordPress admin dashboard, you will see the left-side toolbar where different options are available.
From here, you need to go to the Post section.
Opening the Post Section
In the left-side toolbar, you will find the Post option. From this section, you can:
- View existing blog posts by clicking on All Posts
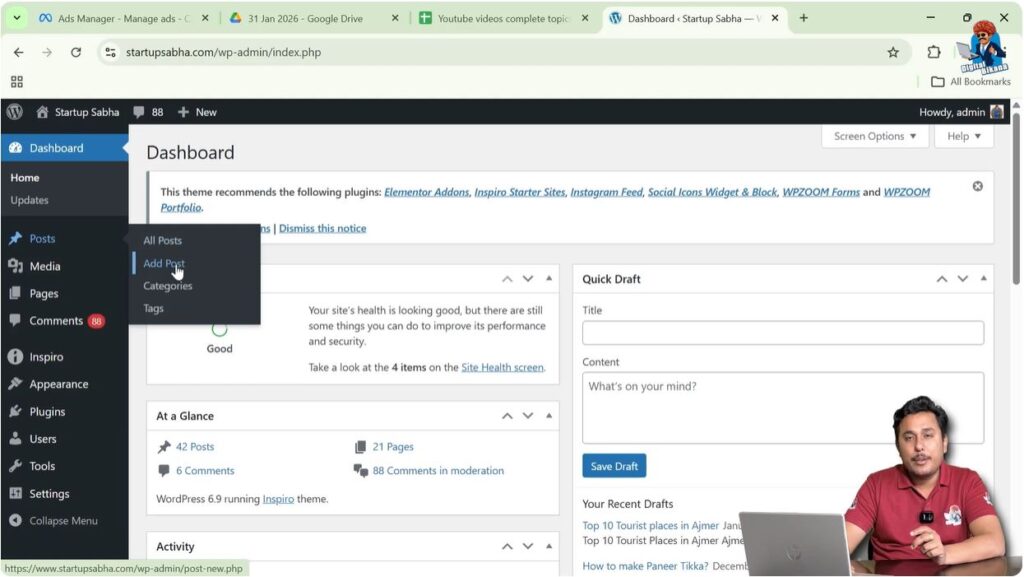
- Create a new blog post by clicking on Add Post
You can add tags while creating a new blog post or while editing an existing blog post.
In this example, a new blog post is being created by clicking on Add Post.
Creating a New Blog Post
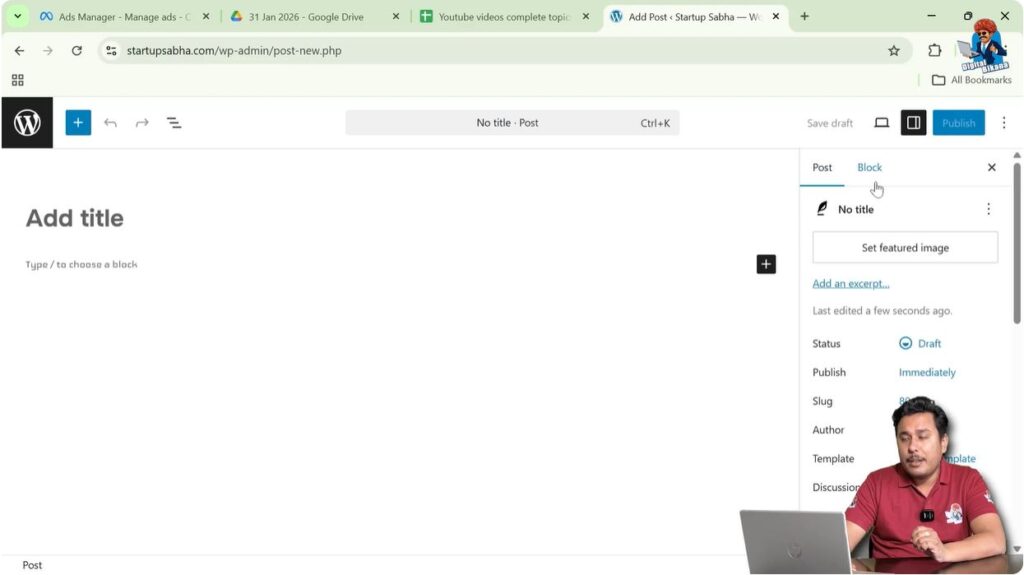
After clicking on Add Post, the WordPress editor will open.
Here you can write your article and enter the title of your blog post.
You can write your content based on the topic you want.
Once the editor is opened, you will see the settings toolbar on the right side.
Opening the Settings Toolbar
On the right side of the screen, there is a settings toolbar that contains two sections:
- Post
- Block
If this toolbar is not visible on your screen, you need to click on the Settings icon present near the Publish button.
After clicking the settings icon, the settings toolbar will appear on the right side.
To add tags, you need to open the Post section of the settings toolbar.
Adding Tags in WordPress Blog Post
In the Post settings section, scroll down until you see the Tags option.
From here, you can create and add tags to your blog post.
Tags should always be related to your blog topic.
Tags help organize blog posts and make them easier to find.
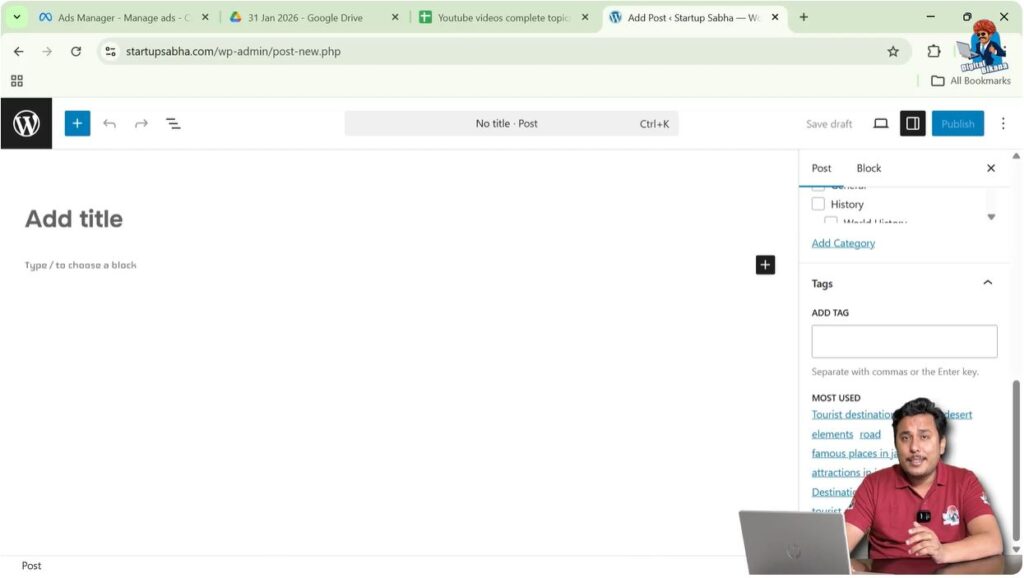
Creating Tags
To create a tag, simply type the tag name inside the tag field.
For example, if your topic is Top 10 Tourist Places in Las Vegas, then you should create tags related to this topic.
Example tags include:
- Tourist attractions in Las Vegas
- Places to visit in Las Vegas
- Tourist destinations in Las Vegas
After typing a tag name, press Enter.
The tag will be created immediately.

Adding Multiple Tags
You can add multiple tags to a single blog post.
For example:
- Tourist attractions in Las Vegas
- Places to visit in Las Vegas
- Tourist destinations in Las Vegas
Each tag should be relevant to the blog post topic.
Adding relevant tags helps search engines understand your content better.

Importance of Tags for SEO
Tags are important for search engine optimization because tag pages have their own URLs.
These tag URLs can appear in search engine result pages.
If your tags rank in search engines, users may visit your website through those tag pages.
When users open a tag page, they will see all blog posts associated with that tag.
From there, they can open your blog post and read it.
This helps increase organic traffic to your website.
Using High Search Volume Tags
It is recommended to use tags that have high search volume.
High search volume tags have better chances of ranking in search engines.
If your tag pages rank in search engines, they can drive traffic to your blog posts.
This traffic helps improve the ranking of your blog post in search engine result pages.
Choosing Relevant Tags
Tags should always be relevant to your blog topic.
For example, if your blog post is about Top 10 Tourist Places in Las Vegas, then your tags should be related to tourism in Las Vegas.
Relevant tags help users find useful information.
Irrelevant tags should be avoided because they do not help users or search engines.
How Tags Help in Ranking
When your tags rank in search engines, they bring traffic to your website.
This traffic reaches your tag pages first.
From the tag pages, users can open your blog posts.
As your blog posts start receiving organic traffic, they may also start ranking in search engines.
This process helps improve the overall SEO of your website.
Example of Tag Creation
Suppose your blog topic is Top 10 Tourist Places in Las Vegas.
You can create tags such as:
- Tourist attractions in Las Vegas
- Places to visit in Las Vegas
- Tourist destinations in Las Vegas
These tags are directly related to your topic.
If these tags rank in search engines, they will drive traffic to your blog post.
Users who search for these keywords may land on your tag pages.
From there, they can open and read your blog post.
Benefits of Adding Tags
Adding tags provides several benefits:
- Helps organize blog posts
- Improves search visibility
- Increases organic traffic
- Helps users find related content
- Improves SEO performance
Proper tagging improves the structure of your website.
Saving the Blog Post
After adding tags, you need to save your blog post.
Click on the Publish button if you are creating a new blog post.
Click on the Update button if you are editing an existing blog post.
Once saved, your tags will be attached to the blog post.
Conclusion
Adding tags in a WordPress blog post is a simple and useful process that helps improve the organization and search visibility of your website. Tags help search engines understand your content and can bring additional organic traffic through tag pages.
You can easily add tags from the Post settings section while creating or editing a blog post. Always try to use relevant and high search volume tags so that your tag pages can rank in search engines and drive traffic to your blog posts.
This is how you can create and add tags in a blog post on a WordPress website step by step.
Related Posts