
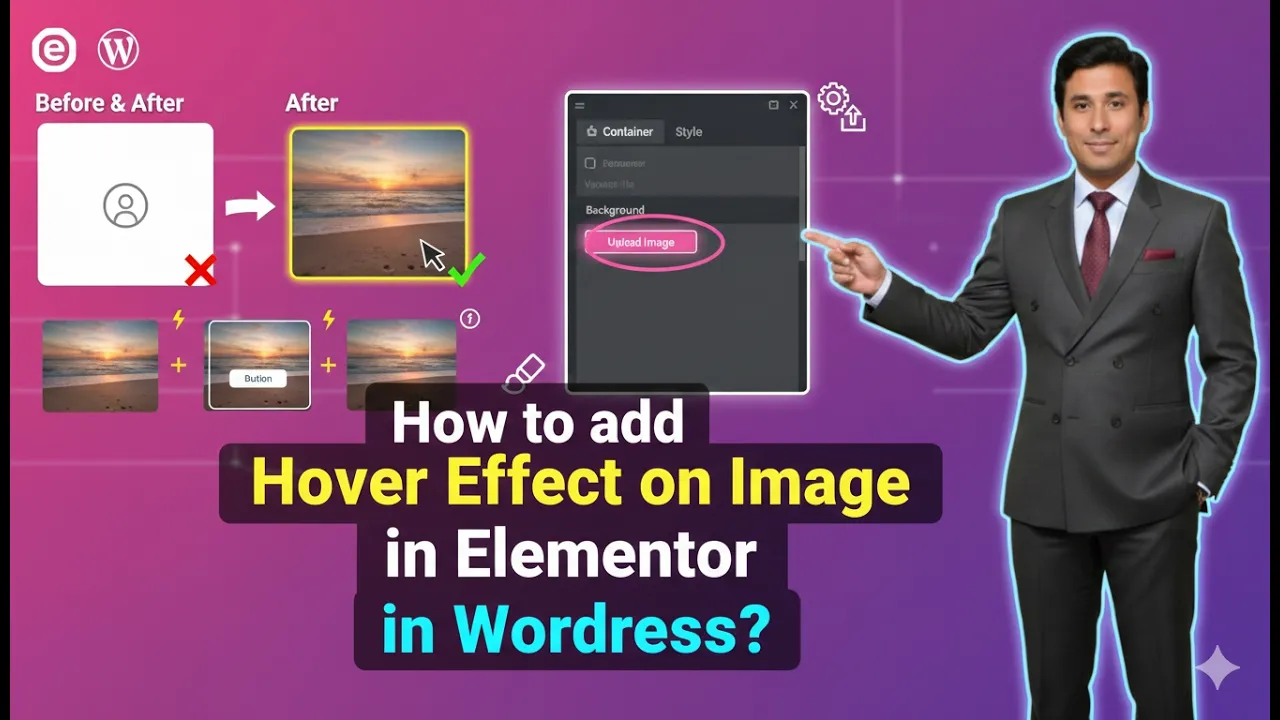
Adding hover effects to images is a useful design technique that enhances the visual interaction of a website. Hover effects allow images to change when a user moves their cursor over them. This feature is commonly used in modern website design to create engaging layouts and improve user experience.
Elementor provides simple options to add hover effects to images using container background settings. By using the normal and hover background options, you can easily change the appearance of an image when a user moves the mouse over it.
In this guide, you will learn how to add a hover effect on an image in Elementor while designing a webpage on a WordPress website. The process includes creating a container, adding a background image, adjusting the container height, setting the hover image, and controlling the image position and transition effect.
Opening Elementor While Creating a Page
Before adding a hover effect to an image, you first need to open the Elementor editor.
When you create a new page using Elementor, the editing interface appears with the page preview in the center of the screen and the Elementor toolbar on the left side. The toolbar contains various widgets and settings used to design the page.
In the middle of the page preview area, you will see a plus icon (+). This icon is used to create a new container or section where elements can be added.

To start designing the layout, you first need to create a container.
Creating a Container in Elementor
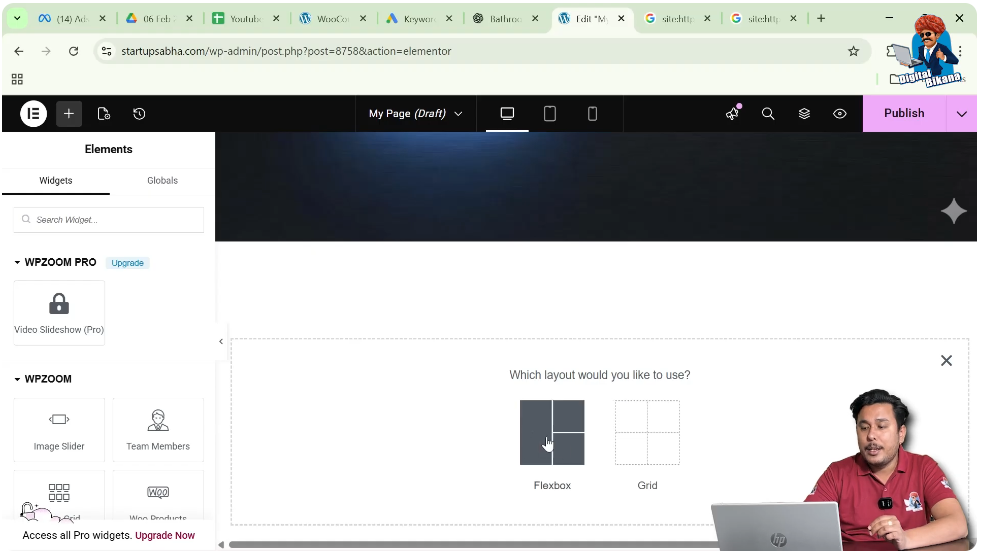
Containers are used to organize elements on a webpage. Elementor allows you to create containers using different layout systems such as Flexbox or Grid.
Step 1: Click the Plus Icon
When editing a page in Elementor, click the plus icon located in the center of the screen. This opens the layout options.
Step 2: Select Flexbox
After clicking the plus icon, Elementor asks you to choose the layout type. You can select Flexbox for creating the container.
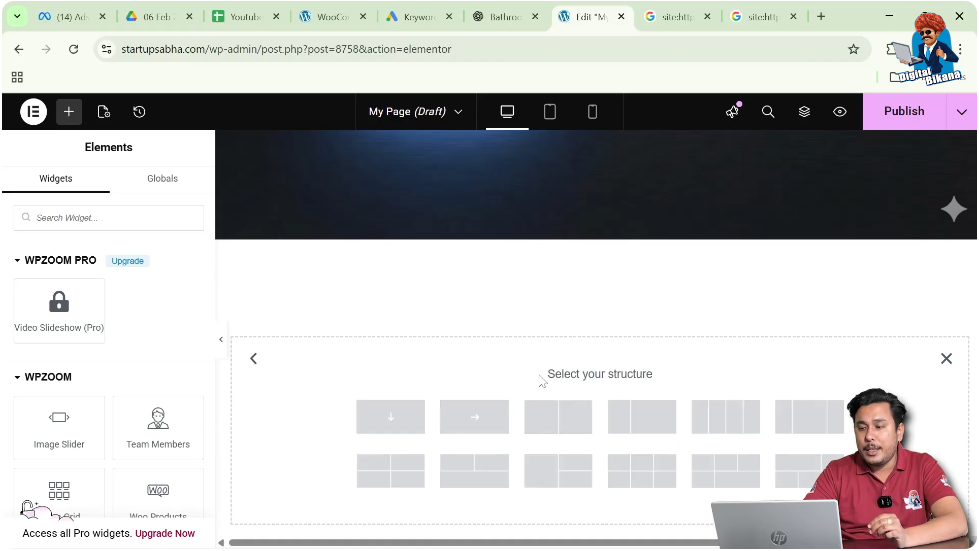
Step 3: Choose the Container Structure
Once Flexbox is selected, Elementor shows several container structures.
For this example, you can select the third structure or a simple structure where the direction is set to column.
After selecting the structure, the container will be created on the page.
Adding an Image to the Container
After creating the container, the next step is to add an image inside the container background.
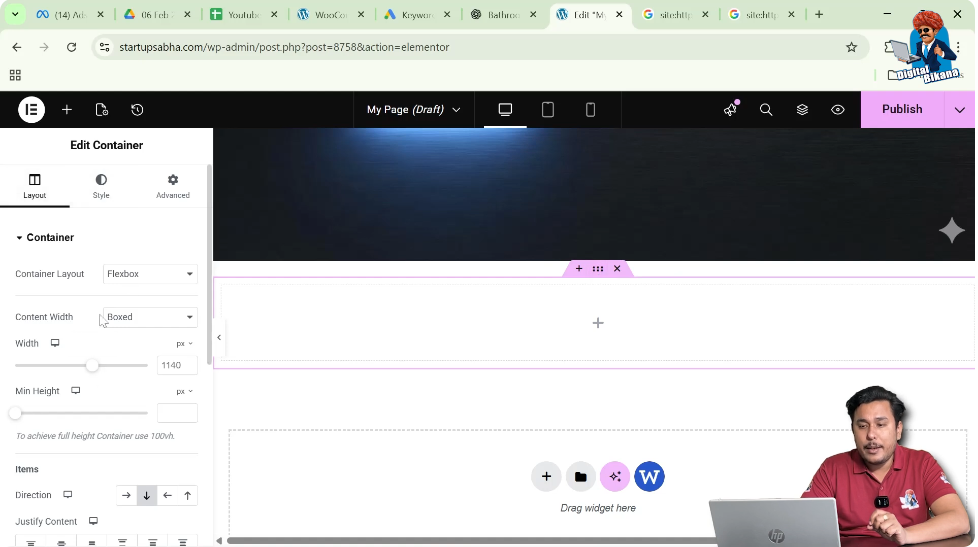
Step 1: Edit the Container
At the top of the container, you will see a six dots icon. These dots represent the container control.
Clicking these six dots allows you to edit the container settings.
Once clicked, the editing options appear in the left-side toolbar.

Step 2: Understand Container Settings
In the left-side panel, three types of settings are available:
- Layout
- Style
- Advanced
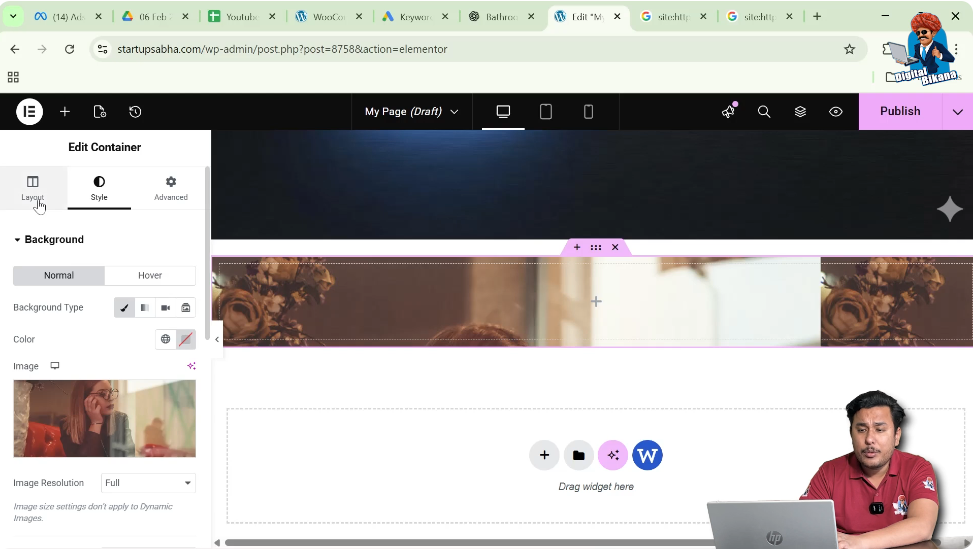
To add a background image, you need to go to the Style settings.
Opening the Style Settings
Click on the Style tab in the container settings.
Inside the Style section, you will see different design options such as:
- Background
- Background Overlay
- Border
- Shape Divider
To add the image, you need to open the Background settings.
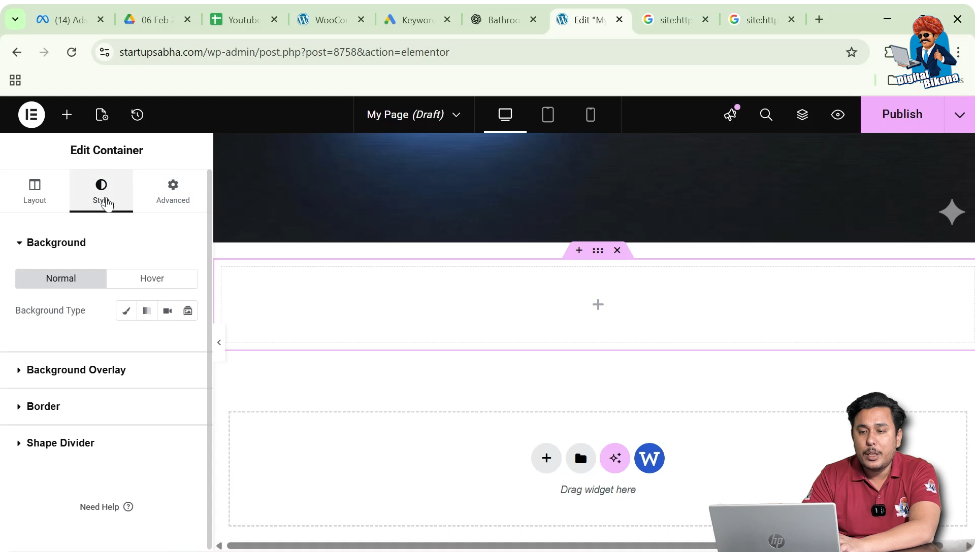
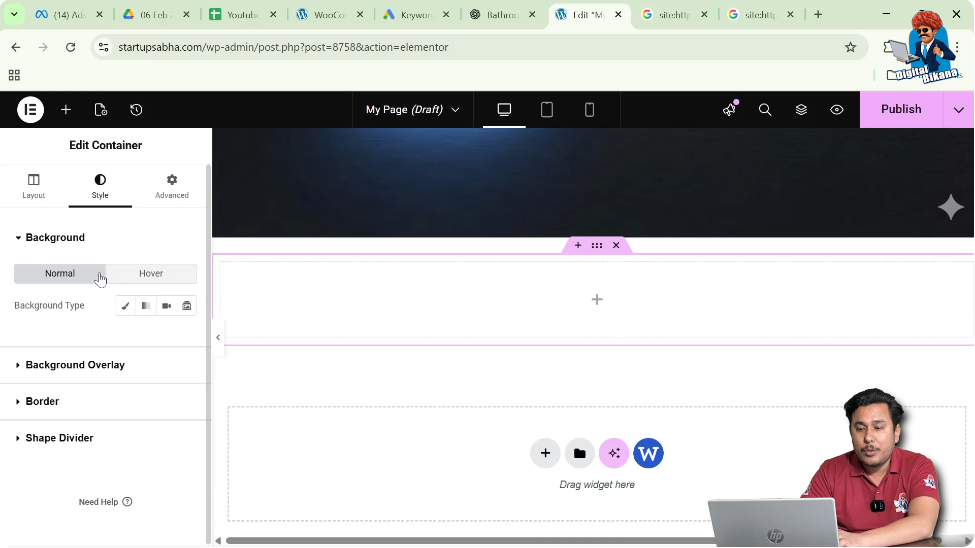
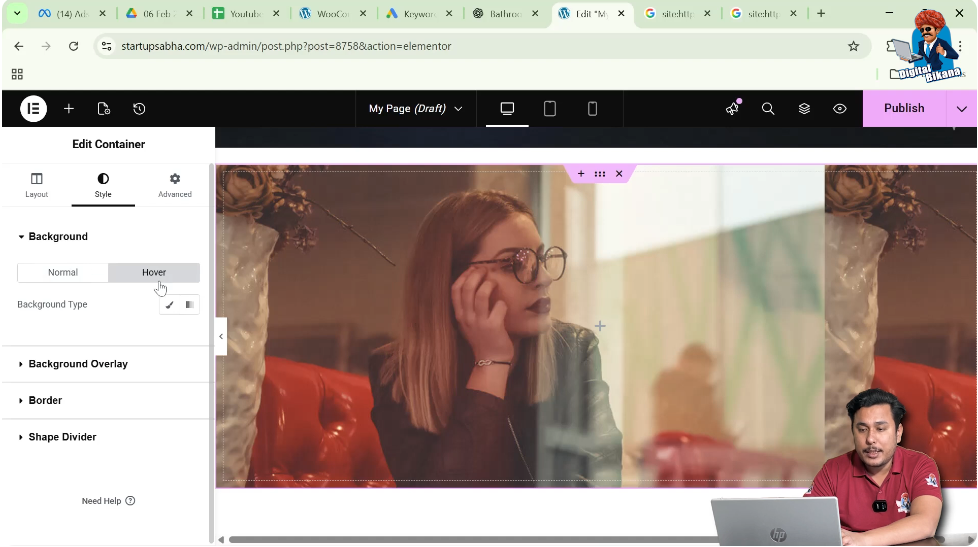
Understanding Normal and Hover Background
Inside the Background settings, two tabs are available:
- Normal
- Hover
The Normal tab controls how the image appears normally on the container.
The Hover tab controls how the image appears when a user moves the cursor over the container.
First, you need to add the normal image.
Adding the Normal Background Image
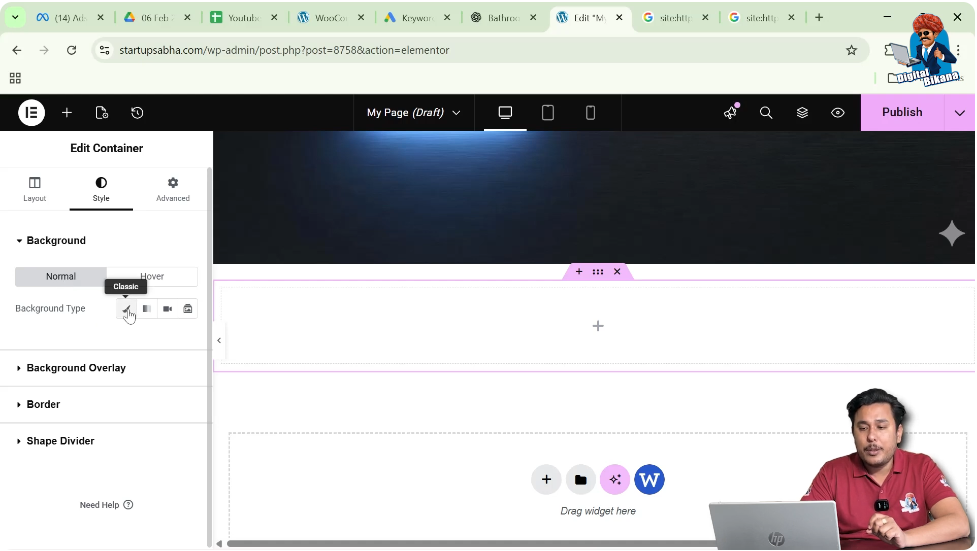
Step 1: Select Background Type
Inside the Normal tab, select Classic as the background type.
The Classic background option allows you to add either a color or an image.
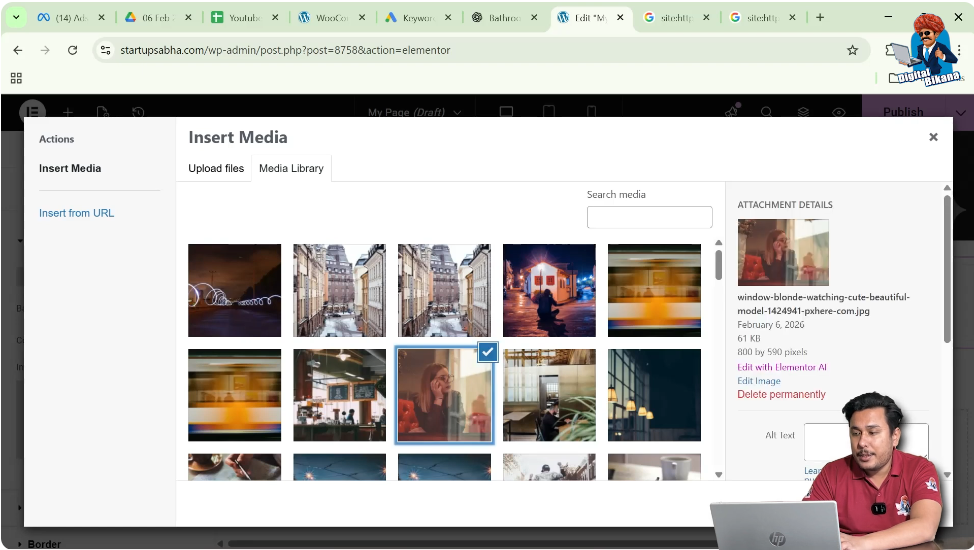
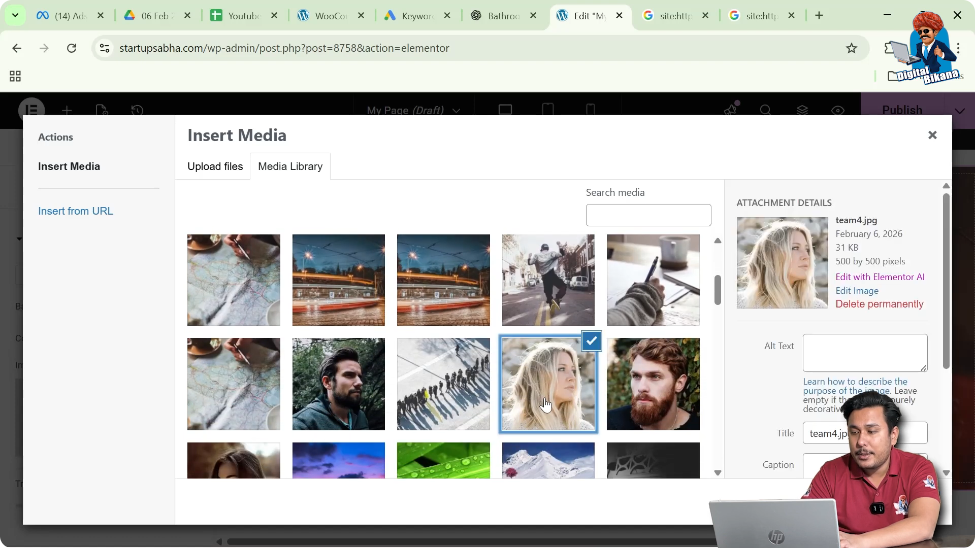
Step 2: Choose the Image
Click the Choose Image button.
This opens the WordPress media library.
From the media library, select the image you want to use and click Select.
The selected image will now appear as the background of the container.
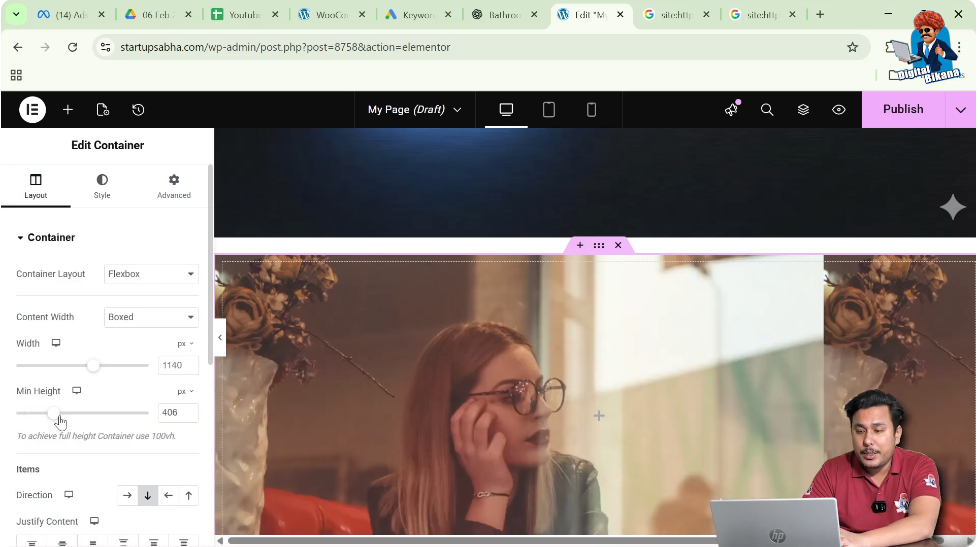
Adjusting the Container Height
After adding the image, you may notice that the container height is smaller than the image height. Because of this, the image may not appear properly.
To fix this issue, you need to increase the container height.
Step 1: Go to Layout Settings
Switch to the Layout tab in the container settings.
Step 2: Increase the Height
Increase the container height until the image becomes visible properly.
For example, you may increase the height to around 460 pixels.
Once the height is increased, the background image becomes clearly visible.
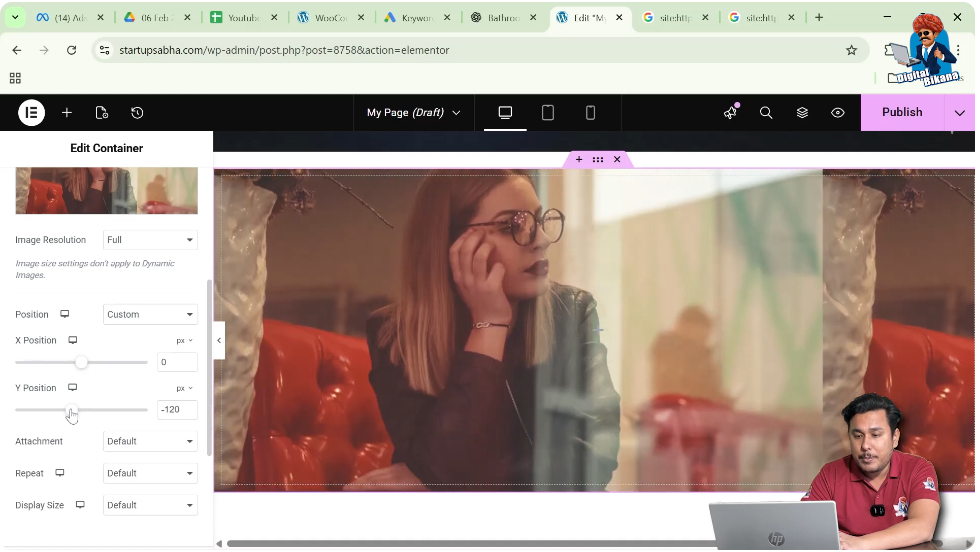
Adjusting the Image Position
Sometimes the image position may not look perfect inside the container. In such cases, you can adjust the image position.
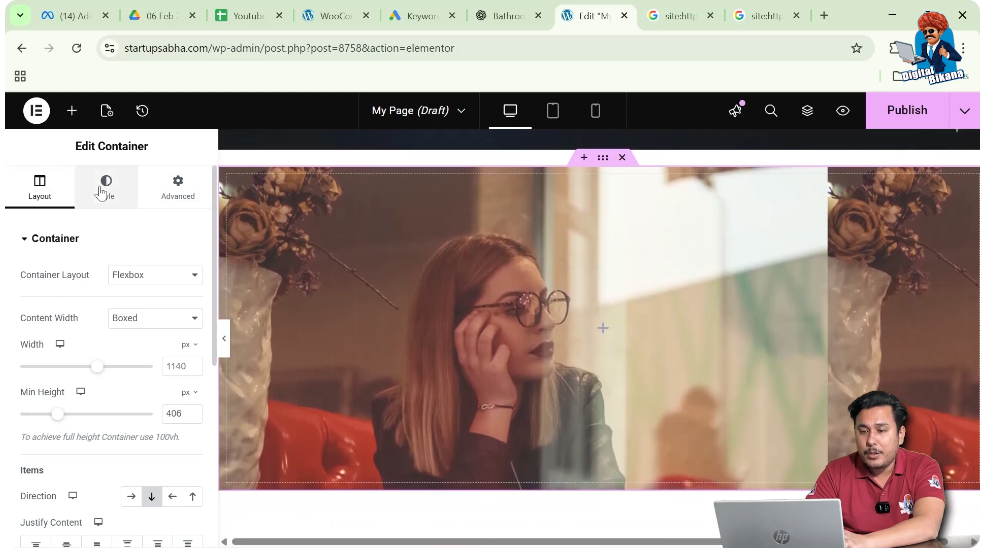
Step 1: Return to Style Settings
Go back to the Style tab in the container settings.
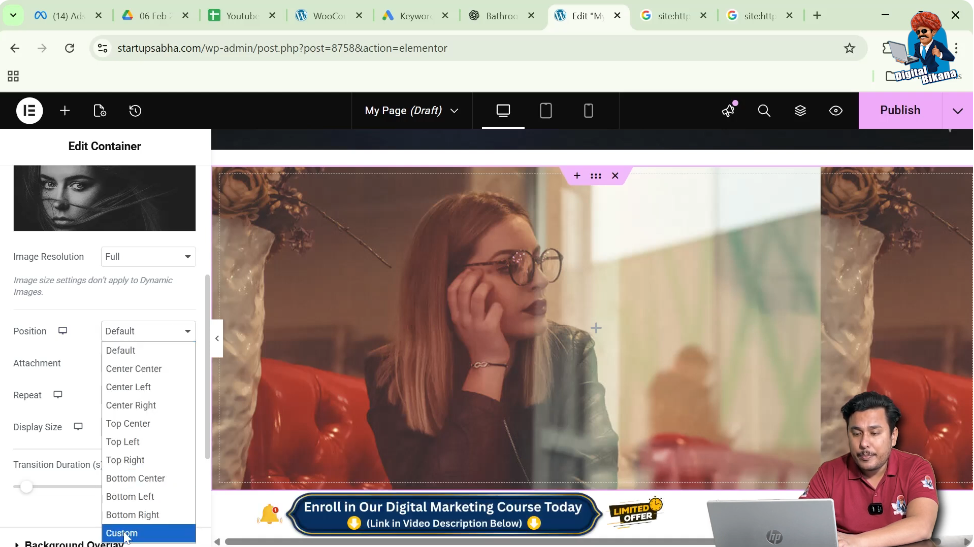
Step 2: Change the Position
Under the background settings, locate the Position option.
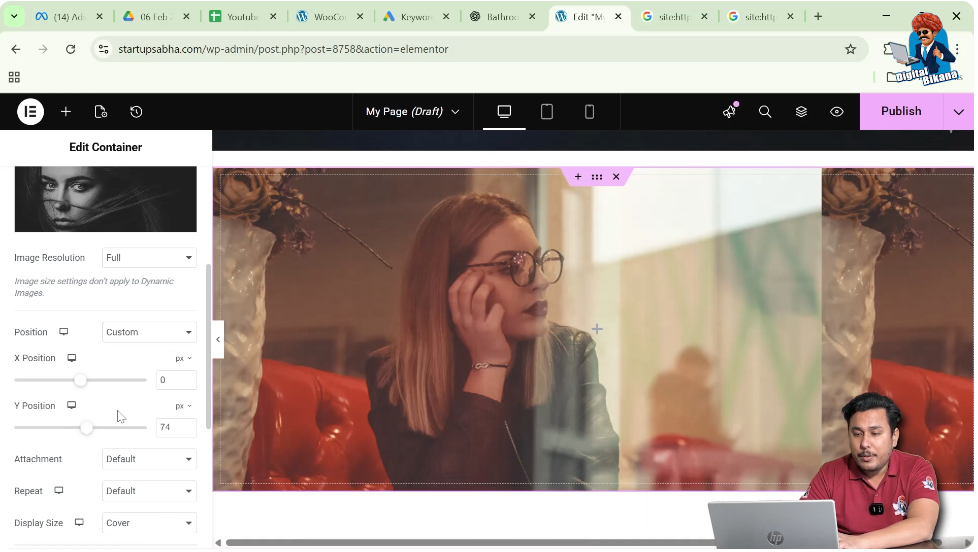
Select Custom Position.
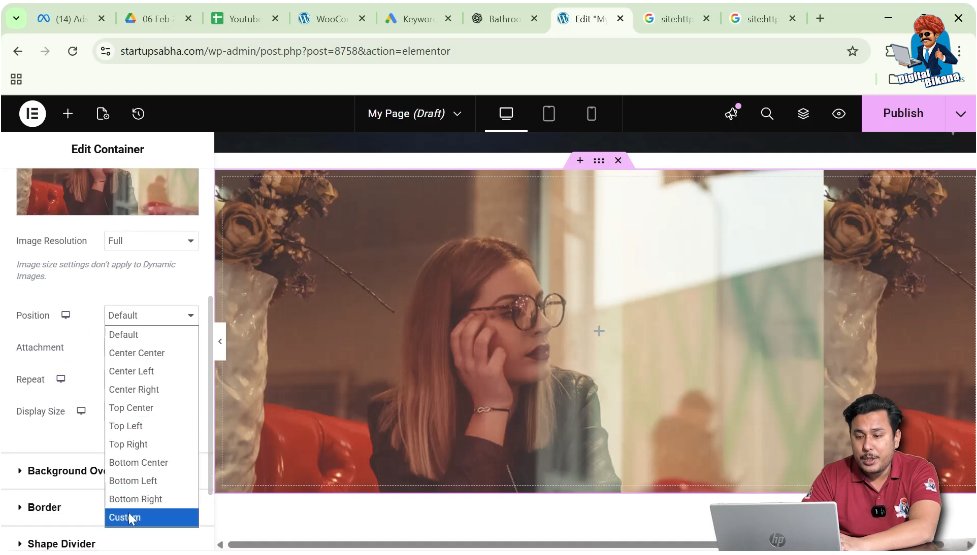
Step 3: Adjust the Y Position
Use the Y-axis control to move the image upward or downward.
If you decrease the Y value, the image moves upward.
If you increase the Y value, the image moves downward.
Adjust the value until the image appears properly inside the container.
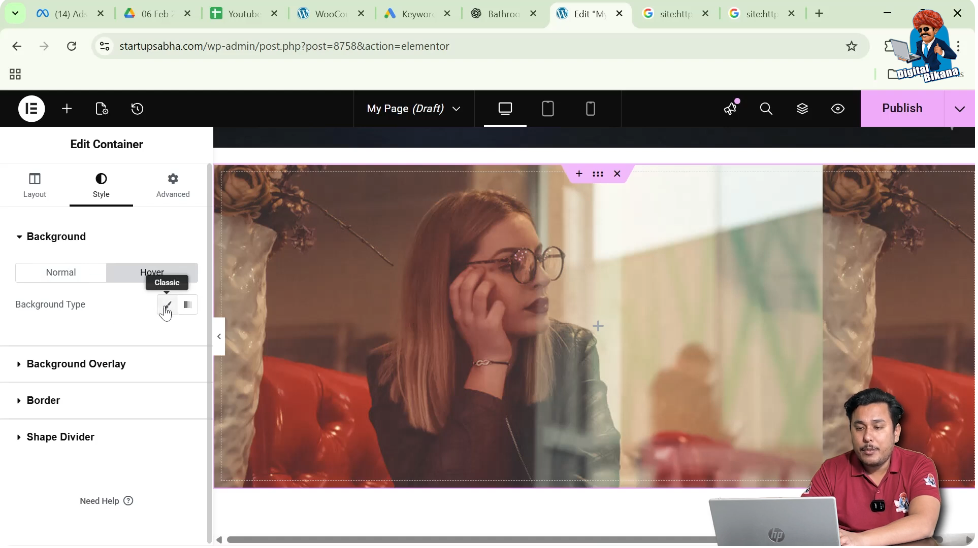
Adding the Hover Image
Once the normal image is properly set, the next step is to add the hover image.
Step 1: Go to Hover Settings
Inside the Background settings, switch from the Normal tab to the Hover tab.
Step 2: Select Classic Background
Just like the normal background, select Classic in the hover background type.
Step 3: Choose the Hover Image
Click Choose Image and select the image you want to display when the cursor hovers over the container.
You can choose any image from the media library.
For example, you can select another image and click Select.
Once selected, the hover image is applied.
Now, when you move your cursor over the image, the image changes automatically.
Fixing the Hover Image Display
After adding the hover image, the image position or size may not appear correctly.
To fix this, you need to adjust the display settings.
Step 1: Scroll Down to Display Size
Inside the Hover settings, scroll down until you find the Display Size option.

Step 2: Select Cover
Change the display size to Cover.
This ensures that the hover image covers the entire container area without repeating.

Adjusting the Hover Image Position
Sometimes the hover image may still not appear properly.
You can fix this by adjusting the image position.
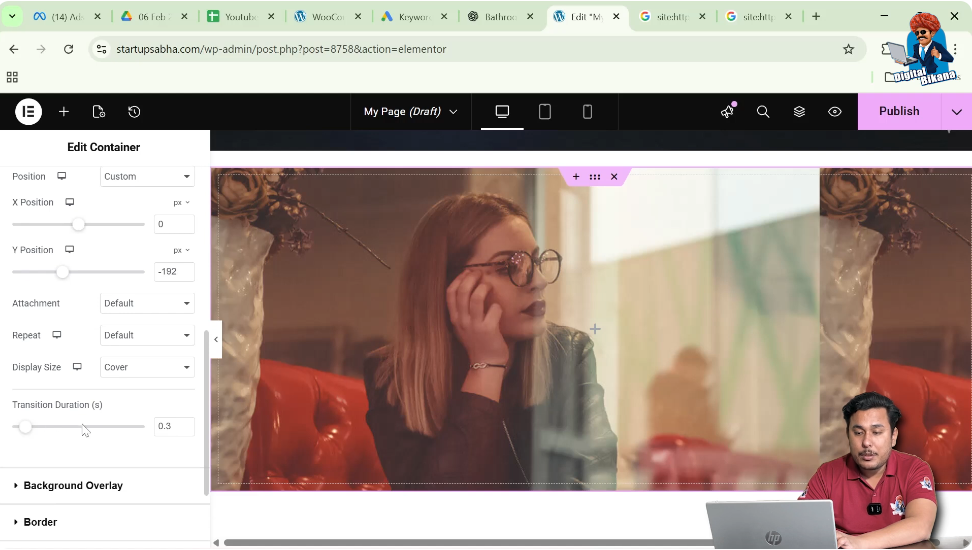
Step 1: Choose Custom Position
Inside the hover settings, find the Position option.
Select Custom Position.
Step 2: Adjust the Y Position
Use the Y-axis slider to move the hover image up or down.
If the image moves too far upward or downward, adjust the value slightly until the image looks correct.
By fine-tuning the position, you can ensure that the hover image appears exactly where you want it.
Setting the Transition Duration
Elementor also allows you to control how smoothly the hover effect appears.
Inside the hover settings, you will find an option called Transition Duration.
This option controls how fast or slow the image changes when the user moves the cursor over the container.
If you increase the transition duration, the image change becomes smoother and more gradual.
Adjust this value slightly to improve the visual effect.
Testing the Hover Effect
After completing the setup, you can test the hover effect.
Move your cursor over the container image.
You will notice that:
- The normal image is displayed initially.
- When the cursor moves over the image, the hover image appears.
- The image change happens smoothly according to the transition duration.
This confirms that the hover effect has been successfully added.
Conclusion
Adding a hover effect to an image in Elementor is a simple process that helps make your website more interactive and visually engaging.
The process begins by creating a container using the plus icon and selecting a Flexbox layout. After creating the container, you add a background image under the Normal background settings. You then increase the container height and adjust the image position so the image appears properly.
Next, you add another image in the Hover background settings. This image appears when the cursor moves over the container. You can also adjust the display size, set the position of the hover image, and control the transition duration to create a smooth effect.
By following these steps, you can easily add hover effects to images while designing webpages in Elementor on a WordPress website.
Related Posts


