
Offering discounts through coupon codes is one of the most effective marketing strategies for any eCommerce website. If you are running an online store using the WooCommerce plugin on a WordPress website, creating and managing coupon codes is simple and flexible.
In this detailed guide, you will learn step by step how to add a coupon code in WooCommerce, configure its settings properly, apply usage restrictions, and test whether the coupon is working correctly.
Accessing the WordPress Admin Dashboard
To begin, log in to your WordPress admin dashboard.
Once logged in, you will see the dashboard interface. On the left-hand side, there is a vertical toolbar. If WooCommerce is installed, you will see an option called Marketing in the left sidebar.
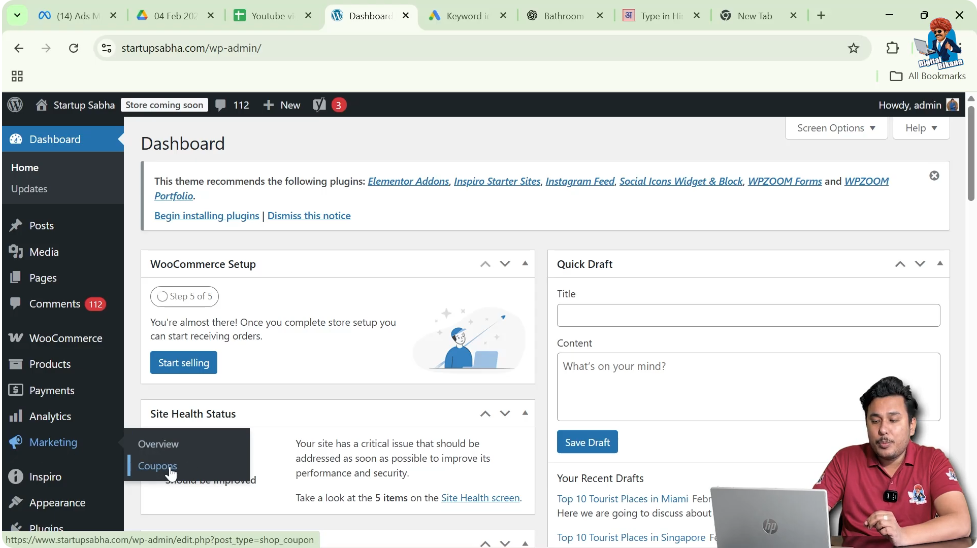
Move your cursor to the Marketing option. A submenu will appear, and from there, click on Coupons.
Creating a New Coupon
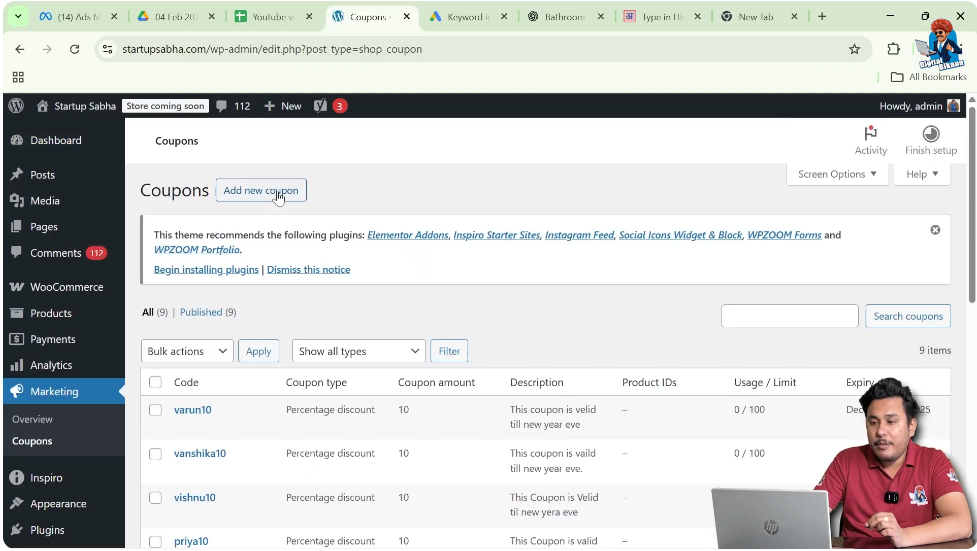
After clicking on Coupons, you will see the coupon management page.
Click on Add New Coupon
On the top right corner, you will find the Add New Coupon button. Click on it to create a new coupon.
Enter Coupon Code
At the top of the page, you will be asked to enter a coupon code.
For example:
NEW10
This code can be shared with customers for promotional purposes.
You can also write a Coupon Description, such as:
Valid till New Year
This description is for internal reference.
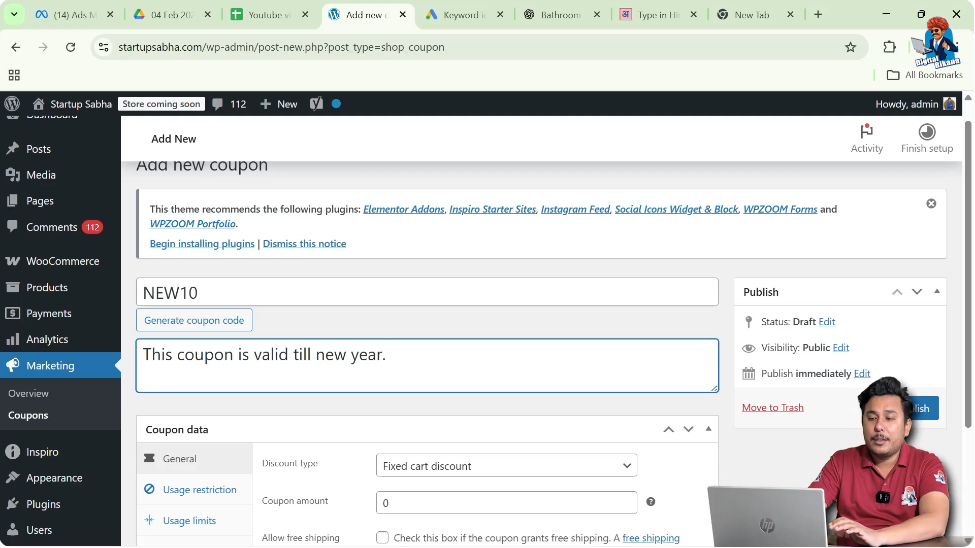
Configuring Coupon Data
Scroll down to the Coupon Data section. This section contains multiple tabs such as:
- General
- Usage Restriction
- Usage Limits
Each tab allows you to configure specific settings.
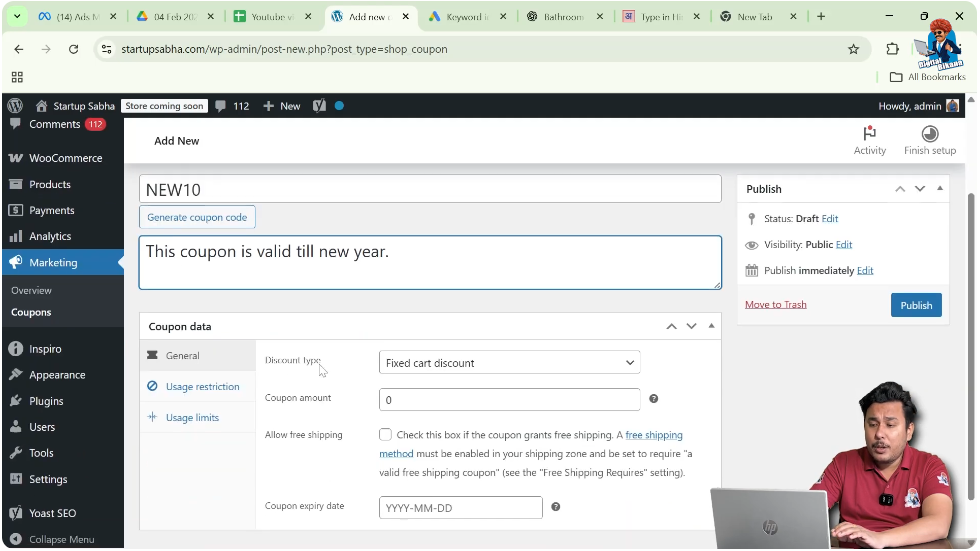
General Settings
Click on the General tab.
Select Discount Type
You will see a dropdown menu for Discount Type.
The available options are:
- Percentage Discount
- Fixed Cart Discount
- Fixed Product Discount
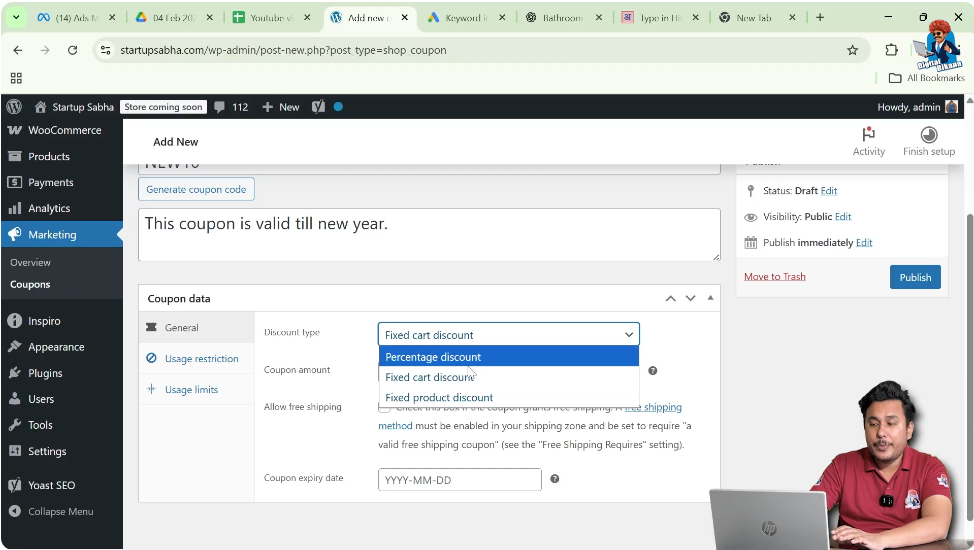
Percentage Discount
If you choose Percentage Discount, the coupon will apply a percentage-based discount to the cart total.
For example:
10 means 10 percent discount.
You do not need to add the percentage symbol because WooCommerce automatically understands the value as a percentage when this discount type is selected.
Fixed Cart Discount
This option allows you to provide a fixed amount discount on the entire cart.
For example:
100 means a discount of 100 currency units on the total cart value.
This is not percentage-based. It is a flat amount.
Fixed Product Discount
This option allows you to give a fixed discount on specific products only.
The discount applies only to selected products and not to the total cart value.
Enter Coupon Amount
If you selected Percentage Discount, enter:
10
This means 10 percent discount.
Allow Free Shipping
You will see an option for Allow Free Shipping.
If enabled, customers will receive free shipping along with the discount.
If you do not want to provide free shipping, leave it unchecked.
Set Coupon Expiry Date
You can define the expiry date of the coupon.
Select the date until which the coupon will remain valid.
After this date, the coupon will automatically stop working.
Usage Restriction Settings
Now click on the Usage Restriction tab.
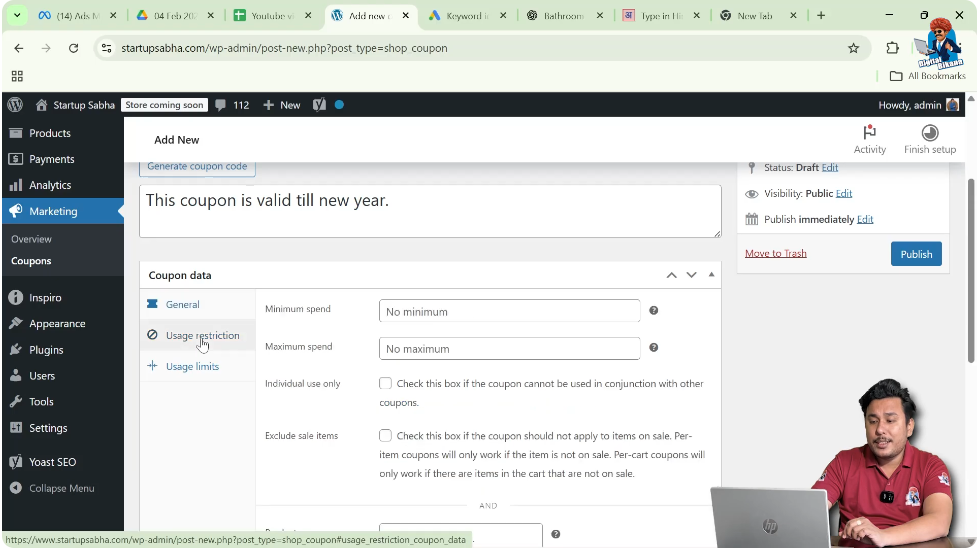
Minimum Spend
You can define a minimum cart value required to use the coupon.
For example:
If you set 2000, customers must have a cart total of 2000 or more to use the coupon.
Maximum Spend
You can also define a maximum cart value.
If the cart total exceeds this amount, the coupon will not be applied.
Generally, this setting is not commonly used.
Individual Use Only
If you check this option, the coupon cannot be used with other coupons.
It means this coupon will work independently and cannot be combined with other discount codes.
Exclude Sale Items
If you check this option, the coupon will not apply to products that are already on sale.
This prevents double discounts.
Product-Specific Coupons
If you want the coupon to apply only to specific products, you can select those products in the Products field.
Make sure the product is already created before assigning it to a coupon.
If you want the coupon to apply to all products, leave this field empty.
Exclude Products
If you want to exclude specific products from the discount, you can add them in the Exclude Products field.
For example, if you are selling 50 products and want to exclude 10 products from the discount, you can add those 10 product names here.
Product Categories
If the coupon applies only to certain categories, you can select those categories.
Exclude Categories
If you want to exclude a specific category from the discount, you can use the exclude category option.
Allowed Emails
You can restrict the coupon to specific customers by entering their email addresses separated by commas.
Only those email addresses will be able to use the coupon.
This is useful for premium customers or targeted marketing campaigns.
Product Brands
If you are offering discounts on specific brands, you can select them here.
You can also exclude certain brands.
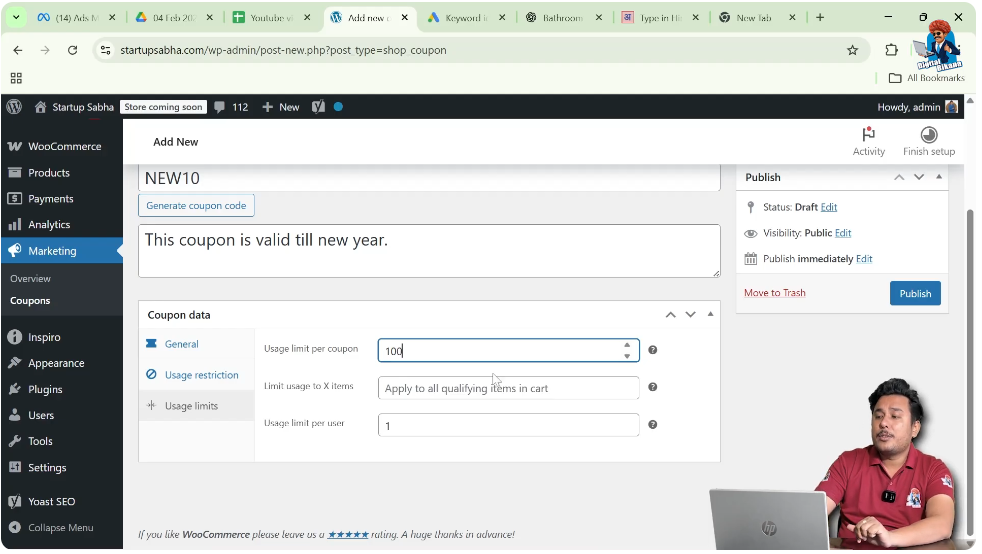
Usage Limits Settings
Now click on the Usage Limits tab.
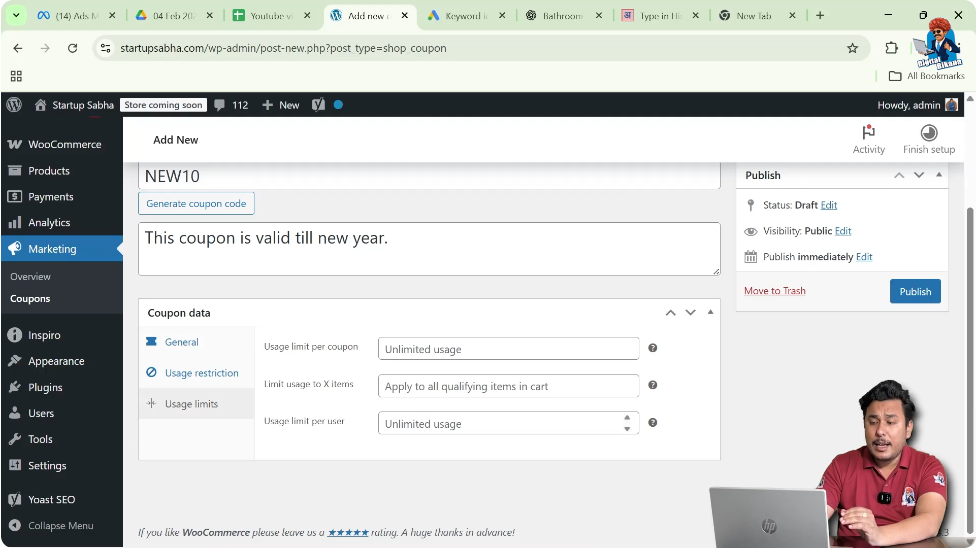
Usage Limit Per User
This defines how many times a single user can use the coupon.
For example:
If you enter 1, each user can use the coupon only once.
Limit Usage to X Items
You can limit how many items in the cart are eligible for the discount.
For example:
If a user buys 20 items but you limit it to 5 items, the discount will apply only to 5 items.
Usage Limit Per Coupon
This defines how many total times the coupon can be used across all customers.
For example:
If you enter 100, only the first 100 users can use the coupon.
After 100 uses, the coupon will become invalid.
Publishing the Coupon
After configuring all settings, click on the Publish button.
Your coupon is now active.
Testing the Coupon
After publishing, it is important to test the coupon.
Add Product to Cart
Go to the Products section and select a product.
Click on Add to Cart.
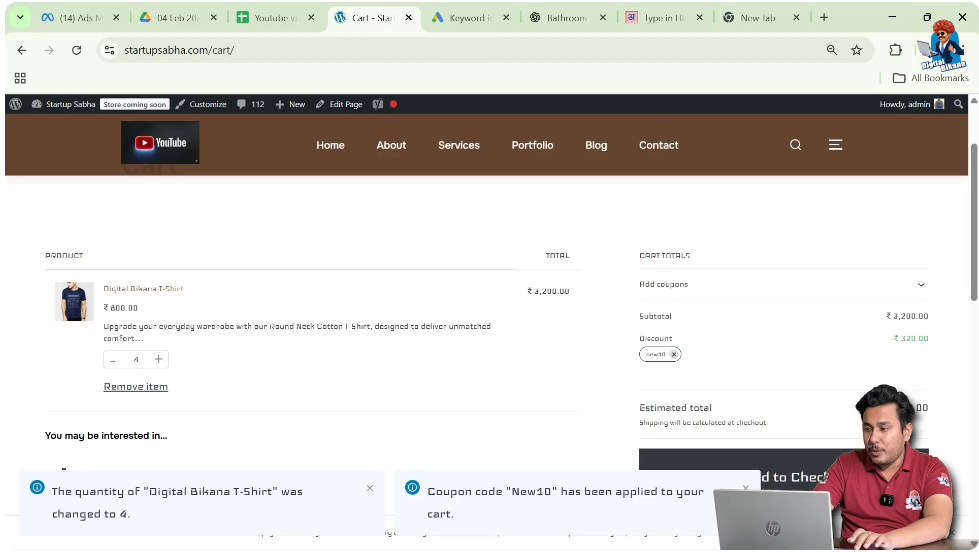
View Cart
Click on View Cart.
In the cart page, you will see an option to enter a coupon code.
Enter:
NEW10
Click on Apply Coupon.
If the cart meets the minimum spend requirement, the discount will be applied successfully.
If not, you may need to increase the cart value.
For example, if the minimum spend is 2000, increase the product quantity and try again.
Once the conditions are satisfied, the coupon discount will appear in the cart summary.
Step-by-Step Summary
Step 1: Log in to WordPress Dashboard
Access your admin panel.
Step 2: Go to Marketing
Click on Coupons.
Step 3: Click Add New Coupon
Create a new coupon.
Step 4: Enter Coupon Code
For example, NEW10.
Step 5: Configure General Settings
Select discount type and enter coupon amount.
Step 6: Set Usage Restrictions
Define minimum spend, product restrictions, and email restrictions.
Step 7: Configure Usage Limits
Set limits per user and per coupon.
Step 8: Publish the Coupon
Click Publish.
Step 9: Test the Coupon
Add product to cart and apply coupon.
Conclusion
Adding a coupon code in WooCommerce on a WordPress website is a straightforward process that involves configuring discount type, usage restrictions, and usage limits.
By carefully setting minimum spend conditions, product restrictions, and user limits, you can run effective promotional campaigns while maintaining control over your discounts.
After creating the coupon, always test it to ensure it works correctly. Properly configured coupon codes can increase sales, attract new customers, and improve overall store performance.
Related Posts


