

Setting up tax correctly is one of the most important steps while running an eCommerce website. If you are using WooCommerce on your WordPress website, you must configure tax classes and tax rates properly so that customers are charged the correct tax based on their location and the type of product.
In this detailed guide, you will learn step by step how to add tax classes and tax rates in WooCommerce, how to configure standard and zero-rate taxes, and how GST (CGST, SGST, IGST) can be set up inside WooCommerce.
Accessing WooCommerce Settings
First, log in to your WordPress admin dashboard.
On the left side toolbar, you will see the WooCommerce option. Since the WooCommerce plugin is already installed, move your cursor over WooCommerce. A submenu will appear.
Click on Settings.
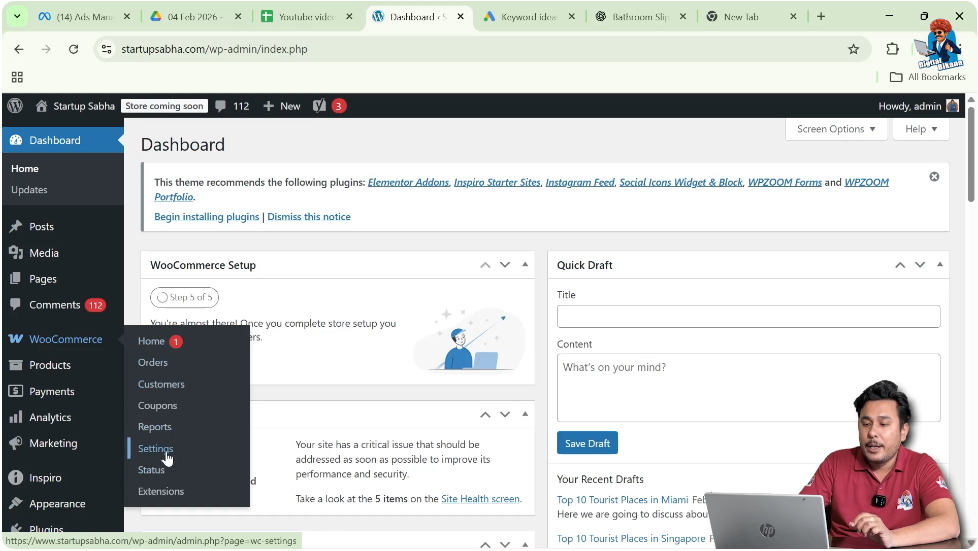
Now you are inside WooCommerce Settings.
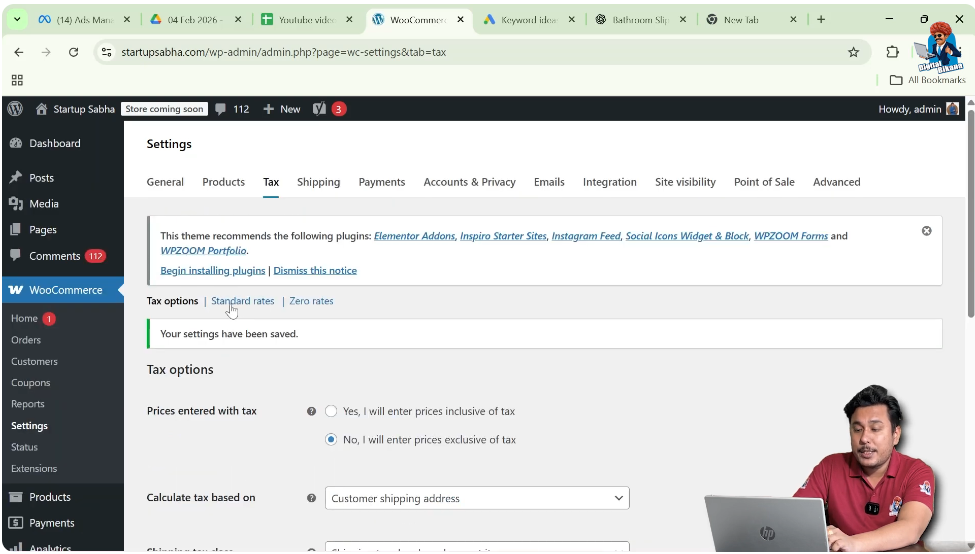
Opening Tax Settings
At the top of the settings page, you will see multiple tabs such as:
- General
- Products
- Tax
- Shipping
- Payments
- Accounts and Privacy
- Emails
- Advanced
Click on the Tax tab.
Once you click on Tax, you will see different sub-sections related to tax configuration.

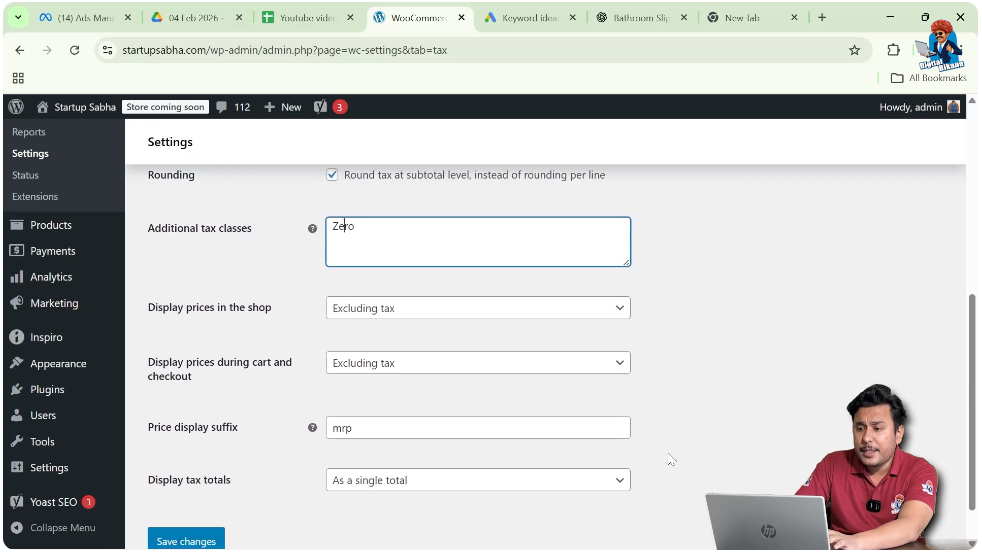
Adding Additional Tax Classes
Inside the Tax settings, scroll down until you see the Additional Tax Classes field.
By default, WooCommerce includes:
- Standard Rate
If you want to add another tax class such as Zero Rate, you can type:
Zero Rate
After typing it, click on Save Changes.
Now you will see a new tab for Zero Rate in the tax sub-settings along with Standard Rates.
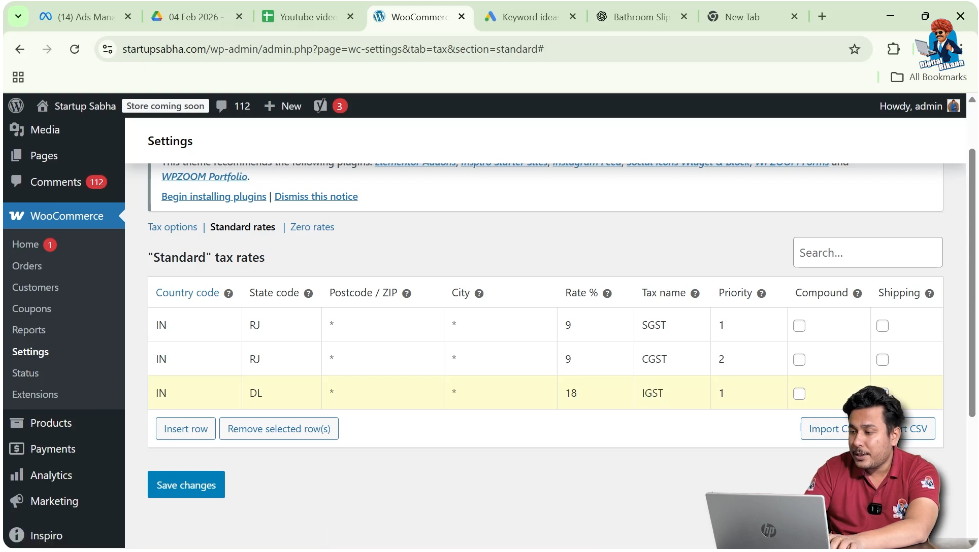
Configuring Standard Tax Rates
Now click on Standard Rates.
If you have not previously added any tax rates, this section will be empty.
Insert a New Row
Click on Insert Row.
Now you need to fill in the following fields:
- Country Code
- State Code
- Postcode / ZIP
- City
- Rate
- Tax Name
- Priority
- Compound
- Shipping
Adding Tax for Rajasthan
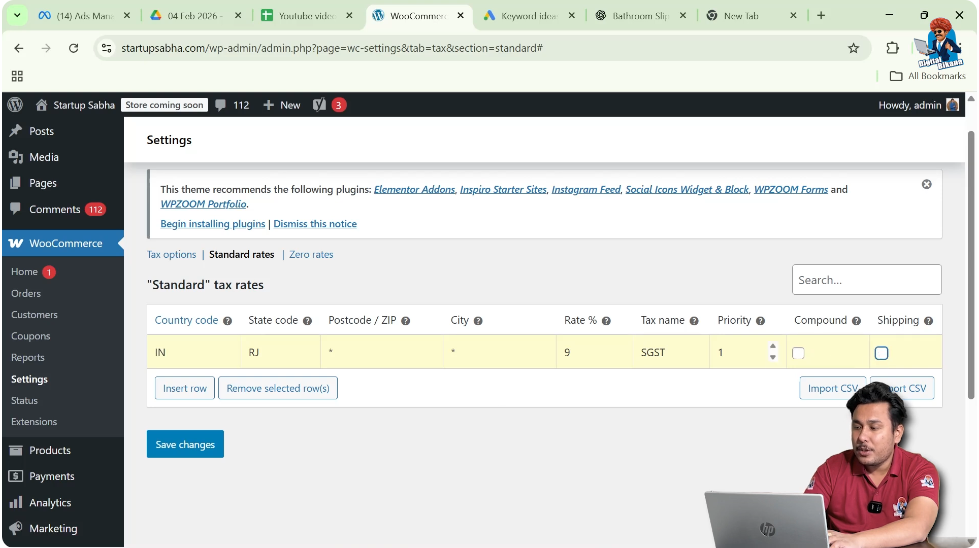
Enter Country Code
Type:
IN
Select India from the dropdown.
Enter State Code
For Rajasthan, type:
RJ
Postcode and City
Leave Postcode and City blank if the tax rate does not change according to postal codes or cities.
WooCommerce provides this option because in some countries tax slabs vary by postcode. If applicable, you can use it.
Enter Rate
Enter:
9%
Enter Tax Name
Type:
SGST
Set Priority
Set Priority to:
1
Compound and Shipping
Do not check Compound.
Do not check Shipping.
This means tax will not be compounded and will not be applied on shipping.
Adding CGST for Rajasthan
Click on Insert Row again.
Enter Country Code
IN
State Code
RJ
Rate
9%
Tax Name
CGST
Priority
2
Leave Compound and Shipping unchecked.
Now Rajasthan will have:
- 9% SGST
- 9% CGST
Total GST = 18%

Adding IGST for Delhi
Click on Insert Row again.
Country Code
IN
State Code
DL
Rate
18%
Tax Name
IGST
Priority
1
Leave Compound and Shipping unchecked.
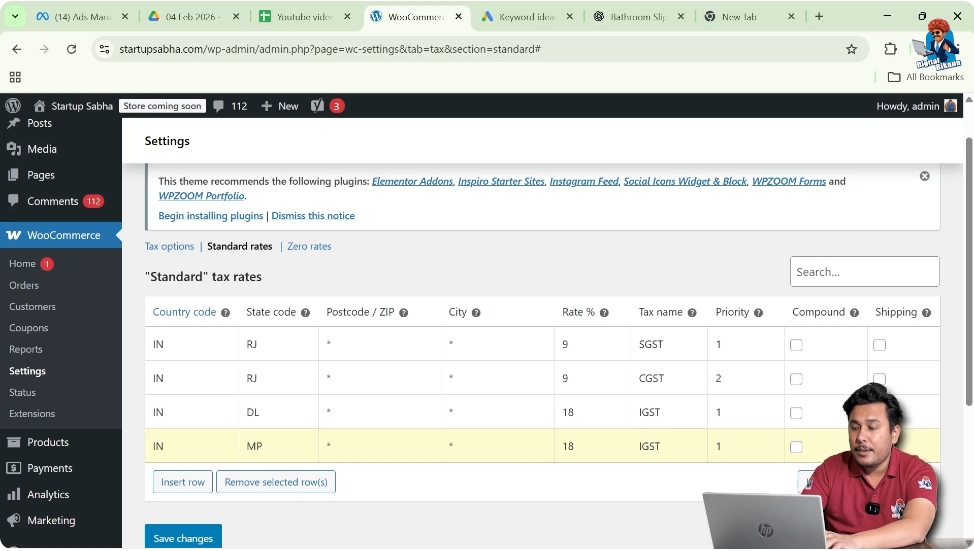
Adding IGST for Madhya Pradesh
Click on Insert Row again.
Country Code
IN
State Code
MP
Rate
18%
Tax Name
IGST
Priority
1
Leave Compound and Shipping unchecked.
Understanding SGST, CGST, and IGST
If buyer and seller are in the same state:
- SGST and CGST are charged
If buyer and seller are in different states:
- IGST is charged
For example:
If you sell from Rajasthan to Rajasthan:
9% SGST + 9% CGST
If you sell from Rajasthan to Delhi:
18% IGST
What Is Compound Tax?
Compound tax means tax applied on top of another tax.
For example:
If product price = 100
18% tax = 18
Total = 118
If compound is enabled, another tax may be calculated on 118 instead of 100.
In India, tax regulations do not allow such compounding in this scenario, so we keep Compound unchecked.
What Is Shipping Tax Option?
The Shipping checkbox determines whether tax should be applied to shipping charges.
If your shipping charges already include tax, you may leave this unchecked.
If tax must be applied separately on shipping, you can enable it.
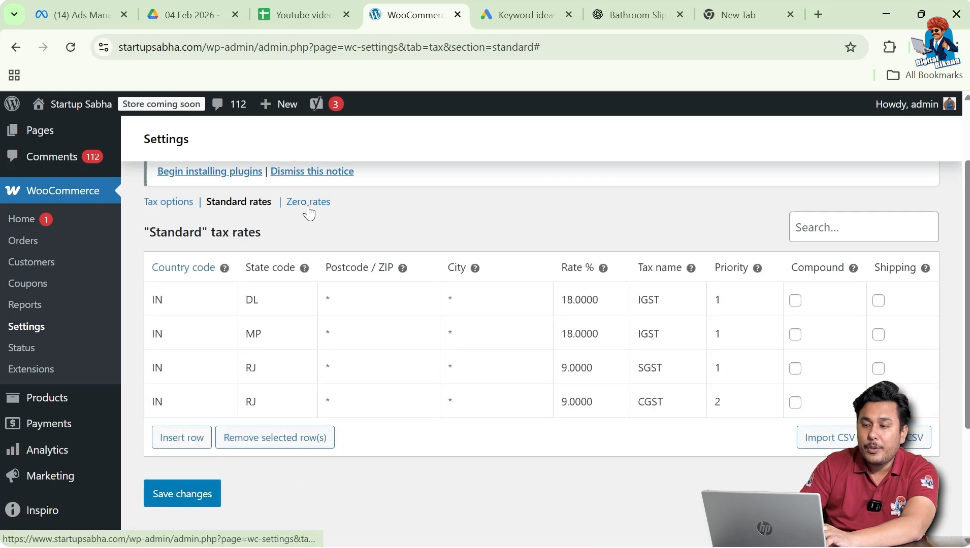
Saving Standard Rates
After entering all state tax rows, click on Save Changes.
Now your standard tax rates are configured.
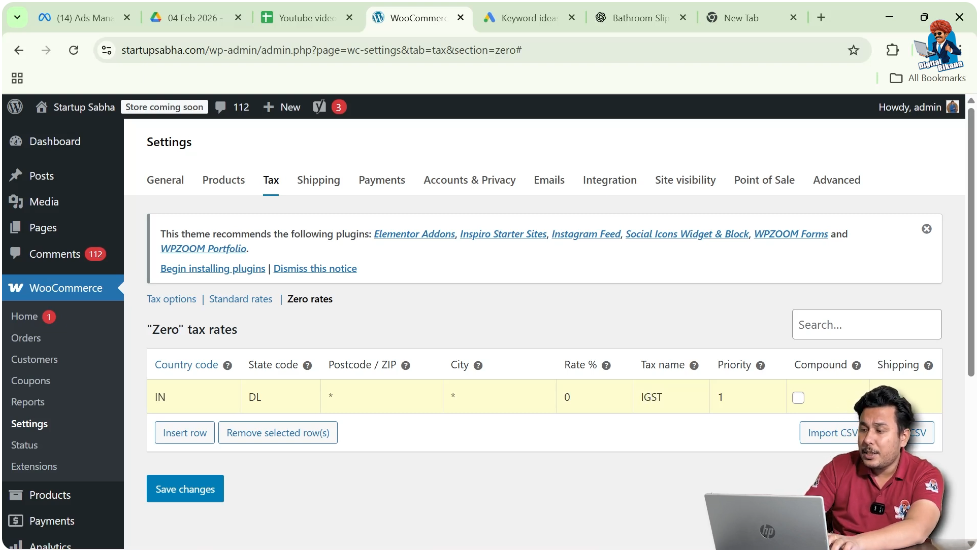
Adding Zero Rate Tax
If you are selling tax-exempt products, you must configure Zero Rate.
Click on the Zero Rate tab.
Insert Row
Click on Insert Row.
Country Code
IN
State Code
DL (for example)
Rate
0
Tax Name
IGST
Priority
1
Uncheck Compound and Shipping.
Click on Save Changes.
You can add more rows for other states with zero rate as needed.
Assigning Tax Class to Product
After creating tax classes:
While creating or editing a product:
Go to Product Data
Select Tax Status
Choose:
- Taxable
- None
Select Tax Class
Choose:
- Standard Rate
- Zero Rate
If the product is tax exempt, select Zero Rate.
If taxable, select Standard Rate.
Adding Tax for International Sales
If you are selling products outside India:
You must insert new rows in Standard Rates.
Add:
- Country Code
- State Code (if required)
- Tax Rate
- Tax Name
Click Save Changes.
WooCommerce supports international tax configuration.
Step-by-Step Summary
Step 1: Log in to WordPress Dashboard
Access admin panel.
Step 2: Go to WooCommerce
Click on Settings.
Step 3: Open Tax Tab
Click on Tax.
Step 4: Add Additional Tax Class
Add Zero Rate and click Save.
Step 5: Configure Standard Rates
Click Standard Rates.
Step 6: Insert Rows for Each State
Add Country Code, State Code, Rate, and Tax Name.
Step 7: Save Changes
Click Save.
Step 8: Configure Zero Rate
Insert rows with 0% rate.
Step 9: Assign Tax Class to Products
Select tax class while editing products.
Conclusion
Adding tax classes and tax rates in WooCommerce on a WordPress website ensures that customers are charged correctly according to their state and product type. By configuring Standard Rate and Zero Rate properly, and understanding how SGST, CGST, and IGST work, you can maintain compliance with tax regulations.
WooCommerce provides flexible options such as compound tax, shipping tax, postcode-based tax, and international tax configuration. Once set up correctly, tax calculation becomes automatic and accurate for every order placed on your website.
Related Posts


