

Managing products efficiently is one of the most important aspects of running an online store. If you are using WooCommerce on a WordPress website, adding SKUs to your products helps you organize inventory properly and track stock easily. In this article, you will learn how to add SKUs in your WooCommerce store step by step, including both simple products and variable products.
Understanding What SKU Means
Before learning how to add SKUs in WooCommerce, it is important to understand what an SKU is.
SKU stands for Stock Keeping Unit. It is an identification number assigned to each product or product variant to manage inventory efficiently.
For example, if you are running a manufacturing unit and you are producing multiple products, remembering each product by its name becomes difficult. In such cases, assigning a unique SKU to each product helps in managing stock and tracking inventory properly.
An SKU is generally made up of 8 to 12 characters and is created for internal organization purposes.
Difference Between SKU and Barcode
Many people confuse SKUs with barcodes, but both are different.
Barcodes are scannable and universal. They are typically used for retail scanning and are unique to each individual item.
On the other hand, SKUs are internal identification numbers created by the business owner. SKUs are mainly used for product categories or product variants and are not universal.
While barcodes are assigned for each individual product unit, SKUs are used for organizing and managing product types or variants within a store.
Accessing the WooCommerce Product Section
To add SKUs in WooCommerce, you need to log in to your WordPress admin dashboard.
After logging in, look at the left side toolbar.
You will see an option called Products.
Move your cursor over the Products option.
A submenu will appear.
From there, click on Add New to create a new product.

Adding SKU to a Simple Product
If your product does not have variations such as size or color, it is considered a simple product.
Let us take an example.
Suppose you are selling a T-shirt.
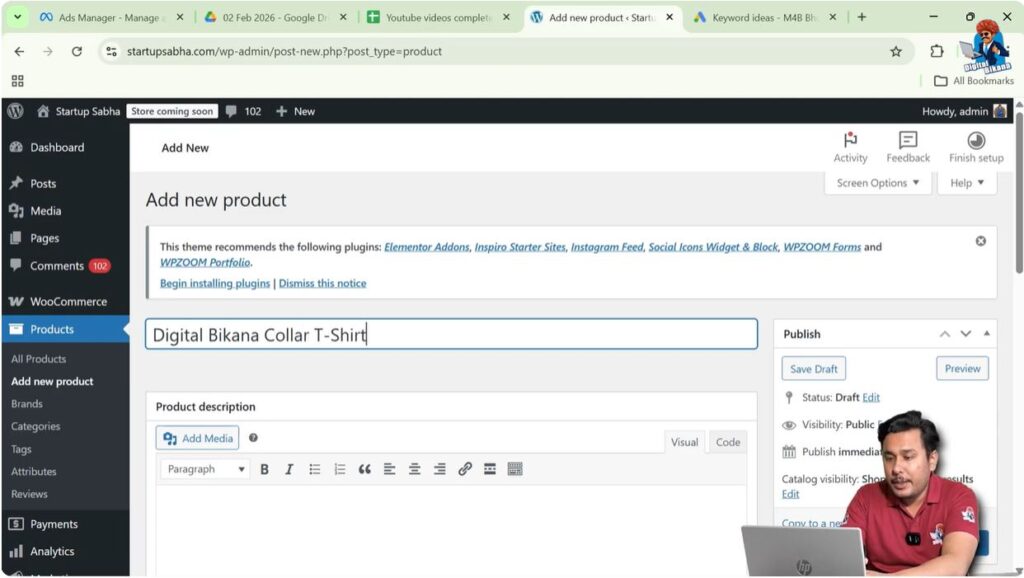
Step 1: Add Product Name
After clicking on Add New, type the product name at the top.
For example:
Digital Bikana Collar T-Shirt
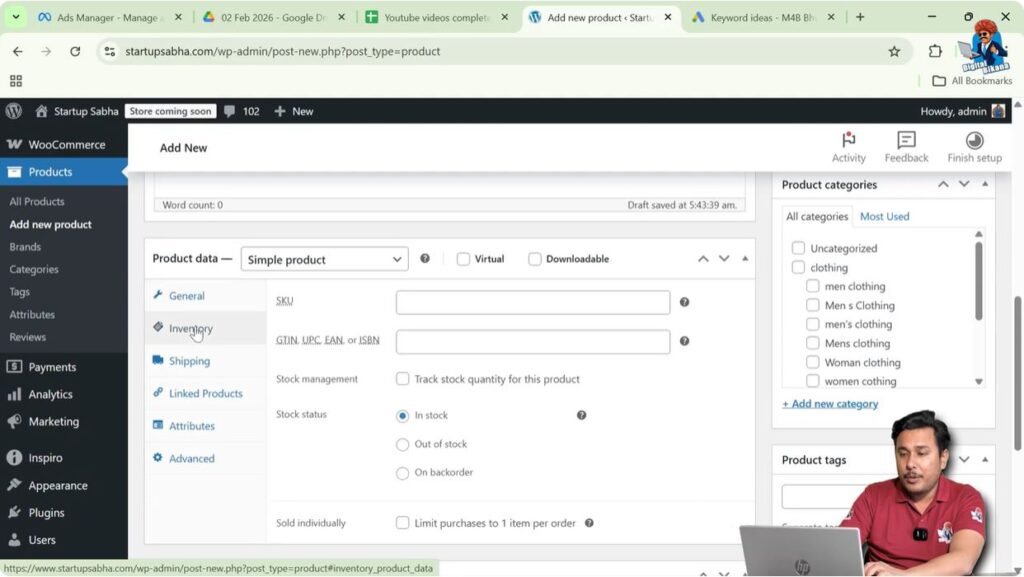
Scroll down to the Product Data section.
Step 2: Go to Inventory Section
Inside Product Data, click on the Inventory tab.
Here you will find the SKU field.
Now you can assign an SKU.
For example:
DB-01-CL-RD2011
In this format:
- DB = Brand initials
- 01 = Product number
- CL = Collar
- RD = Red color
- 2011 = Unique internal code
You can create your own structured format according to your business requirement.
After adding the SKU, you can continue filling other product details and publish the product.
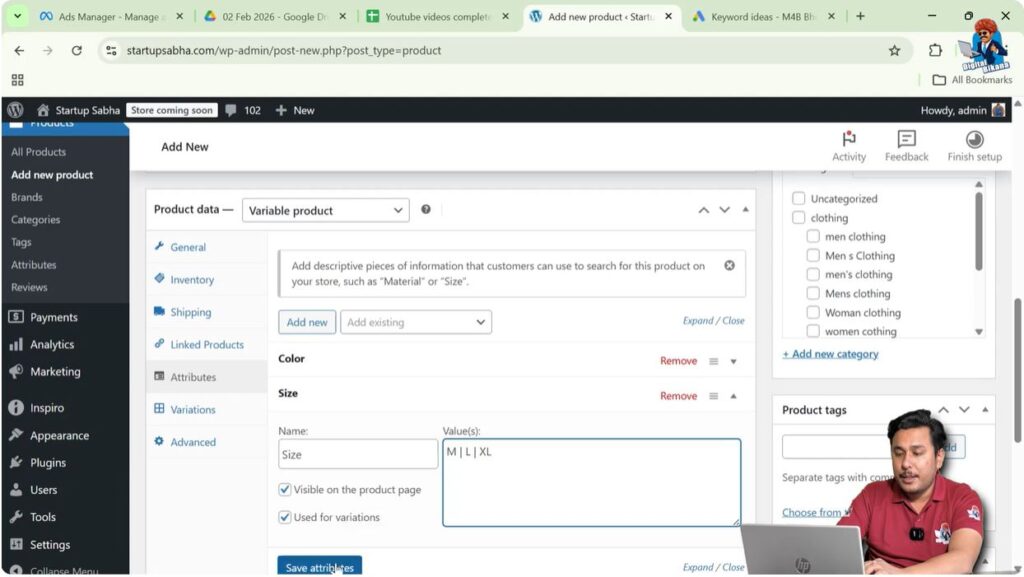
Adding SKU to a Variable Product
If your product has different variations such as color and size, then it is a variable product.
For example, your T-shirt is available in:
- Red
- Blue
- White
And sizes:
- M
- L
- XL
Now let us see how to add SKUs to variable products.
Creating Attributes for Variable Product
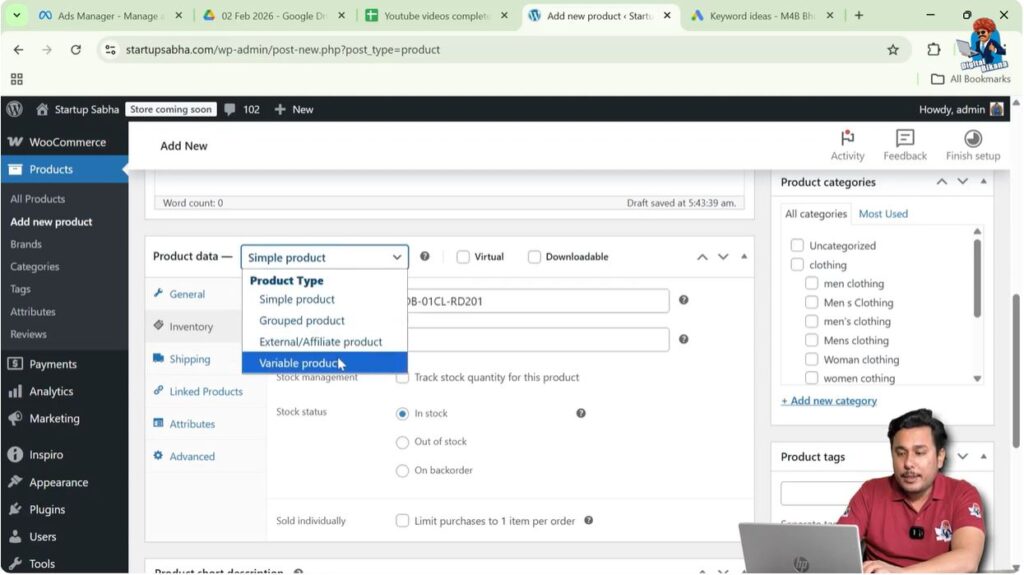
Step 3: Select Variable Product
In the Product Data section, change the product type from Simple Product to Variable Product.
Now click on the Attributes tab.
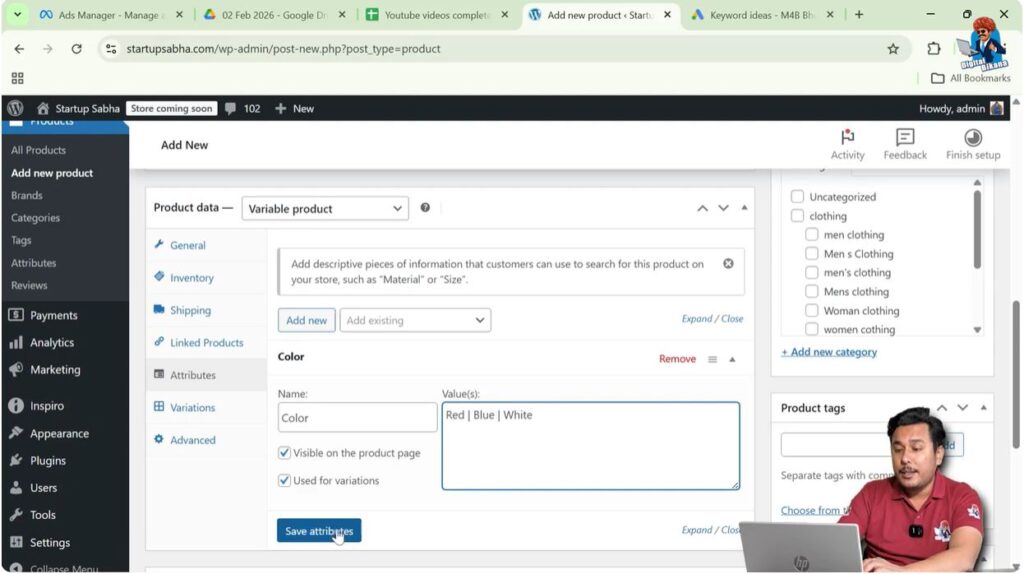
Step 4: Add Color Attribute
Click on Add.
Rename the attribute as Color.
In the values field, type:
Red | Blue | White
Use the vertical line symbol (|) to separate values.
Click on Save Attributes.
Step 5: Add Size Attribute
Click on Add again.
Rename the attribute as Size.
In the values field, type:
M | L | XL
Click on Save Attributes.
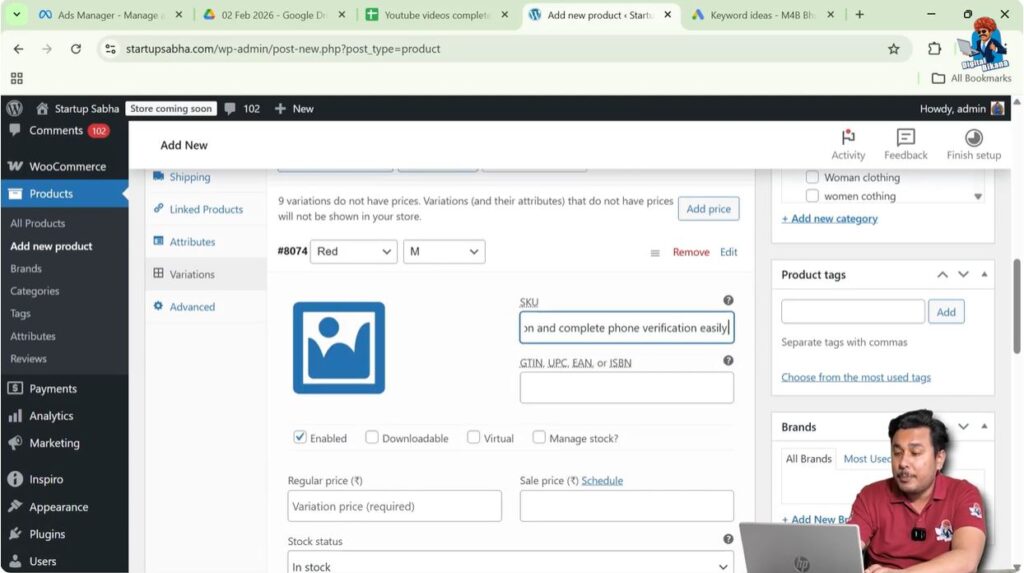
Generating Variations
Step 6: Generate Variations
Now go to the Variations tab.
Click on Generate Variations.
WooCommerce will automatically create all combinations.
Since there are 3 colors and 3 sizes, 9 variants will be created.
Now you need to assign SKUs individually to each variant.

Adding SKU to Each Variant
Click on the edit icon for each variation.

For example:
Red – M Size
SKU:
DB01-CL-RD01-M
Red – L Size
SKU:
DB01-CL-RD02-L
Red – XL Size
SKU:
DB01-CL-RD03-XL
Now for Blue color:
Blue – M Size
SKU:
DB01-CL-BL01-M
Blue – L Size
SKU:
DB01-CL-BL02-L
And so on.
You can structure the SKU in a meaningful way so that:
- RD = Red
- BL = Blue
- WH = White
- M = Medium
- L = Large
- XL = Extra Large
Each variant must have a unique SKU.
Repeat this process for all nine variations.
Why Structured SKUs Are Important
A structured SKU system helps in:
- Easy inventory tracking
- Faster stock management
- Quick product identification
- Simplified warehouse organization
- Reduced errors in order processing
Instead of searching products by name, you can simply refer to SKU codes internally.
Best Practices for Creating SKUs
When creating SKUs:
- Keep them short but meaningful
- Avoid special characters
- Maintain consistent structure
- Use abbreviations for colors and sizes
- Do not duplicate SKUs
Every SKU must be unique within your WooCommerce store.
Publishing the Product
After assigning SKUs to all variants, click on Save Changes in the Variations section.
Then click on Publish or Update.
Your product is now ready with proper SKU management.
Managing Inventory with SKUs
Once SKUs are assigned:
- You can search products by SKU in WooCommerce
- You can track stock using SKU numbers
- You can export product lists with SKU data
- You can integrate with inventory management systems
SKUs play a crucial role in scaling your eCommerce business.
Conclusion
Adding SKUs in your WooCommerce store is essential for effective inventory management. SKUs are internal identification numbers used to organize products and their variants efficiently. Unlike barcodes, SKUs are created for internal tracking and are not universal.
For simple products, you can add the SKU directly from the Inventory section. For variable products, you must first create attributes, generate variations, and then assign unique SKUs to each variant individually.
By following a structured SKU system, you can manage stock easily, reduce errors, and improve overall store organization in WooCommerce on your WordPress website.
Related Posts


