

Deleting a blog post on a WordPress website is a simple process that can be done directly from the WordPress admin dashboard. Sometimes you may want to remove outdated content, incorrect information, or unnecessary blog posts from your website. WordPress provides two options while deleting a blog post: moving it to Trash and permanently deleting it.
In this article, you will learn how to delete a blog post on a WordPress website step by step. The explanation covers both temporary deletion (moving to Trash) and permanent deletion.
When you log in to the WordPress admin dashboard, you will see multiple options on the left side toolbar. One of these options is the Posts section, which allows you to manage all blog posts on your website.
Accessing the Posts Section
Before deleting a blog post, you need to open the Posts section in the WordPress dashboard.
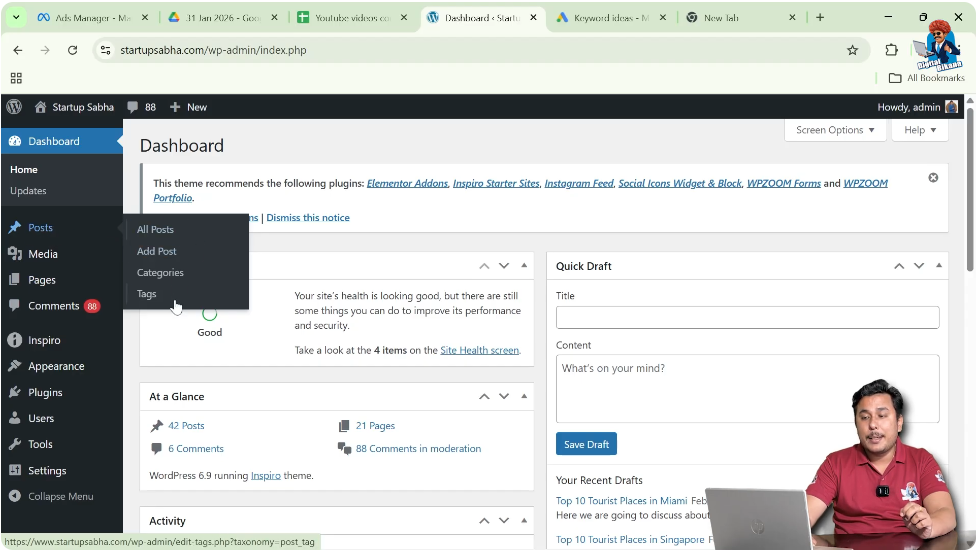
Step 1: Open the Posts Menu
Log in to your WordPress website admin dashboard.
On the left side toolbar, move your cursor over the Posts option.
As soon as you move your cursor over Posts, a submenu will appear.
This submenu includes:
- All Posts
- Add Post
- Categories
- Tags
Click on All Posts.
After clicking All Posts, you will see a list of all blog posts written by you.
Viewing All Blog Posts
The All Posts section displays every blog post available on your website.
Here you can see:
- Published posts
- Draft posts
- Scheduled posts
Each blog post title appears in the list.
When you move your cursor over a blog post title, additional options become visible.
These options allow you to edit, trash, or view the post.

Deleting a Blog Post (Moving to Trash)
WordPress first moves deleted posts to the Trash instead of permanently deleting them.
This allows you to restore the post later if needed.
Step 2: Select the Blog Post to Delete
In the All Posts section, find the blog post you want to delete.
Move your cursor over the blog post title.
When you hover over the title, the Trash option will appear below it.
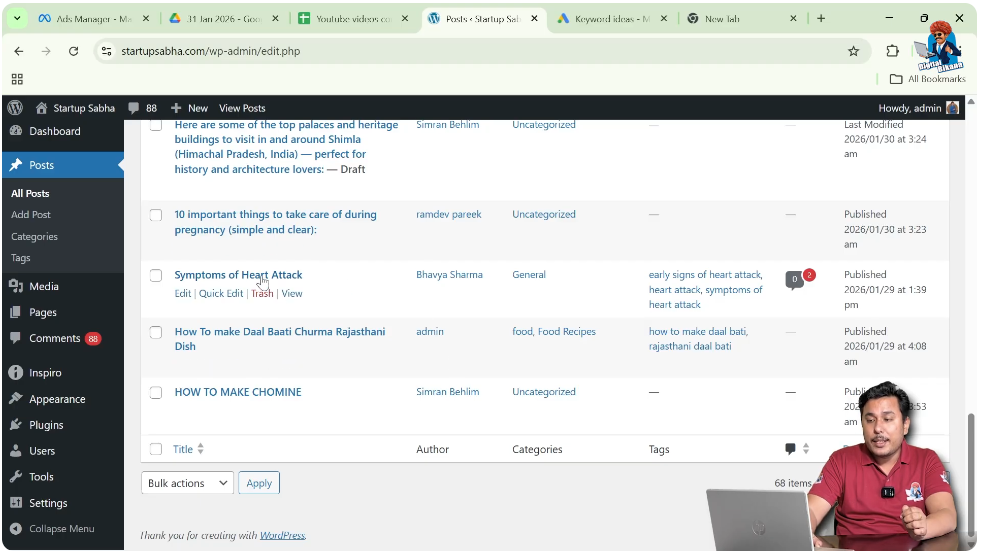
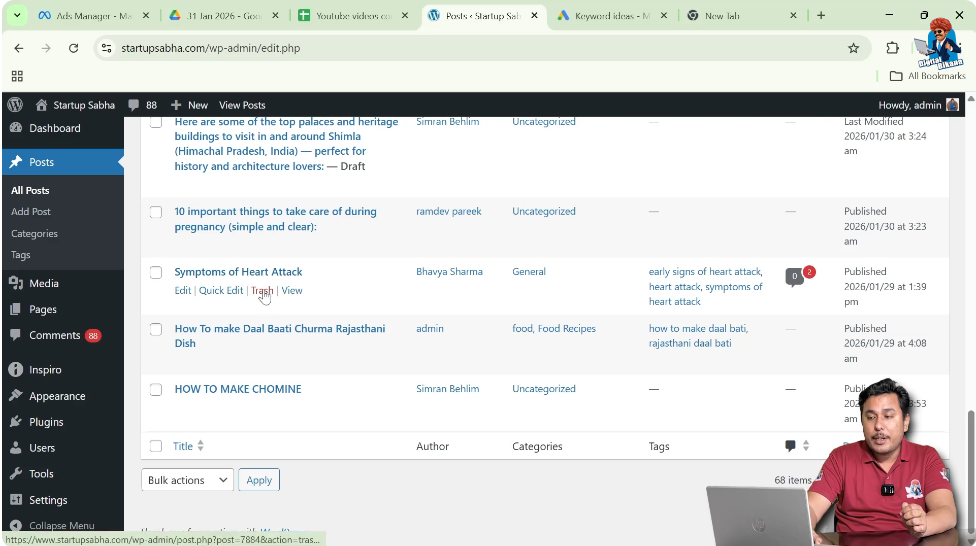
Step 3: Click on Trash
Click on the Trash option.
After clicking Trash, the blog post will be removed from the main list.
The blog post is now moved to the Trash section.
It is not permanently deleted yet.
Opening the Trash Section
All blog posts that are moved to Trash are stored in the Trash section.
You can view and manage deleted posts from there.
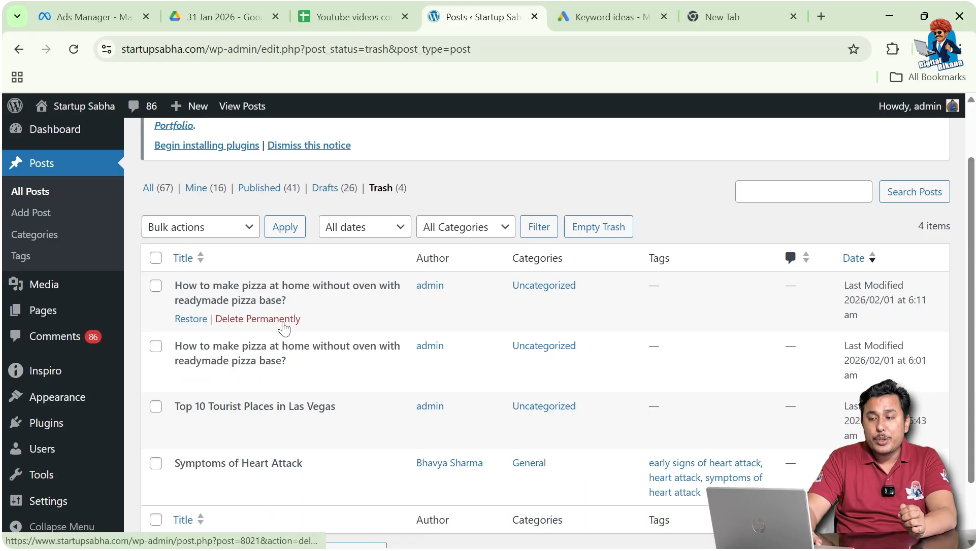
Step 4: Open Trash
In the All Posts section, click on the Trash option.
You will see the number of blog posts currently in Trash.
For example, it may show that four blog posts are in Trash.
Click on Trash to open the list of deleted blog posts.

Permanently Deleting a Blog Post
If you want to permanently remove a blog post from your website, you can delete it permanently from the Trash section.
Once permanently deleted, the blog post cannot be restored from the WordPress dashboard.
Step 5: Delete Permanently
Inside the Trash section, move your cursor over the blog post title.
The Delete Permanently option will appear under the blog post title.
Click on Delete Permanently.
After clicking Delete Permanently, the blog post will be removed permanently from your website.
It will no longer be available in Trash or anywhere else in the dashboard.
Difference Between Trash and Permanent Deletion
When you click on Trash, the blog post is temporarily removed.
It can still be restored from the Trash section.
When you click on Delete Permanently, the blog post is removed completely.
It cannot be recovered from the WordPress dashboard.
Therefore, it is important to ensure that you truly want to delete the blog post before permanently deleting it.
Why WordPress Uses Trash Feature
The Trash feature helps prevent accidental data loss.
If a blog post is deleted by mistake, it can be restored from the Trash section.
This feature provides an extra layer of safety.
Instead of removing content instantly, WordPress keeps it in Trash for a certain period.
This gives users time to recover deleted posts if necessary.
Managing Deleted Blog Posts
Inside the Trash section, you can:
- Restore blog posts
- Delete them permanently
This allows better control over content management.
If you are unsure about deleting a blog post permanently, you can leave it in Trash temporarily.
Later, you can decide whether to restore or permanently delete it.
Important Points to Remember
Always check the blog post carefully before deleting it permanently.
Moving a blog post to Trash is reversible.
Deleting a blog post permanently is not reversible from the dashboard.
If you accidentally delete a blog post permanently, you may need a backup to recover it.
Therefore, use the Delete Permanently option carefully.
Conclusion
Deleting a blog post on a WordPress website is a simple process. You can move a blog post to Trash by clicking the Trash option under the blog post title. The deleted post will appear in the Trash section.
If you want to remove the blog post completely, you can click Delete Permanently from the Trash section.
The Trash feature helps prevent accidental data loss by allowing temporary deletion before permanent removal. By following these steps, you can easily manage and delete blog posts on your WordPress website.
Related Posts


