
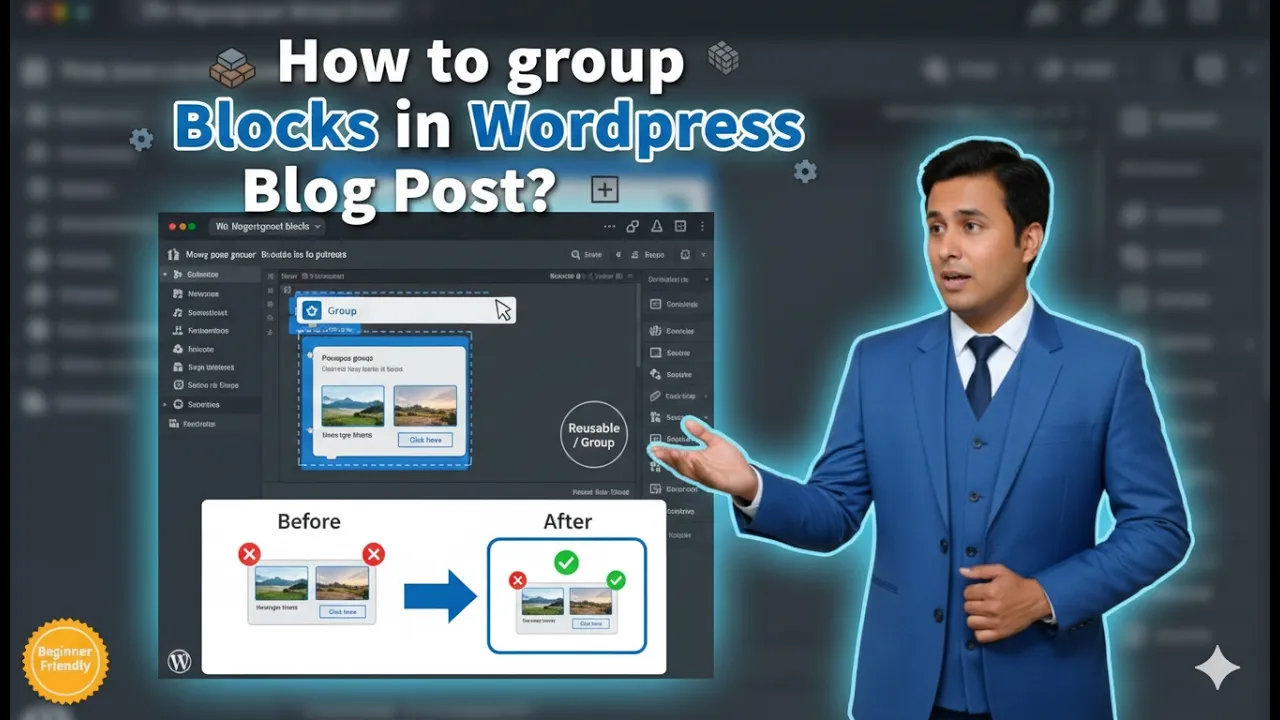
Grouping blocks in a WordPress blog post is a useful feature that helps manage multiple blocks together. When writing or editing a blog post, you may have several headings, paragraphs, or bullet points that belong to the same section. Instead of moving or editing each block individually, you can group them together and manage them as a single unit.
This article explains how to group blocks in a WordPress blog post using the WordPress block editor. The explanation is based on editing an existing blog post so that the process can be understood clearly.
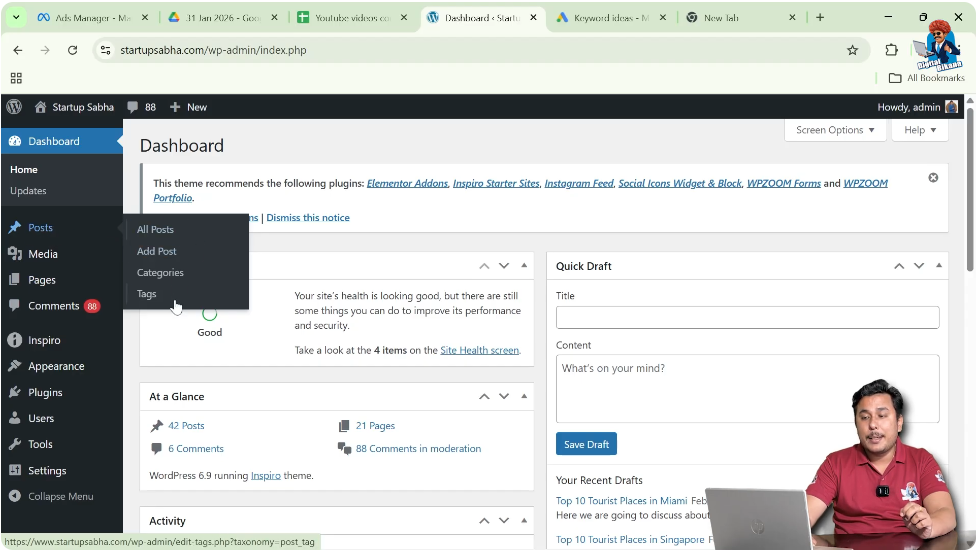
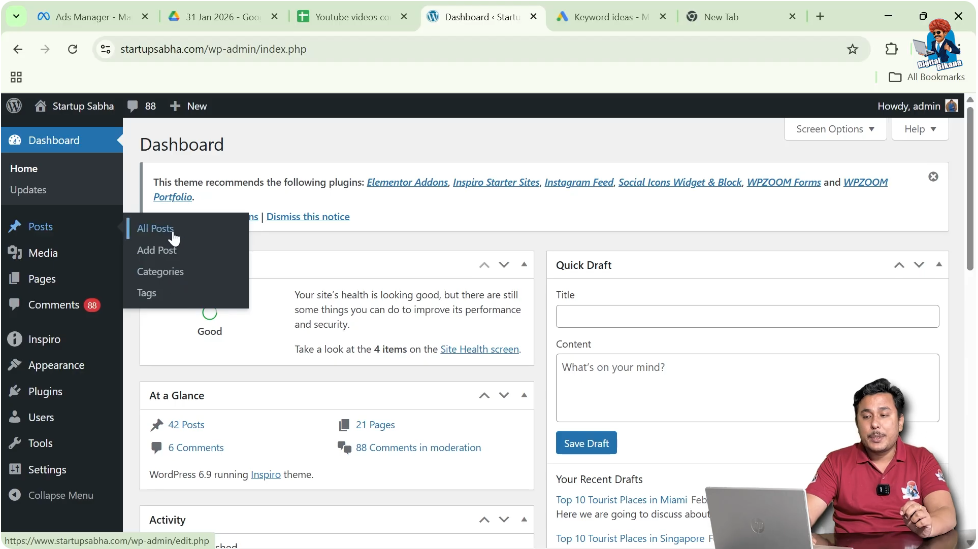
When you log in to the WordPress admin dashboard, you will see different options in the left side toolbar. One of these options is the Posts section, which allows you to manage blog posts.
Accessing the Posts Section
Before grouping blocks, you need to open a blog post inside the WordPress editor.
Step 1: Open the Posts Menu
Log in to your WordPress website admin dashboard.
On the left side toolbar, move your cursor over the Posts option.
As soon as you move your cursor over Posts, a submenu will appear.
This submenu contains the following options:
- All Posts
- Add Post
If you want to create a new blog post, you can click on Add Post.
In this case, click on All Posts because an existing blog post is used for demonstration.
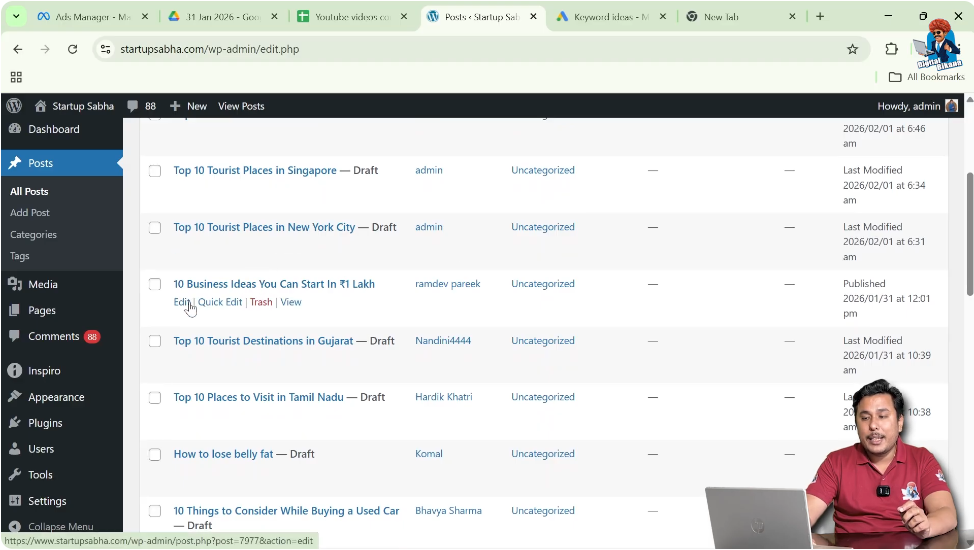
Opening an Existing Blog Post
After clicking on All Posts, a list of blog posts written by you will be displayed.
When you move your cursor over any blog post title, the Edit option appears below the title.
Step 2: Edit the Blog Post
Click on the Edit button under the blog post title.
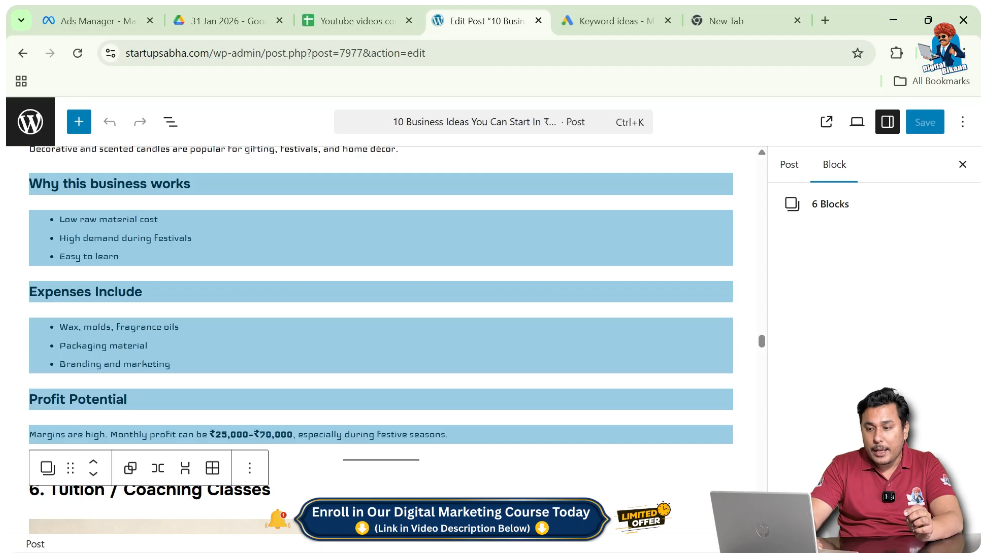
After clicking Edit, the blog post will open in editor mode.
You will now see all the blocks used in the blog post.
Why You Need to Group Blocks
Grouping blocks becomes useful when you want to rearrange or delete multiple blocks at once.
If you try to rearrange blocks individually, it can become troublesome because you need to move each block one by one.
For example, suppose you have:
- A heading block
- A bullet points block
- Another heading block
- Another bullet points block
If these blocks belong to one section, moving them individually can take time.
Instead, you can group them together and move them simultaneously.
Grouping blocks helps in:
- Rearranging multiple blocks together
- Deleting multiple blocks together
- Managing related content as a single unit
Selecting Blocks to Group
To group blocks, you first need to select multiple blocks.
Step 3: Select Multiple Blocks
Move your cursor to the left or right side of the blocks you want to group.
Press and hold the left mouse button.
While holding the left mouse button, drag your cursor upward or downward to select multiple blocks.
For example, you may select:
- Three heading blocks
- Two bullet point blocks
- One paragraph block
After selecting the required blocks, release the left mouse button.
All selected blocks will be highlighted.
Grouping Selected Blocks
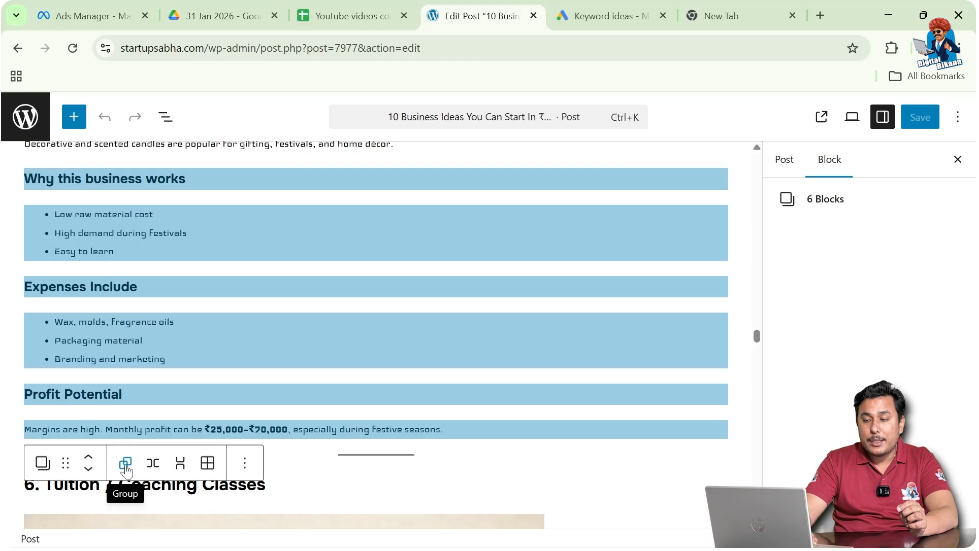
After selecting multiple blocks, a toolbar will appear.
The toolbar may appear at the top or just above the selected blocks.
Step 4: Click on Group Option
In the toolbar, you will see the Group option.
Click on the Group option.
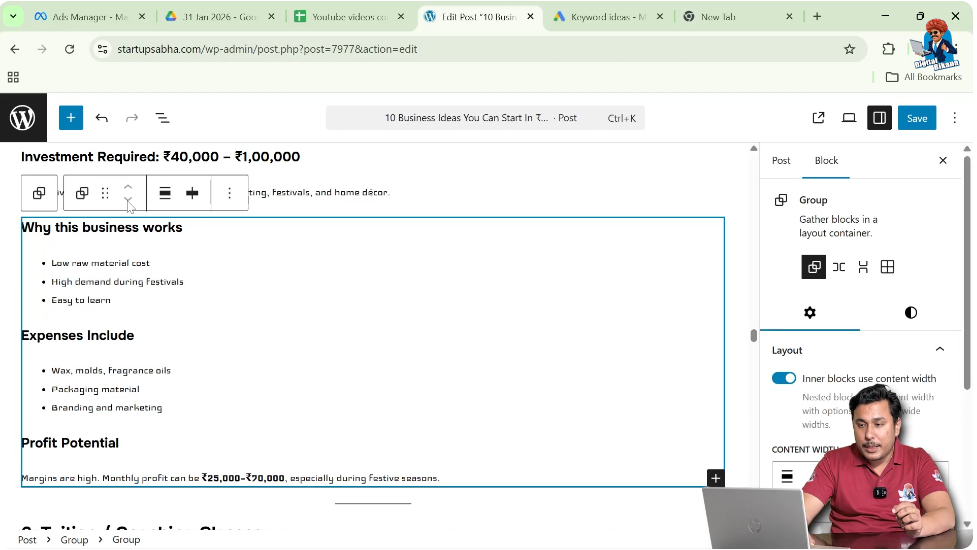
After clicking Group, the selected blocks will be combined into a single grouped block.
Now all selected blocks are part of one group.
Moving Grouped Blocks
Once blocks are grouped, they can be moved together.

Instead of moving each block individually, you can move the entire group at once.
Step 5: Move Grouped Blocks Up or Down
Click anywhere inside the grouped block.
The toolbar will appear.
In the toolbar, you will see:
- Move Up
- Move Down
Click Move Up to move the entire group upward.
Click Move Down to move the entire group downward.
All grouped blocks will move together.
This makes rearranging sections easier.
Example of Grouping Blocks
For example, suppose you want to group:
- The heading “Why This Business Works”
- Three bullet points under it
- Another heading
- Another bullet points block
Select all these blocks by clicking and dragging your mouse.
After selecting them, click on the Group option.
Now these blocks are grouped.
You can move them together using Move Up or Move Down.
This saves time and effort.
Ungrouping Blocks
If you no longer want the blocks to remain grouped, you can ungroup them.
Step 6: Ungroup the Blocks
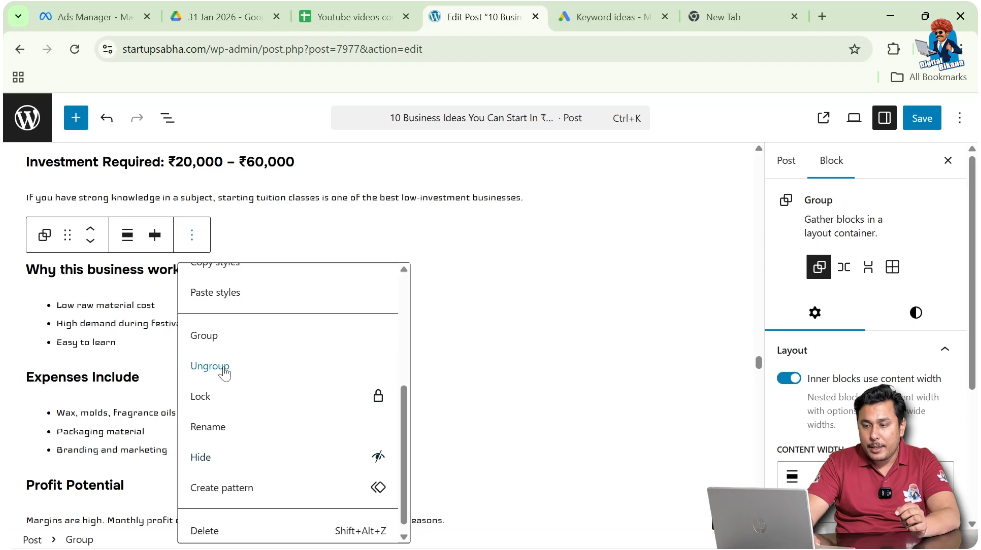
Click on the grouped block.
The toolbar will appear.
Click on the three-dot menu in the toolbar.
In the dropdown menu, select Ungroup.
After clicking Ungroup, the blocks will be separated again.
Now each block can be edited or moved individually.
When to Use Grouping
Grouping should be used when:
- Multiple blocks belong to one section
- You want to rearrange a full section
- You want to delete a complete section
- You want to manage content more efficiently
Grouping blocks helps maintain structure and organization in blog posts.
It reduces the effort required to move blocks one by one.
Important Notes About Grouping
The toolbar appears only when blocks are selected.
If no blocks are selected, the Group option will not appear.
Make sure to properly select all required blocks before grouping.
You can select blocks by:
- Clicking and dragging the mouse
- Selecting from the block list view
Once grouped, blocks behave like a single unit until ungrouped.
Managing Content with Grouped Blocks
Grouped blocks allow better content management.
Instead of treating headings, paragraphs, and lists separately, grouping combines them into a structured section.
This helps especially when editing long blog posts.
You can rearrange sections easily.
You can also duplicate grouped sections if required.
Grouping improves workflow efficiency in WordPress.
Conclusion
Grouping blocks in a WordPress blog post is a simple and powerful feature. It allows multiple blocks such as headings, paragraphs, and bullet points to be combined into a single unit.
By selecting multiple blocks and clicking the Group option, you can manage them together. Grouped blocks can be moved up or down simultaneously, making rearrangement easier.
If needed, grouped blocks can also be ungrouped using the Ungroup option from the three-dot menu.
Grouping blocks helps organize content properly and simplifies editing tasks in WordPress.
Related Posts


