
Adding bullet points in a WordPress blog post helps organize content in a clear and readable format. Bullet points make it easier for readers to understand important information quickly. Instead of writing everything in long paragraphs, lists help present content in a structured way.
In this article, you will learn how to add bullet points and text in a WordPress blog post using the WordPress block editor. The process explained here uses an already written blog post as a reference so that the steps can be understood more clearly.
When you log in to the WordPress admin dashboard, you will see different options in the left side toolbar. One of these options is the Posts section, which is used to manage blog articles.
Accessing the Posts Section
Before adding bullet points, you need to open a blog post inside the WordPress editor.
Step 1: Open Posts Menu
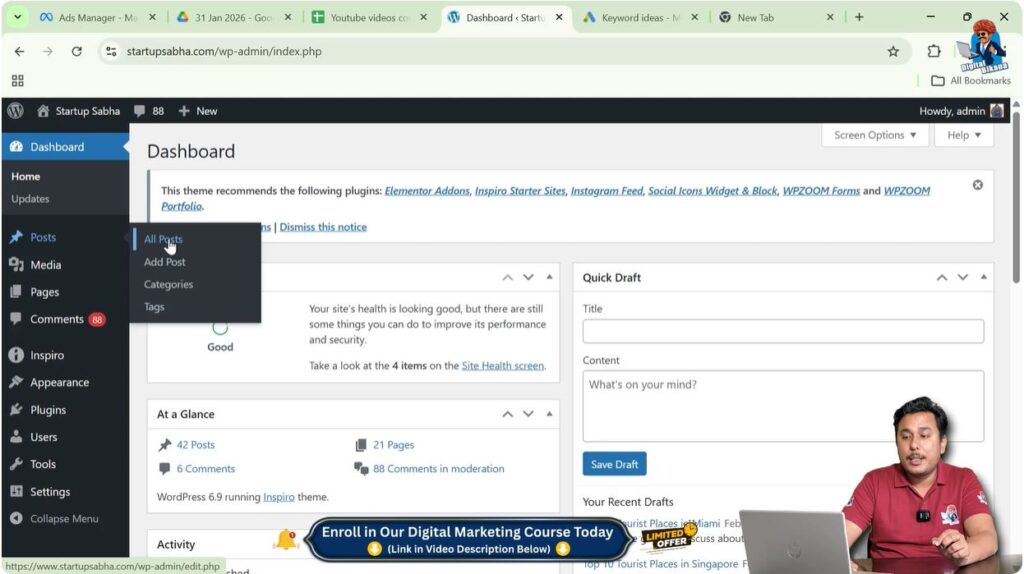
Log in to your WordPress website admin dashboard.
On the left side toolbar, move your cursor over the Posts option.
When you move the cursor over Posts, a submenu will automatically appear.
This submenu contains options such as:
- All Posts
- Add Post
The All Posts option shows all blog posts written on the website.
The Add Post option is used to create a new blog post.
In this case, an existing blog post is used as a reference to understand how to add bullet points.
Opening an Existing Blog Post
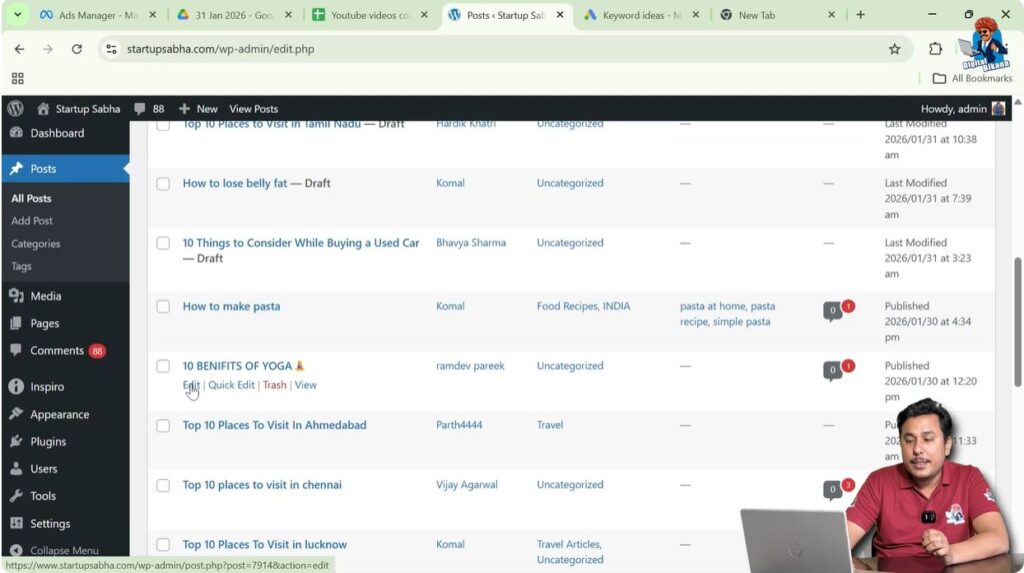
After clicking on All Posts, a list of blog posts will be displayed.
These posts may include many articles written earlier.
Step 2: Edit a Blog Post
Scroll down the list of posts.
Find the article you want to edit.
For example, a blog post titled 10 Benefits of Yoga can be selected.
Under the blog post title, you will see the Edit button.
Click on the Edit button.
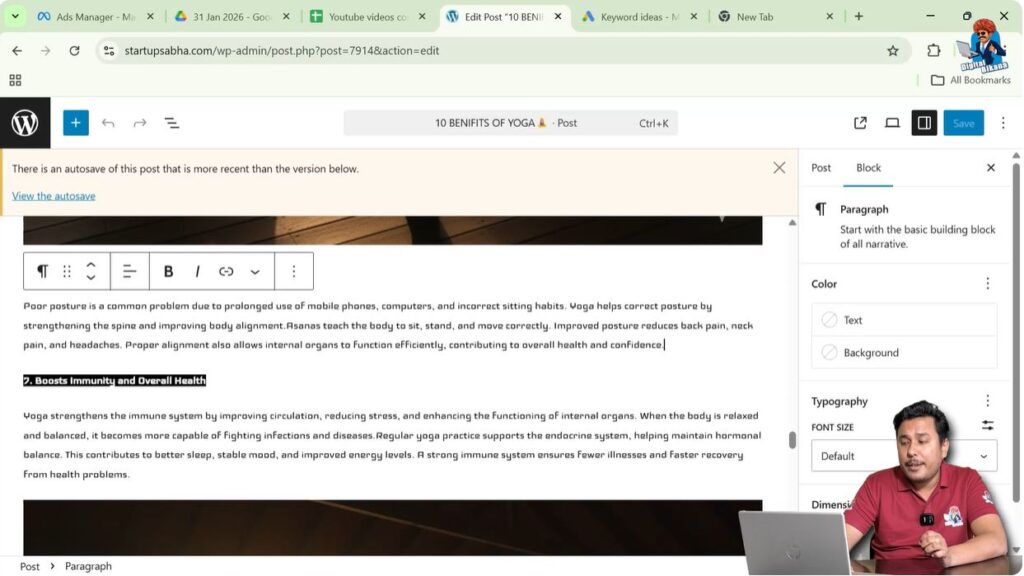
After clicking Edit, the WordPress blog post editor will open.
This editor allows you to modify content and add bullet points.
Finding the Right Place to Add Bullet Points
Once the blog post editor is open, you need to find the correct location where bullet points should be added.
Bullet points are usually added below headings or inside content sections.
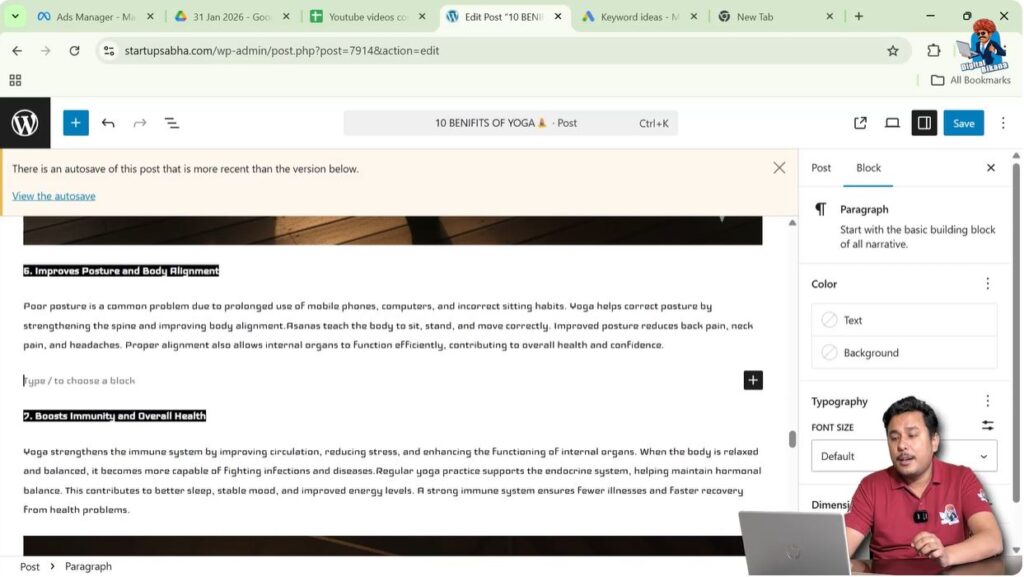
Step 3: Scroll to the Content Area
Scroll down to the article content.
Find a paragraph where you want to insert bullet points.
For example, you may find a section that contains a paragraph under a subheading.
Step 4: Create a New Line
Place your cursor at the end of the paragraph.
Press Enter on the keyboard.
This will create a new line.
Now you can start typing the content that you want to convert into bullet points.
Writing Text for Bullet Points
Before converting text into bullet points, you need to write the content.
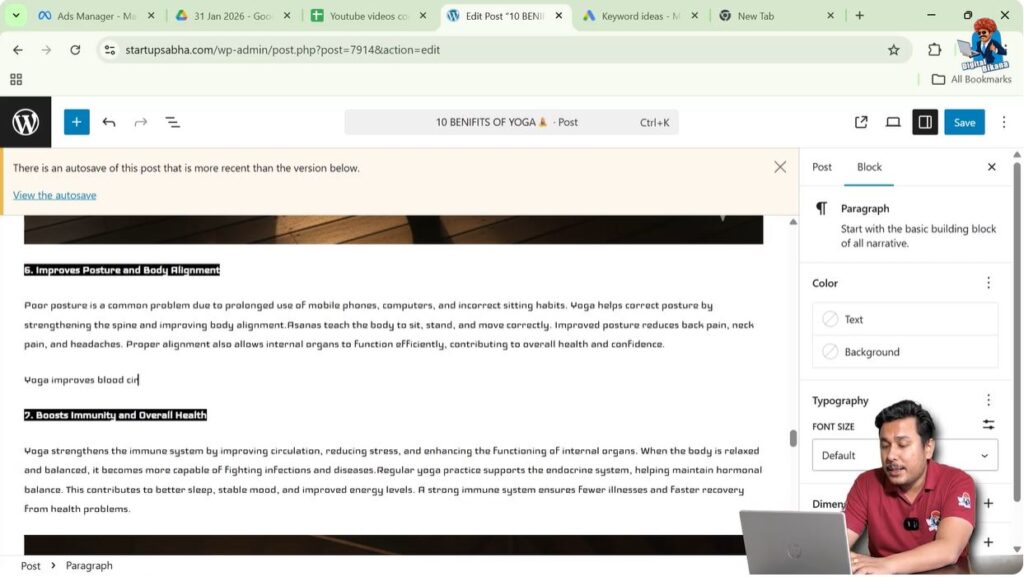
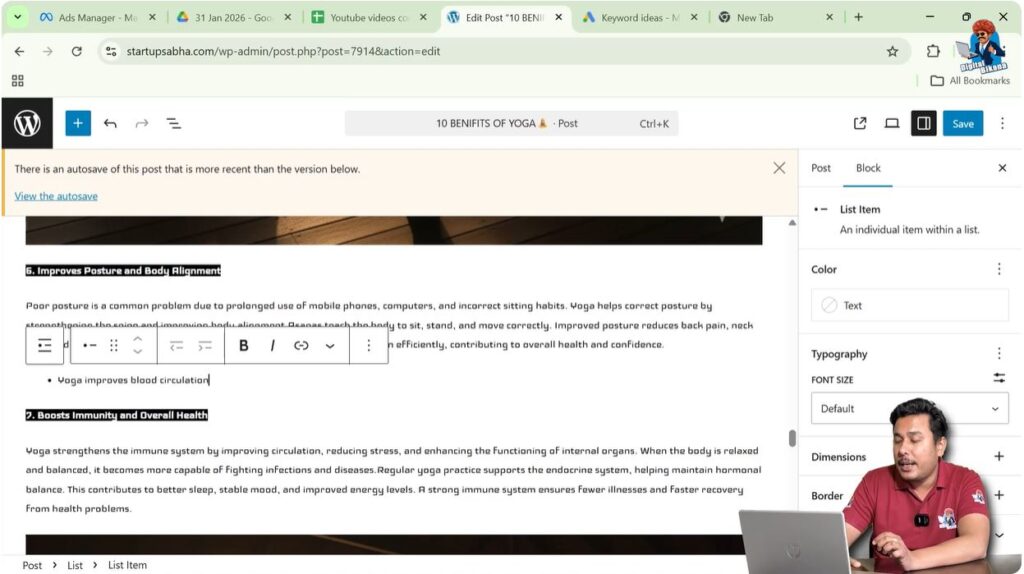
Step 5: Type the First Point
Start typing the text.
For example:
Yoga improves blood circulation.
After typing the text, you can convert it into a bullet point.
Converting Text into Bullet Points
WordPress provides tools to convert normal text into bullet points.
Step 6: Select the Text
Move your cursor over the text you have written.
When the text is selected, a toolbar will automatically appear.
This toolbar contains formatting options.
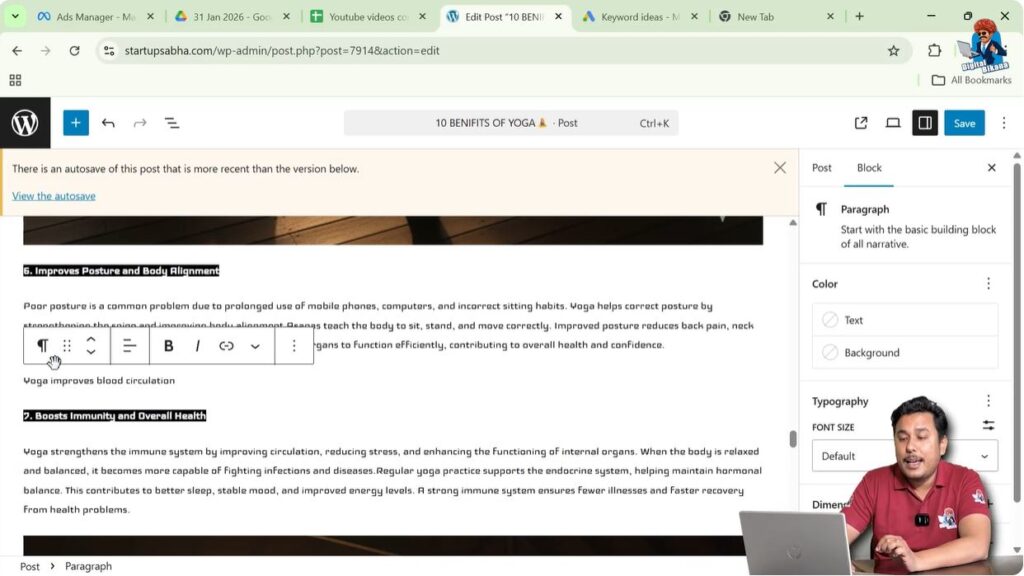
Step 7: Open More Options
In the toolbar, find the arrow button for more options.
Click on the arrow button.
You will see multiple formatting options.

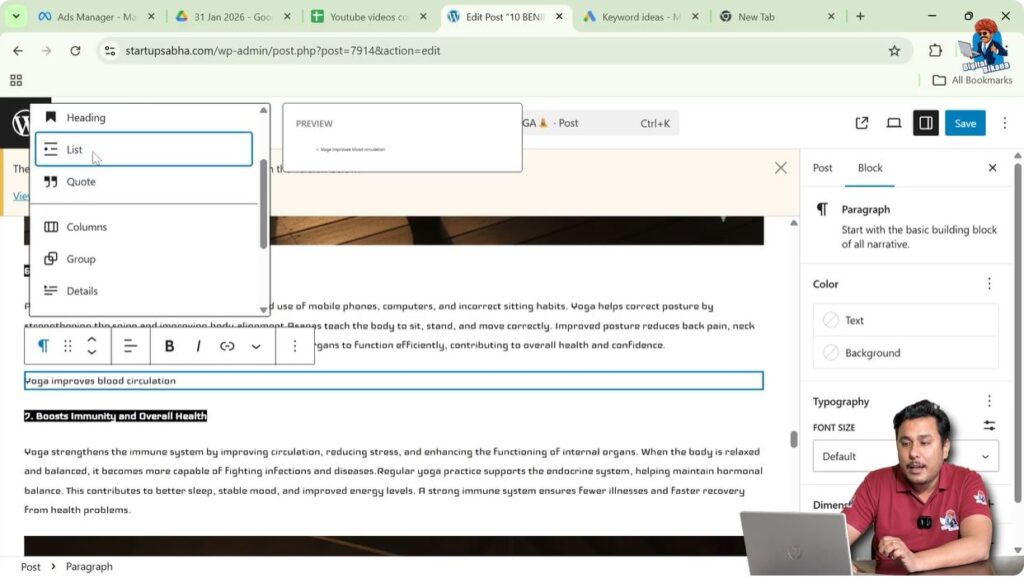
Step 8: Select List Option
You can also click on the Paragraph (P) icon.
From there, select List.
After selecting the list option, the text will be converted into a bullet point.
Now the first bullet point is created.
Adding More Bullet Points
Once the first bullet point is created, additional points can be added easily.
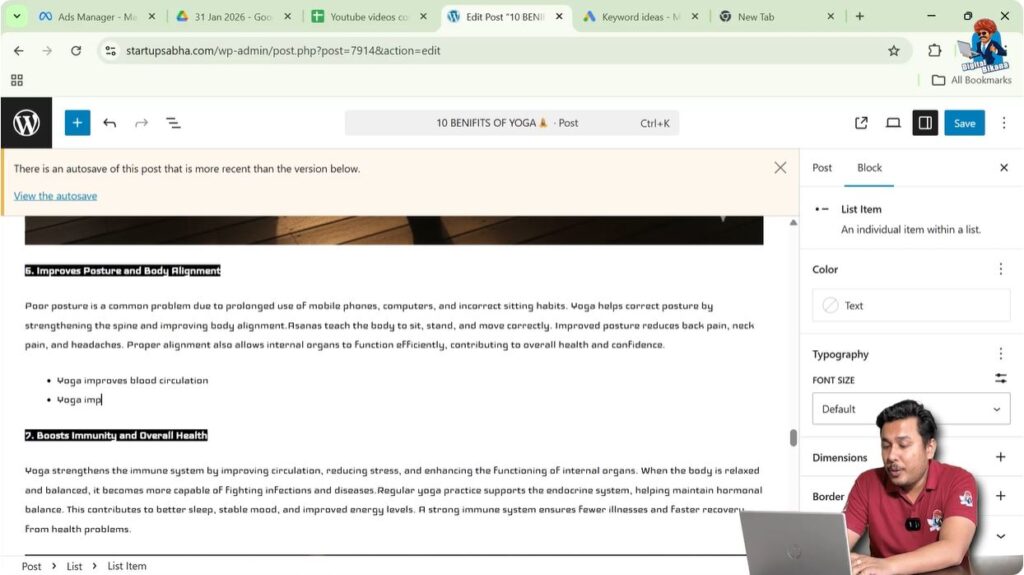
Step 9: Press Enter for Next Point
Place the cursor at the end of the bullet point text.
Press Enter.
A new bullet point will automatically appear.
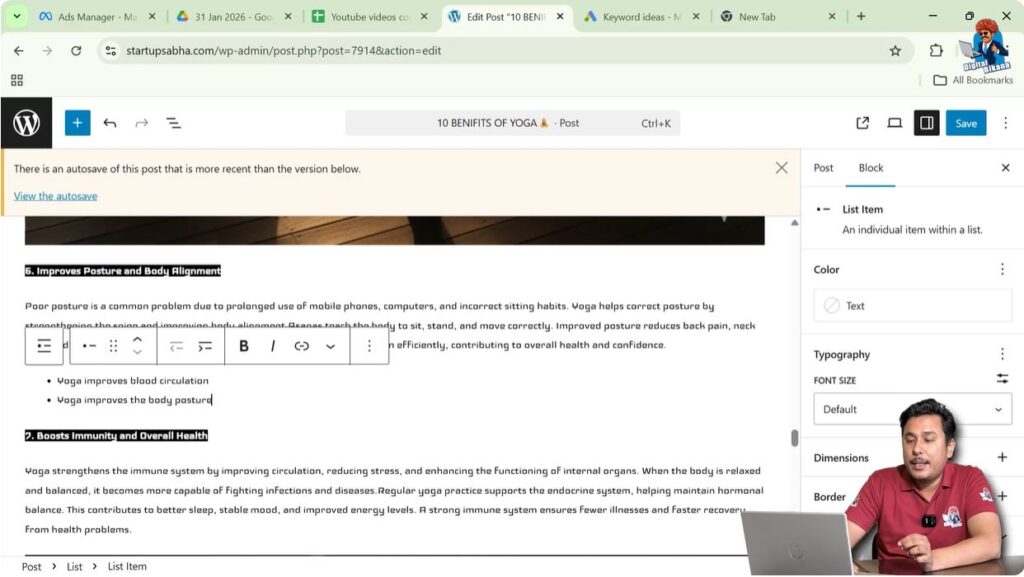
Step 10: Type the Next Point
Type the next point.
For example:
Yoga improves body posture.
This text will automatically appear as a bullet point.
You can continue adding more points in the same way.
Changing Bullet Points to Numbered List
WordPress also allows converting bullet points into numbered lists.
Numbered lists are useful when the content needs to be presented in a sequence.
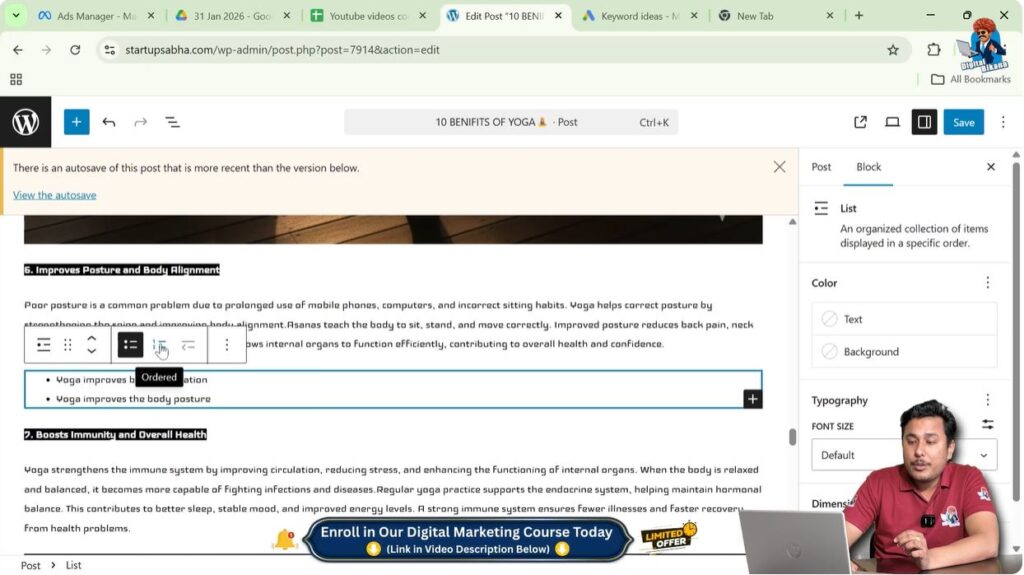
Step 11: Select the Bullet Points
Move your cursor over the bullet point text.
The top toolbar will appear automatically.
Step 12: Select Parent Block List
Click on the list item options.
Select Parent Block List.
This allows you to control list formatting.

Step 13: Convert to Ordered List
Select the Ordered List option.
After selecting this option, the bullet points will be converted into numbered points.
For example:
- Yoga improves blood circulation
- Yoga improves body posture
This is useful when you want to show content in order.
Using Bullet Points Effectively
Bullet points improve readability and make content easier to understand.
Instead of writing long paragraphs, important information can be shown using lists.
Bullet points help highlight key information and improve user experience.
They make blog posts look more organized and professional.
Bullet points are especially useful for:
- Listing benefits
- Showing features
- Highlighting steps
- Presenting important points
Toolbar Appears Only After Selection
One important thing to remember is that the toolbar appears only when text is selected.
If the text is not selected, the formatting toolbar will not appear.
Therefore, always select the text before applying bullet points.
Once the text is selected, the toolbar will appear automatically.
From there, the list option can be selected.
Conclusion
Adding bullet points in a WordPress blog post is a simple process that helps improve content structure and readability. By opening a blog post, creating a new line, typing the content, and converting the text into a list, bullet points can be added easily.
The WordPress block editor provides options to convert normal text into bullet points or numbered lists. The toolbar appears automatically when text is selected, allowing easy formatting.
Bullet points make blog posts easier to read and help present information in a clear and organized way.
Related Posts


