
Making a blog post private on a WordPress website is a useful feature when you do not want a blog post to be publicly visible. WordPress allows you to control the visibility of your posts so that only authorized users can view them. This feature is helpful when you are working on content that is not ready for public viewing or when you want to share the content only with specific users.
In this article, you will learn how to make your blog post private on a WordPress website using two different methods. You will also understand other visibility options available in WordPress.
Opening the Posts Section in WordPress Dashboard
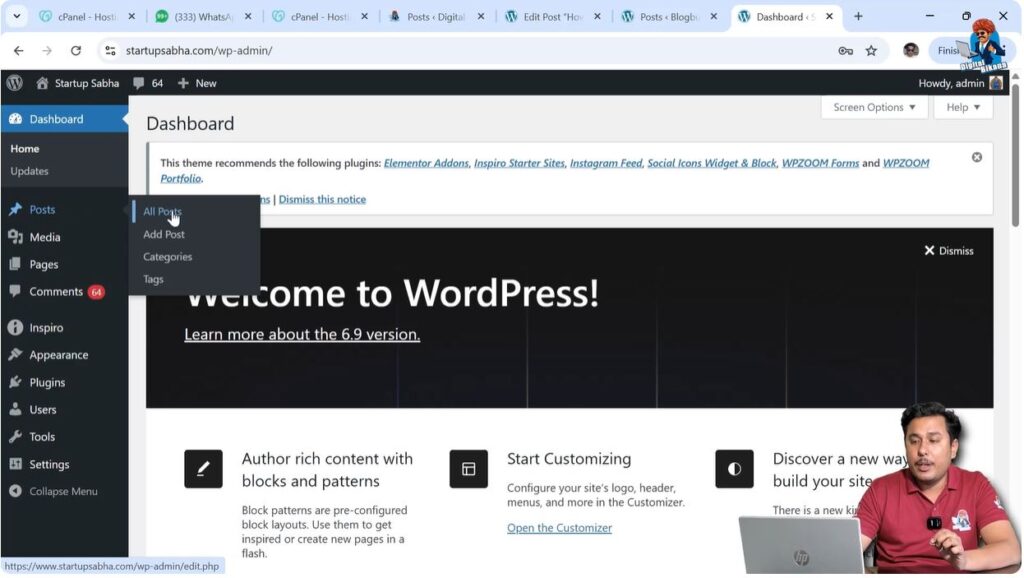
First, log in to your WordPress admin dashboard.
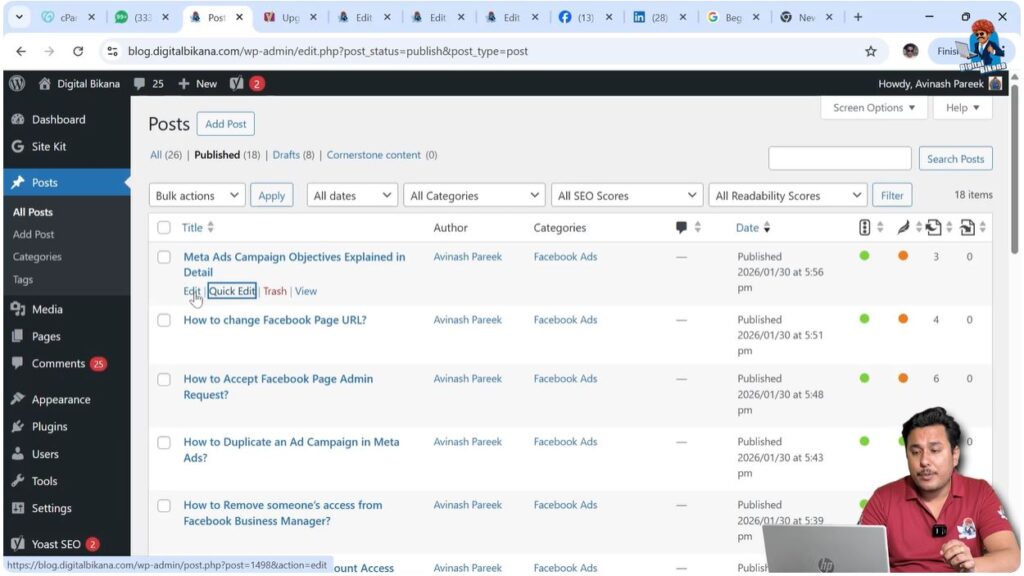
After logging in, go to the left-side toolbar and click on the Posts section. Then click on All Posts to open the list of blog posts available on your website.
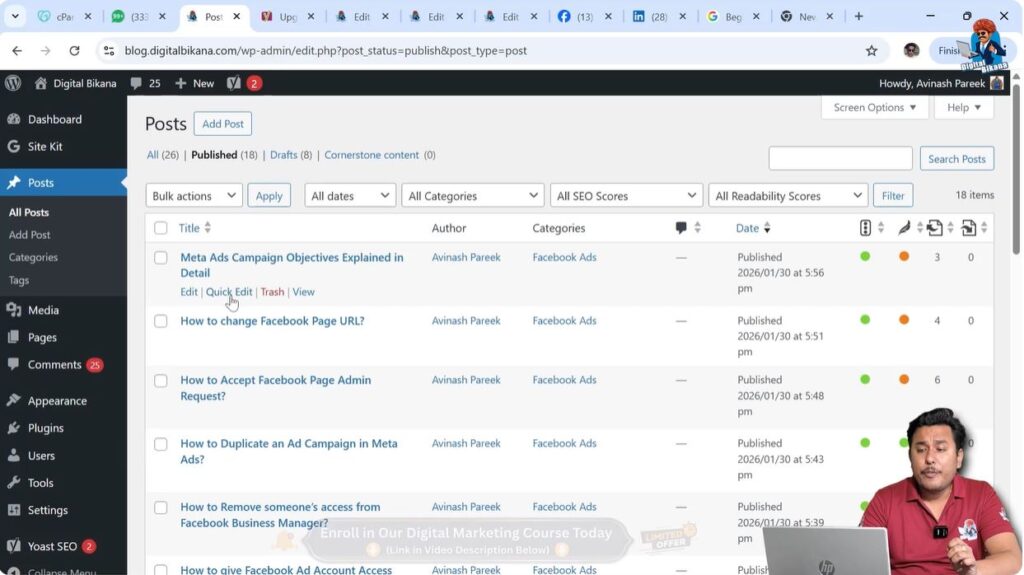
In the All Posts section, you can see all the blog posts that have been written on your website.
You can make any published blog post private.
Under each blog post title, you will see options such as:
- Edit
- Quick Edit
Both options can be used to change the visibility of a blog post.
Making Blog Post Private Using Quick Edit
The first method to make a blog post private is by using the Quick Edit option.
This method allows you to make a blog post private without opening the full editor.
This is a faster method if you only want to change the visibility.
Move your cursor over the blog post title.
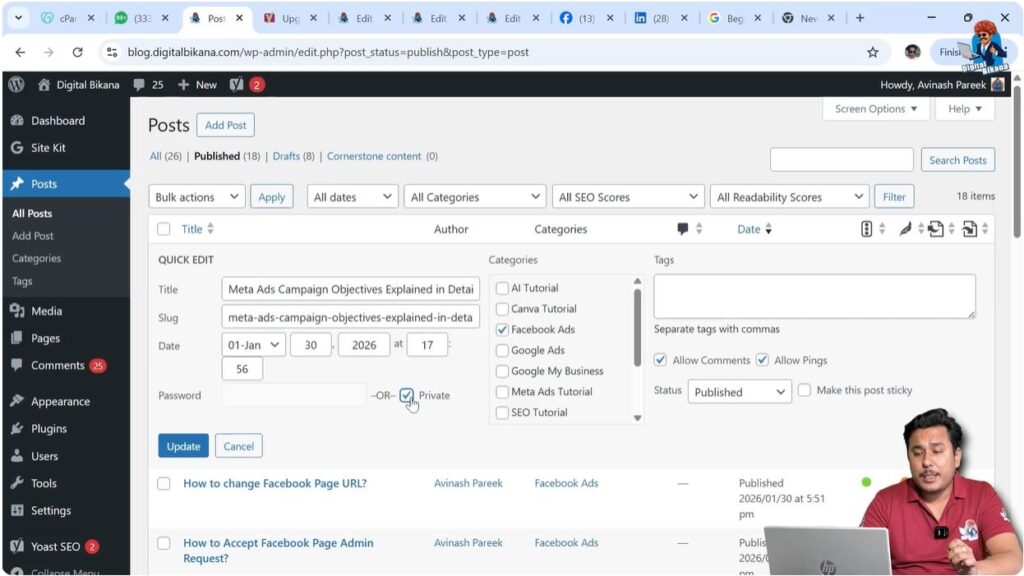
Click on Quick Edit.
You will see several settings options.
Find the Private checkbox.
Check the Private option.
Click on Update.
After updating, the blog post will become private.
The blog post will no longer be publicly visible.
Visitors coming to your website will not be able to see this blog post.
Only users who have the link to the blog post can view it.
Step 1 – Open Quick Edit
Go to Posts → All Posts.
Move your cursor over the blog post title.
Click on Quick Edit.
Step 2 – Make Post Private
Find the Private checkbox.
Select the Private option.
Click on Update.
The blog post will become private.
Making Blog Post Private Using Editor Mode
The second method to make a blog post private is by using the WordPress editor.
This method allows you to control the visibility settings from inside the editor.
Move your cursor over the blog post title.
Click on Edit.
The blog post editor will open.
Look at the right-side settings panel.
If the settings panel is not visible, click on the Settings icon near the Publish button.
Open the Post section.
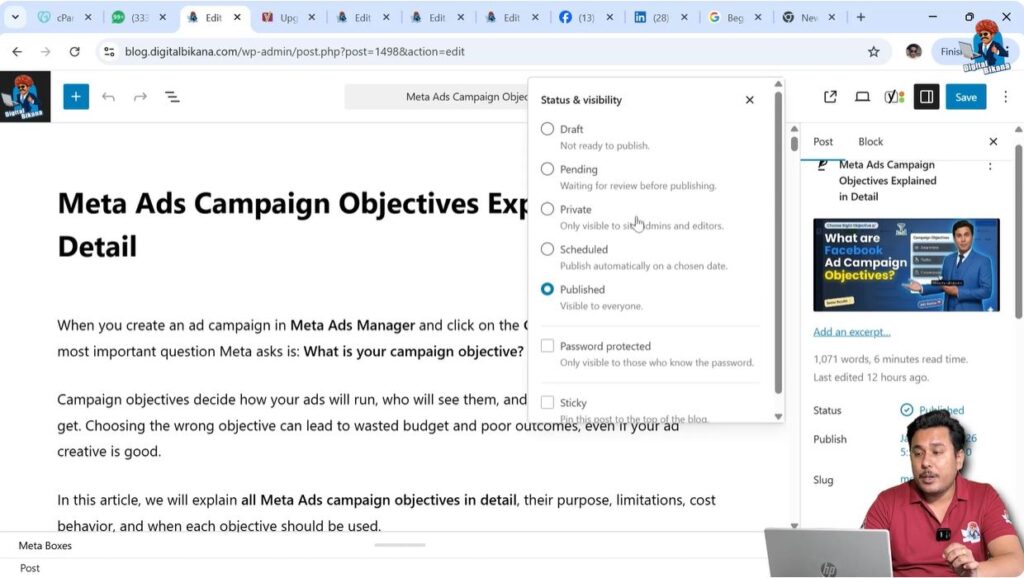
Here you will see the Status and Visibility settings.
The current status may show as Published.
Click on Published to open the visibility options.
You will see multiple visibility options available.
Step 3 – Open Post Editor
Go to Posts → All Posts.
Move your cursor over the blog post title.
Click on Edit.
The editor will open.
Step 4 – Change Visibility to Private
Go to the right-side settings panel.
Open the Post section.
Click on Published.
Select Private.
Update the post.
The blog post will become private.
Draft Status Option
WordPress allows you to change the status of a blog post to Draft.
If a published blog post contains mistakes or needs further editing, you can change it back to Draft.
Draft posts are not publicly visible.
Draft status is useful when you want to continue editing the post later.
Pending Review Option
WordPress also provides a Pending Review status.
This option is useful when multiple users work on a website.
When a post is marked as Pending Review, an editor or administrator can review the post before publishing.
This helps maintain content quality.
Pending posts are not publicly visible.
Scheduled Post Option
WordPress allows you to schedule blog posts for future publishing.
Instead of publishing immediately, you can set a future date and time.
The blog post will automatically be published on the scheduled date.
Scheduling helps maintain a consistent posting schedule.
Password Protected Option
WordPress also provides a password-protected option.
If a post is password protected, visitors must enter the password to view the content.
When users open the blog post URL, they will be asked to enter the password.
Only users who know the password can access the blog post.
This option allows controlled access.
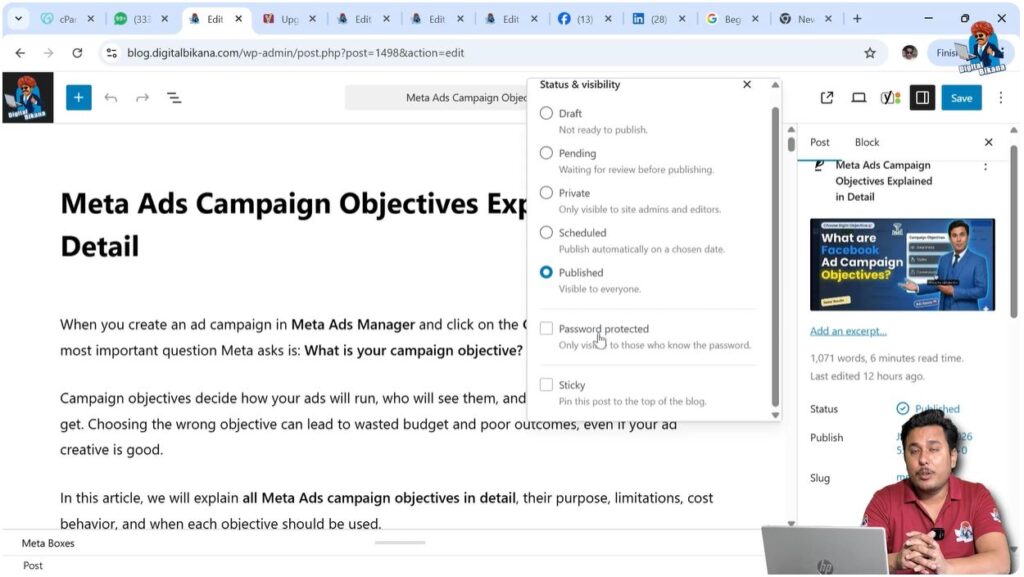
Sticky Post Option
WordPress also provides a Sticky Post option.
Sticky posts remain at the top of the blog page.
Even when new posts are published, sticky posts continue to appear at the top.
This option is useful for highlighting important posts.
When to Use Private Posts
Private posts are useful when content is not ready for public viewing.
They are helpful for internal discussions or testing.
Private posts can also be used for sharing limited information.
Private posts allow controlled access to content.
Conclusion
Making a blog post private on a WordPress website is simple and can be done using Quick Edit or the post editor. Private posts are not publicly visible and can only be accessed by authorized users.
WordPress also provides additional visibility options such as Draft, Pending Review, Scheduled posts, Password Protected posts, and Sticky posts.
These visibility options help you manage and control how your blog posts appear on your website.
Related Posts


