

In this article, you will learn how to connect a domain name with a hosting plan in GoDaddy step by step. Connecting a domain name with a hosting plan is an important step before installing WordPress or creating a website.
Before connecting a domain name with hosting, you should already have purchased both the domain name and the hosting plan. After purchasing them, the next step is to connect the domain name with the hosting plan so that your website files can be stored on the hosting server.
Once the domain name is connected with the hosting plan, you will be able to install WordPress on the domain name connected with your hosting storage.
This guide explains how to add a domain name to your hosting plan using GoDaddy.
Requirement Before Connecting Domain and Hosting
Before starting the process, make sure you have already:
After purchasing both, the next step is to connect the domain name with the hosting plan.
This allows the domain name to use the hosting storage and resources.
Why Domain and Hosting Connection is Required
Connecting a domain name with a hosting plan allows you to use your hosting storage with your domain name.
Without connecting the domain and hosting plan, you cannot install WordPress or upload website files.
Once the domain name is connected with the hosting plan, you can proceed with installing WordPress on the domain name.
Opening GoDaddy Website
1. Sign in to GoDaddy Account
First, open your browser and visit GoDaddy by searching GoDaddy on Google and opening the first website.
Sign in to your GoDaddy account.
After signing in, you will land on the GoDaddy homepage.

Accessing GoDaddy Products
2. Go to My Products Section
On the GoDaddy homepage, click on the profile icon.
After clicking on the profile icon, select My Products.
In the My Products section, you will see all the products and services you have purchased.
This includes:
All your purchased services are stored in the My Products section.

Opening Hosting Plan
3. Manage Hosting Plan
In the My Products section, scroll down to find your hosting plan.
Once you locate your hosting plan, click on Manage.
You may need to sign in again to your GoDaddy account.
After signing in again, you will reach your hosting dashboard.

Understanding Control Panel
Hosting Control Panel
After opening the hosting dashboard, you need to visit the Control Panel Admin.
The control panel is the place where you can manage your hosting resources.
Control panel works in a similar way to the control panel in a computer system.
For example, when you uninstall a program on a computer, you go to the control panel.
In the same way, hosting also has its own control panel where you can manage hosting settings and resources.
To continue the process, click on Control Panel Admin.
Opening cPanel
After clicking Control Panel Admin, you will enter the GoDaddy cPanel.
cPanel is the interface where you manage domains and hosting settings.
From cPanel, you can manage domains connected to your hosting plan.

Adding Domain to Hosting
4. Go to Domain Section
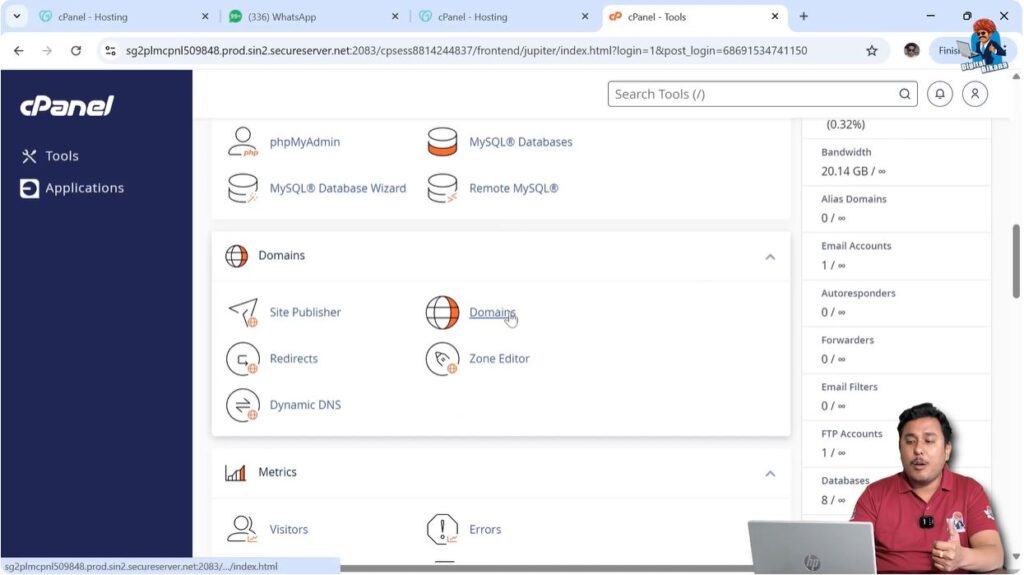
Inside cPanel, scroll down and find the Domain Section.
In the Domain Section, you will see an option called Domains.
Click on Domains to proceed.
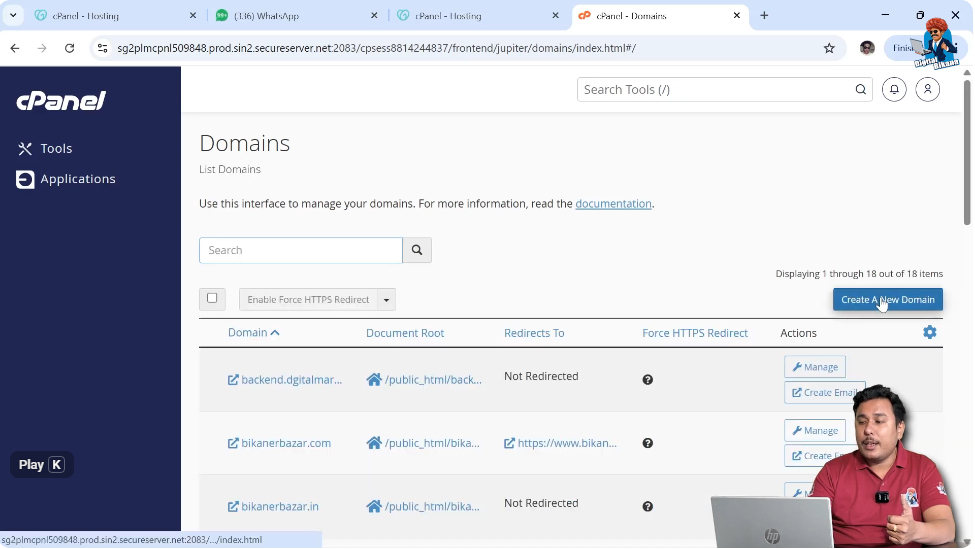
5. Create a New Domain
After clicking Domains, click on Create a New Domain.
This option allows you to connect a new domain name with your hosting plan.
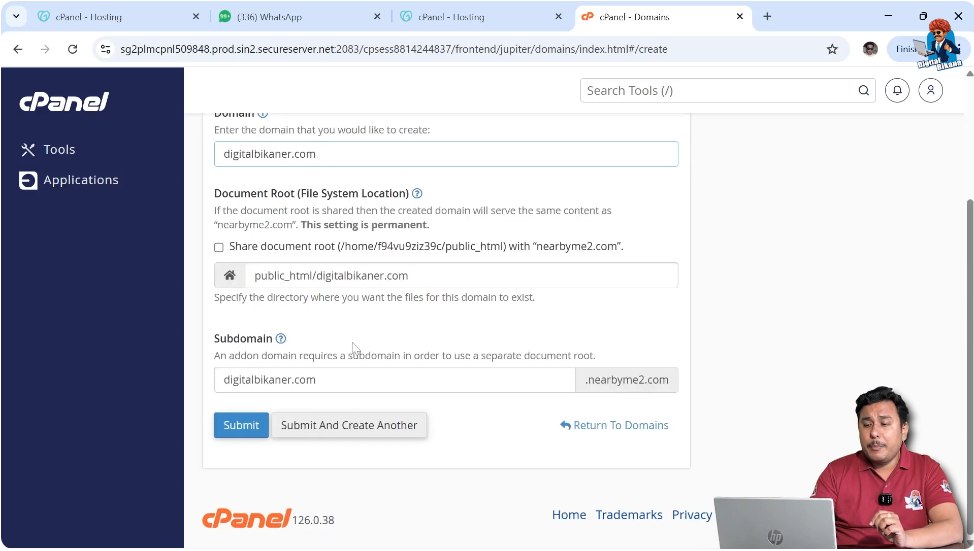
6. Enter Domain Name
After clicking Create a New Domain, enter the domain name that you want to connect with your hosting plan.
Type the domain name correctly and proceed further.

7. Create Subdomain (If Required)
After entering the domain name, the system may ask whether you want to create a subdomain.
If you want to create a subdomain, you can select the option.
After selecting the option, click on Submit.
Domain Added to Hosting
After clicking Submit, your domain name will be added to your hosting plan.
This means your domain name is now connected with your hosting storage.
This process is generally used when you already have a primary domain connected with your hosting plan and you want to connect an additional domain name.
After connecting the domain name with hosting, you can proceed with installing WordPress on the domain name.
Conclusion
Connecting a domain name with a hosting plan in GoDaddy is a simple process. You need to sign in to your GoDaddy account, go to My Products, open your hosting plan, access the control panel, and add a new domain name.
After connecting the domain name with the hosting plan, your hosting storage becomes available for that domain.
Once the domain name is connected successfully, you can install WordPress and start building your website.
Related Posts


