Hello friends, in this article we are going to learn how to create website traffic ads using Facebook Ads Manager in complete detail. Website traffic ads are used when your primary goal is to send people directly to your website so they can explore your products, services, or content.
Understanding Website Traffic Ads
Website traffic ads are designed to:
- Increase visits to your website
- Encourage users to click on a website CTA button
- Bring interested users directly to a landing page
In these ads, when users click the call-to-action button, they are redirected to the website URL you provide.
How to run Website Traffic Ads Using Facebook Ads Manager?
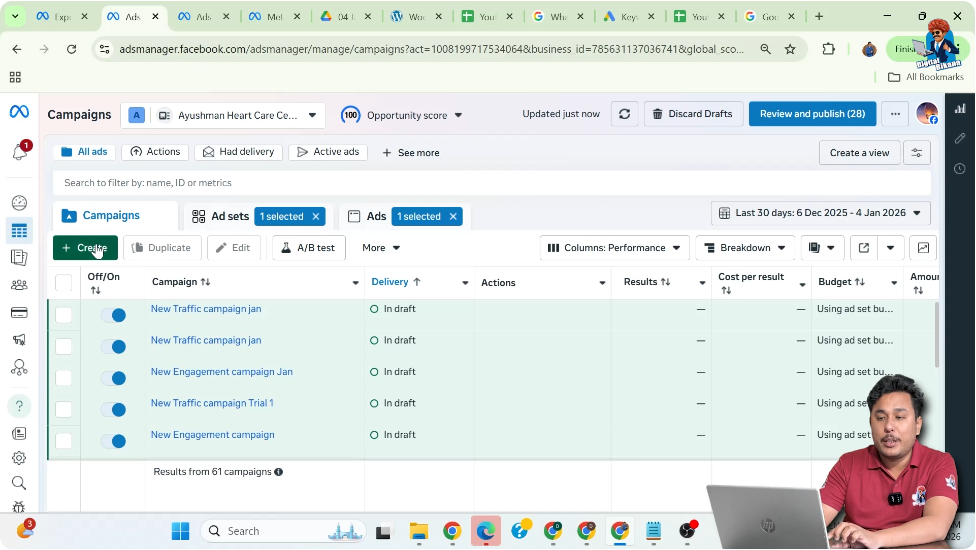
Step 1: Opening Facebook Ads Manager
First of all, log in to your Facebook Ads Manager.
Once you are inside Meta Ads Manager, you will see the dashboard. From here, click on the Create button to start creating a new ad campaign.
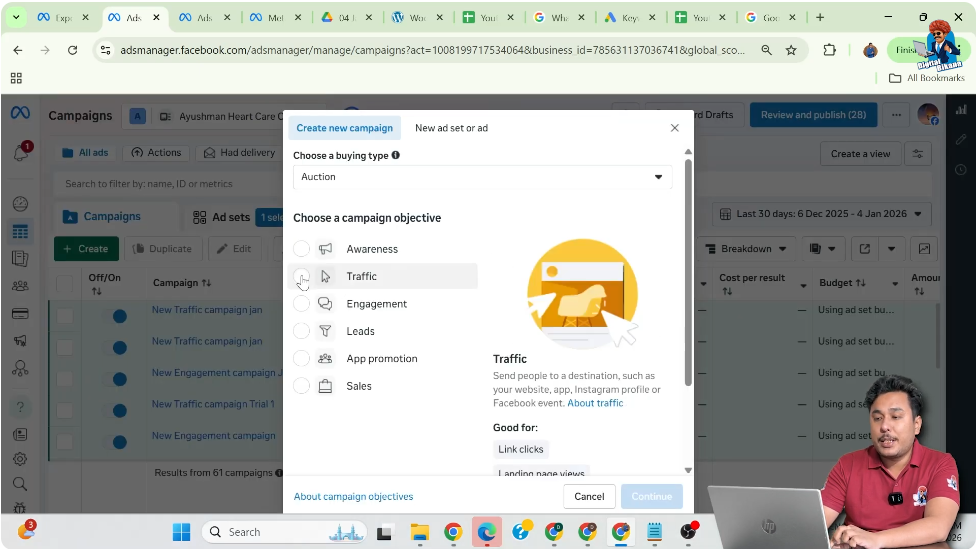
Step 2: Selecting the Traffic Campaign Objective
After clicking on Create, you will be asked to choose a campaign objective.
Here:
- Select Traffic as your campaign objective
The reason for selecting Traffic is that the main goal of this campaign is to get more visits on your website.
After selecting Traffic, click on Continue.
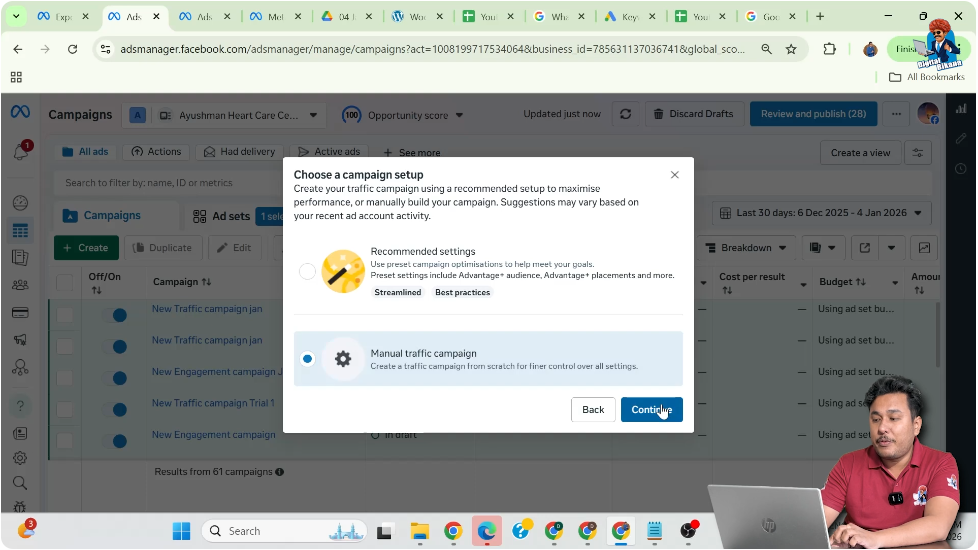
Step 3: Choosing Manual Traffic Campaign Setup
After selecting the Traffic objective, Facebook gives you two setup options.
Here:
- Select Manual Traffic Campaign
- Then click on Continue
This option allows you to control every setting manually at the campaign, ad set, and ad creative levels.
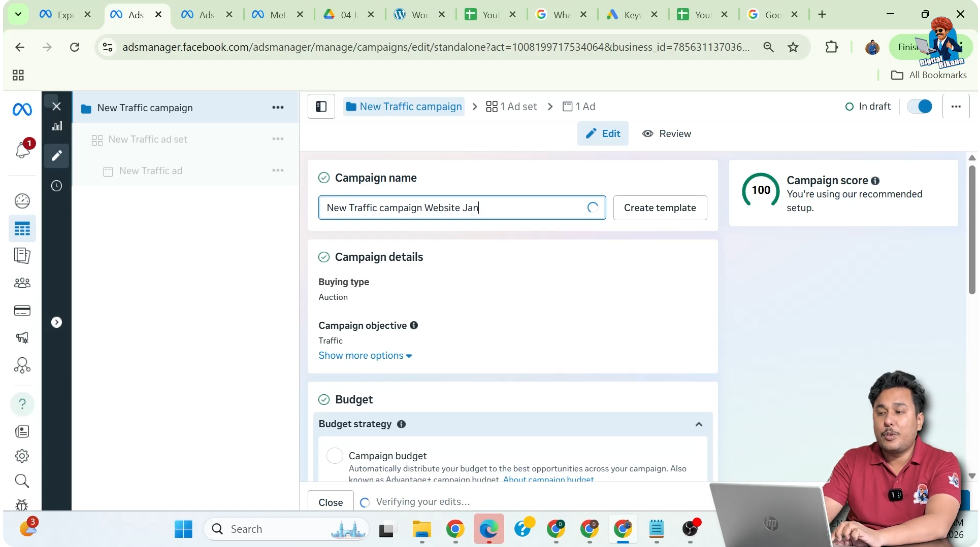
Step 4: Renaming the Campaign
At the campaign level, you can rename your campaign.
Important points about campaign naming:
- The campaign name is visible only to you
- It is for internal reference
- Users will never see this name
You can name the campaign anything that helps you identify it easily.
Budget Selection at Ad Set Level
While scrolling down, you will see the budget options.
Here:
- Budget is selected at the Ad Set level, not at the campaign level
This choice is intentional and is done for better control. The budget at the campaign level is not selected here.
Step 5: Turning Off A/B Testing
In the A/B testing section:
- Keep A/B testing turned off
This means you are not testing multiple variations of the campaign at this stage.

Step 6: Special Ad Category Selection
In the Special Ad Category section:
- Do not select any category if your business does not fall under it
Special ad categories apply only to certain industries. If your business does not belong to those categories, simply skip this step.
Click on Next.

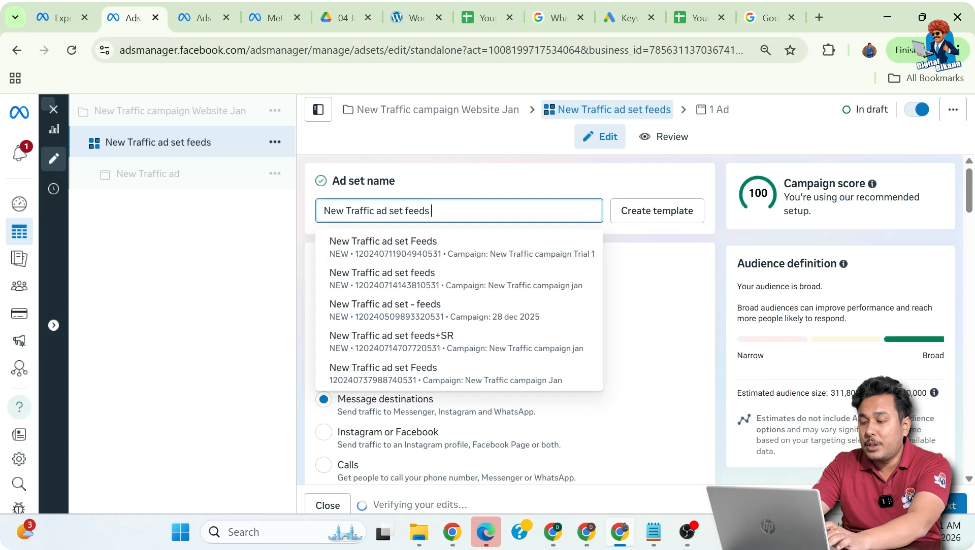
Step 7: Renaming the Ad Set
Now you are at the Ad Set level.
Here:
- Rename the ad set with any name you like
Just like the campaign name, the ad set name:
- Is for your reference only
- Is not visible to users
Step 8: Selecting Conversion Location as Website
In the conversion location section:
- Select Website
This ensures:
- A website CTA button appears under your ad
- Users who click the CTA are redirected to your website

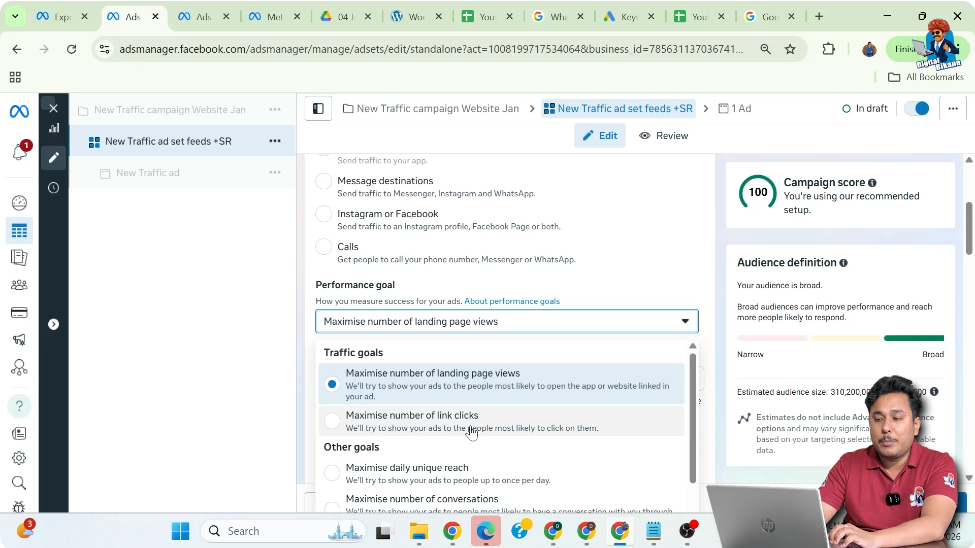
Step 9: Choosing the Performance Goal
Scroll down to the Performance Goal section.
Here, Facebook asks whether you want:
- Maximum landing page views
- Maximum link clicks
Select Maximum Link Clicks because:
- You want more people to click on the website button
- Your goal is to increase clicks to your website
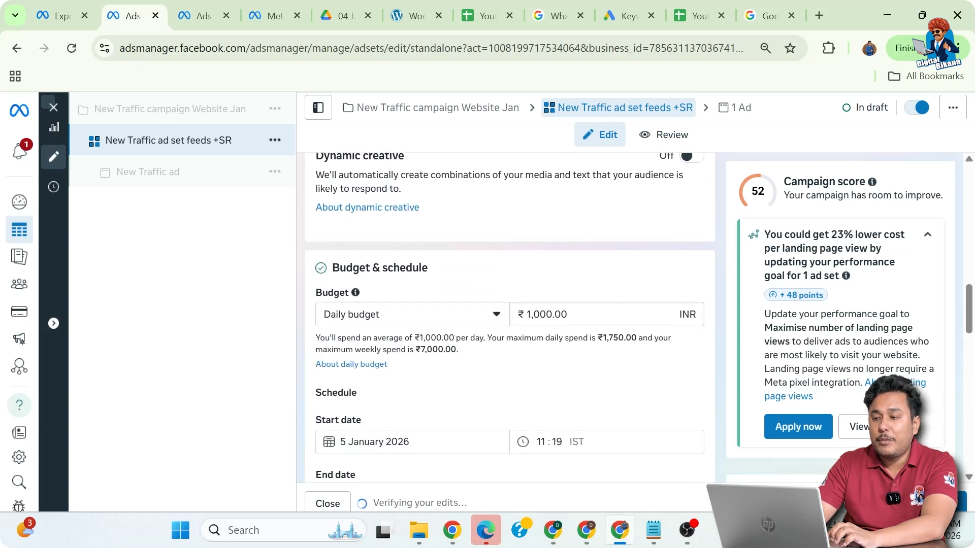
Step 10: Setting the Daily Budget
Now set your daily budget.
For example:
- Set the daily budget to ₹1,000 per day
This means Facebook will try to spend up to this amount each day for this ad set.
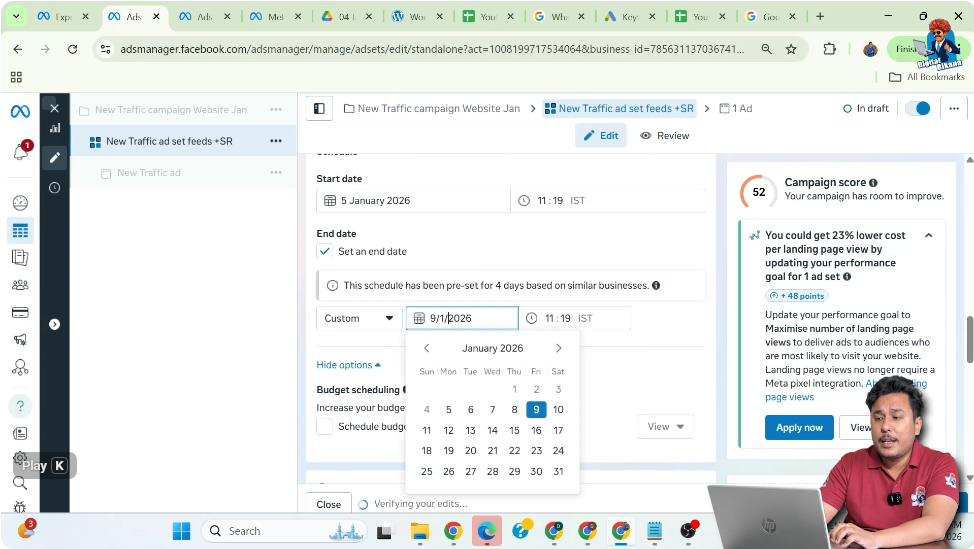
Step 11: Setting the Ad Schedule
In the schedule section:
- Select the start date
- Select the end date
For example:
- Running the ad for the next 10 days
This controls how long your ads will run.
Step 12: Setting Location Targeting
Scroll down to the Location section.
Here you can:
- Search for a place
- Select a city or area
- Define a radius
This allows your ads to be shown only to people within the selected location and radius.

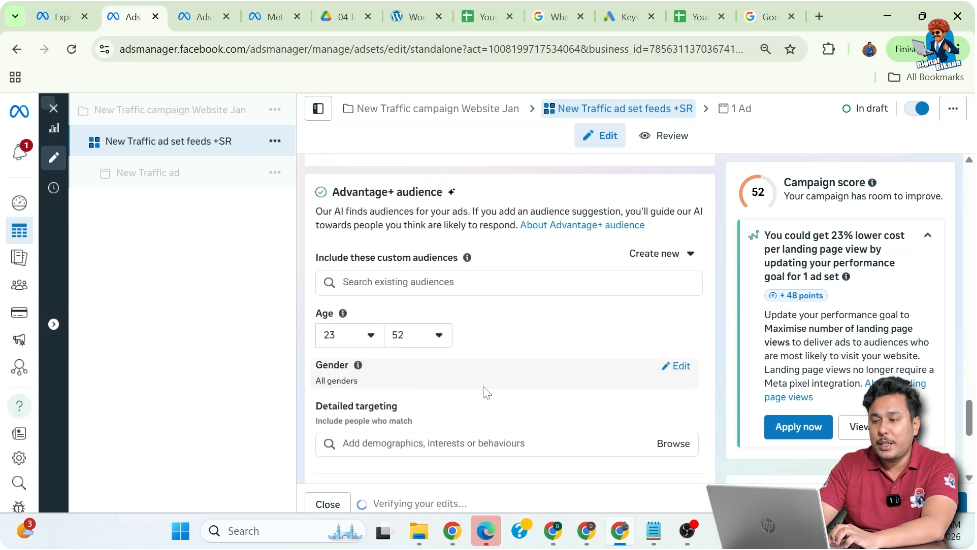
Step 13: Editing Age and Gender Targeting
In the audience section, click on Show More Options.
Here you can:
- Set minimum age
- Set maximum age
- Select gender
If you want to show ads to everyone:
- Select All under gender
Step 14: Setting Detailed Targeting
In the detailed targeting section:
- Select filters based on your business
There are three types of targeting:
For example:
- Selecting Small Business Owners
You can choose any filter that matches your business audience.

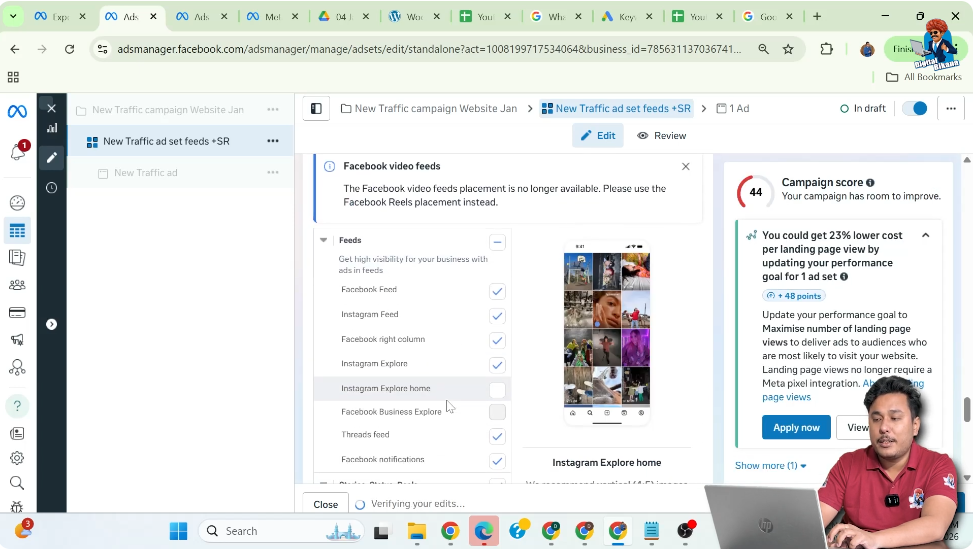
Step 15: Selecting Manual Placements
Scroll down to the Placements section.
Here:
- Select Manual Placements
Manual placement gives you full control over where your ads appear.

Step 16: Choosing Appropriate Placements
Based on your ad creative sizes:
- Select Feeds
- Select Stories
- Select Reels
Uncheck:
- In-stream ads
- Search results
- Apps and sites
These placements may not deliver good results for this type of campaign.
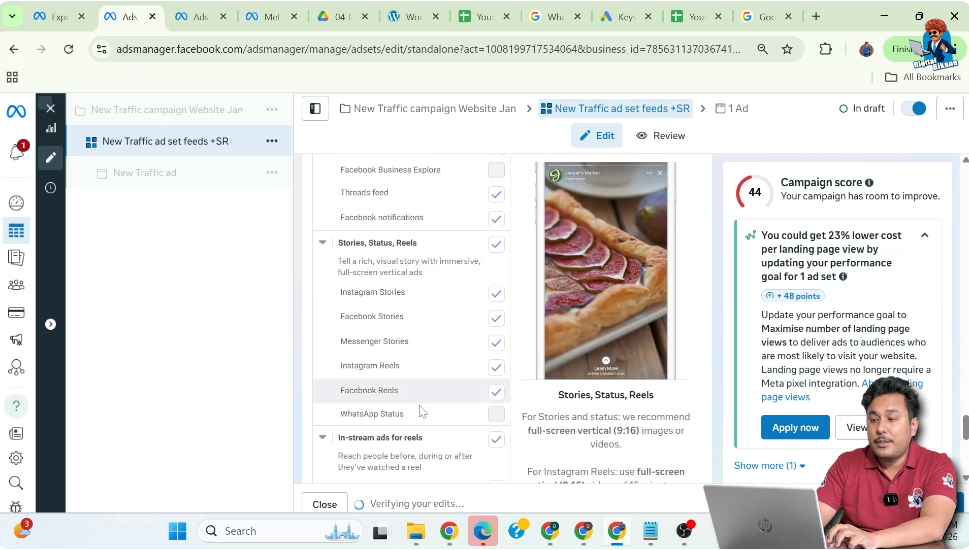
Step 17: Removing Instagram Explore Placement
Instagram Explore is unchecked because:
- The ad creative appears very small
- Text becomes difficult to read
Using the preview helps you decide which placements work best.
Step 18: Moving to the Ad Creative Level
After completing the ad set settings:
- Click on Next
Now you are at the Ad Creative level, where you design the actual ad.

Partnership Ads Setting
At this stage:
- Keep partnership ads turned off
Your Facebook Page and Instagram account are already selected automatically.
Step 19: Choosing Ad Setup Type
In the ad setup section, you will see two options:
- Create ad
- Use existing post
Select Create ad because:
- You want to upload a new banner
- You are not using an existing post

Step 20: Selecting Creative Format
Here:
- Creative source is Manual Upload
- Format is Single Image Ad
Carousel ads are not selected at this stage.

Step 21: Entering the Website URL
Now enter the Website URL where you want users to land.
Important points:
- It does not have to be the homepage
- You can use any landing page URL
This URL decides where users are redirected after clicking the CTA.
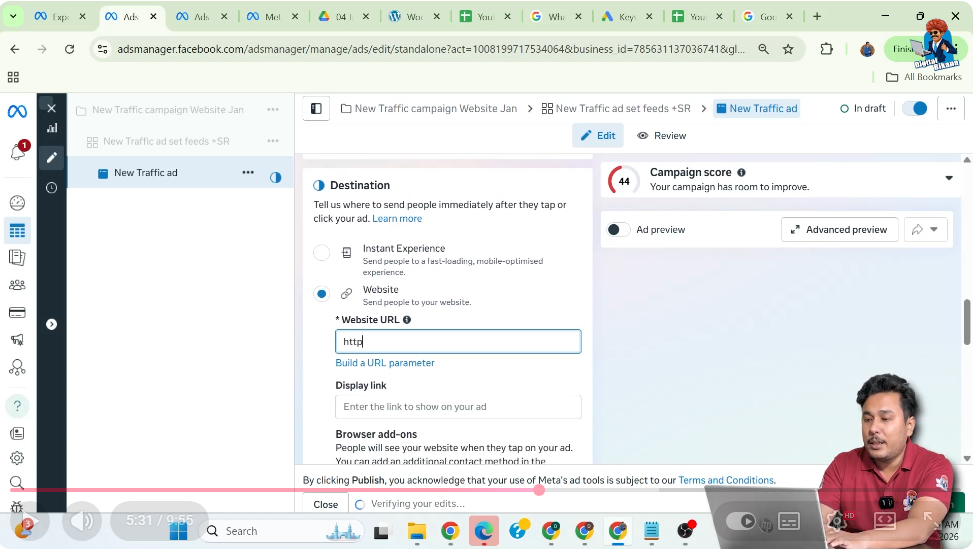
Step 22: Adding the Display Link
In the display link section:
- Paste the URL for display purposes
Even if the display link is different:
- Users will always land on the final URL you entered above
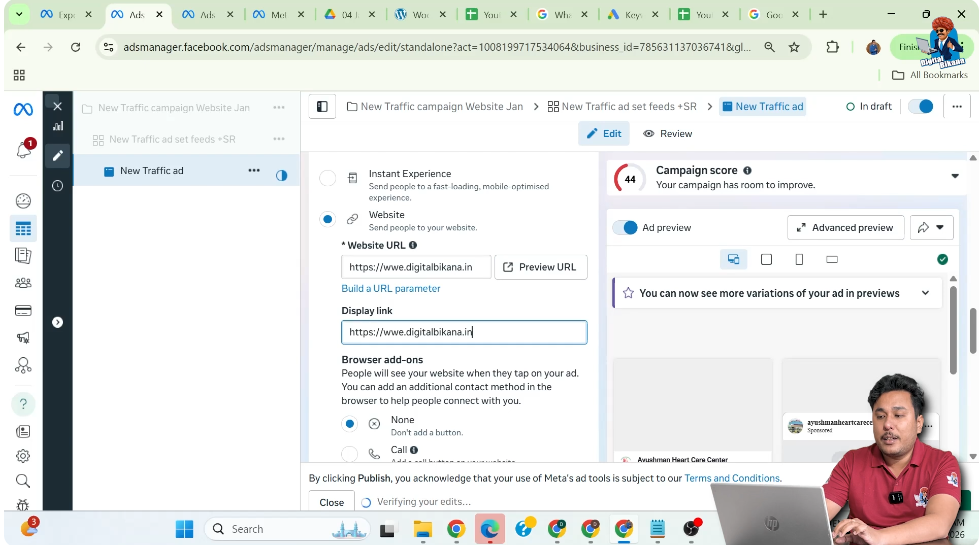
Step 23: Browser Add-ons Option
Browser add-ons allow additional buttons such as call buttons.
If you do not want any add-ons:
- Select None

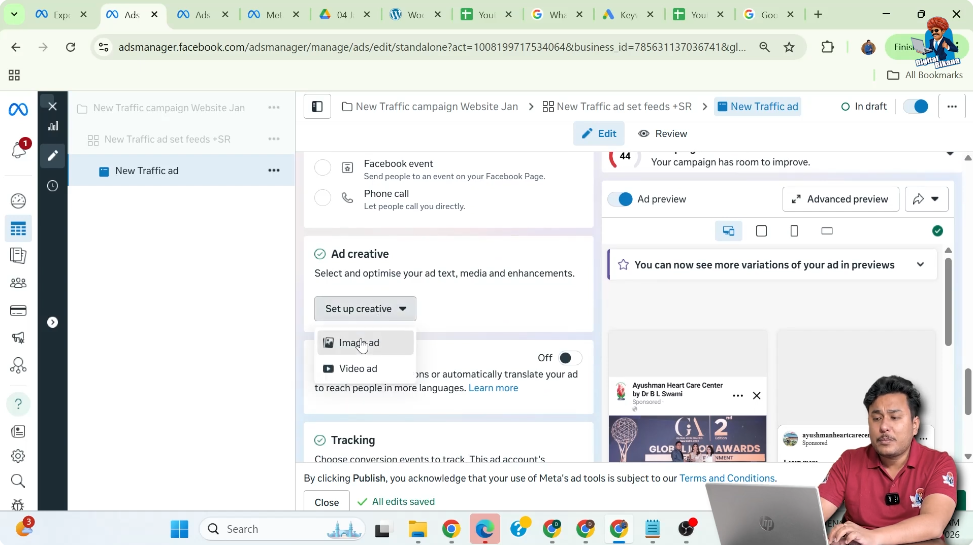
Step 24: Uploading the Ad Creative
Now upload your banner image.
You can:
- Upload a new image
- Or select an already uploaded image
After selecting the image, click on Next.
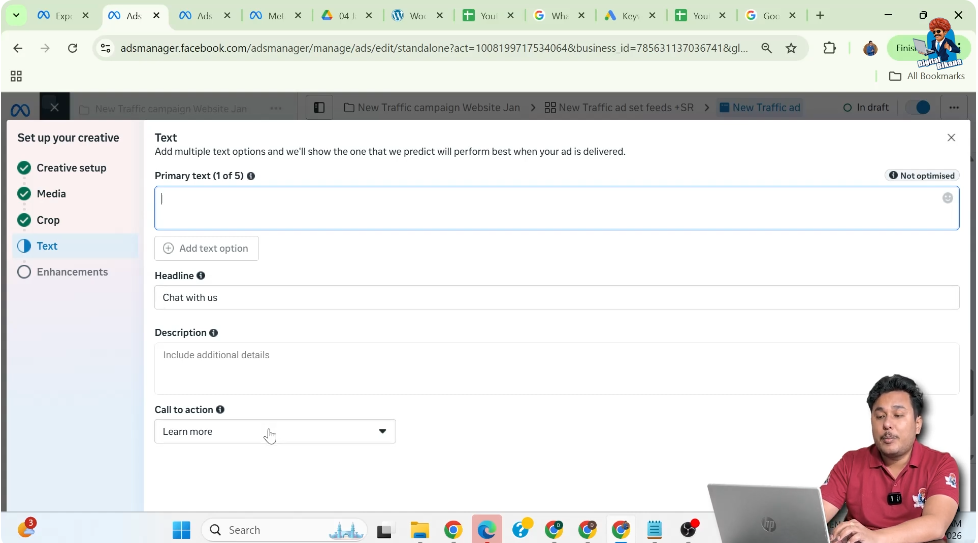
Step 25: Writing Primary Text and Headline
Now enter:
- Primary text (caption)
- Headline
You can:
- Write it manually
- Or use AI suggestions
You can also add your business address if required.

Step 26: Selecting the Call-to-Action Button
Choose a CTA button that suits your goal.
For example:
- Book Now
This button will appear on your ad and encourage users to click.
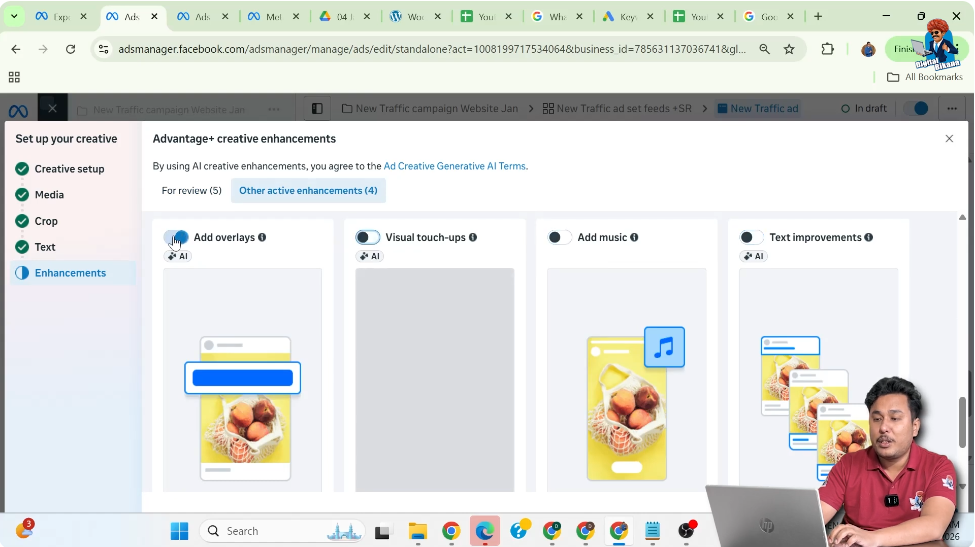
Step 27: Turning Off Advantage Plus Creative
Facebook may suggest using Advantage Plus Creative enhancements.
If you do not want these:
- Turn all enhancement options off
This keeps your creative exactly as you designed it.
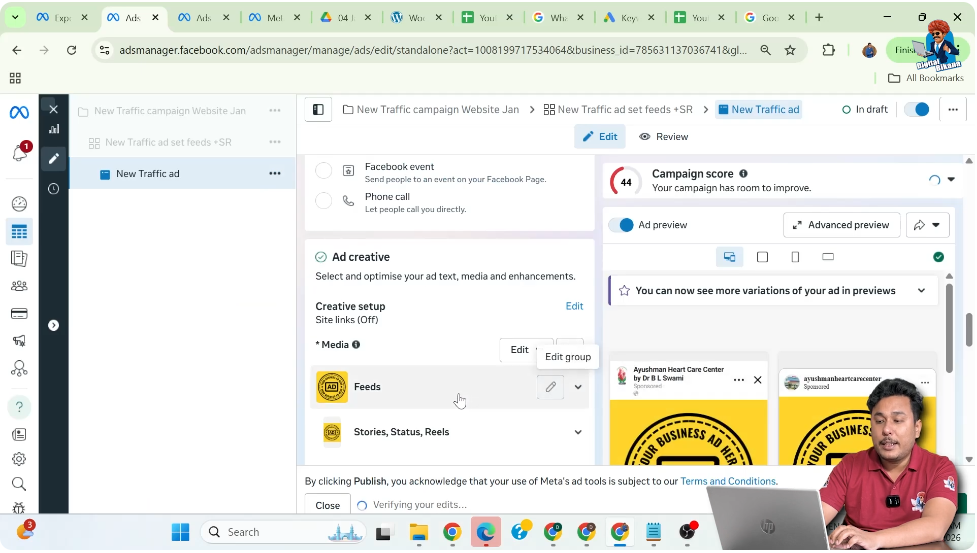
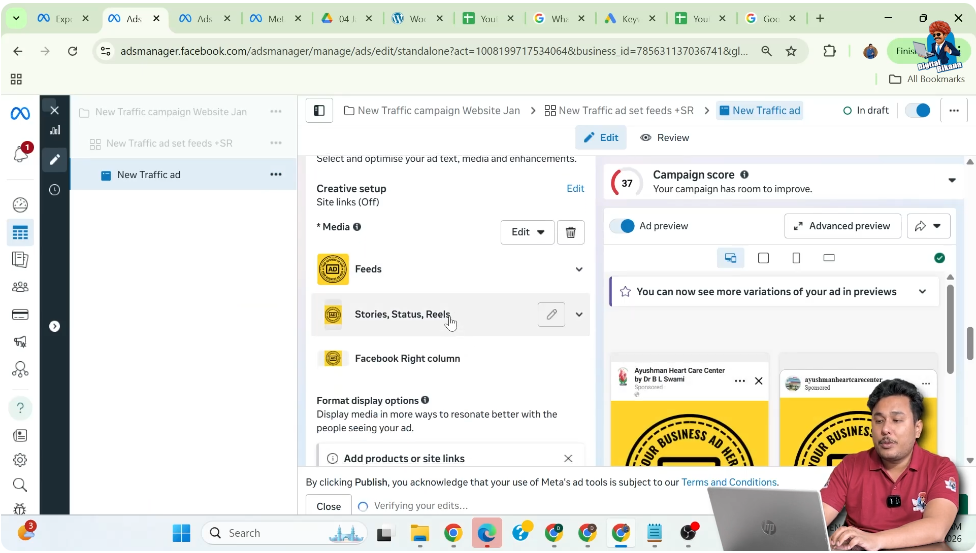
Step 28: Previewing Feed Placement
In the feed preview:
- The banner appears correctly
- Text and headline are readable
- CTA button is visible
When users click the CTA, they land on your website.
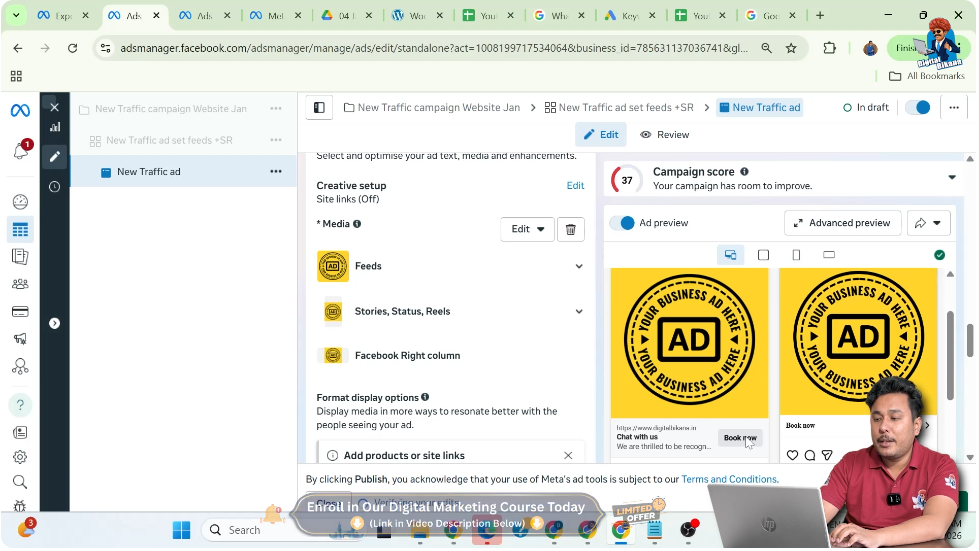
Step 29: Fixing Story and Reels Creative Size
In Stories and Reels:
- Square (1:1) banners do not fit properly
- Black bars appear at the top and bottom
To fix this:
- Upload a 9:16 portrait banner
- Replace the creative for Stories and Reels
Step 30: Saving Story and Reels Creative
After uploading the portrait banner:
- Review the preview
- Ensure text and CTA are visible
- Click Save
Step 31: Final Review and Publishing the Campaign
Now your website traffic ad campaign is fully ready.
Review:
- Campaign settings
- Ad set targeting
- Budget and schedule
- Ad creative and CTA
Finally, click on Publish.
Once published:
- Your ad campaign goes live
- Users can start clicking and visiting your website
Final Conclusion
Creating website traffic ads using Facebook Ads Manager is a structured and detailed process. By carefully selecting the traffic objective, setting the right audience, choosing effective placements, and designing proper creatives, you can successfully drive visitors to your website.
Following each step correctly ensures that your ads look professional, reach the right people, and achieve the main goal of increasing website traffic.
Related Posts