
Managing an Instagram professional account often requires collaboration. Business owners, social media managers, agencies, or team members may need access to the Instagram account to handle content, messages, or ads. Instead of sharing login credentials, Facebook provides a secure and official way to give access using Meta Business Suite. In this article, we will explain in detail how to provide Instagram access to someone using Meta Business Suite.
Understanding Instagram Access Through Meta Business Suite
Meta Business Suite allows businesses to manage their Facebook Pages and Instagram professional accounts from one place. It also provides role-based access so that different people can work on the account without sharing passwords.
By giving access through Meta Business Suite, you maintain full control over your Instagram account while allowing others to perform assigned tasks. This method is secure, professional, and recommended by Meta.
How to give Access of Instagram Professional Account to someone?
Step 1: Log in to Your Facebook Account
To begin the process, log in to your Facebook account. Make sure you are using the Facebook account that is connected to your Instagram professional account.
Only users who have administrative or management-level access to the business assets can provide access to others. Once you are logged in successfully, you can move to the next step.
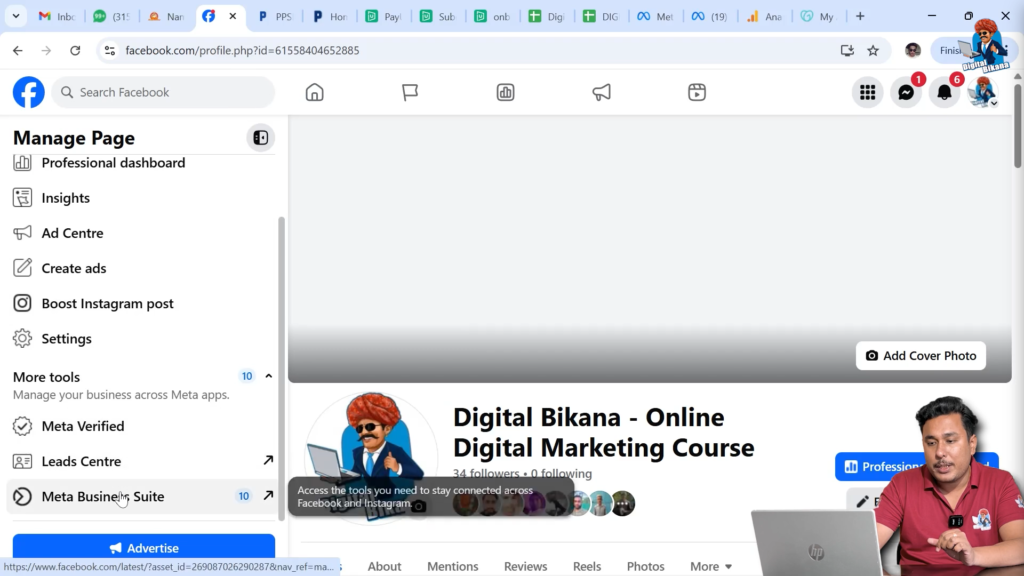
Step 2: Switch from Personal Profile to Facebook Page
After logging in, you need to switch from your personal Facebook profile to your Facebook Page.
Click on the profile icon located on the right side of the screen. From the available options, select your Facebook Page. This step is important because Meta Business Suite works at the page and business level, not from a personal profile.
Once you switch to the Facebook Page, all actions you perform will be related to your business.

Step 3: Open Meta Business Suite
After switching to your Facebook Page, click on your profile page and then select Meta Business Suite.
This will take you to the Meta Business Suite dashboard. From here, you can manage posts, messages, ads, insights, and settings for both Facebook and Instagram.
Meta Business Suite acts as the central hub for managing your business presence on Meta platforms.
Step 4: Navigate to the Settings Section
Inside Meta Business Suite, locate the Settings option. This is usually found in the menu area.
Clicking on Settings will open various business-related controls such as user access, asset permissions, and account connections. This is where you manage who can access your business accounts.

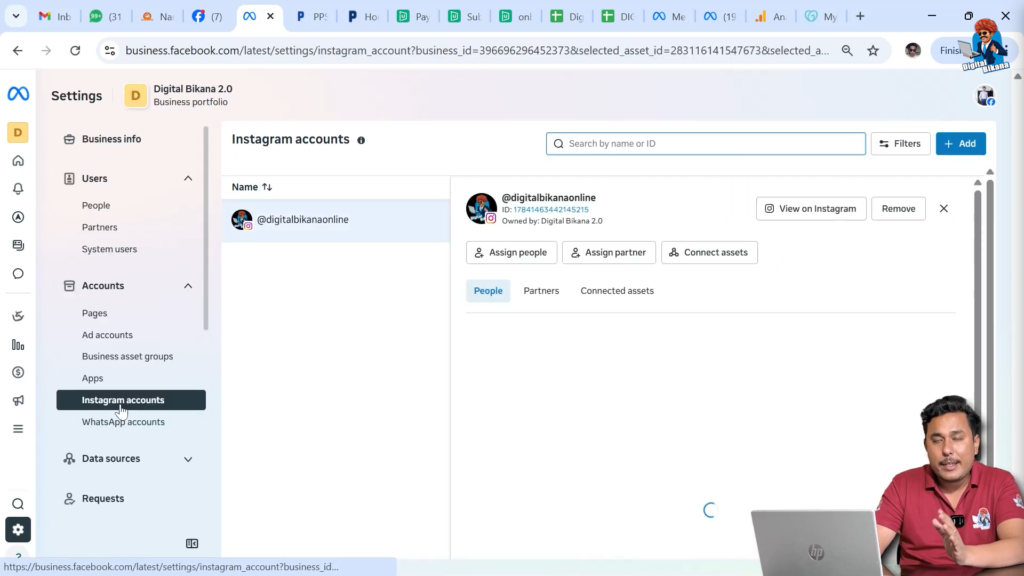
Step 5: Check Whether Instagram Account Is Logged In
Before providing Instagram access to anyone, it is very important to confirm that your Instagram account is already logged in to Meta Business Suite.
If your Instagram account is not connected, you will see a login option. You can log in to your Instagram account directly from there. Once logged in, the Instagram account becomes available for access assignment.
If the Instagram account is already logged in, the login option will not appear. This means your account is ready for the next steps.
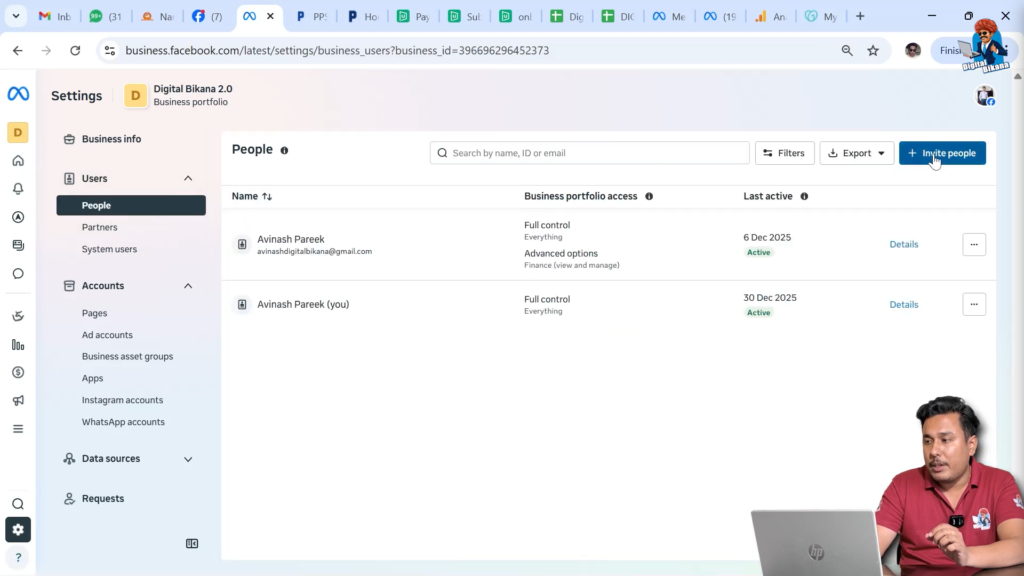
Step 6: Go to the People Section Under Users
After confirming the Instagram account connection, go back to the Users section and click on People.
The People section displays a list of users who already have access to your business assets. From here, you can invite new people, manage existing permissions, or remove access if required.

Step 7: Invite a New Person
In the People section, click on the Invite People option.
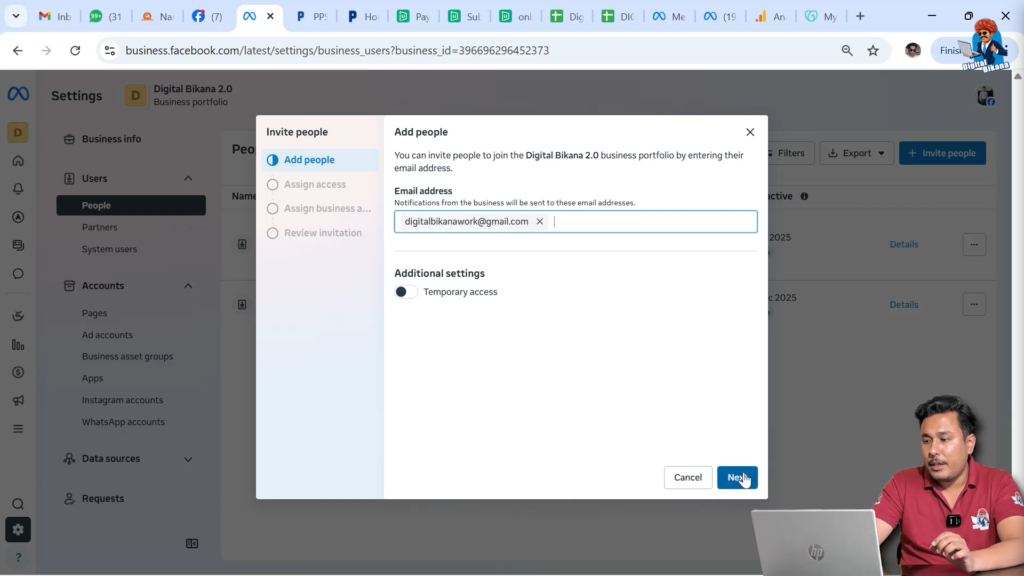
You will now be asked to enter the email ID of the person to whom you want to give Instagram access. Enter the correct email address carefully. This email address should be associated with the Facebook account of the person you are inviting.
After entering the email ID, click on Next to proceed.
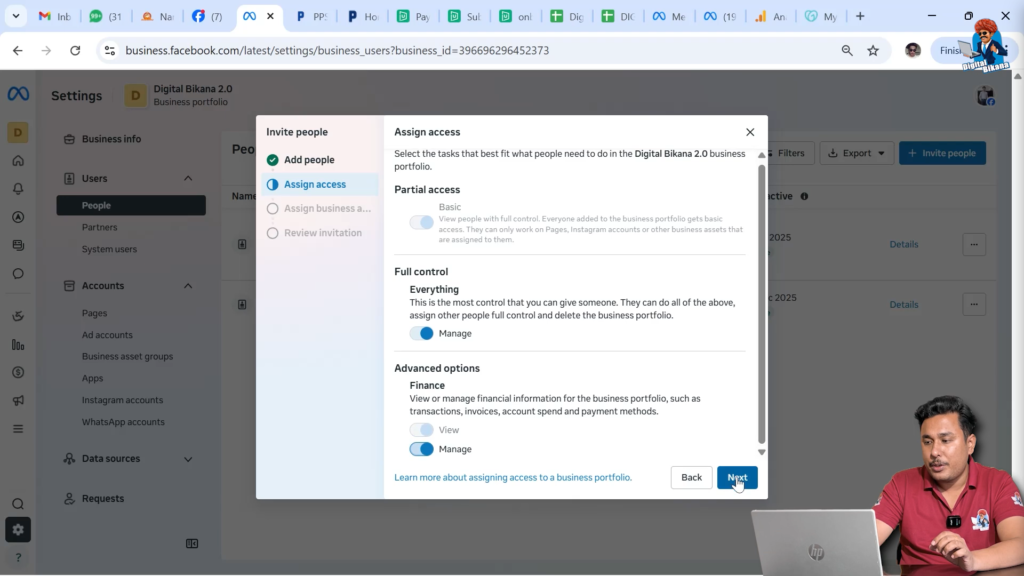
Step 8: Choose the Management Option
On the next screen, click on the Manage option.
This step allows you to manage and assign assets to the invited person. Since the goal is to provide access only to the Instagram account, you will move forward by selecting the appropriate asset.
Step 9: Select the Instagram Account
Now you will see a list of available business assets. Select the Instagram account.
Since access is being provided only for the Instagram account, no other assets need to be selected. This ensures that the person receives access only to Instagram and not to other business assets like Facebook Pages or ad accounts.
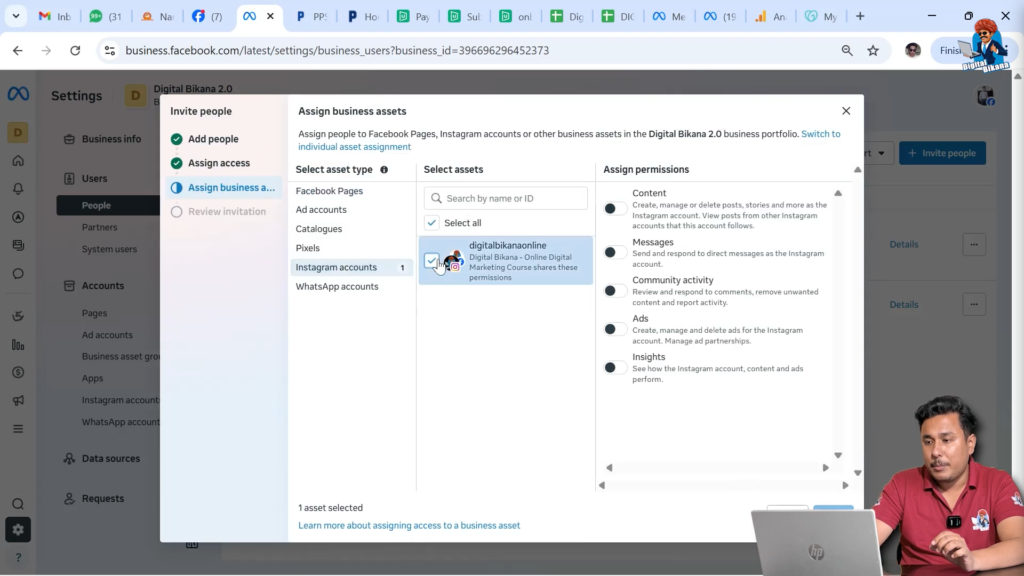
Step 10: Enable Instagram Permissions
After selecting the Instagram account, you will see multiple permission options.
Turn on all the available permission options so the person can manage the Instagram account properly. These permissions allow actions such as handling content, messages, and other Instagram-related activities.
Once all permissions are enabled, click on Next.

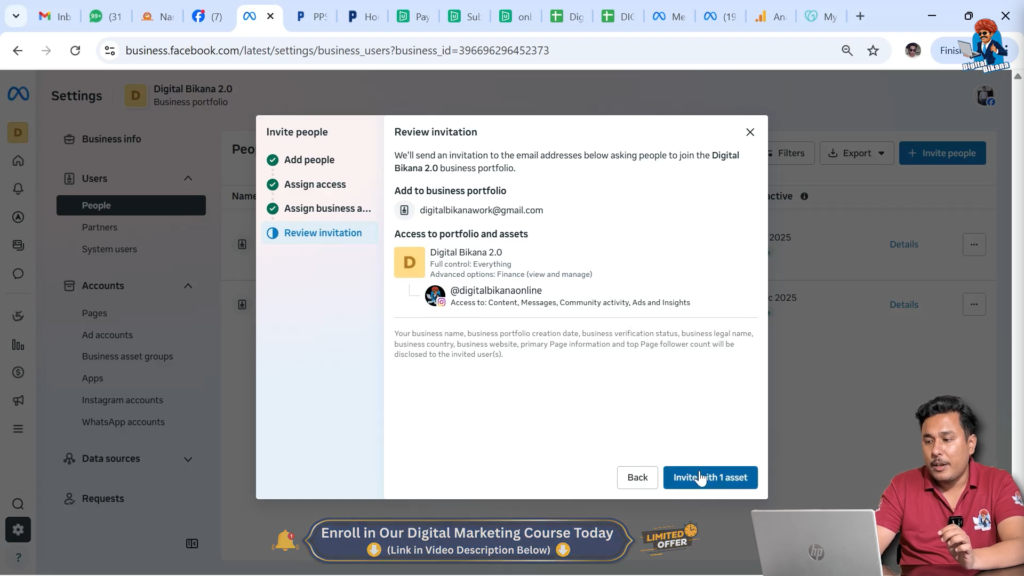
Step 11: Review and Confirm Instagram Access
Meta Business Suite will now show a confirmation screen.
This screen displays the Instagram account and the permissions that are being provided. Carefully review the information to ensure that access is being given only to the intended Instagram account.
If everything looks correct, proceed to the next step.
Step 12: Send the Invitation
After confirmation, click on Invite with one asset.
Once you do this, Meta Business Suite will send an email invitation to the person whose email ID you entered earlier.
Step 13: Invitation Acceptance by the User
The invited person will receive an email containing an invitation to access the Instagram account.
They need to open the email and click on the accept invitation option. After clicking the acceptance link, they will be asked to log in to their Facebook account.
Once logged in, the person will automatically receive access to the Instagram account with the permissions you assigned.
Why This Method Is Important
Providing Instagram access through Meta Business Suite is the safest and most reliable method. It eliminates the need to share passwords and allows you to control exactly what the other person can do.
This system also makes it easy to remove access later if required, without affecting the security of your Instagram account.
Final Thoughts
Granting Instagram access using Meta Business Suite is a simple yet powerful process when done correctly. By following the steps explained above, you can confidently provide access to team members, agencies, or collaborators while maintaining full control of your business account.
This structured approach ensures security, transparency, and professional account management, making it ideal for businesses of all sizes.
Related Posts