Managing a business on Facebook often requires teamwork. Whether you are working with a digital marketer, an agency, an accountant, or an internal team member, you may need to give them access to your Facebook Business Portfolio. Facebook provides a secure and structured way to do this through Meta Business Suite.
In this article, we will explain in detail how to give access to someone to your Facebook Business Portfolio using Meta Business Suite. This guide is especially useful for business owners, advertisers, and marketers who want to safely manage permissions without sharing login details.
Understanding Facebook Business Portfolio and Meta Business Suite
Before starting the process, it is important to understand what a Facebook Business Portfolio is and how Meta Business Suite works.
A Facebook Business Portfolio is a centralized place where you can manage all your business assets. These assets include Facebook Pages, Ad Accounts, Instagram accounts, payment methods, and people who work on your business. Instead of handling everything separately, Meta Business Suite allows you to control all these elements from one dashboard.
Meta Business Suite is designed to help businesses manage content, messages, ads, insights, and settings efficiently. One of its most important features is the ability to assign roles and permissions to different people based on their responsibilities.
How to get Business Manager access on Facebook?
Step 1: Log in to Your Facebook Account
To begin, log in to your Facebook account using your email ID or phone number and password. Make sure you are logging in with the Facebook account that already has admin access to the Business Portfolio.
This is important because only admins or owners of the Business Portfolio can invite new people and assign permissions.
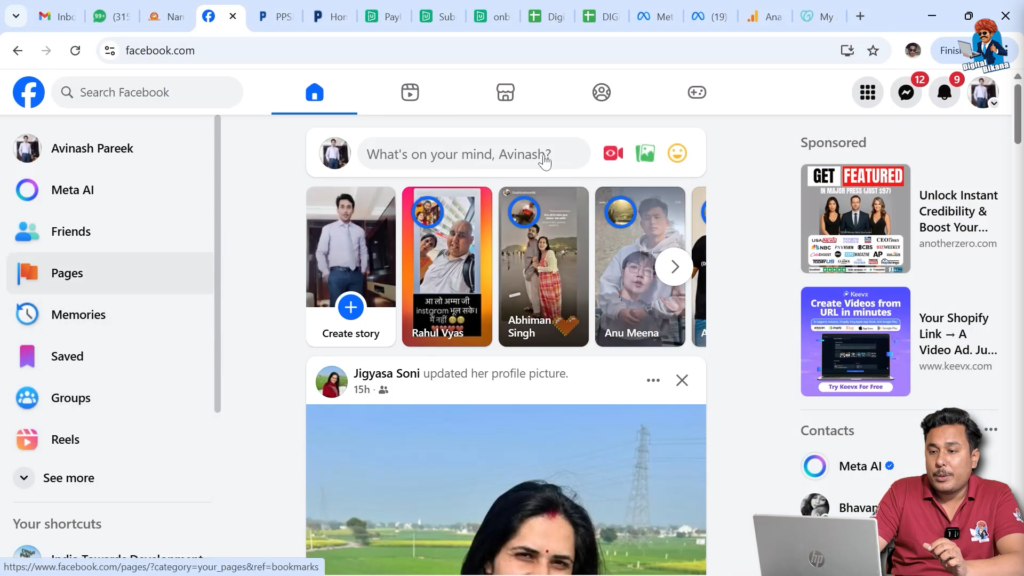
Step 2: Switch from Personal Profile to Facebook Page
Once you are logged in, you need to switch from your personal Facebook profile to your Facebook Page.
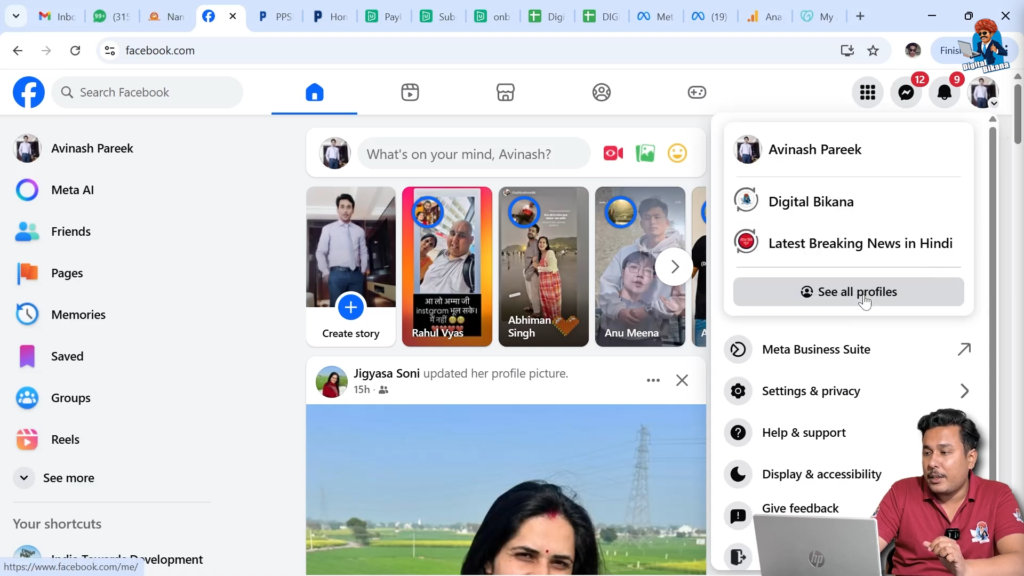
Click on the profile icon in the top-right corner of the screen. From the dropdown menu, click on “See all profiles.” You will see a list of pages connected to your account. Select the Facebook Page for which you want to manage business access.
After switching, you will now be acting as your business page instead of your personal profile.

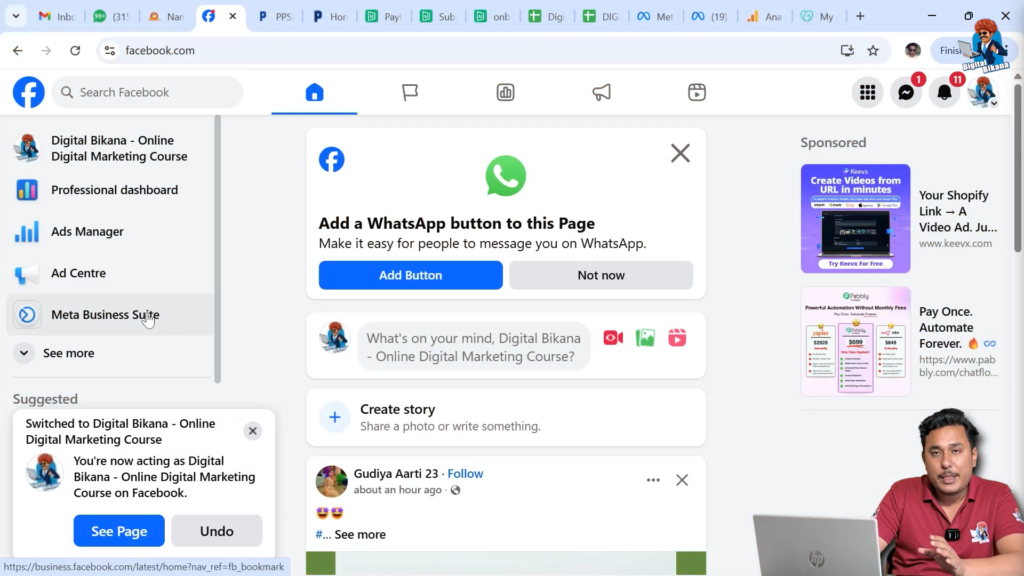
Step 3: Open Meta Business Suite
After switching to your Facebook Page, you will see the Meta Business Suite option. Click on it to open the business dashboard.
Once Meta Business Suite opens, you will land on the main dashboard where you can see posts, insights, messages, and notifications related to your business. This is the central control panel for managing your business presence on Facebook and Instagram.
Step 4: Go to the Settings Section
Now, look at the left-hand menu inside Meta Business Suite. Scroll down and click on Settings.
The Settings section contains all administrative controls, including business information, payment settings, asset management, and people access. This is where you can manage who can work on your business assets.

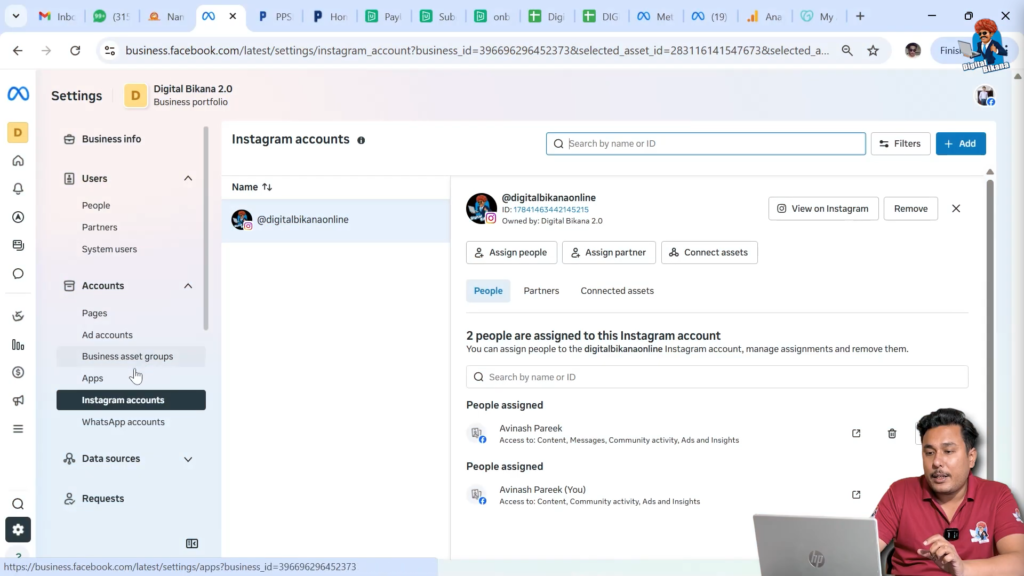
Step 5: Check Instagram Account Connection
Before inviting anyone, it is important to check whether your Instagram account is connected to Meta Business Suite.
Click on the Instagram-related option in the settings area. If your Instagram account is already logged in and connected, you will be able to see it there. This means it can be assigned to other users later.
If your Instagram account is not connected, you should first log in to the Instagram account and link it to Meta Business Suite. Once the Instagram account is successfully connected, return to the main settings area.
This step is necessary if you want to give Instagram access along with Facebook Page and Ad Account access.
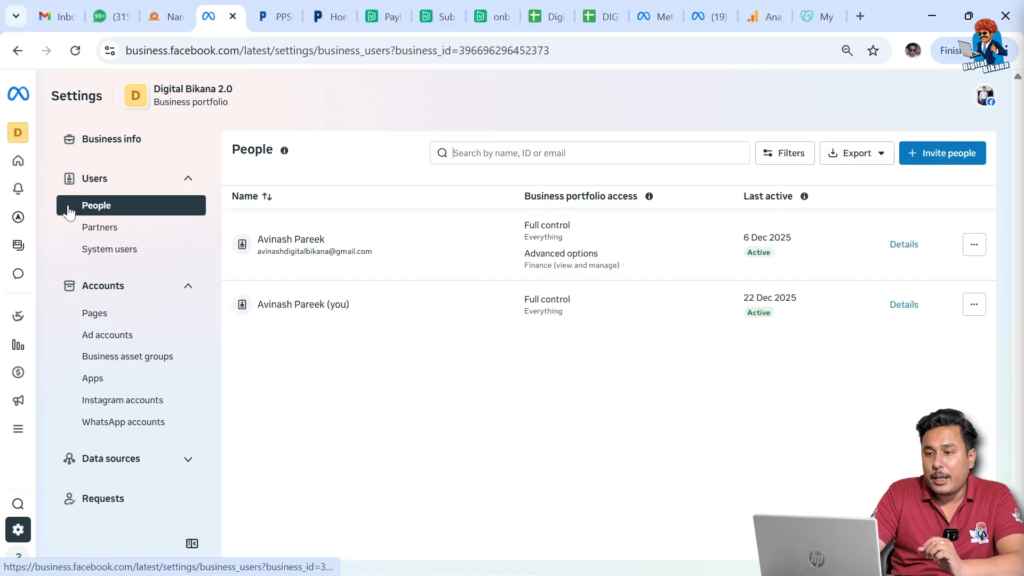
Step 6: Open the People Section
Inside the Settings menu, find the People option. Click on it to open the user management section.
The People section shows all the users who already have access to your Business Portfolio. From here, you can add new people, modify permissions, or remove access if needed.
Step 7: Invite a New Person
In the People section, you will see an option called Invite People. Click on this option to start adding a new user.
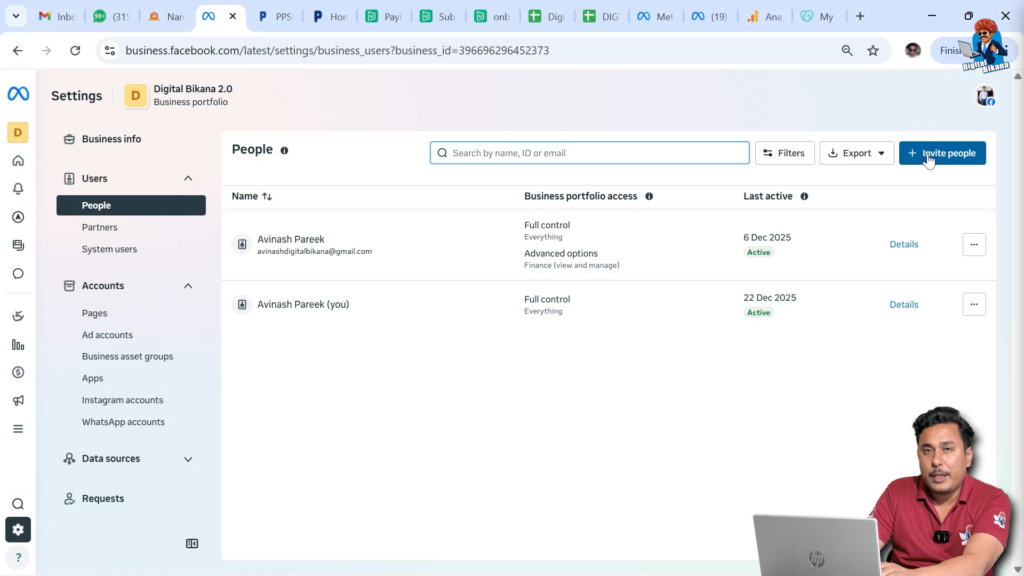
You will be asked to enter the email ID of the person to whom you want to give access. Enter the correct email address carefully. This email ID should be associated with the Facebook account of the person you are inviting.
After entering the email address, click on Next.

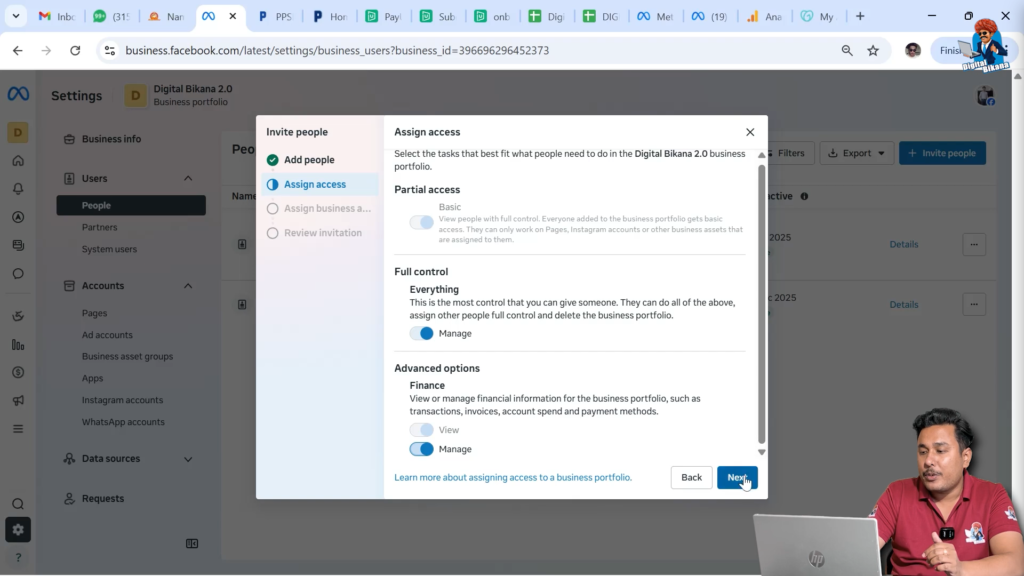
Step 8: Choose Access Level for Business Portfolio
Now Meta will ask what level of access you want to give to this person.
You will see options for partial access and full access. Partial access allows limited permissions, while full access provides broader control over the Business Portfolio.
If you want the person to manage most business activities, select full access. You can also enable managerial access to finance. This allows the person to add funds, manage payment methods, and download invoices.
Once you select the required access level, click on Next.
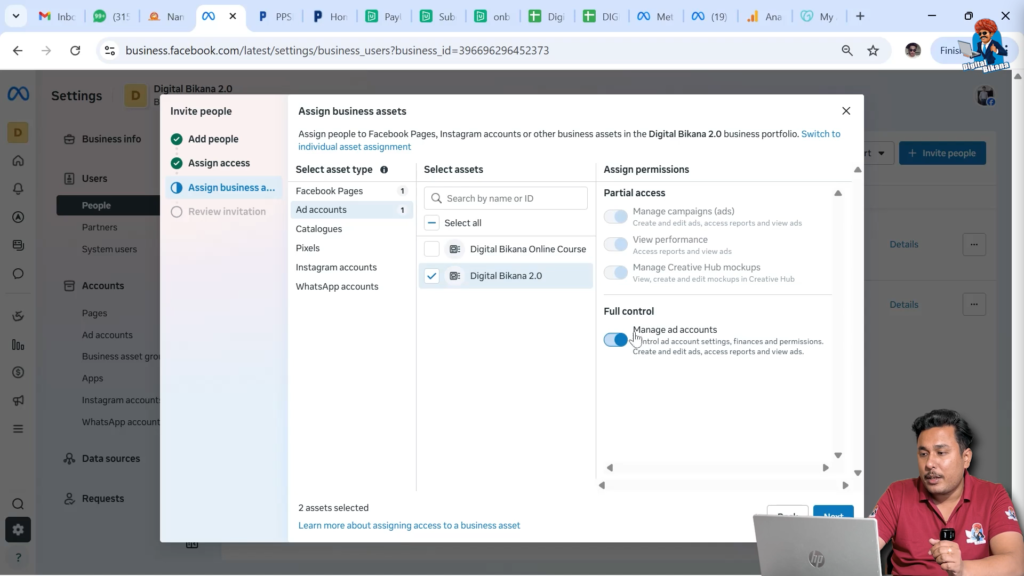
Step 9: Select Business Assets to Share
After choosing the access level, Meta will ask which business assets you want to assign to the invited person.
You will see a list of available assets, such as Facebook Page, Ad Account, and Instagram account. Select the Facebook Page first. Once selected, you can assign permissions such as full control or limited control.
For complete management, choose full control of the Facebook Page.

Step 10: Assign Ad Account Permissions
Next, move to the Ad Accounts section. Select the ad account you want to share with the invited person.
You can assign ad account permissions based on the role. If you want the person to manage campaigns, budgets, and ads fully, give full control access to the ad account.
This step is essential if the person will be running Facebook Ads or Instagram ads on your behalf.
Step 11: Provide Instagram Account Access
Now select the Instagram account connected to your Business Portfolio.
You will see multiple permission toggles. Turn on all the required permissions so the person can manage posts, messages, ads, and insights for Instagram.
After assigning Instagram permissions, review the selected assets once again.

Step 12: Review and Confirm Permissions
After selecting all assets and assigning permissions, click on Next.
Meta will now show a confirmation screen. This screen summarizes the access you are giving, including Business Portfolio access level and assigned assets.
Carefully review all the details to make sure everything is correct. If any permission needs to be changed, you can go back and edit it.
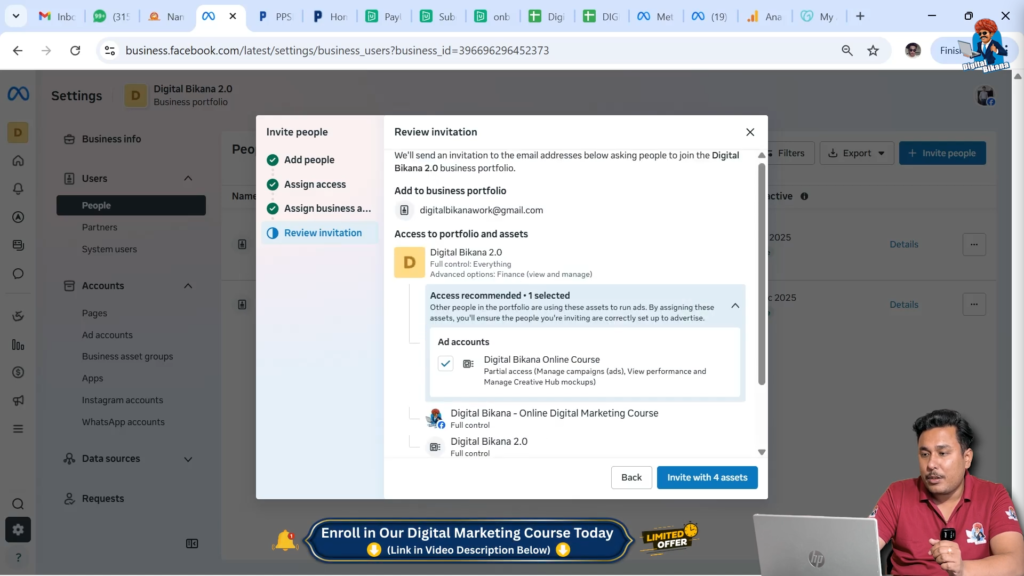
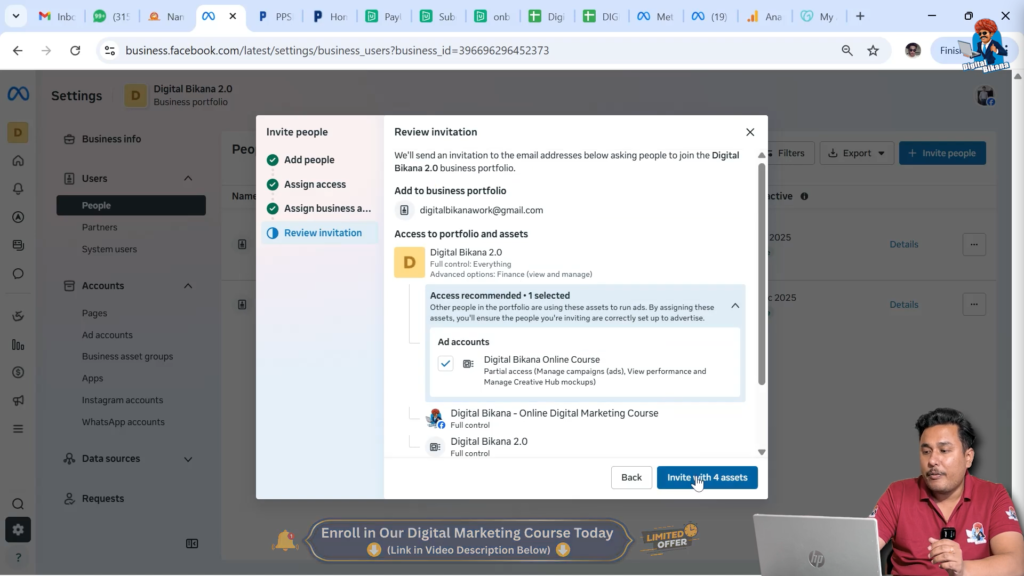
Step 13: Send the Invitation
Once everything is confirmed, click on Invite with assets.
Meta will now send an email invitation to the person you added. This email contains a link to accept the invitation.
Step 14: Invitation Acceptance by the User
The invited person needs to check the email ID associated with their Facebook account. In the email, they will see an option to accept the invitation.
After clicking on the accept button, the person will be asked to log in to their Facebook account. Once logged in, the access will be activated automatically.
The person will now be able to access the Business Portfolio with the permissions you assigned.
Final Thoughts
Giving access through Meta Business Suite is the safest and most professional way to manage your Facebook Business Portfolio. It allows you to control exactly what each person can access without sharing your personal login details.
By following the steps explained in this article, you can confidently add team members, agencies, or partners to your business setup while keeping full control over your assets.
This structured access system not only improves collaboration but also protects your business from unauthorized changes or security risks.
Related Posts