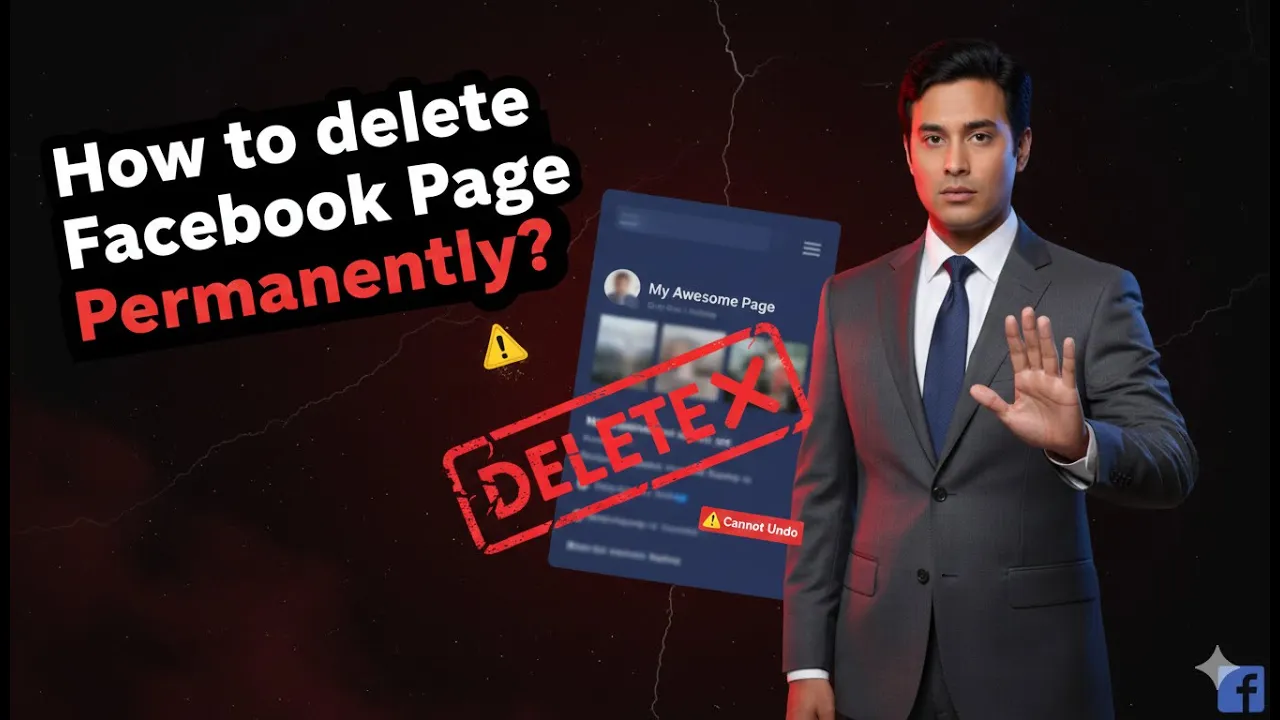
Deleting a Facebook page permanently is an important decision, especially for businesses or creators who no longer want to maintain their presence on Facebook. Facebook provides a built-in option to permanently delete a page through its settings, and the process is straightforward if followed correctly.
In this detailed guide, we will explain how to delete a Facebook page permanently, step by step, using the Facebook page settings. This article breaks down each step clearly so that anyone can understand and complete the process without confusion.
Understanding Permanent Deletion of a Facebook Page
Before starting the process, it is important to understand what permanent deletion means. When you delete a Facebook page permanently, the page is completely removed from Facebook. It will no longer be visible to users, followers, or administrators.
Facebook also provides temporary options such as deactivating or unpublishing a page, but permanent deletion removes the page entirely. Therefore, this action should be performed carefully.
How to Delete a Facebook Page Permanently?
1. Logging in to Your Facebook Account
The first step in deleting a Facebook page permanently is logging in to your Facebook account.
Open Facebook and enter your login credentials. Once logged in successfully, you will land on your Facebook homepage. At the top-right corner of the screen, you will see your profile icon.
This icon gives access to your account menu and allows you to switch between your personal profile and your Facebook pages.
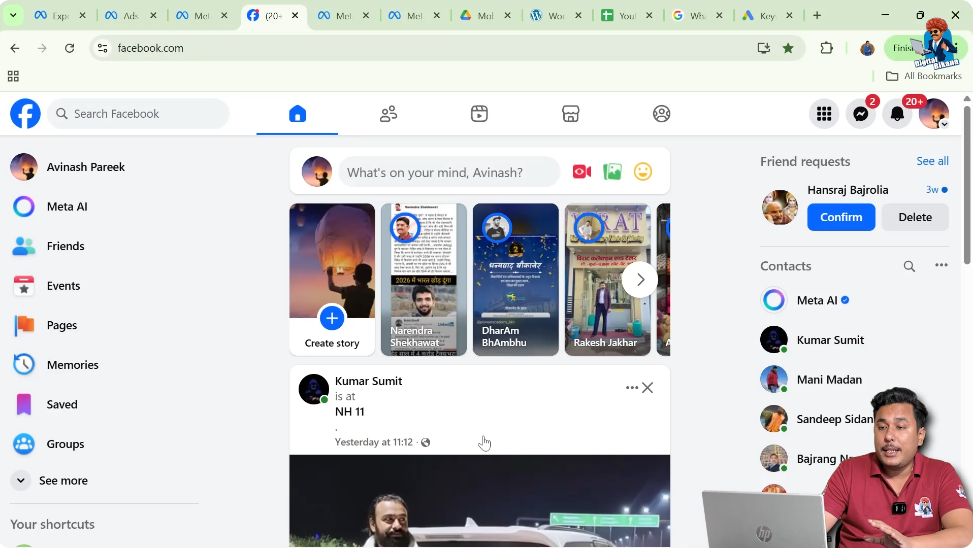
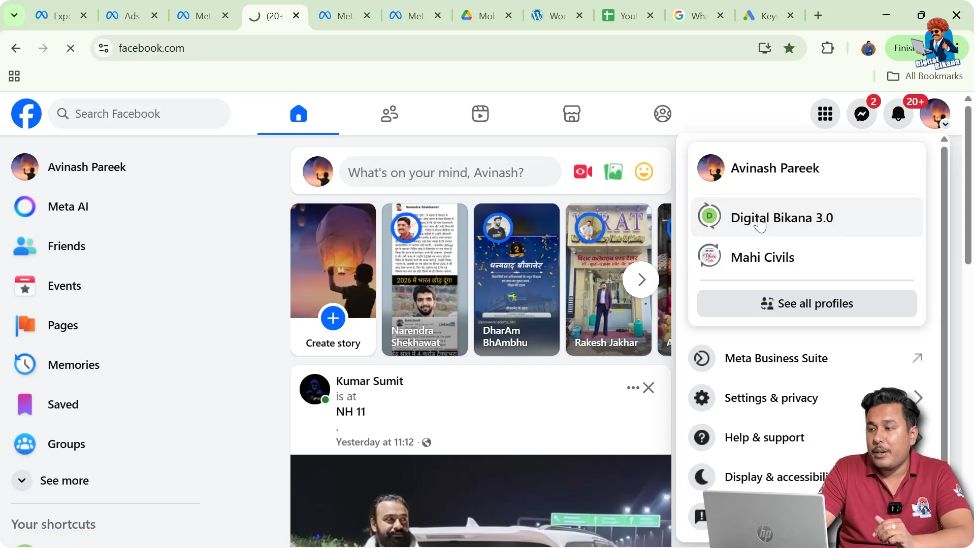
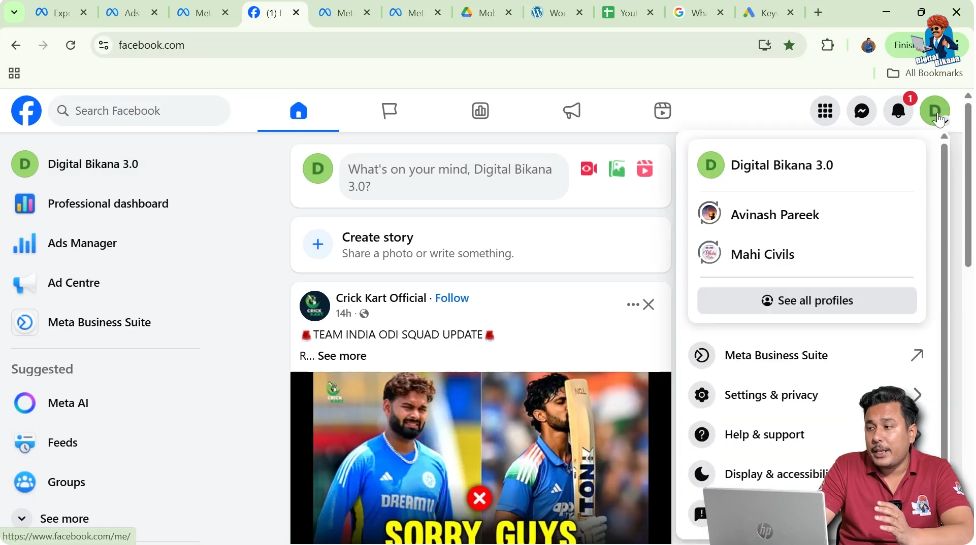
2. Opening the Account Menu
After logging in, click on the profile icon located in the top-right corner of the Facebook interface.
When you click on this icon, a menu opens that shows your personal profile along with all Facebook pages that you manage. This menu is important because deleting a Facebook page requires you to switch to the page profile first.

3. Switching to Your Facebook Page
From the account menu, select the Facebook page that you want to delete.
Once you click on the page name, Facebook switches your view from your personal profile to the selected Facebook page. You will now be inside the Facebook page profile, where all page-related settings and controls are available.
It is necessary to switch to the page profile because Facebook page deletion options are not available from a personal profile.
4. Confirming You Are on the Facebook Page Profile
After switching, ensure that you are viewing your Facebook page profile and not your personal account.
You can confirm this by checking the page name, profile image, and layout. Once you are sure that you are on the correct Facebook page, you can proceed with the deletion process.
5. Opening Settings and Privacy
Now that you are inside the Facebook page profile, go to the top-right corner again and click on the profile icon.
From the dropdown menu, click on Settings and Privacy. This option opens a submenu with additional settings related to your page.
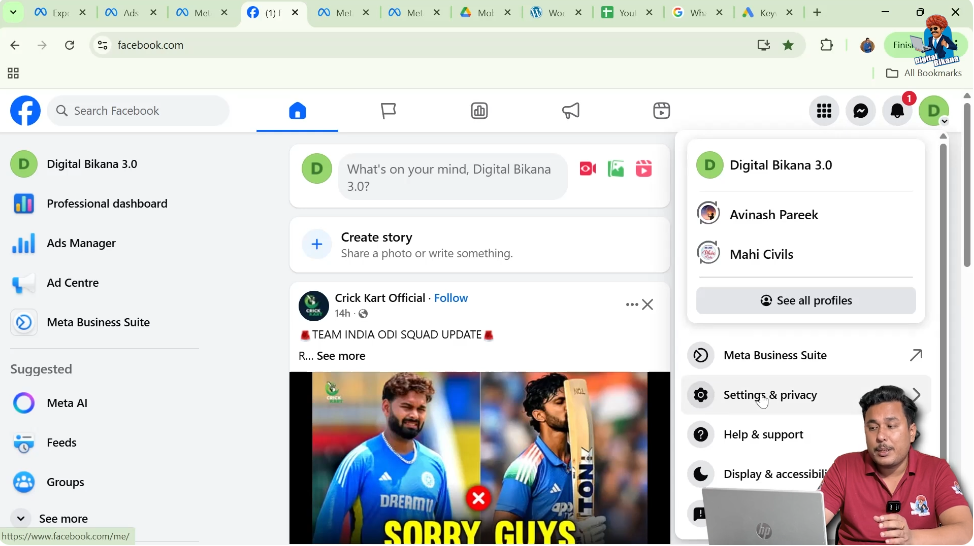
From this submenu, click on Settings.
It is important to click on settings only after switching to your Facebook page. Otherwise, you may open personal account settings instead of page settings.

6. Accessing the Facebook Page Settings
Once you click on Settings, you will be taken to the Facebook page settings dashboard.
This dashboard contains multiple options that allow you to manage different aspects of your Facebook page, including visibility, access, and control options.
All deletion-related options are located inside these settings.
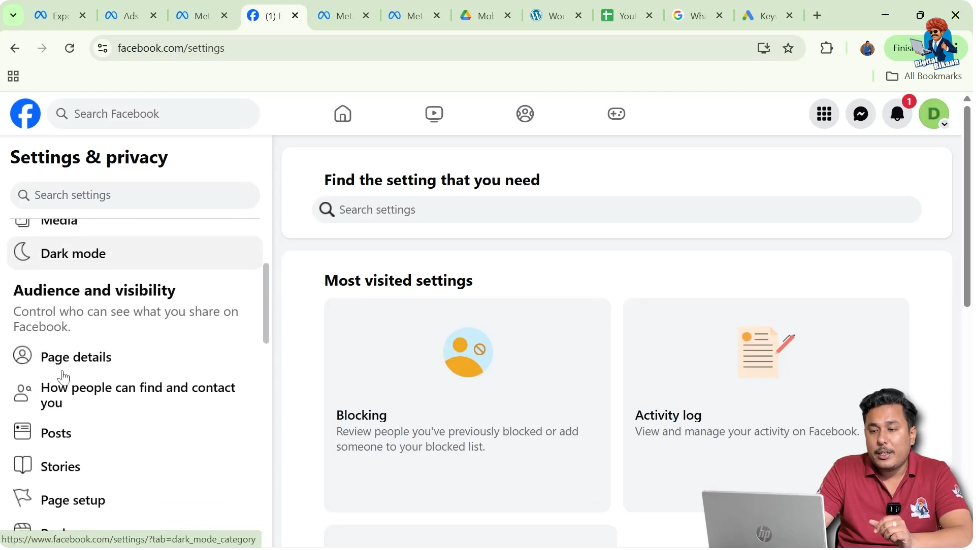
7. Scrolling Down the Left-Side Menu
Inside the settings page, look at the left-side menu. This menu contains multiple sections related to page management.
Scroll down through this menu until you find the option called Access and Control.
This section contains settings related to page ownership, visibility, and deletion options.
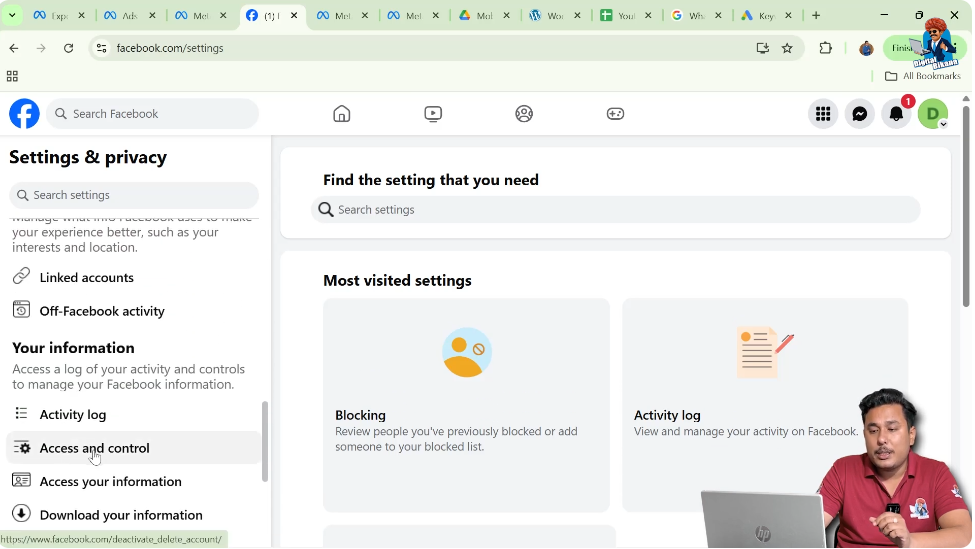
8. Opening the Access and Control Section
Click on Access and Control to open it.
Once opened, you will see different options that control how your Facebook page behaves and how it can be accessed or removed.
This is the section where Facebook provides options for temporary and permanent page actions.
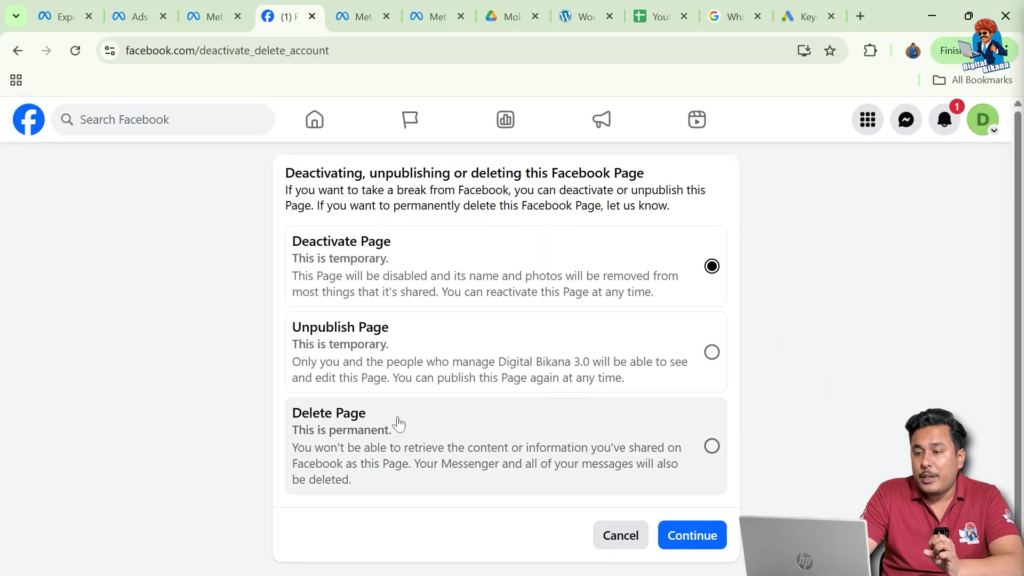
9. Understanding Page Control Options
Under the Access and Control section, Facebook shows multiple options related to page management. These options include:
- Deactivate Page
- Unpublish Page
- Delete Page
Each option has a different purpose, and it is important to understand them before selecting the final option.
A. Deactivate Page Option
The Deactivate Page option temporarily disables your Facebook page.
If you select this option, your page will be hidden temporarily and can be reactivated later. This option is useful if you want a break from managing the page but do not want to delete it permanently.
However, this option does not remove the page permanently.
B. Unpublish Page Option
The Unpublish Page option also performs a temporary action.
When a page is unpublished, it becomes invisible to the public, but it still exists and can be published again in the future.
This option is often used when page owners want to make changes or pause public visibility without deleting the page.
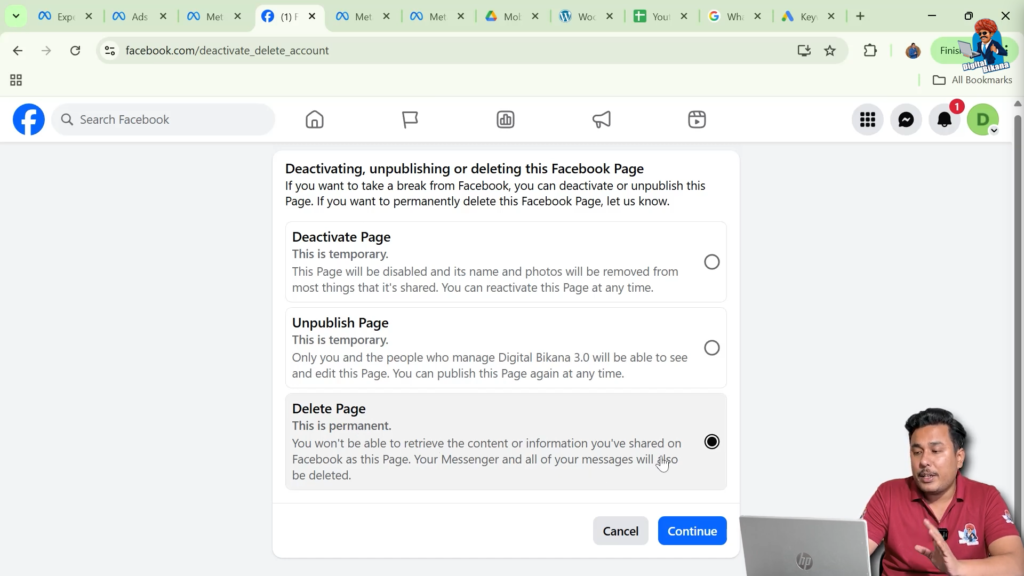
C. Delete Page Option
The Delete Page option is the permanent action.
If you choose this option, your Facebook page will be permanently deleted from Facebook. Once deleted, the page cannot be recovered.
This option should be selected only if you are sure that you no longer need the Facebook page.
10. Selecting the Delete Page Option
To permanently delete the Facebook page, click on the Delete Page option.
After selecting this option, Facebook prepares to remove the page permanently. This step confirms that you want to proceed with deletion instead of temporary actions.
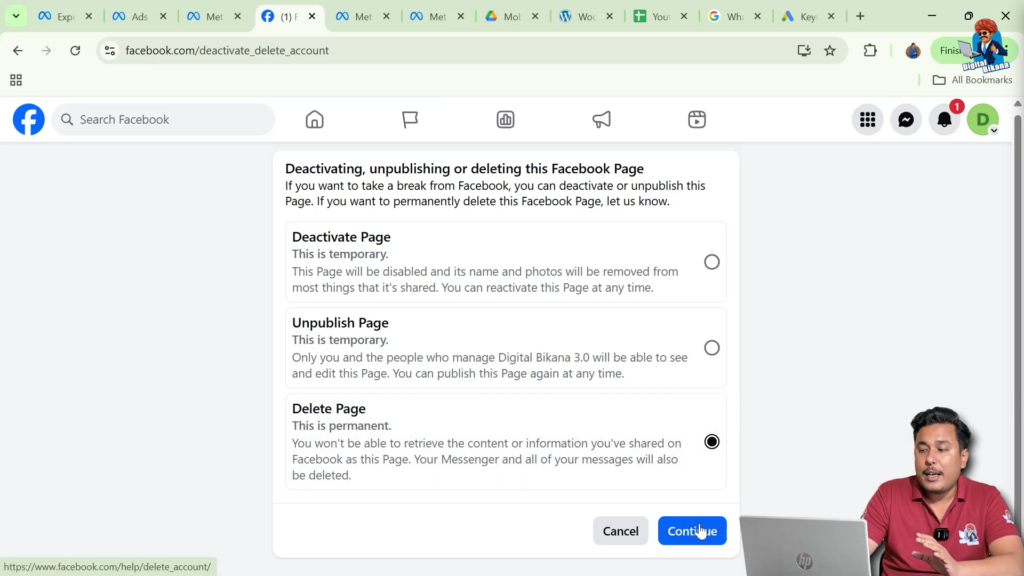
11. Confirming the Deletion Process
After selecting Delete Page, click on Continue.
This confirmation step ensures that the action is intentional. Once you click continue, Facebook proceeds with the permanent deletion process.
12. Completing the Facebook Page Deletion
After clicking continue, your Facebook page will be permanently deleted from Facebook.
The page will no longer appear on Facebook, and users will not be able to find or access it.
This marks the completion of the deletion process.
Important Points to Remember Before Deleting a Page
Before deleting a Facebook page permanently, keep the following points in mind:
- Permanent deletion cannot be undone
- The page will be removed completely from Facebook
- Followers and content will be lost
- Temporary options are available if permanent deletion is not required
Understanding these points helps you make an informed decision.
Final Overview of the Entire Process
To summarize, the complete process of deleting a Facebook page permanently involves the following steps:
- Log in to your Facebook account
- Click on the profile icon
- Switch to your Facebook page
- Open Settings and Privacy
- Click on Settings
- Scroll down to Access and Control
- Select Delete Page
- Click Continue to confirm
By following these steps in order, you can permanently delete your Facebook page without any difficulty.
Final Note
Deleting a Facebook page permanently is a simple process when done correctly through the page settings. Make sure you select the delete option carefully, as this action permanently removes the page from Facebook.
Once deleted, the page cannot be recovered, so always confirm your decision before completing the process.
Related Posts