Hello friends, in this article we are going to understand in detail how to verify your business email address in Meta Business Suite settings. Email verification is an important step because it helps Meta confirm that your business contact details are genuine and accessible. A verified email address also ensures that you receive important notifications, alerts, and updates related to your business account.
Why Email Verification in Meta Business Suite Is Important
Before going into the steps, it is important to understand why verifying your business email address matters.
A verified business email helps in:
- Confirming the authenticity of your business
- Receiving important security alerts from Meta
- Getting notifications related to Meta ads, pages, and account activity
- Maintaining trust and credibility inside Meta’s systems
Without email verification, you may miss critical updates or face limitations in certain business features.
Where Email Verification Is Done in Meta Business Suite
Business email verification is done inside Meta Business Suite settings, specifically under the Business Info section.
This option is available only to users who have proper access to the business account.
How to Verify Email Address in Meta Business Suite?
Step 1: Logging in to Meta Business Suite
The first step is to log in to your Meta Business Suite account.
Make sure you are logging in with the Facebook account that has access to the business you want to manage. Once logged in successfully, you will land on the Meta Business Suite dashboard.
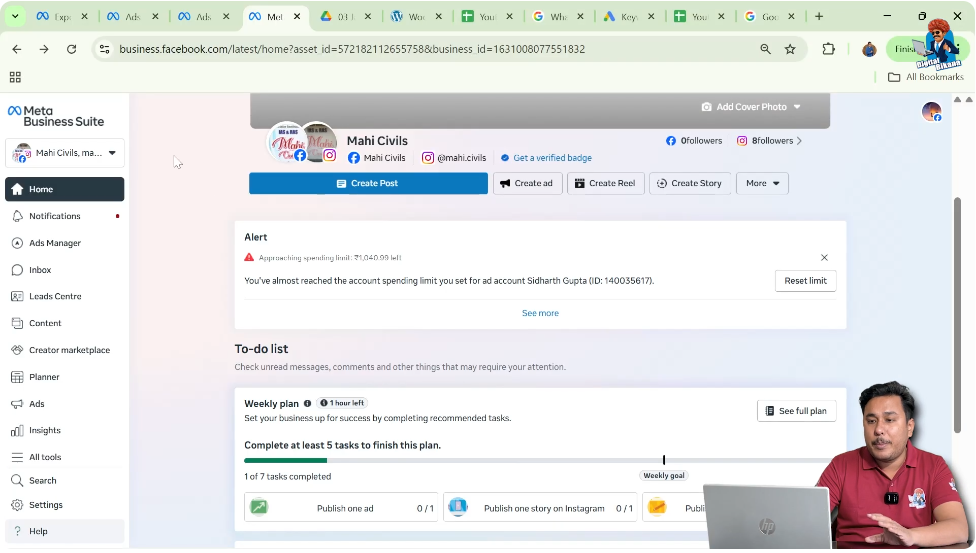
Step 2: Opening the Settings Section
After entering Meta Business Suite, look at the left-side menu.
Here, you will find an option called Settings.
Click on Settings to open all configuration and management options related to your business.

Understanding the Settings Area
The Settings section contains various options related to:
- Business information
- Users and permissions
- Security settings
- Account details
Email verification is handled inside the Business Info section.
Step 3: Navigating to Business Info
Inside the Settings menu, locate and click on Business Info.
The Business Info section displays key information related to your business, such as:
- Business name
- Business email address
- Other essential contact details
This is where you can view and manage your business email verification status.

Step 4: Checking Email Verification Status
Once you are inside the Business Info section, scroll down slightly.
Here, you will see your business email address. There are two possible situations:
- The email address is already verified
- The email address is not verified
If your email is already verified, it will be clearly indicated. If it is not verified, you will see an Edit option next to the email field.

Step 5: Editing the Email Address (If Not Verified)
If your business email address is not verified, click on the Edit button.
After clicking Edit:
- Enter your correct email address
- Double-check for spelling mistakes
- Make sure the email address is active and accessible
Once you have entered the email address, click on Save.

What Happens After Clicking Save
As soon as you click on Save:
- Meta automatically sends a verification email to the email address you entered
- This email is generated instantly by Meta
At this stage, no further action is required inside Meta Business Suite until you verify the email.
Step 6: Checking Your Email Inbox for Verification Mail
Now, open the email inbox of the email address you added.
In most cases, the verification email from Meta may appear in:
- Inbox
- Social tab (especially in Gmail)
If you do not see the email in the main inbox, make sure to check:
- Social section of Gmail
- Spam or Promotions folder (if applicable)
Step 7: Opening the Verification Email
Once you receive the email from Meta:
- Open the email
- Read the message carefully
Inside the email, you will find a verification button or link provided by Meta.
Step 8: Clicking the Verification Button
Click on the verification button inside the email.
After clicking the button:
- Meta will redirect you to a login page
- You will be asked to log in using your email ID and password
This step is necessary to confirm that the verification request is genuine.
Step 9: Logging In to Confirm Verification
Enter your Facebook account login details when prompted.
Once you successfully log in:
- Meta completes the verification process
- Your business email address becomes verified
This process confirms that you have access to the email address you added.
Step 10: Confirming Email Verification in Meta Business Suite
After completing the login process, go back to Meta Business Suite.
Navigate again to:
- Settings
- Business Info
Now, when you check the email section, your business email address will appear as verified.
What to Do If You Don’t Receive the Verification Email
Sometimes, the verification email may not appear immediately.
In such cases:
- Check the Social tab in Gmail
- Refresh your inbox
- Check Spam or Promotions folders
If needed, you can repeat the process by clicking Edit and saving the email again to resend the verification email.
Common Mistakes to Avoid During Email Verification
While verifying your business email address, avoid these common mistakes:
Entering an Incorrect Email Address
Always double-check spelling before saving the email.
Not Checking the Social Tab
Many users miss the email because it lands in Gmail’s Social section.
Skipping the Login Step
Verification is completed only after logging in through the verification link.
Best Practices for Business Email Verification
To ensure smooth verification:
- Use an official business email address
- Use an email you check regularly
- Complete verification immediately after receiving the email
This helps avoid delays or missed confirmations.
Benefits of a Verified Business Email
Once your email is verified:
- Your business profile becomes more complete
- You receive important Meta notifications
- Communication from Meta becomes reliable
- Account security improves
A verified email ensures you stay informed about any changes or updates related to your business.
Final Understanding of the Email Verification Process
Verifying a business email address in Meta Business Suite is a simple but essential process.
The complete flow includes:
- Opening Meta Business Suite
- Going to Settings
- Accessing Business Info
- Adding or editing your email
- Verifying it through the email sent by Meta
Each step ensures that your business contact details are accurate and secure.
Final Conclusion
Email verification in Meta Business Suite helps Meta confirm that your business email address is valid and accessible. The process involves editing your email in Business Info, receiving a verification email, clicking the verification link, and logging in to confirm.
Once verified, your email will reflect correctly in Meta Business Suite settings, ensuring smooth communication and improved account credibility.
This completes the detailed, step-by-step explanation of how to verify your business email address in Meta Business Suite settings.
Related Posts