Unpublishing a blog post on a WordPress website is a simple process that allows you to remove a published post from public view without deleting it. Sometimes mistakes happen while publishing content. You may have added incorrect information, uploaded the wrong images, or published the post before completing the final edits. In such situations, instead of deleting the post, you can simply unpublish it and move it back to draft or pending review.
In this article, you will learn how to unpublish a blog post on a WordPress website using two different methods: Quick Edit and Editor Mode.
When you log in to the WordPress admin dashboard, you will see various options on the left side toolbar. One of these options is the Posts section, which allows you to manage all your blog posts.
Accessing the Posts Section
Before unpublishing a blog post, you need to open the Posts section inside the WordPress dashboard.
Step 1: Open the Posts Menu
Log in to your WordPress admin dashboard.
On the left side toolbar, move your cursor over the Posts option.
As soon as you move your cursor over Posts, a submenu will appear.
This submenu contains options such as:
- All Posts
- Add Post
Click on All Posts.
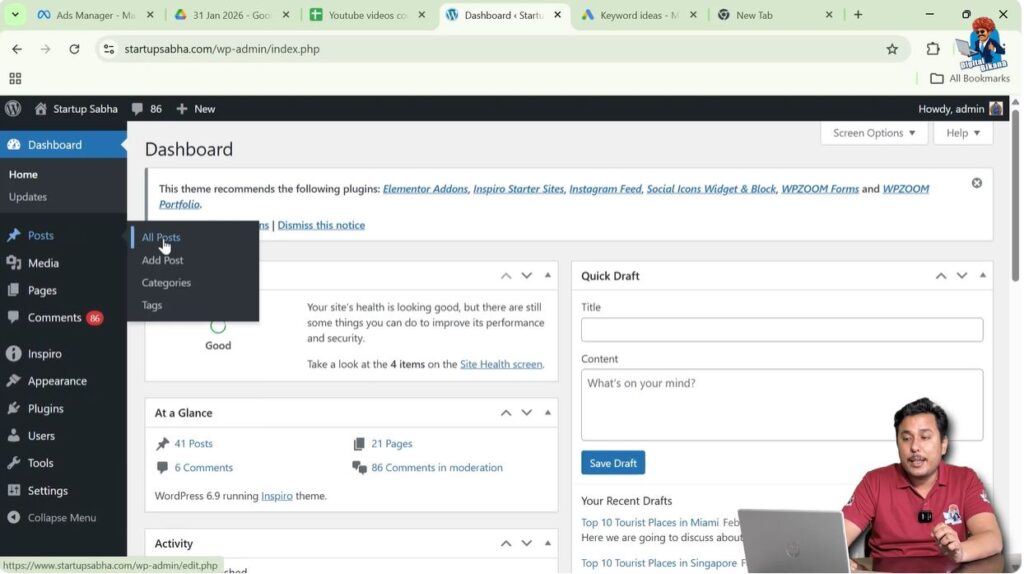
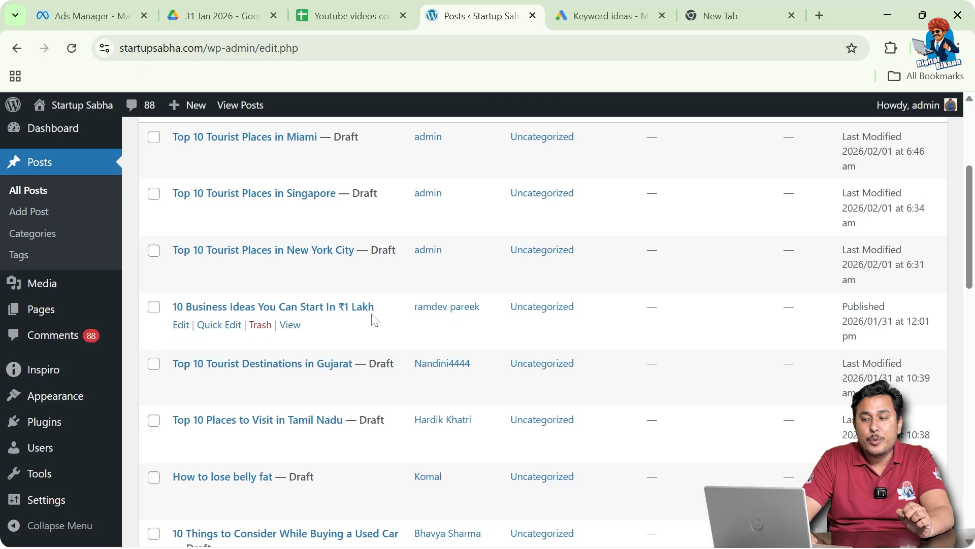
After clicking All Posts, you will see a list of all blog posts written by you.
Unpublishing a Blog Post Using Quick Edit
One of the fastest ways to unpublish a blog post is by using the Quick Edit option.
Step 2: Locate the Published Blog Post
In the All Posts section, find the blog post that is already published.
The published blog posts are marked accordingly.
Move your cursor over the blog post title.
You will see multiple options appear below the title.
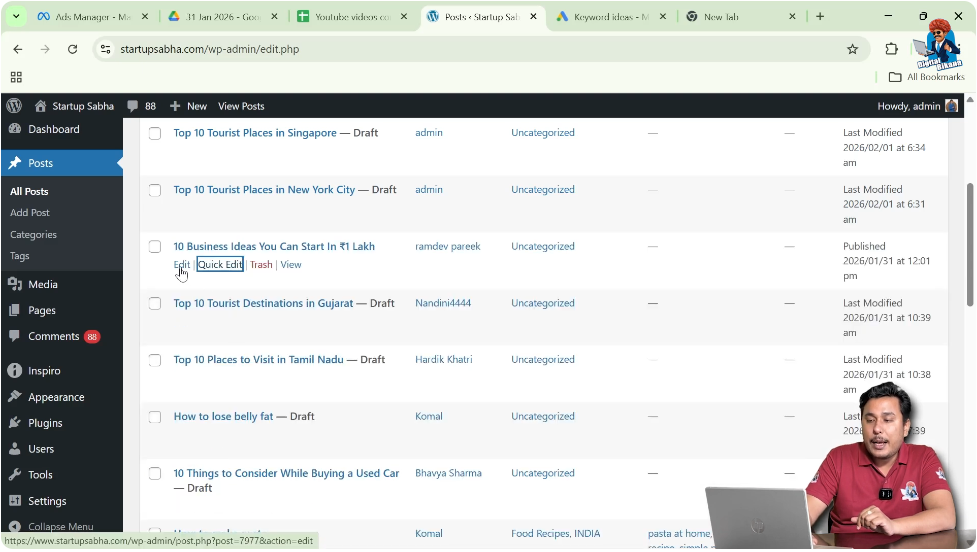
Step 3: Click on Quick Edit
Click on the Quick Edit option.
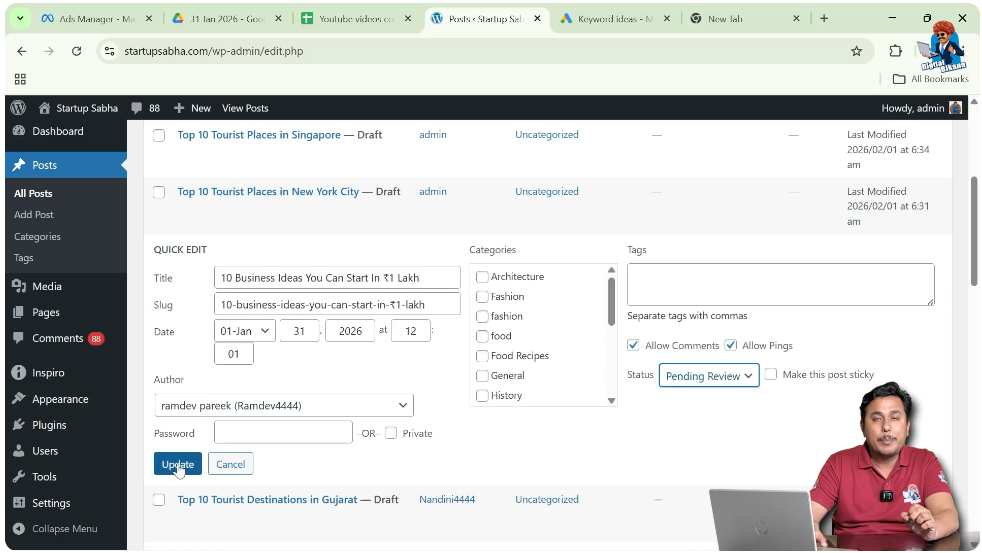
After clicking Quick Edit, additional editing options will expand below the blog post title.
Here you will find options to modify the post details, including its status.

Step 4: Change the Post Status
Inside the Quick Edit options, find the Status dropdown.
The status will currently be set to Published.
Click on the dropdown menu.
You can change the status to:
- Draft
- Pending Review
Select Draft if you want to unpublish the blog post and continue editing it later.

Step 5: Click Update
After changing the status to Draft or Pending Review, click on Update.
Once you click Update, the blog post will be unpublished.
It will no longer be visible on the front end of your website.
Why You May Need to Unpublish a Blog Post
There are several reasons why you may want to unpublish a blog post:
- You entered incorrect content.
- You uploaded wrong images.
- The blog post needs further editing.
- The content was published accidentally.
Instead of deleting the blog post, unpublishing allows you to correct mistakes and publish it again later.
Unpublishing a Blog Post Using Editor Mode
You can also unpublish a blog post from inside the editor mode.
Step 6: Open the Blog Post in Editor Mode
In the All Posts section, click on Edit under the blog post title.
The blog post will open in editor mode.
Step 7: Open the Settings Panel
In the top-right corner of the editor, you will see a Settings icon near the Save option.
If the settings toolbar is not visible, click on the Settings icon.
The settings panel will appear on the right side of the screen.
This panel contains two sections:
- Post
- Block
You need to open the Post section.

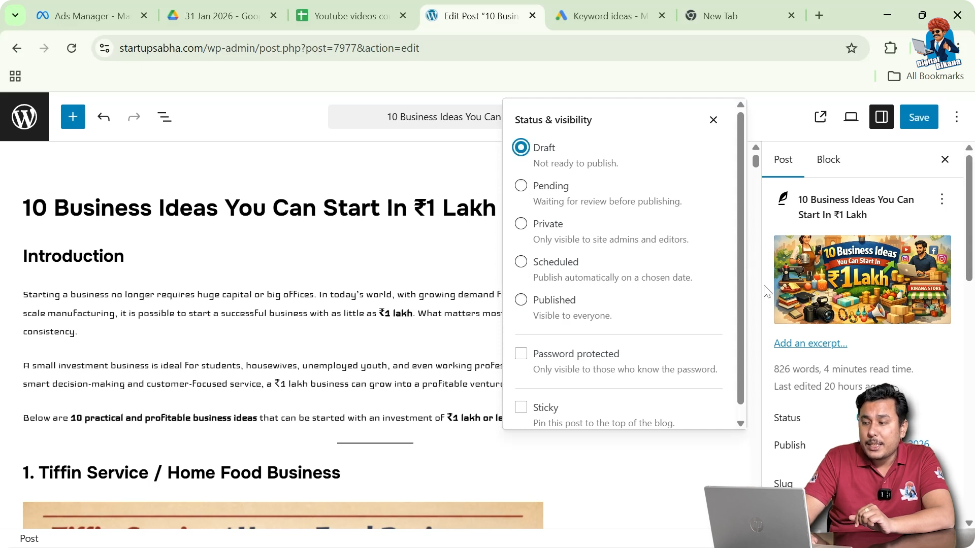
Step 8: Change the Post Status from Published
Inside the Post section, you will see the current status of the blog post.
It will show that the post is published.
Click on the Published status.
You will see options to change the visibility or status.
You can change the status to:
- Draft
- Pending Review
- Private
- Scheduled
If you want to unpublish the blog post, select Draft.
Step 9: Save the Changes
After selecting Draft, click on Save.
The blog post will now be unpublished.
It will no longer be visible to visitors on your website.

Making a Blog Post Private
Instead of moving the blog post to Draft, you can also make it Private.
When a blog post is marked as Private:
- It is not visible to public visitors.
- Only authorized users can view it.
This option is useful if you want limited access to the blog post.
Difference Between Draft and Pending Review
When you unpublish a blog post, you can choose between Draft and Pending Review.
- Draft: The post is unpublished and can be edited further.
- Pending Review: The post is unpublished and waiting for review before publishing again.
Both options remove the post from public view.
Republishing the Blog Post
After making necessary corrections, you can publish the blog post again.
To republish:
- Open the blog post in editor mode.
- Change the status back to Published.
- Click Publish or Update.
The blog post will become visible on the website again.
Important Points to Remember
Unpublishing does not delete the blog post.
The content remains saved inside the WordPress dashboard.
You can edit and republish the blog post at any time.
This feature helps correct mistakes without losing content.
Always review your blog post carefully before publishing it again.
Conclusion
Unpublishing a blog post on a WordPress website is a simple and useful feature. You can unpublish a blog post using the Quick Edit option by changing its status from Published to Draft or Pending Review. You can also unpublish it from the editor mode by adjusting the status in the Post settings panel.
Unpublishing is helpful when you need to correct mistakes, update content, or temporarily remove a blog post from public view. After making the necessary changes, you can easily republish the blog post.
By following these steps, you can effectively manage the visibility of your blog posts on a WordPress website.
Related Posts