Temporarily deactivating a Facebook page is a useful option when you want to take a short break from managing your page without deleting it permanently. Whether you are rebranding, pausing business activities, or simply stepping away for a while, Facebook allows you to deactivate your page easily through its settings.
In this detailed guide, you will learn how to temporarily deactivate a Facebook page by following a simple step-by-step process directly from your Facebook account.
Understanding Temporary Deactivation of a Facebook Page
Before proceeding with the steps, it is important to understand what temporary deactivation means.
When a Facebook page is temporarily deactivated:
- The page becomes invisible to the public
- Followers and visitors cannot view or interact with the page
- The page is not deleted permanently
- You can reactivate the page anytime by returning to the settings
This option is ideal for page owners who want flexibility without losing their page data, followers, or content.
How to Deactivate Facebook Page Temporarily?
1. Logging in to Your Facebook Account
The first step in deactivating a Facebook page is logging in to your Facebook account.
Open Facebook on your preferred device and enter your login credentials. Once logged in, you will be directed to your Facebook home screen. From here, all page management actions can be performed.
Make sure you are using the account that has admin access to the Facebook page you want to deactivate. Without admin permissions, you will not be able to access page settings.

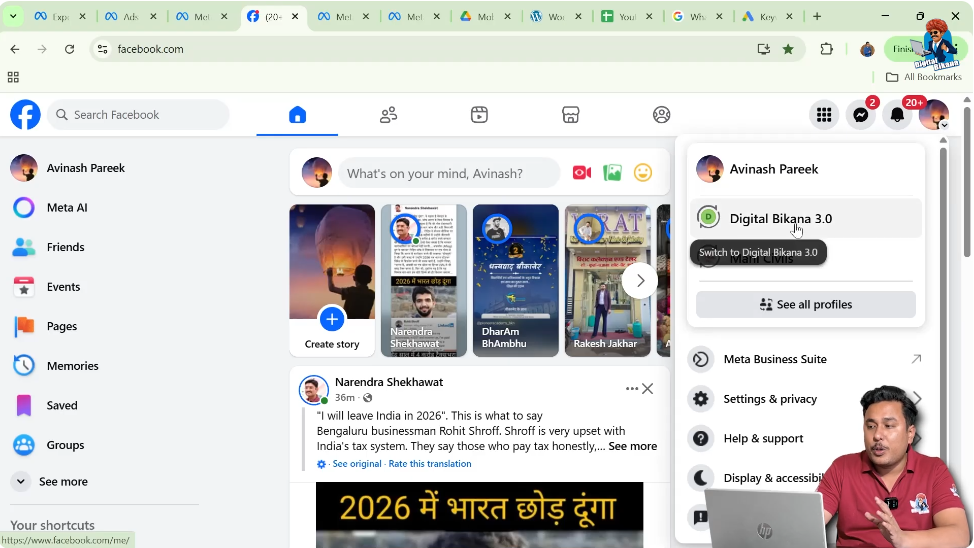
2. Locating the Profile Icon
After logging in, look at the top-right corner of the screen. You will see your profile icon, which provides access to account and page-related options.
Clicking on this icon opens a menu that allows you to switch between your personal profile and any Facebook pages you manage.
This step is important because page settings can only be accessed after switching to the page profile.

3. Switching to Your Facebook Page
In the dropdown menu, you will see the name of your Facebook page listed. Click on the page name to switch from your personal profile to your Facebook page profile.
Once selected, Facebook will automatically redirect you to the page dashboard. This confirms that you are now operating as the Facebook page and not your personal profile.
You must complete this step before accessing the page settings. If you remain on your personal profile, the page deactivation option will not appear.
4. Confirming You Are on the Facebook Page Profile
After switching, verify that you are on the Facebook page profile. You will notice that the page name appears instead of your personal name.
This confirmation ensures that any changes you make will apply directly to the Facebook page.
Being on the correct profile is essential to avoid confusion and accidental changes to the wrong account.

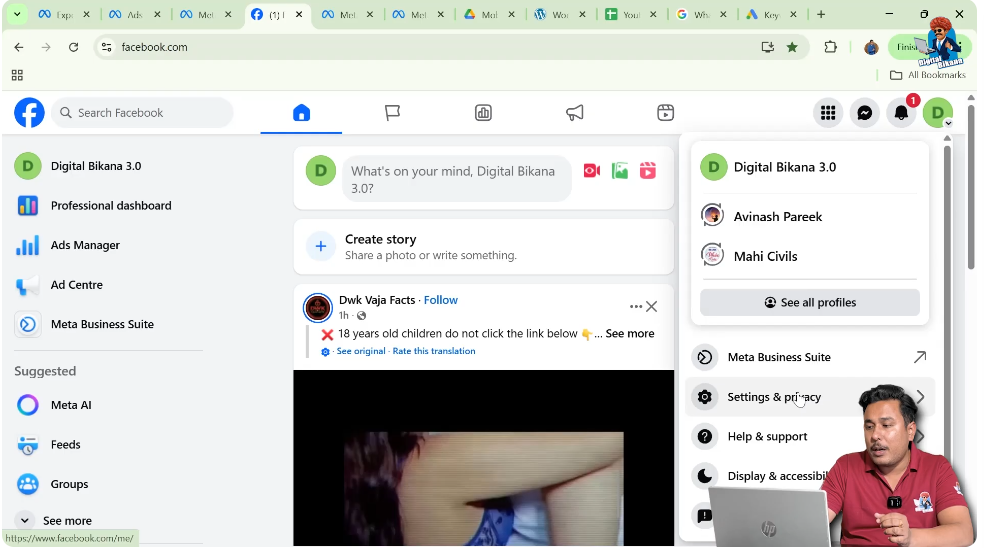
5. Opening the Profile Icon Again
Once you are inside the Facebook page profile, move to the top-right corner again and click on the profile icon.
This opens a menu specifically related to the Facebook page. From here, you can manage page settings, privacy options, and administrative controls.
6. Accessing Settings and Privacy
From the dropdown menu, click on Settings and Privacy.
This section contains all configuration options related to your Facebook page, including visibility, access, and control settings.
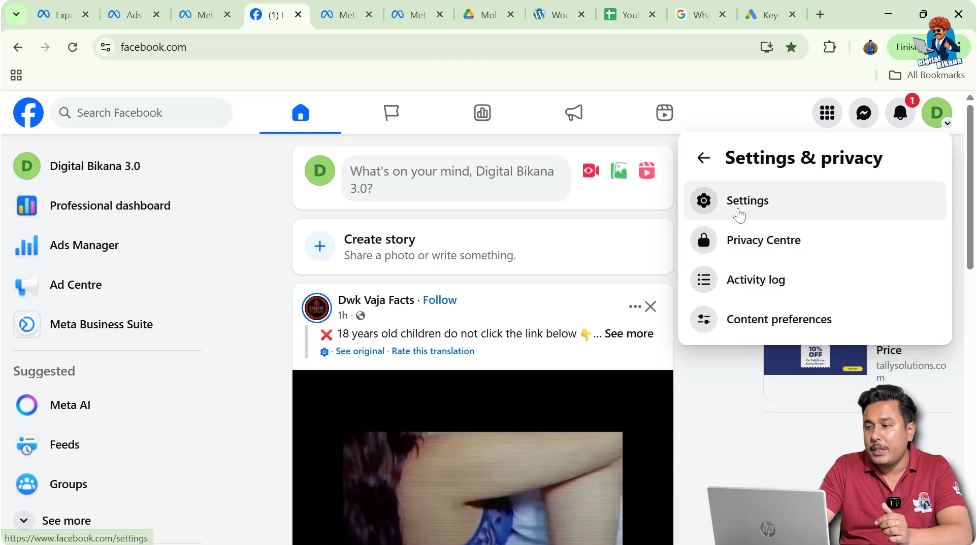
After clicking Settings and Privacy, select Settings to proceed further.
Make sure you do not skip this step, as page deactivation is available only inside the main settings panel.
7. Navigating the Settings Page
Once inside the settings section, you will see a menu on the left side of the screen.
This menu contains various options related to page management. These include visibility settings, access controls, and administrative tools.
Scroll down slowly to locate the option needed for deactivation.
8. Finding the Access and Control Option
As you scroll down the left-side menu, you will find an option called Access and Control.
Click on Access and Control to open settings related to page availability and management permissions.
This section allows page owners to control whether the page is active, unpublished, or deactivated.

9. Understanding Access and Control Settings
The Access and Control section is designed to give page owners flexibility over how their page appears on Facebook.
From this section, you can manage:
- Temporary page deactivation
- Page availability
- Visibility controls
For this guide, the focus is on temporary deactivation only.
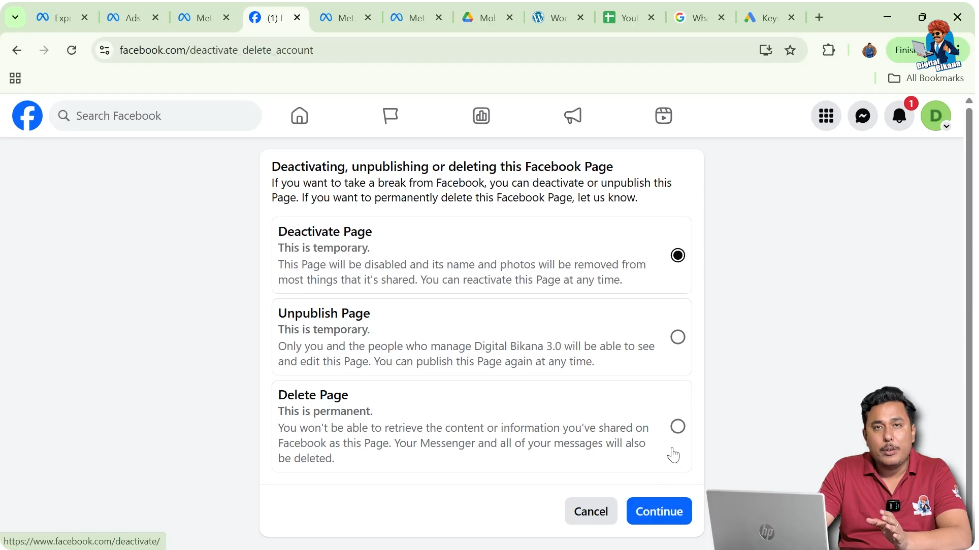
10. Selecting the Temporary Deactivation Option
Inside the Access and Control section, you will see an option that allows you to Deactivate Your Page Temporarily.
This option is specifically designed for page owners who want to pause their page without removing it permanently.
Click on this option to begin the deactivation process.

11. Proceeding with Deactivation
After selecting the temporary deactivation option, Facebook will prompt you to continue.
Click on Continue to confirm your action.
This step confirms that you want to temporarily deactivate your Facebook page and are aware that it will be hidden from public view.

12. Facebook Page Deactivation Confirmation
Once you click continue, Facebook processes the request immediately.
Your Facebook page will now be deactivated for a temporary time period. During this time:
- The page will not be visible to users
- No one can like, comment, or view the page
- The page remains safe and recoverable
What Happens After Deactivation
After deactivation, the page is placed in a paused state.
You can reactivate it anytime by logging back into your Facebook account, switching to your page, and adjusting the settings.
All content, followers, and page data remain intact.
Why Temporary Deactivation Is Useful
Temporary deactivation is beneficial for:
- Businesses taking a short break
- Pages undergoing updates or changes
- Creators pausing activity without losing followers
- Page owners testing content strategies
This option provides flexibility without permanent consequences.
Important Points to Remember
- Always switch to your Facebook page before accessing settings
- Temporary deactivation does not delete your page
- You can reactivate the page anytime
- Admin access is required to perform deactivation
Understanding these points helps prevent accidental actions.
Final Thoughts
Temporarily deactivating a Facebook page is a simple and effective way to pause your online presence without losing your page permanently. By following the steps outlined in this guide, you can safely deactivate your Facebook page directly from the settings.
This method ensures that your page remains secure and available for future use whenever you decide to reactivate it.
Related Posts