

Changing the heading color in Elementor is a simple yet powerful way to enhance the design and visual appeal of your website. The color of your heading plays a major role in attracting attention, improving readability, and maintaining brand consistency.
In this article, we will explain how to change the heading color in Elementor step by step. The explanation follows a structured approach and expands each step in detail so that you can easily apply it while designing your website.
Accessing the Elementor Editor
To begin, you need to open Elementor and start editing your web page.
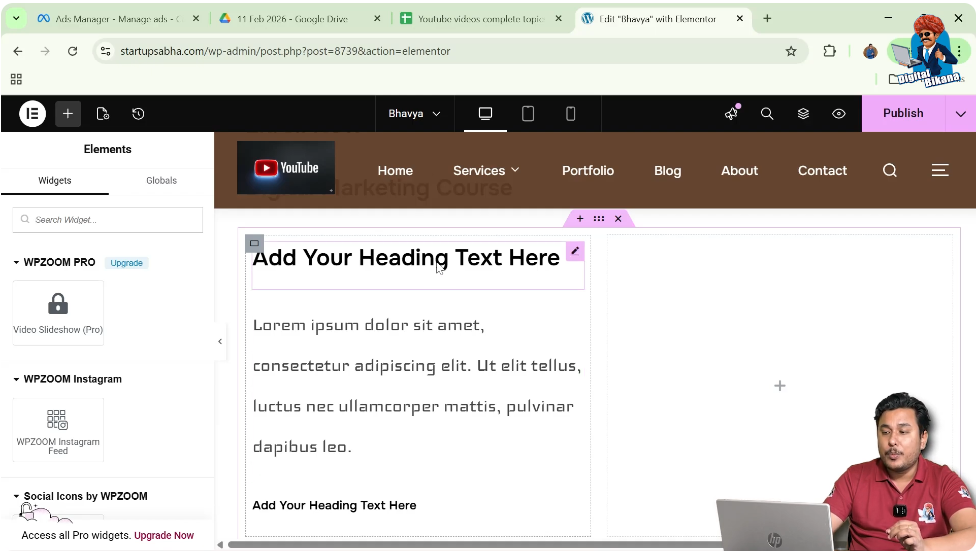
As shown in the process, you are inside the Elementor editor and creating a new web page. A section has already been created, and a heading widget is added inside that section.
This is the starting point for modifying the heading color.
Adding a Heading Widget
Before changing the color, you must have a heading on your page.
If not already added, you can add a heading widget from the Elementor panel and place it inside your section.
Once the heading is visible, you can proceed with editing it.
Selecting the Heading for Editing
Step 1: Hover Over the Heading
Move your cursor over the heading text.
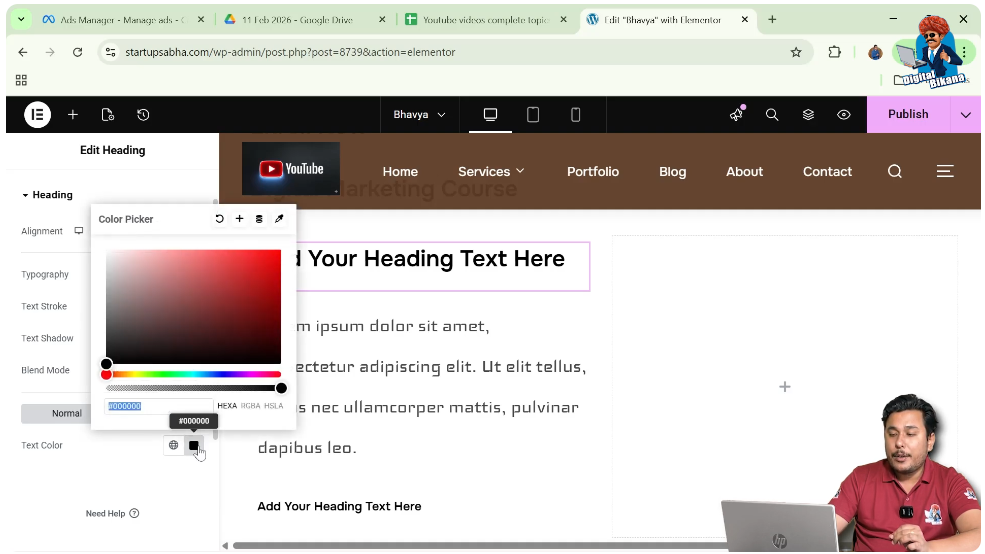
Step 2: Click the Edit Icon
You will see a pen icon in the top right corner of the heading.
Click on this icon to open the editing panel.
Understanding the Settings Panel
After clicking the edit icon, the settings panel will appear on the left side.
This panel contains three main sections:
- Content Settings
- Style Settings
- Advanced Settings
To change the heading color, you need to use the Style Settings section.
Navigating to Style Settings
Step 3: Click on Style Tab
Click on the Style tab in the left-side toolbar.
This section allows you to customize the appearance of the heading.

Accessing Text Color Option
Inside the style settings, you will find the Heading section.
Here, there are options like:
- Normal
- Hover
Make sure you are in the Normal state.
Step 4: Click on Text Color
You will see the Text Color option.
Click on it to open the color palette.
Changing the Heading Color
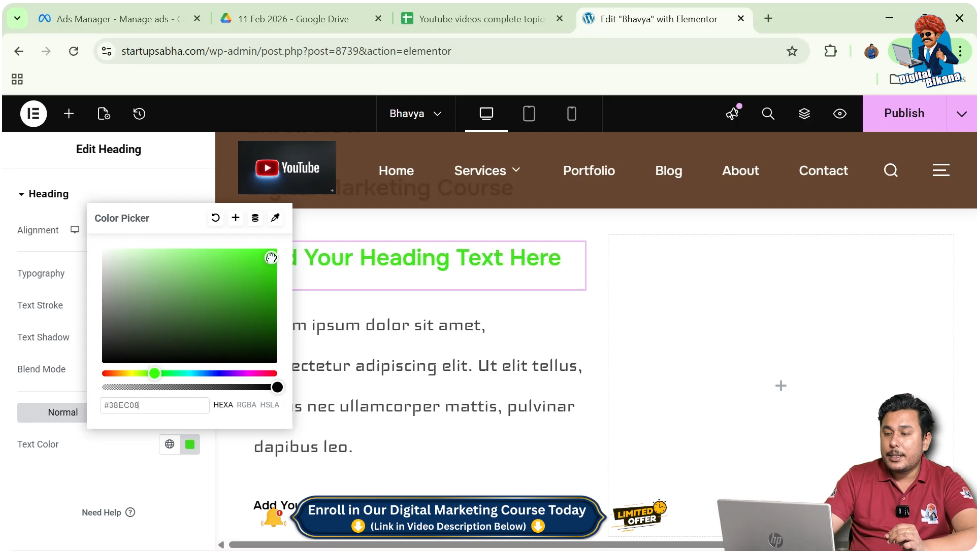
Step 5: Select Color
In the color palette, you can choose any color you want.
For example:
- Select green color
Applying the Color
Once you select a color:
- The heading color changes instantly
- You can preview the changes in real time
Understanding Color Selection
Elementor allows you to:
- Choose colors from the palette
- Enter HEX or RGB values
- Maintain consistent branding
This gives you full control over your design.
Visual Impact of Heading Color
Changing the heading color can:
- Highlight important text
- Improve readability
- Match your brand identity
- Enhance user experience
Practical Example
In the demonstrated process:
- A heading is added to the section
- The heading is edited using the pen icon
- The style tab is opened
- Text color option is selected
- Green color is applied
As a result, the heading color changes successfully.
Common Mistakes to Avoid
Not Using Style Tab
Color settings are available only in the style section.
Choosing Low Contrast Colors
Avoid colors that reduce readability.
Ignoring Consistency
Use consistent colors across your website.
Best Practices
- Use brand colors
- Maintain proper contrast
- Test colors on different devices
- Keep design simple and clean
Final Understanding
Changing the heading color in Elementor is a straightforward process that can significantly improve your website’s design. By using the style settings, you can easily customize colors without any technical knowledge.
Conclusion
Customizing the heading color is an essential step in creating a visually appealing website. Elementor makes this process easy with its user-friendly interface and color options.
By following the steps explained in this guide, you can quickly change the heading color and enhance the overall look of your website.
Related Posts


