
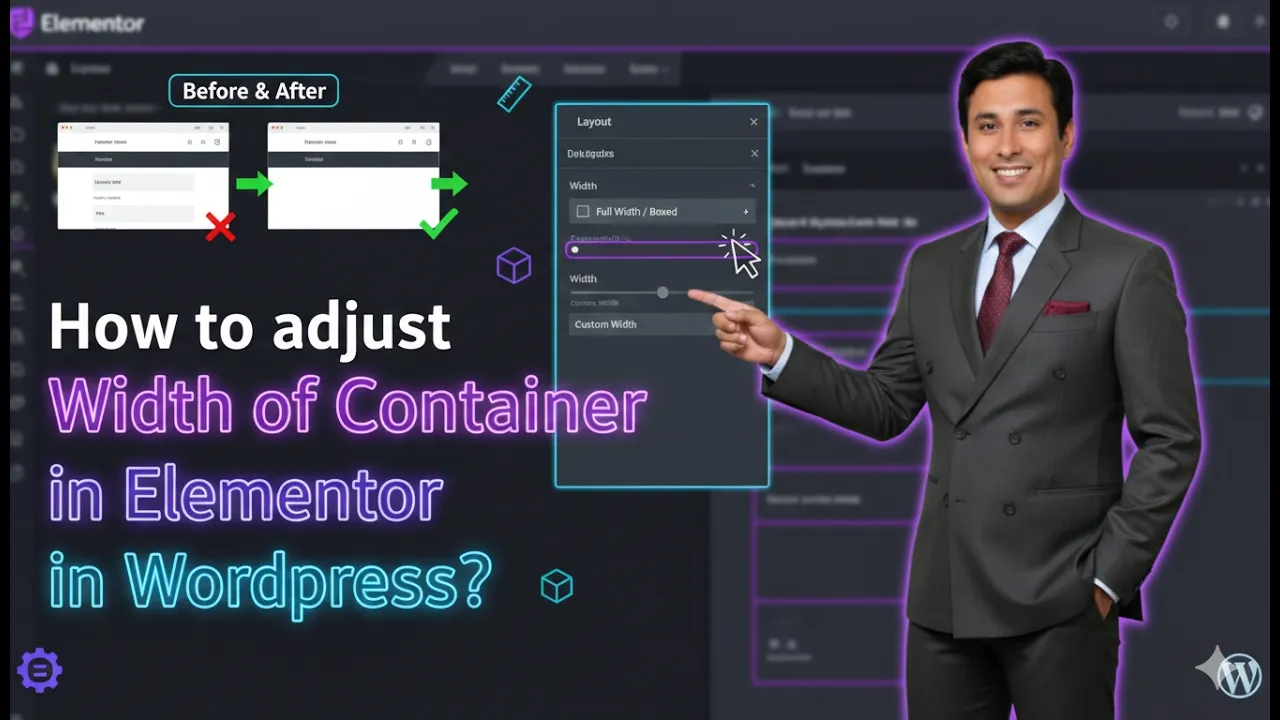
Designing a well-structured webpage requires proper control over the layout elements. One of the most important elements in Elementor is the container, which is used to organize content, images, and other design elements on a webpage. Adjusting the width of a container allows you to control how much space the container occupies on the page and how the content inside it is displayed.
Elementor provides flexible options that allow users to adjust the width of a container easily. By modifying container layout settings, you can increase or decrease the container width and control how the background image or content inside the container appears.
In this guide, you will learn how to adjust the width of a container in Elementor while editing a webpage on a WordPress website. The process involves creating a container, editing container settings, adding a background image, and modifying the container width using layout settings.
Opening Elementor While Editing a Webpage
Before adjusting the width of a container, you first need to open the Elementor editor for the webpage you want to modify.
When you open a page using Elementor, the editor interface appears with a live preview of the webpage in the center of the screen. On the left side of the screen, you will see the Elementor editing panel where different widgets and settings are available.
In the middle of the page preview area, you will see a plus icon (+). This icon is used to create a new container or section on the webpage.
If you want to add a new container to your page, you simply need to click on this plus icon.
Creating a Container in Elementor
To adjust the width of a container, you first need to create a container.
Step 1: Click the Plus Icon
While editing the page in Elementor, click the plus icon located in the center of the screen.
Once you click the plus icon, Elementor will ask you to select the layout type.
Step 2: Select Flexbox Layout
Elementor provides layout options such as Flexbox and Grid. For this example, select Flexbox.
Flexbox containers allow flexible control over alignment, spacing, and layout structure.
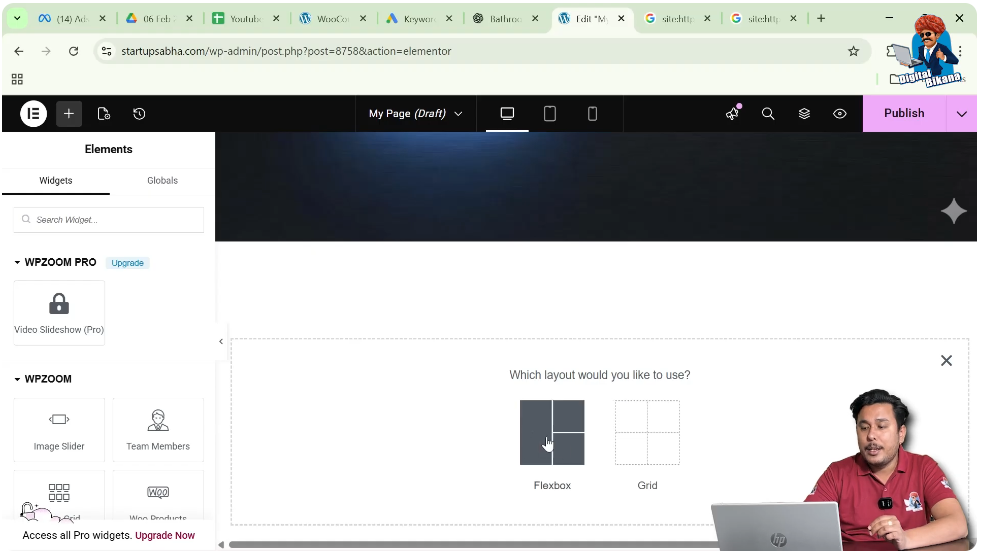
Step 3: Select the Container Structure
After selecting Flexbox, Elementor will show different container structures.
Choose the direction column structure. This structure creates a simple container where the content is arranged vertically.
Once selected, the container will appear on the page.
At this stage, the container is empty and ready for customization.

Editing the Container
After creating the container, the next step is to open the container settings.
Step 1: Click the Six Dots Icon
At the top of the container, you will see six dots. These dots represent the container control.
Clicking these six dots allows you to edit the container settings.
Once clicked, the container settings will appear in the left-side toolbar.
Understanding Container Settings
Inside the container settings panel, Elementor provides three main sections:
- Layout
- Style
- Advanced
Each section allows you to modify different aspects of the container.
For example:
- Layout controls the container structure, width, and alignment.
- Style controls the appearance such as background images or colors.
- Advanced contains additional settings like motion effects, responsive controls, and custom CSS.
To demonstrate container width adjustment, we will first add a background image to the container.

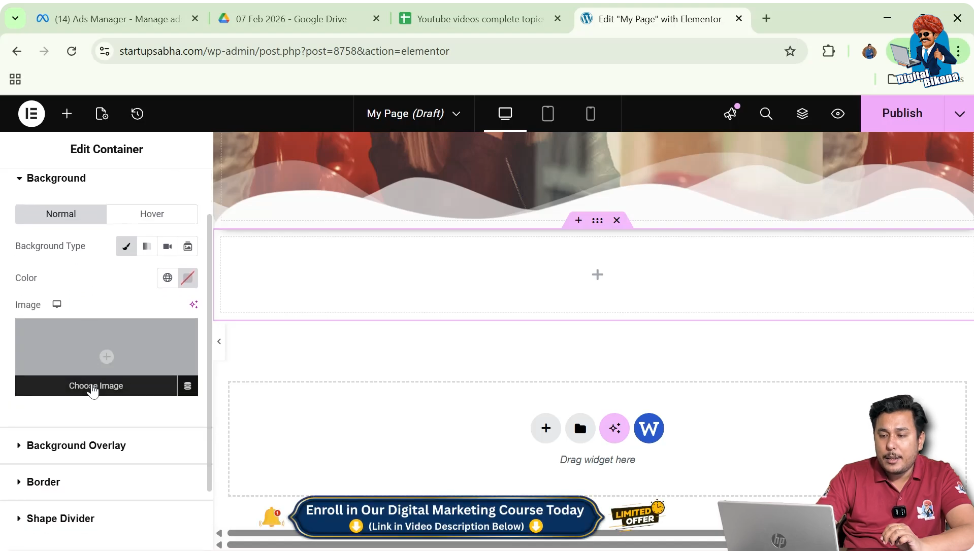
Adding a Background Image to the Container
Before adjusting the container width, a background image can be added to better visualize how the container size changes.
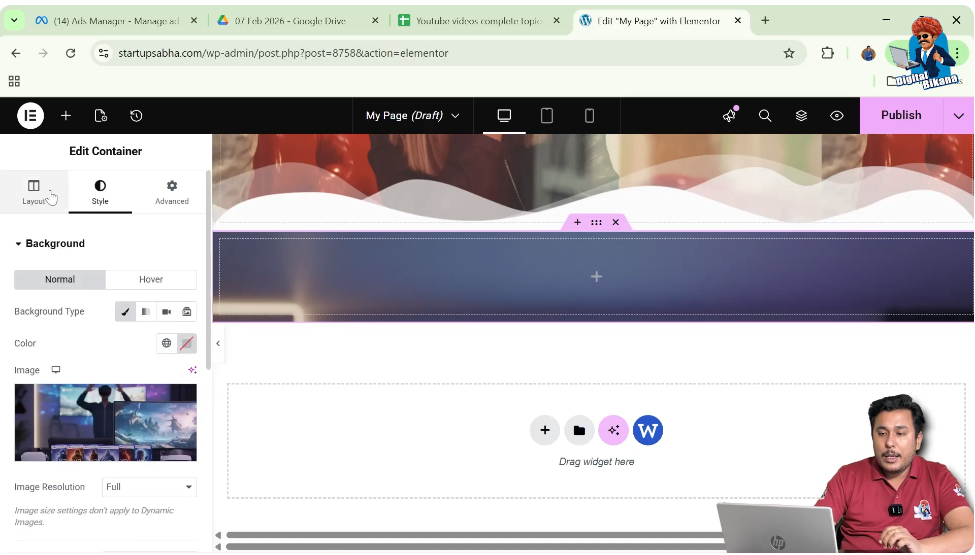
Step 1: Open Style Settings
In the left-side toolbar, click on the Style tab.

Step 2: Go to Background Settings
Inside the Style tab, locate the Background section.
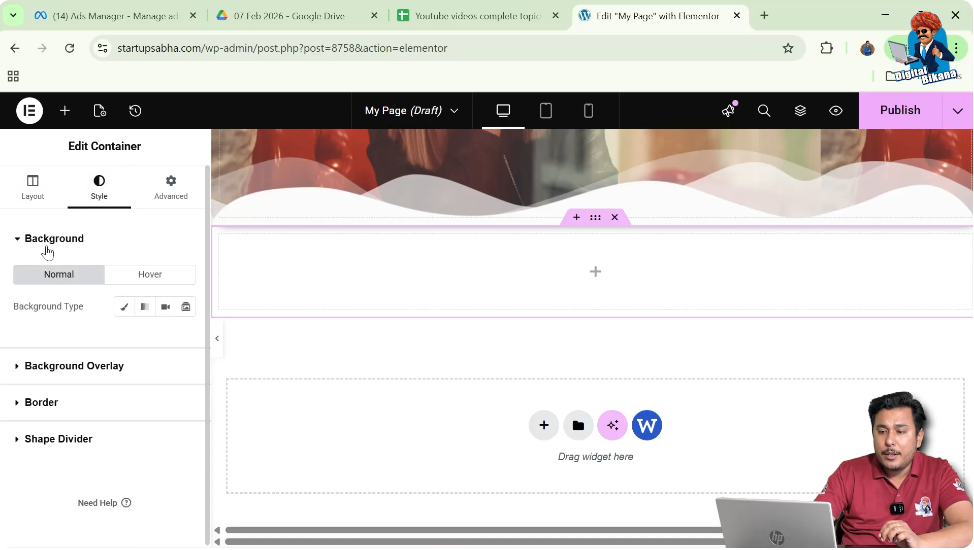
Step 3: Select Background Type
Choose Classic as the background type.
The Classic background option allows you to apply either a color or an image.
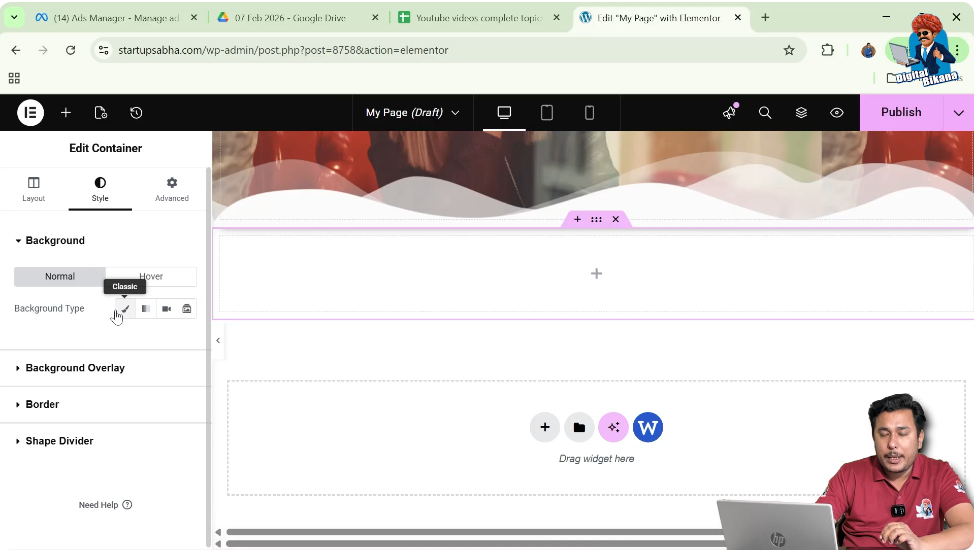
Step 4: Choose the Image
Click the Choose Image button.
The WordPress media library will open.
From the media library, you can either:
- Select an existing image
- Upload a new image from your computer
For this example, select an image and click Select.
Once selected, the image will appear as the container background.
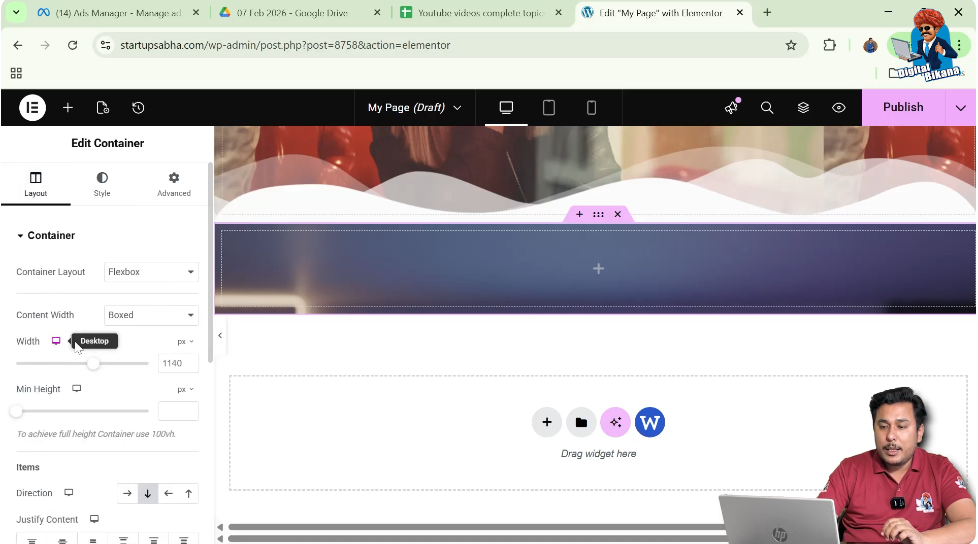
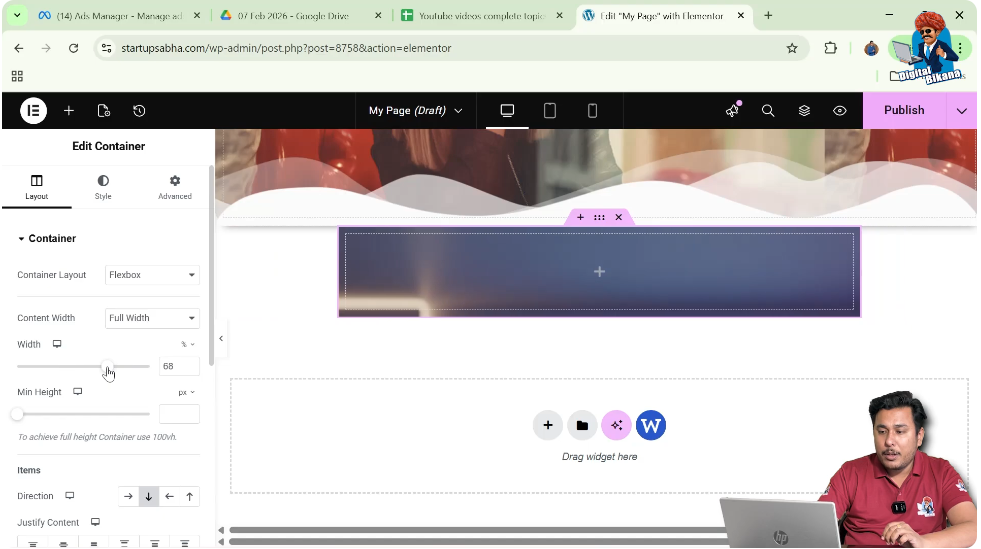
Adjusting the Container Width
After adding the background image, you can now adjust the width of the container.
Step 1: Go to Layout Settings
Return to the Layout tab in the container settings panel.
Step 2: Locate the Width Settings
Inside the Layout settings, you will find options related to the container width.
Here you can adjust the width of the container.
Step 3: Increase or Decrease the Width
You can adjust the width using the width control.
As you move the control, you will notice that:
- The container width increases
- The container width decreases
This change can be seen immediately in the page preview area.
The background image inside the container also adjusts according to the container width.

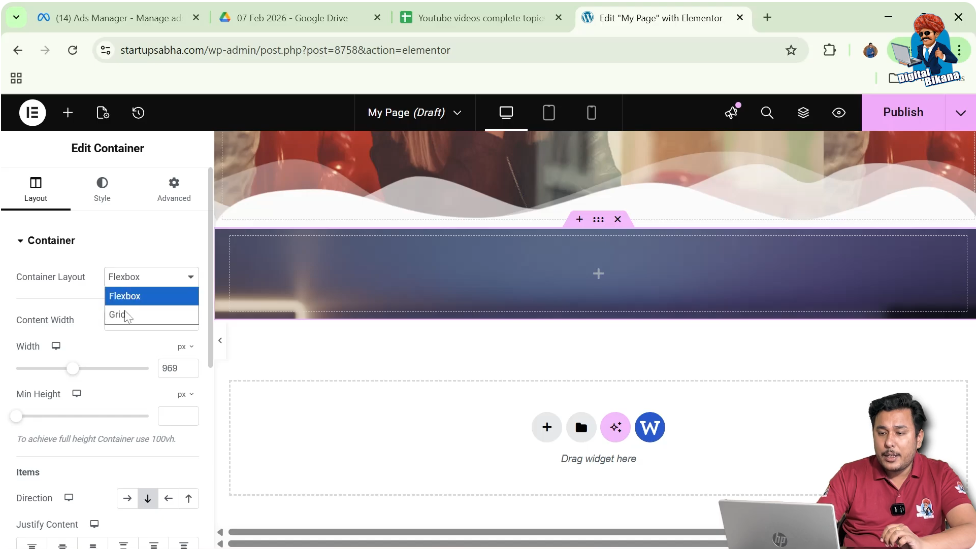
Understanding Container Layout Type
Inside the Layout settings, Elementor also shows the container layout type.
For example, the container layout may be:
- Flexbox
- Grid
You can change the container layout type from this setting if required.
However, the width adjustment works similarly for both layout types.
Understanding Content Width Options
Another important option in the Layout settings is Content Width.
Elementor provides two content width options:
- Boxed
- Full Width
These options determine how the container behaves on the webpage.
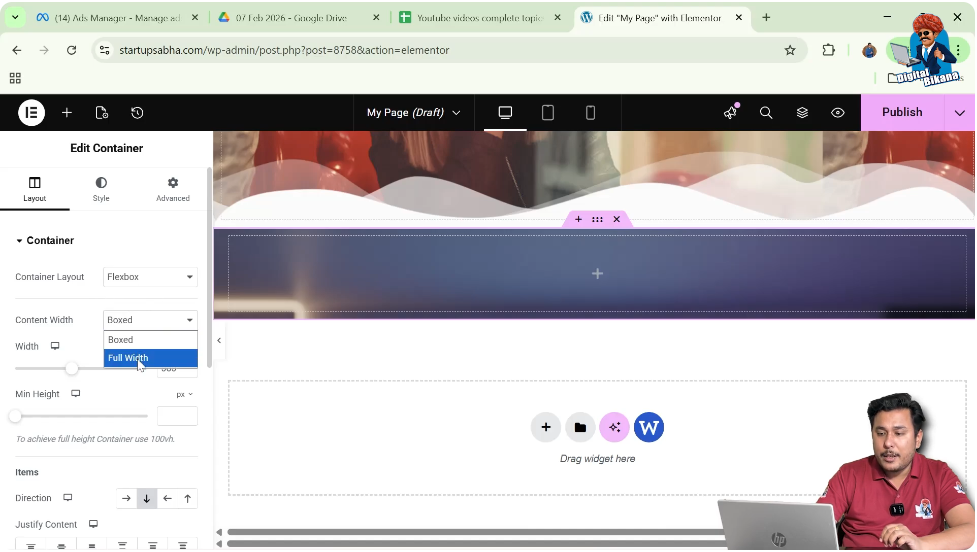
Boxed Content Width
When the Content Width is set to Boxed, the container content is restricted to a fixed width area.
In this mode:
- The container remains within a defined width.
- The background image may appear across the section depending on settings.
- The container width can still be increased or decreased.
Boxed layouts are commonly used to maintain a structured design where the content remains centered within the page.
Full Width Content Layout
When the Content Width is set to Full Width, the container stretches across the entire screen width.
In this mode:
- The container expands across the screen.
- You can increase or decrease the container width.
- The background image adjusts according to the container size.
This layout is commonly used for hero sections, banners, or large background images.
Relationship Between Container Width and Background Image
One important aspect of container width adjustment is how the background image behaves.
When the container width changes:
- The background image also adjusts according to the container width.
If the container width increases, the image appears larger.
If the container width decreases, the image becomes smaller.
This allows you to control the visual appearance of the background image along with the container layout.
Adjusting Container Width Properly
When adjusting container width, it is important to understand how the content width settings affect the result.
When Content Width is Boxed
When content width is set to Boxed:
- The container width can still change.
- The background image may appear across the section.
- The content remains within a structured width area.
When Content Width is Full Width
When content width is set to Full Width:
- The container width adjustment directly affects the entire container area.
- The background image expands or shrinks along with the container.
This option provides more flexibility when designing full-width sections.
Visual Result of Width Adjustment
As you adjust the container width using the layout settings, you will notice the following changes:
- The container size changes horizontally.
- The background image adjusts automatically.
- The container may appear wider or narrower depending on the width setting.
This helps you control the layout of your webpage and design sections that match your design requirements.
Practical Use of Container Width Control
Adjusting the container width is useful in many situations, such as:
- Creating centered content sections
- Designing banner sections
- Creating narrow content blocks
- Controlling background image display
- Designing responsive page layouts
Elementor makes it easy to control these layout settings without requiring any coding.
Conclusion
Adjusting the width of a container in Elementor is a simple process that allows you to control how sections appear on a WordPress webpage.
You begin by creating a container using the plus icon and selecting a Flexbox layout. After creating the container, you can edit it using the six dots icon and access the container settings in the left-side toolbar.
By adding a background image in the Style settings, you can visually see how the container width changes. Then, in the Layout settings, you can increase or decrease the container width using the width control.
Elementor also provides content width options such as Boxed and Full Width, which affect how the container behaves on the webpage.
By adjusting these settings, you can easily control the layout and design of your website sections.
This is how you can adjust the width of a container in Elementor while editing a webpage on a WordPress website.
Related Posts


