
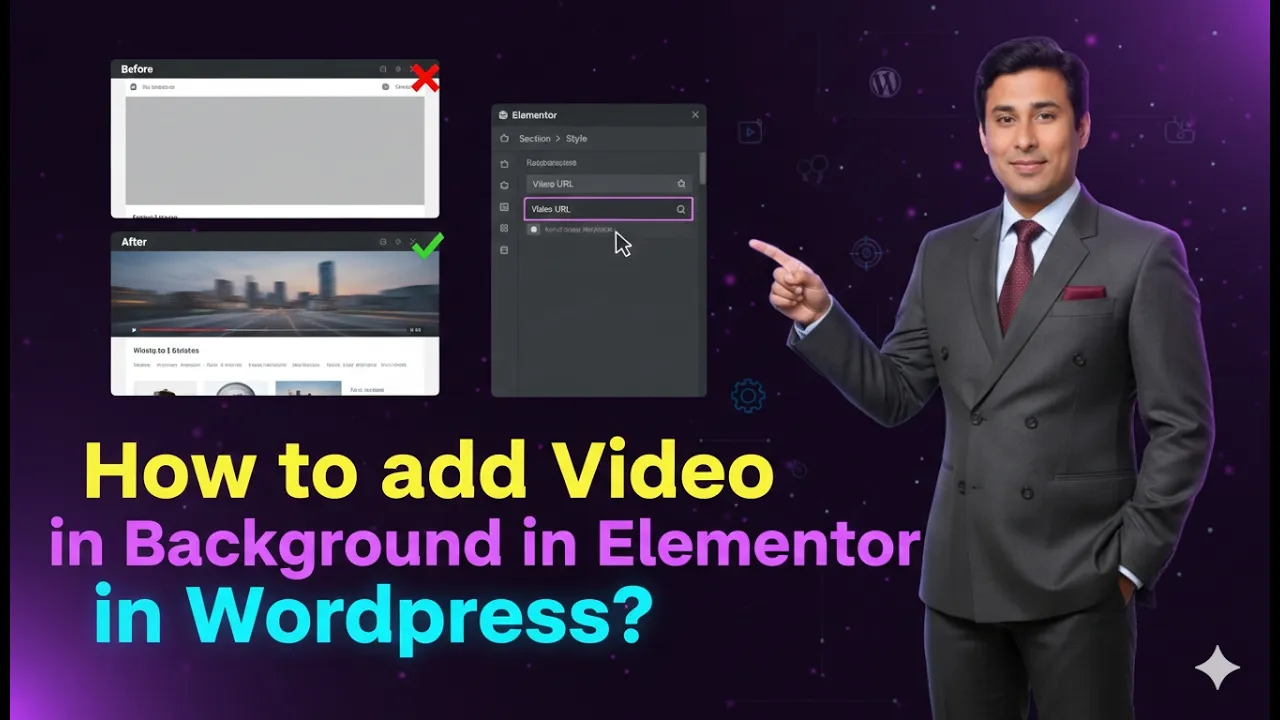
Using a background video on a webpage is a powerful design technique that helps create an engaging and visually attractive website. Instead of a static background image, a background video adds motion and creates a more dynamic experience for visitors. Many modern websites use background videos in hero sections, landing pages, and promotional banners to capture attention.
Elementor provides an easy way to add videos as container backgrounds without writing any code. By using the background settings inside a container, you can insert a video link and display it as the background of a section. You can also control various video settings such as start time, end time, loop mode, and fallback image.
In this guide, you will learn how to add a video in the background of a container while editing a webpage using Elementor on a WordPress website.
Opening the Elementor Editor
Before adding a background video, you first need to open the Elementor editor.
When you edit a webpage using Elementor, the Elementor editor interface appears on the screen. The main workspace displays the live preview of your webpage, while the editing panel appears on the left side of the screen.

Inside the page preview area, you will see a plus icon (+) displayed in the center of the screen. This icon is used to add a container or section to the webpage.
To add a background video, you first need to create a container.
Creating a Container in Elementor
Containers are used to structure the layout of a webpage. A container can hold content such as text, images, videos, and background elements.
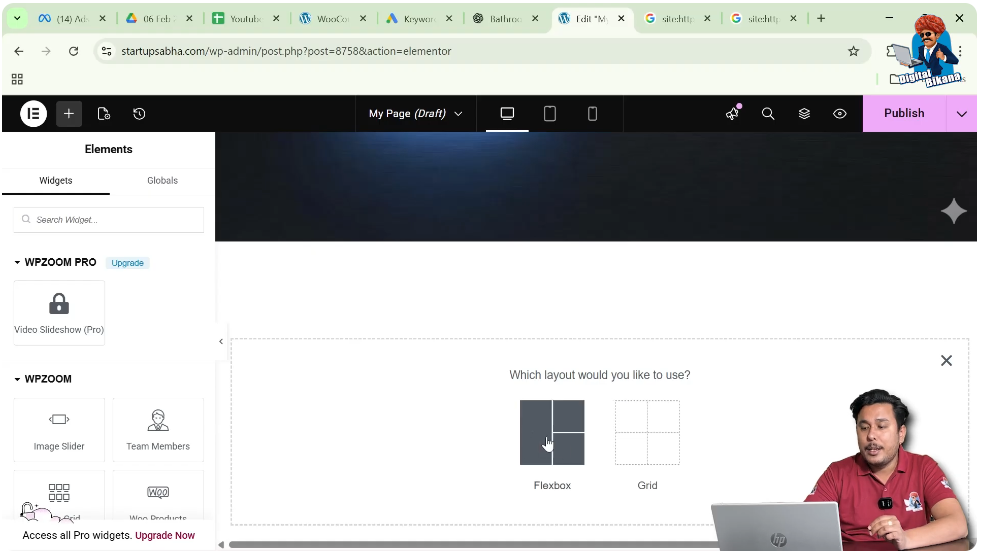
Step 1: Click the Plus Icon
Click the plus icon located in the center of the screen.
After clicking the icon, Elementor will ask you to choose the layout type for the container.
Step 2: Select Flexbox Layout
Elementor provides two layout options:
For this example, select Flexbox.
Flexbox allows flexible control over layout and alignment inside the container.
Step 3: Select the Container Structure
After selecting Flexbox, Elementor displays several container structure options.
Choose the first structure, which represents direction column.
Once selected, the container will appear on the page.

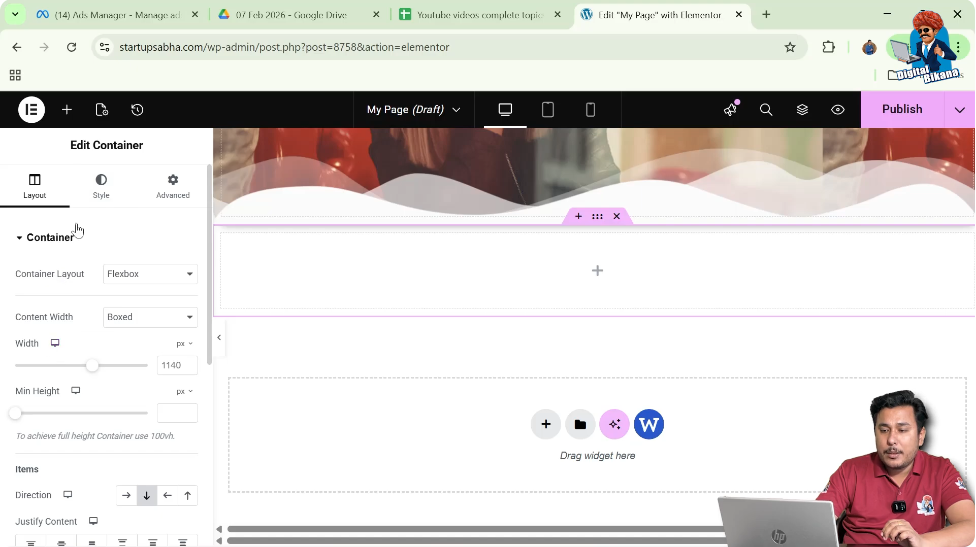
Editing the Container
After creating the container, you need to edit it to apply the background video.
Step 1: Click the Edit Container Icon
At the top of the container, you will see an icon that looks like six dots.
This icon represents the Edit Container option.
Click on this icon to open the container settings.
Once clicked, the container settings appear in the left-side toolbar.
Understanding Container Settings
Inside the container settings panel, Elementor provides three main sections:
- Layout
- Style
- Advanced
Each section controls a different part of the container design.
- Layout settings control container size, alignment, and structure.
- Style settings control the visual appearance such as background images, colors, or videos.
- Advanced settings provide additional controls such as motion effects and responsive settings.
To add a background video, you need to go to the Style settings.
Opening the Style Settings
Click the Style tab in the container settings.
Inside the Style tab, you will see several design options available for the container.
These options include:
- Background
- Background Overlay
- Border
- Shape Divider
To add the background video, open the Background settings.
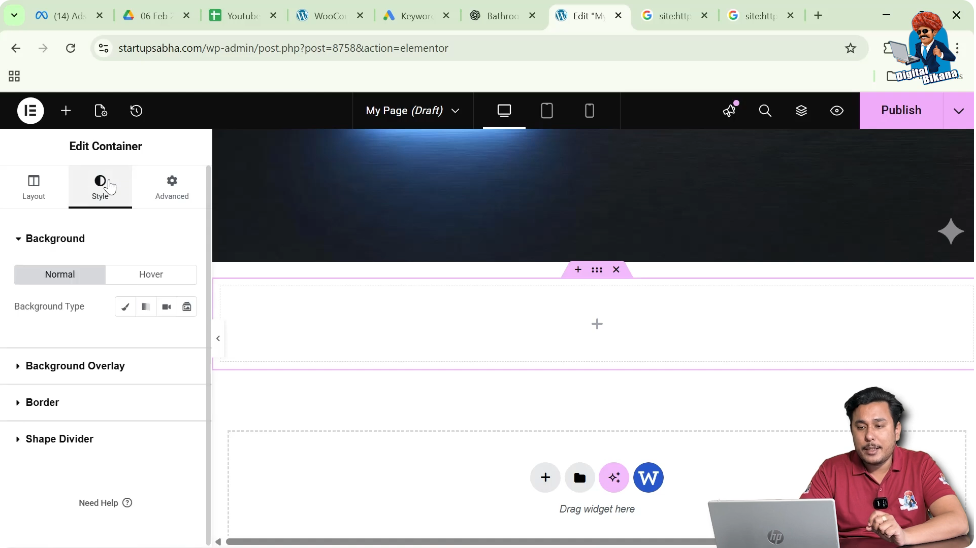
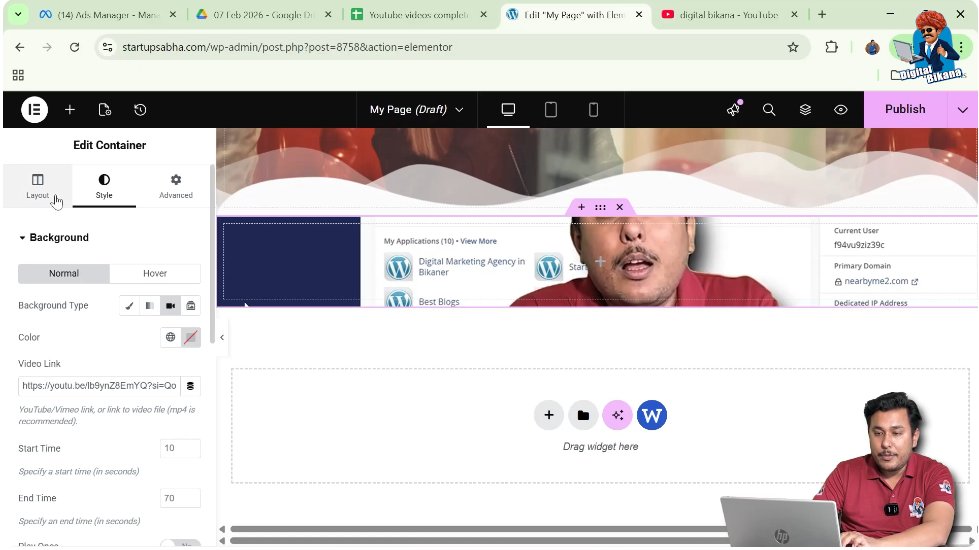
Background Settings in Elementor
Inside the Background settings, Elementor provides two tabs:
- Normal
- Hover
The Normal tab controls the default background of the container.
The Hover tab allows you to change the background when the cursor moves over the container.
For adding a video background, you need to work in the Normal tab.
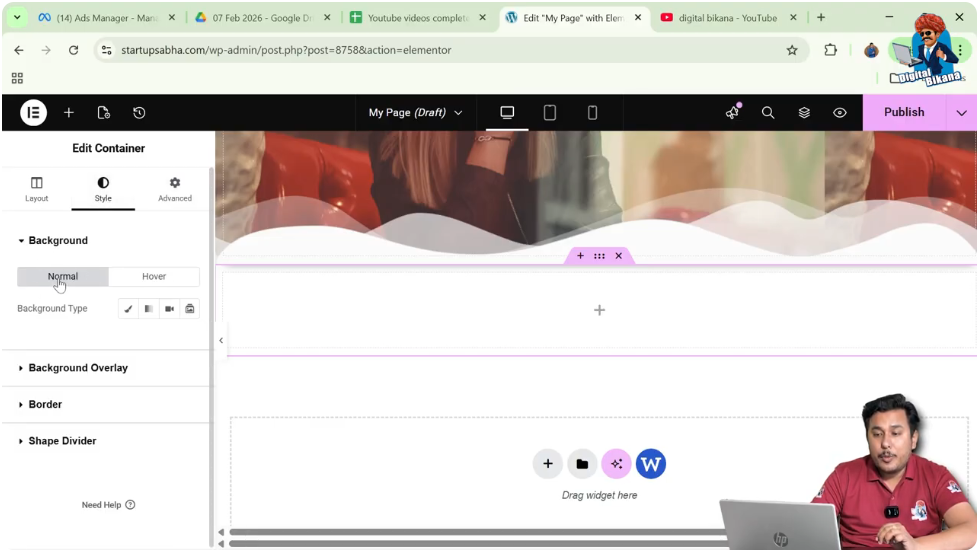
Selecting the Background Type
Inside the Background settings, Elementor provides different background type options.
These options include:
- Classic
- Gradient
- Video
- Slideshow
To add a video background, select the Video option.
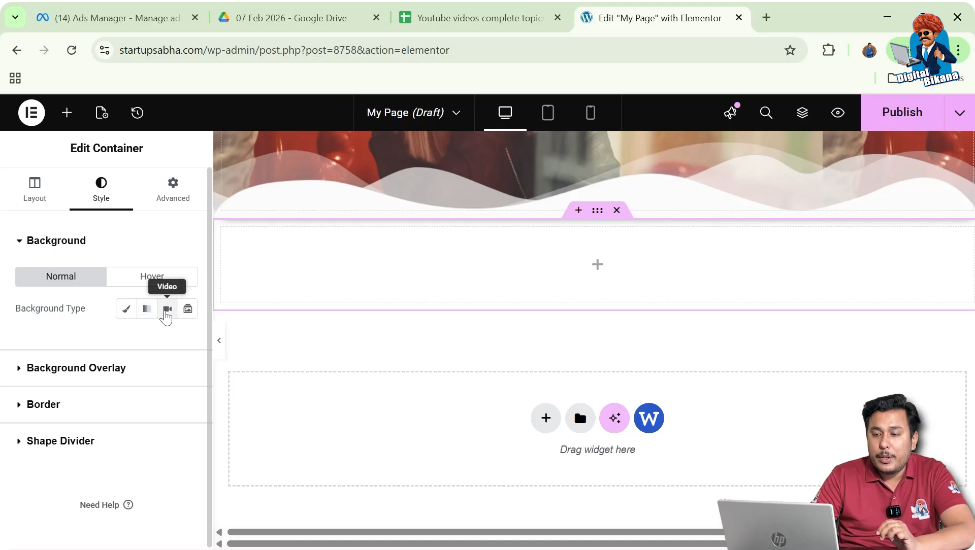
Adding the Video Link
After selecting the video background type, Elementor will ask for a video link.
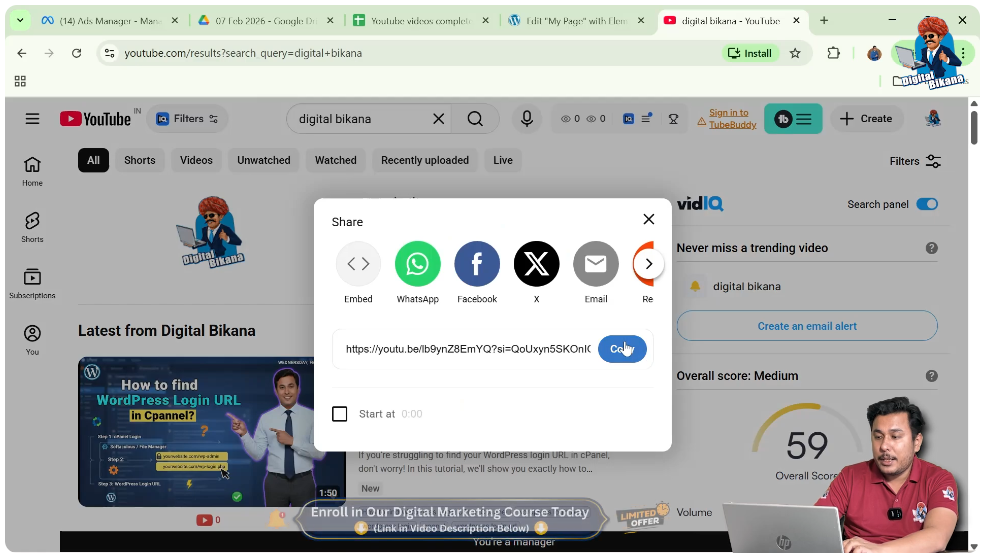
Step 1: Copy the Video Link
Open the video that you want to use as a background.
For example, if the video is hosted online, you can copy the video link.
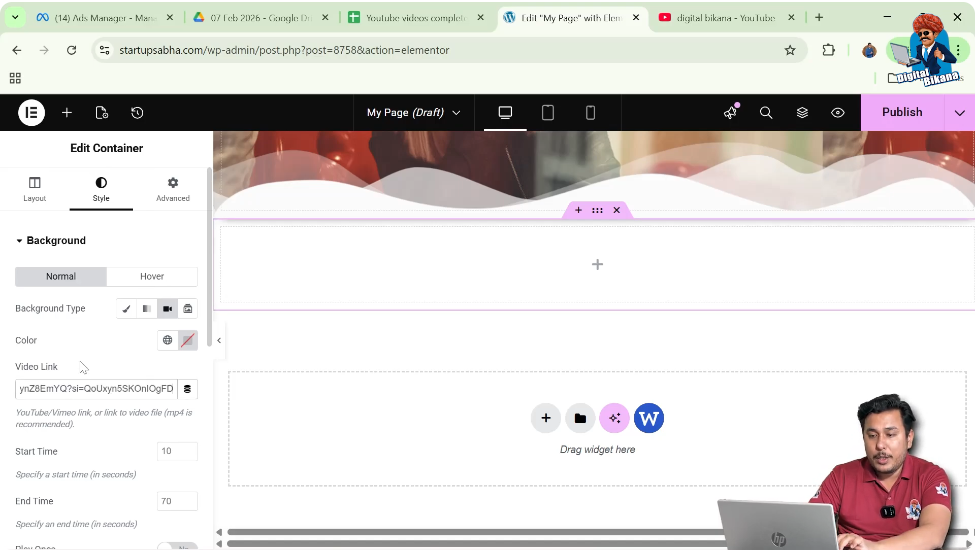
Step 2: Paste the Video Link
Return to the Elementor editor.
Inside the background settings, paste the video link into the Video Link field.
Once the link is pasted, the video will automatically appear as the background of the container.
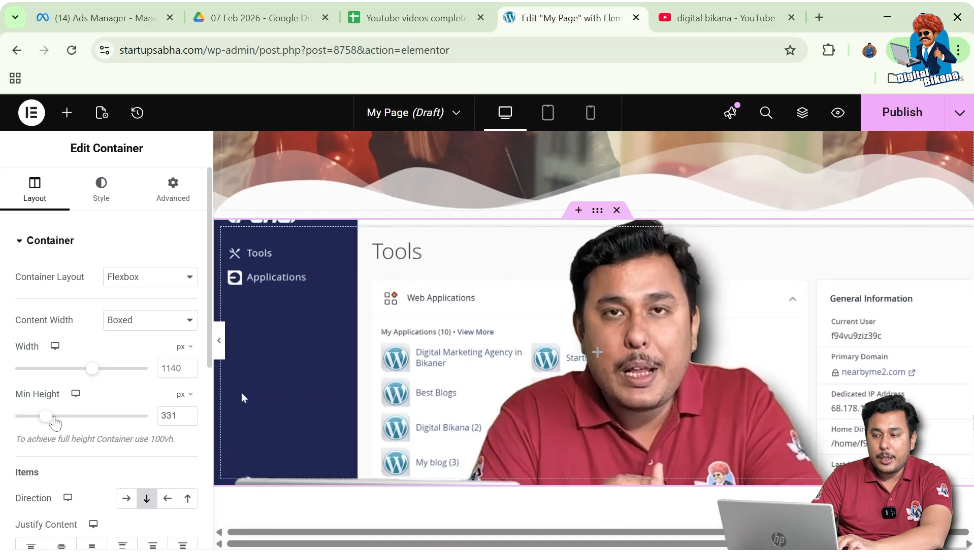
Adjusting the Container Height
After adding the video background, you may notice that the container height is too small. Because of this, the video may not appear properly.
To fix this issue, you need to increase the container height.
Step 1: Open Layout Settings
In the left-side toolbar, click the Layout tab.
Step 2: Increase the Container Height
Inside the container settings, increase the height of the container.
Once the height is increased, the background video becomes clearly visible.
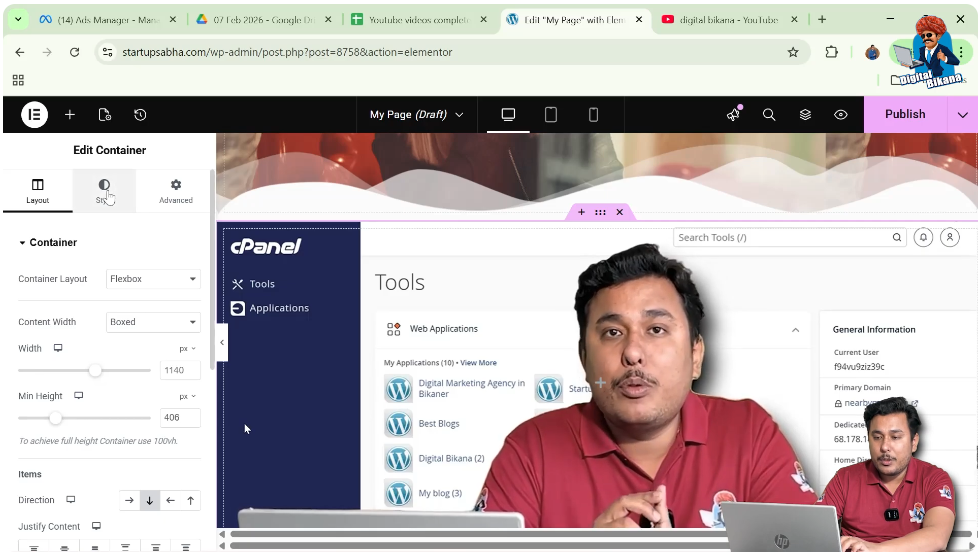
Returning to Style Settings
After adjusting the container height, return to the Style settings.
Inside the Background section, you will see that the video has already been added successfully.
The video now plays in the background of the container.
Adjusting Video Start Time
Elementor allows you to control the start time of the background video.
You can enter a specific time value that determines where the video begins playing.
For example, if you set the start time to a few seconds later, the video will begin from that point instead of the beginning.
Adjusting Video End Time
You can also set an end time for the background video.
This determines when the video should stop playing.
If no end time is specified, the video will play until the end.
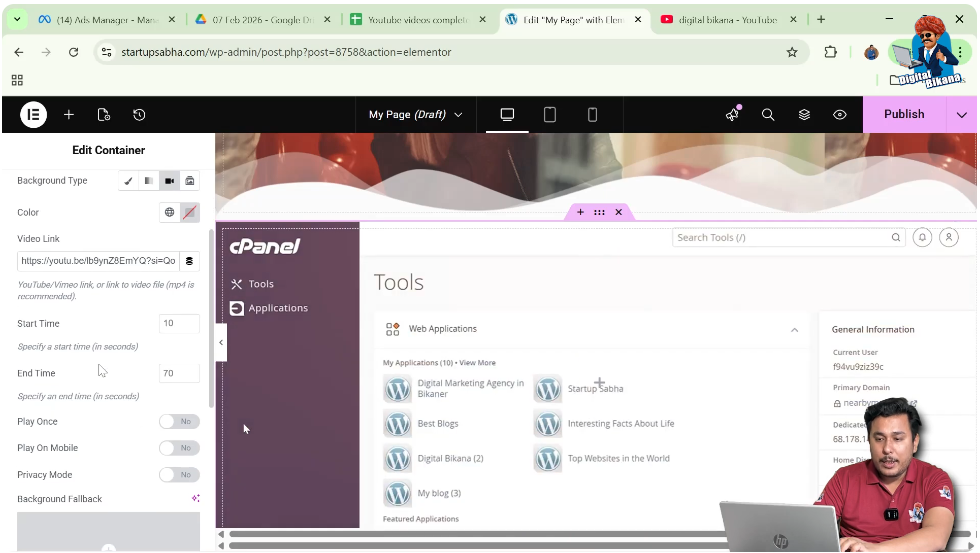
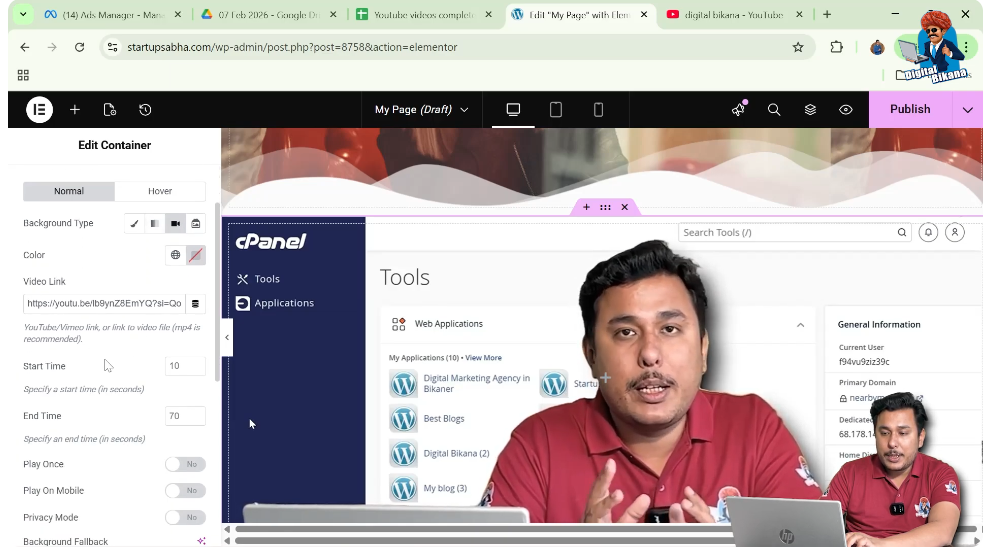
Play Once or Loop Mode
Elementor allows you to choose whether the video should play only once or continuously repeat.
Play Once Option
If the Play Once option is enabled, the video will play one time and then stop.
Loop Mode
If the video is set to loop mode, the video will continuously repeat.
If you want the video to loop automatically, you should leave the Play Once option turned off.
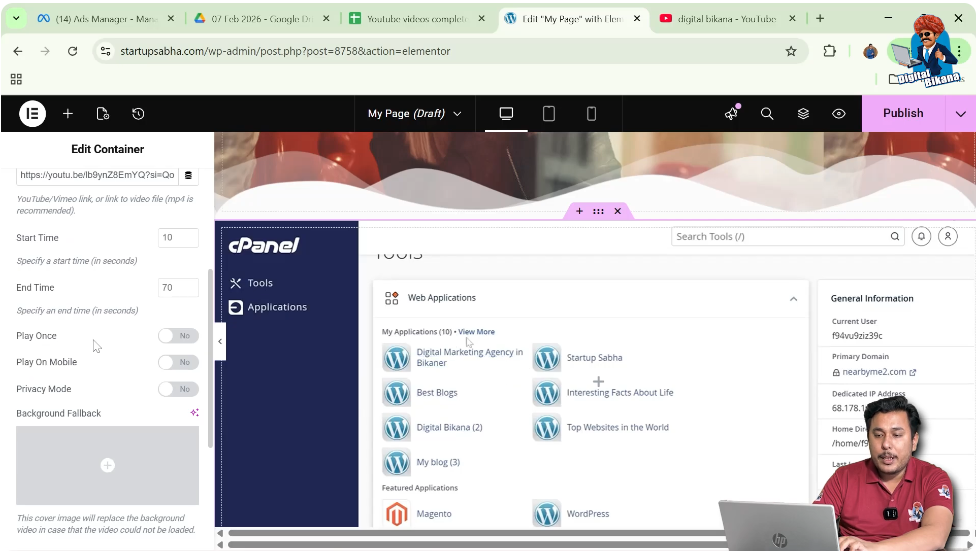
Play on Mobile Option
Elementor also allows you to control whether the video should play on mobile devices.
The Play on Mobile option determines whether the background video appears on mobile screens.
By default, this option is set to Yes.
You can change it depending on your design needs.
Privacy Mode Option
The Privacy Mode setting allows you to control privacy settings for embedded videos.
You can turn privacy mode on or off depending on how you want the video to behave.
Adding a Background Fallback Image
Elementor also provides an option called Background Fallback Image.
A fallback image is used when the background video cannot be loaded.
For example, if the video fails to load due to network issues or device limitations, the fallback image will appear instead.
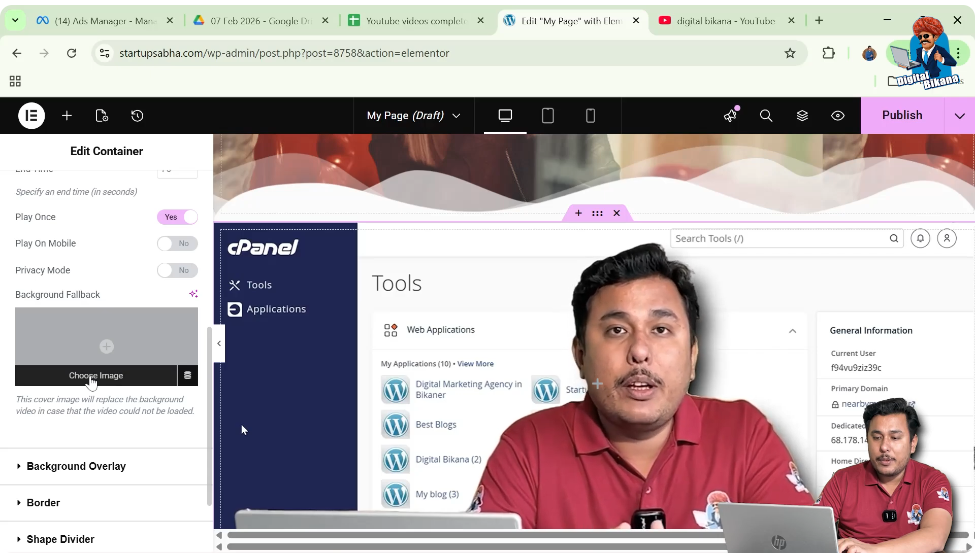
How Fallback Image Works
If the video does not load properly, Elementor automatically displays the fallback image.
This ensures that the container still displays a background even if the video cannot be played.
Benefits of Using Background Videos
Adding background videos to containers can significantly improve website design.
Some advantages include:
- Creating visually engaging sections
- Capturing visitor attention immediately
- Enhancing landing page design
- Making hero sections more dynamic
- Improving storytelling through visual motion
However, it is important to use background videos carefully so that they do not affect website loading speed.
Conclusion
Adding a video in the background of a container in Elementor is a simple process that allows you to create dynamic and visually engaging website sections.
You begin by creating a container using the plus icon and selecting a Flexbox layout. After creating the container, you edit the container settings and open the Style tab. Inside the Background settings, you select the Video option and paste the video link.
Once the video is added, you increase the container height so the video becomes clearly visible. Elementor also allows you to customize video settings such as start time, end time, play once option, loop mode, mobile playback, privacy mode, and fallback image.
By following these steps, you can easily add a background video to a container while designing webpages using Elementor on a WordPress website.
Related Posts


