
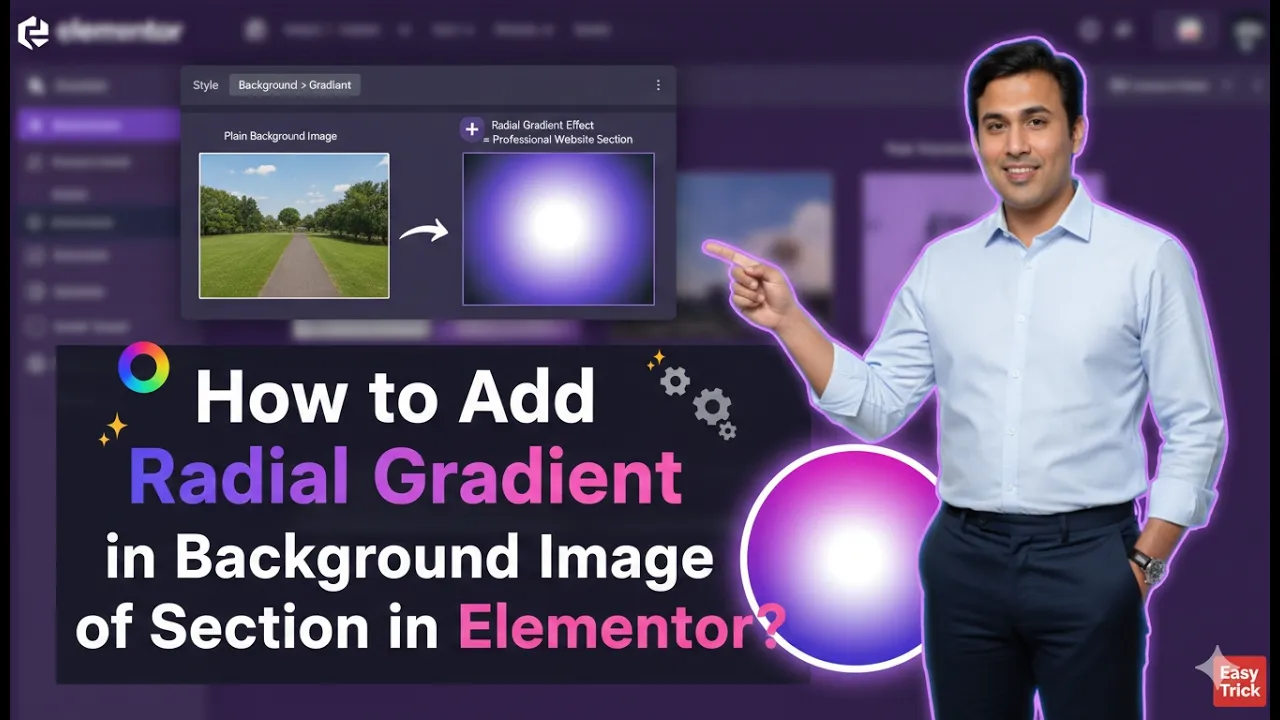
In this article, we will learn how to add a radial gradient to the background image of a section in Elementor. This process is simple and can significantly enhance the visual appeal of your website. By following a structured approach, you can create a modern and attractive design using Elementor’s built-in styling options.
We will walk through each step in detail, starting from creating a section to applying a background image and finally adding a radial gradient overlay.
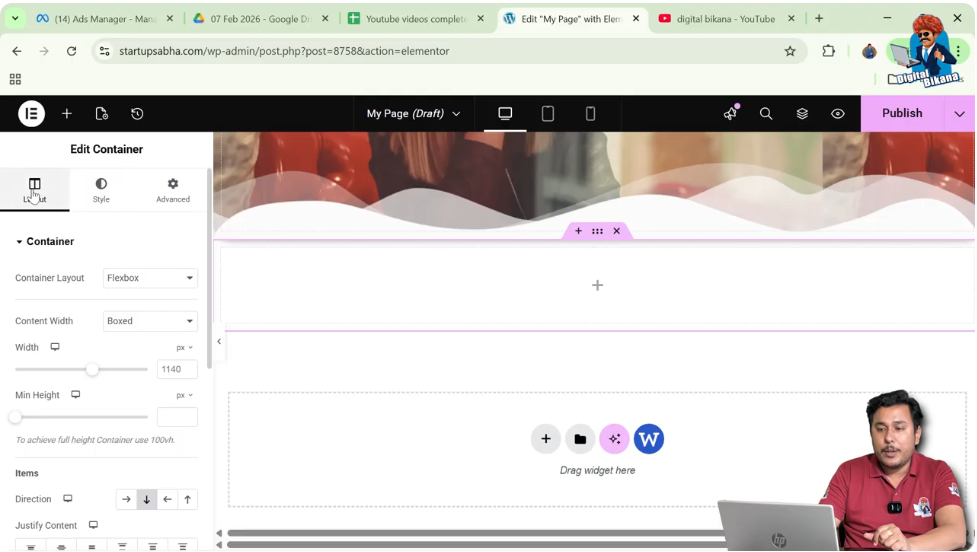
Creating a New Section in Elementor
To begin, you need to create a new section on your webpage using Elementor.
Understanding Section Creation
Elementor allows you to design web pages using sections, columns, and widgets. A section acts as a container that holds all the content and styling elements. To start designing, you first need to add a section.
Steps to Create a Section
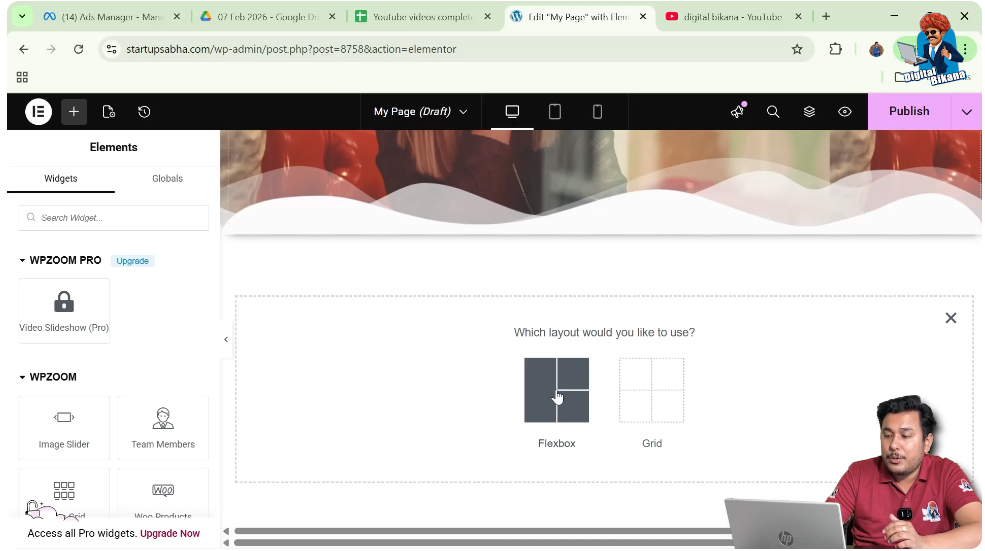
Step 1: Click on the Plus Icon
In the Elementor editor, locate the plus (+) icon in the middle of the screen. Click on it to create a new section.
Step 2: Choose the Layout
After clicking the plus icon, Elementor will ask you to select a layout. You can choose from options like Flexbox or Grid, depending on your requirement.
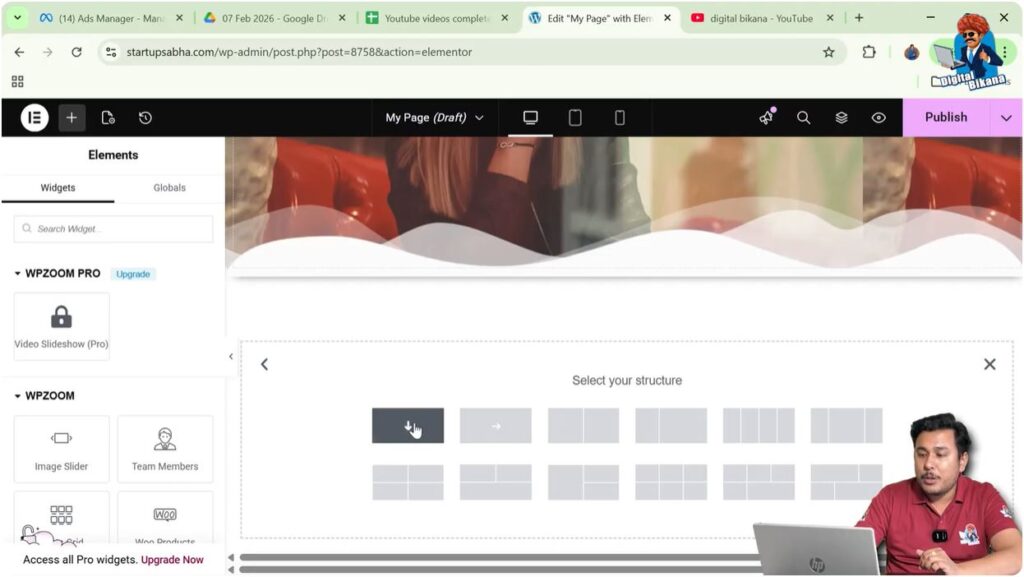
Step 3: Select Structure
Next, select the structure of the section. In this case, choose a single column layout with a column direction.
Once you complete these steps, a new section will be successfully created on your page.
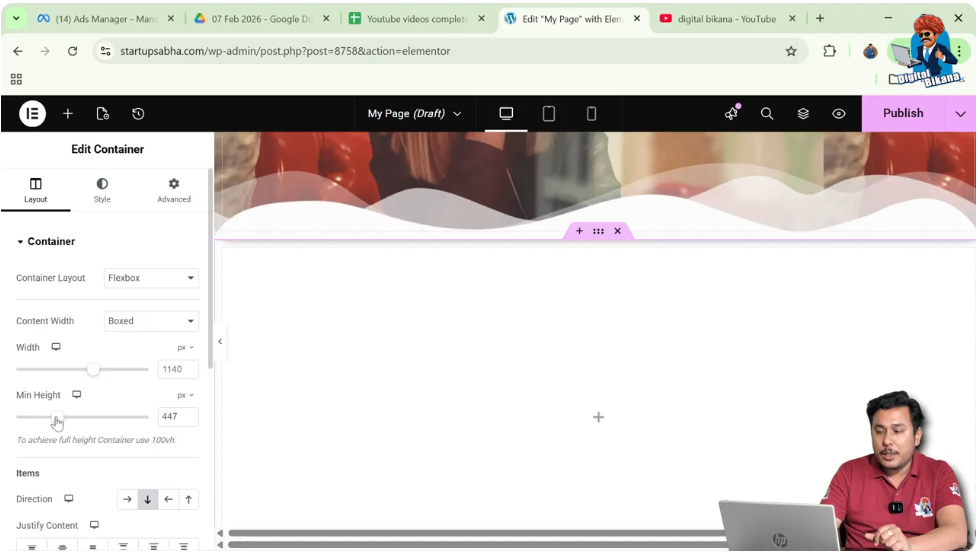
Adjusting the Height of the Section
After creating the section, the next step is to adjust its height so that the background image and gradient are clearly visible.
Importance of Section Height
The height of the section determines how much space your background image and gradient will occupy. A proper height ensures better visibility and design balance.
Steps to Increase Section Height
Step 1: Go to Layout Settings
On the left-side toolbar in Elementor, navigate to the Layout settings.
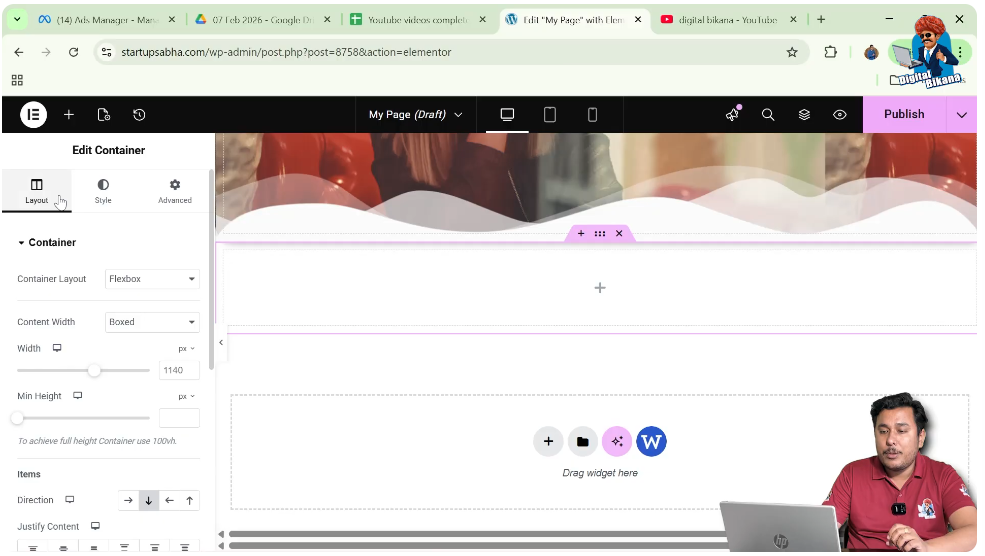
Step 2: Adjust Minimum Height
Find the option for minimum height and increase it according to your design needs.
Once you adjust the height, your section will have enough space for further customization.
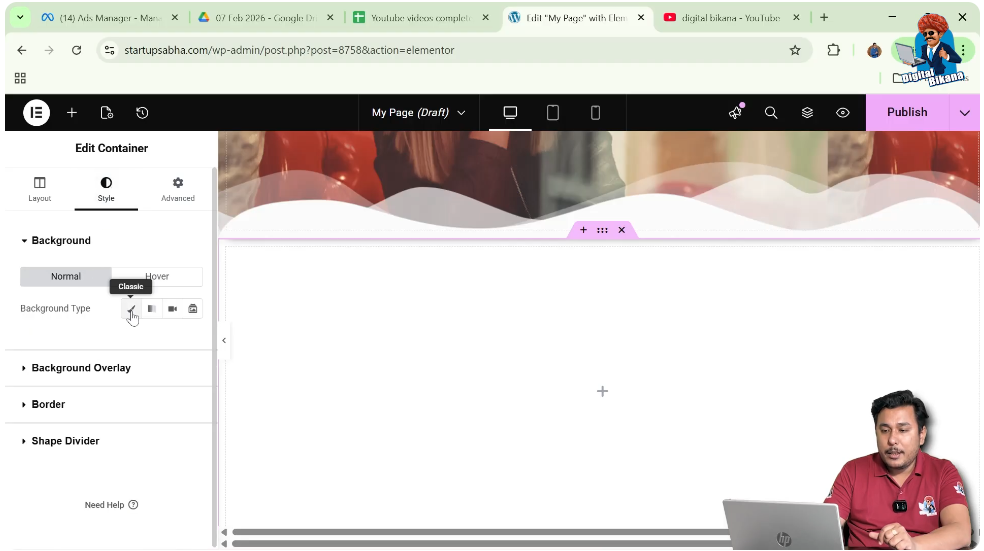
Adding a Background Image
Now that the section is ready, the next step is to add a background image.
Understanding Background Images
A background image enhances the visual appeal of your section and serves as a base layer for further styling, such as gradients and overlays.
Steps to Add Background Image
Step 1: Go to Style Settings
In the left-side toolbar, switch to the Style tab.
Step 2: Select Background Type
Under the Background section, choose the “Normal” option and then select the “Classic” background type.
Step 3: Choose an Image
You will be prompted to either upload an image or select one from the media library. If you already have an image uploaded, simply select it.
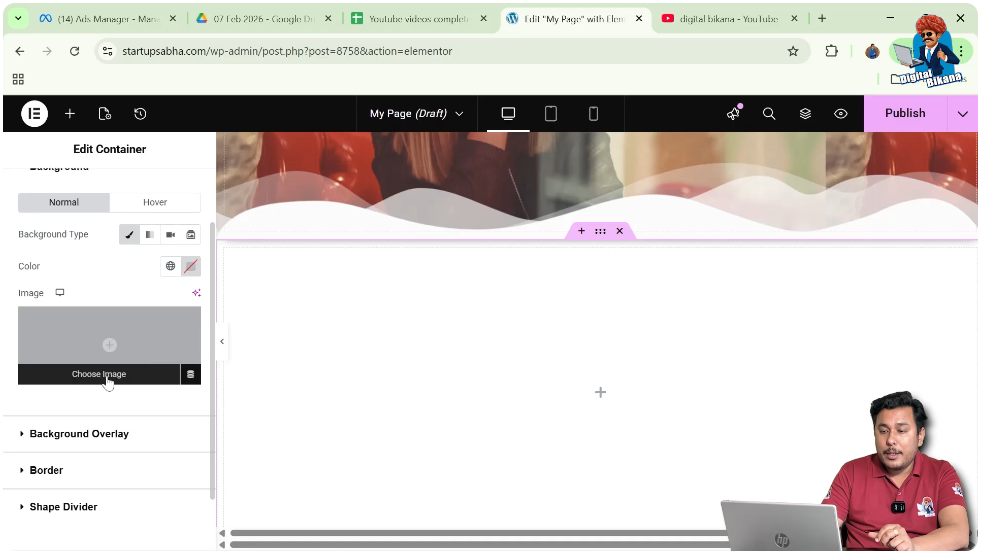
Step 4: Apply the Image
Click on the “Select” button to apply the image to your section.
At this point, your background image will be visible, but it may not be properly positioned.

Adjusting Background Image Settings
After adding the image, you may notice that it does not fit perfectly within the section. Therefore, adjustments are necessary.
Improving Image Display
To ensure that the image looks good and fits well within the section, you need to modify display and positioning settings.
Steps to Adjust Image
Step 1: Set Display Size to Cover
Change the display size option to “Cover.” This ensures that the image fills the entire section.
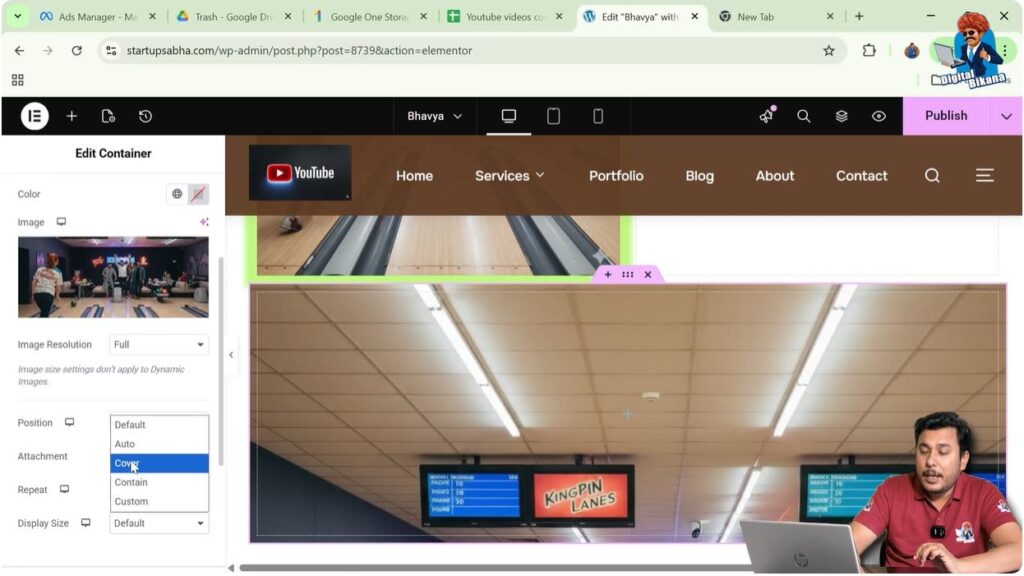
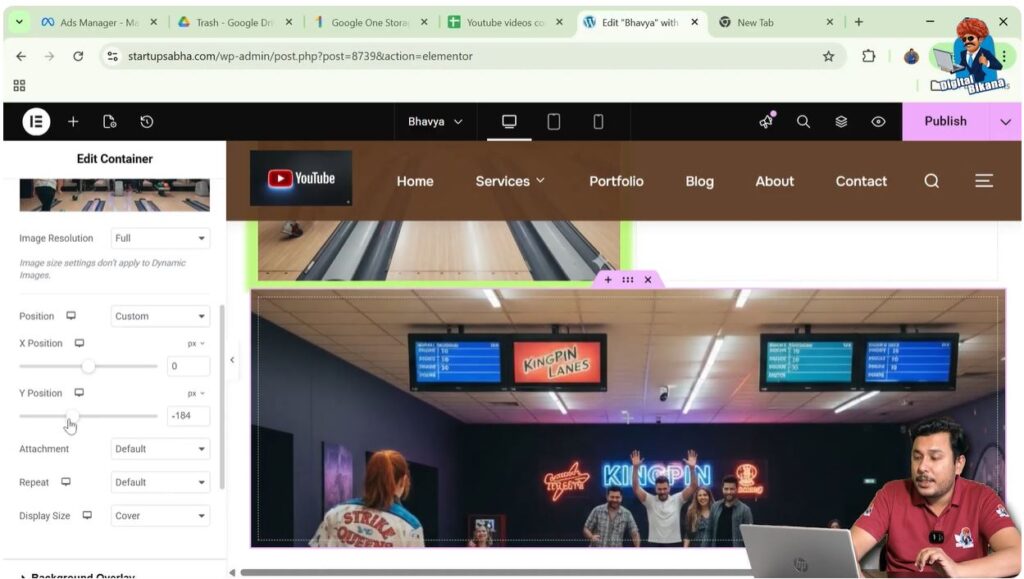
Step 2: Modify Position
Set the position to “Custom” so that you can manually adjust the placement.

Step 3: Adjust Y Position
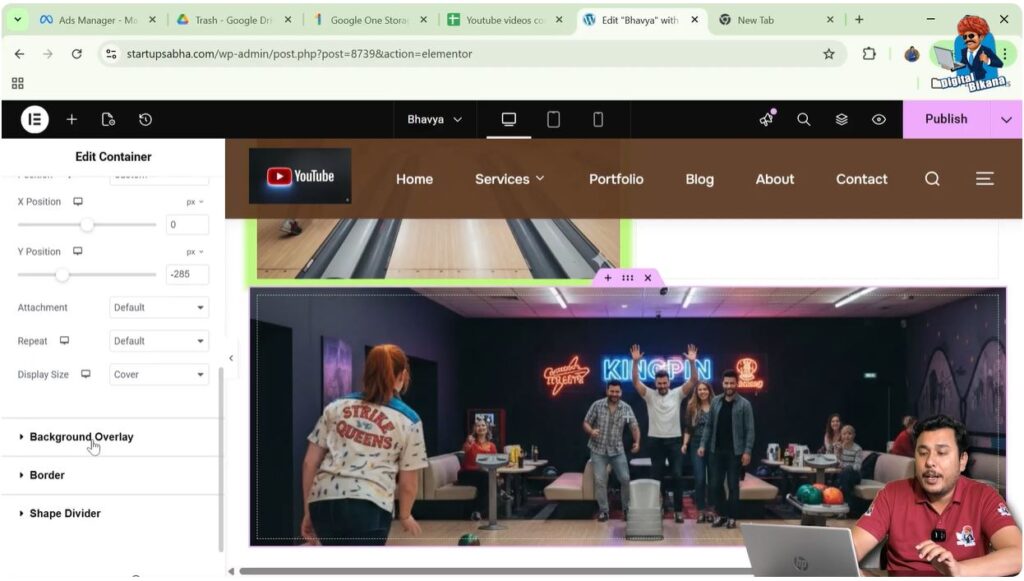
Decrease the Y position value to align the image properly within the section.
After making these adjustments, your background image will appear correctly positioned and visually appealing.
Adding a Radial Gradient Overlay
Once the background image is properly set, the next step is to add a radial gradient overlay.
Understanding Gradient Overlay
A gradient overlay adds a layer of color on top of your background image. It helps improve readability and enhances design aesthetics. In this case, we will apply a radial gradient.
Steps to Add Radial Gradient
Step 1: Scroll to Background Overlay
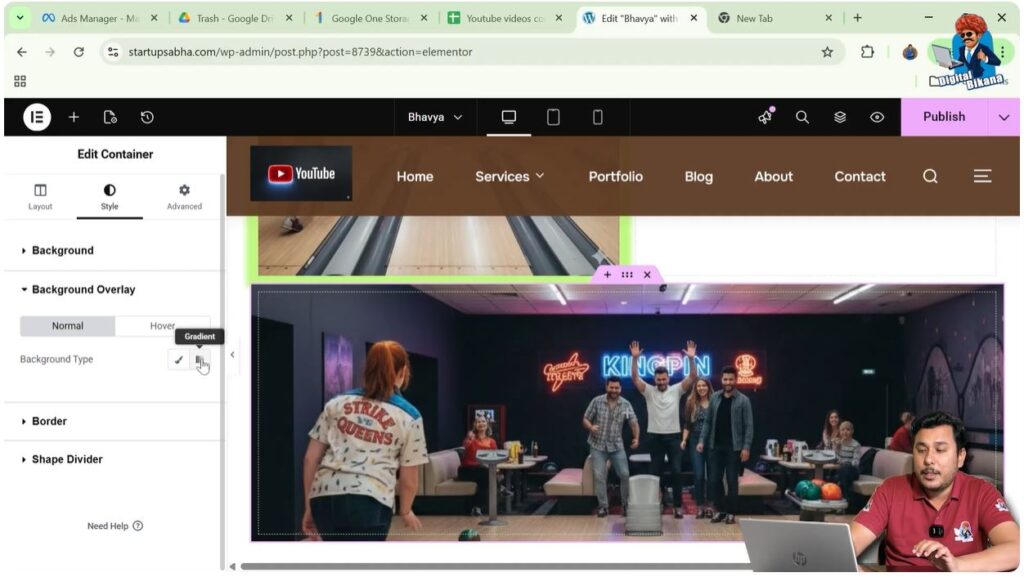
In the Style settings, scroll down until you find the “Background Overlay” option.
Step 2: Select Background Type
Under Background Overlay, choose the “Normal” option and then change the background type to “Gradient.”
Step 3: Choose Colors
You will see two color options: Color 1 and Color 2. Select your desired colors.
For example, you can choose green for Color 1 and pink for Color 2.
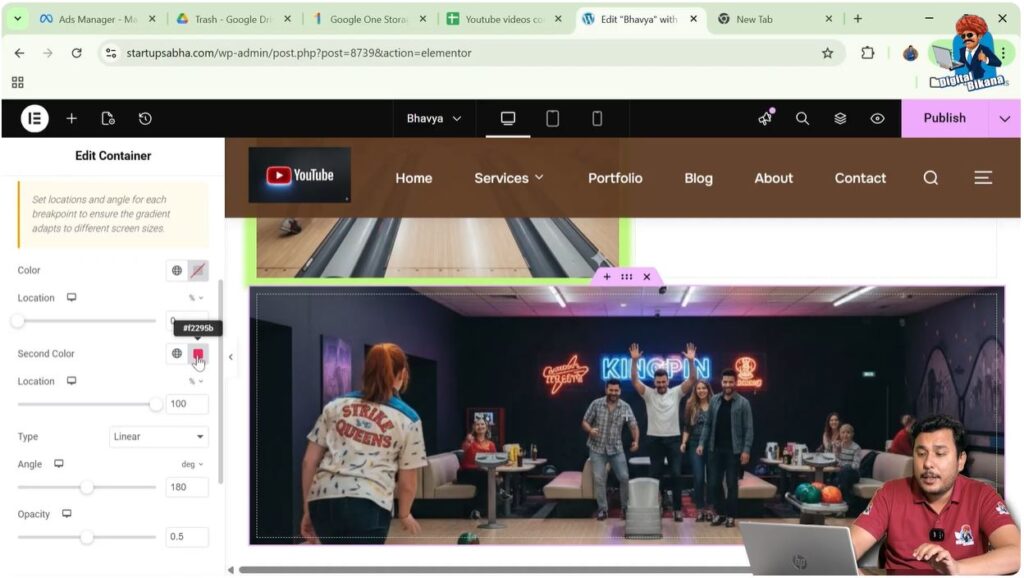
Step 4: Change Gradient Type
By default, the gradient type is set to linear. Change it to “Radial.”

Step 5: Adjust Location
You can increase or decrease the location value to control how the gradient spreads across the image.
After completing these steps, the radial gradient will be applied over your background image.

Customizing the Gradient Effect
After applying the gradient, you can further refine its appearance.
Fine-Tuning the Design
The gradient effect can be customized based on your design preferences. Adjusting colors and positioning can create different visual styles.
Key Adjustments
Color Selection
Choose colors that match your website’s theme.
Gradient Spread
Modify the location to control the intensity and spread of the gradient.
Visual Balance
Ensure that the gradient does not overpower the background image.
These adjustments help you achieve a professional and visually balanced design.
Final Output and Result
After completing all the steps, your section will now have:
- A properly sized section
- A well-positioned background image
- A visually appealing radial gradient overlay
This combination enhances the overall look of your webpage and creates a modern design effect.
Conclusion
Adding a radial gradient to the background image of a section in Elementor is a simple yet powerful design technique. By creating a section, adjusting its height, adding a background image, and applying a gradient overlay, you can significantly improve your website’s appearance.
With Elementor’s easy-to-use interface, you can experiment with different colors, positions, and settings to achieve your desired design. Following the steps outlined in this article, you can quickly implement radial gradients and create visually engaging web pages.
Related Posts


