
Adding new columns inside a container in Elementor is an important technique for creating advanced layouts. It allows you to build nested structures where you can divide a section into multiple columns and further divide those columns into sub-columns. This helps in designing more flexible and organized web pages.
In this article, we will explain how to add new columns inside a container in Elementor step by step. The explanation follows a structured approach and expands each concept in detail so that you can clearly understand how to create nested column layouts.
Accessing the Elementor Editor
To begin, you need to open Elementor and start editing your web page.
As shown in the process, you are inside the Elementor editor and working on a web page. You need to first create a section before adding columns and containers.
Creating a New Section
Step 1: Click on Plus Icon
Click on the plus icon displayed in the middle of the screen.
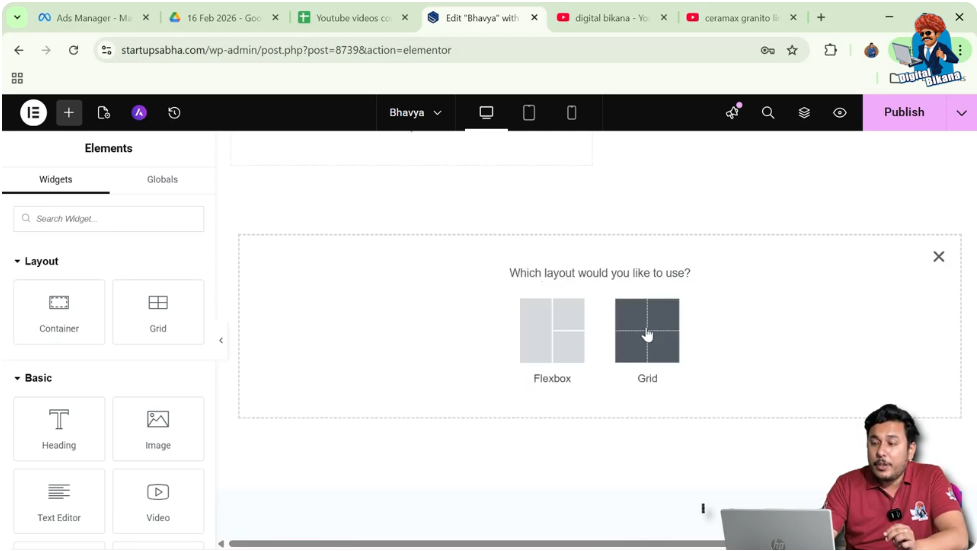
Step 2: Select Layout Type
You will be asked to choose a layout:
Select Grid.
Step 3: Choose Structure
Select a structure such as:
- One row
- Two columns
This creates a basic grid layout.

Adding More Columns in Section
Step 4: Edit Container
Click on the six-dot icon above the section to edit the container.
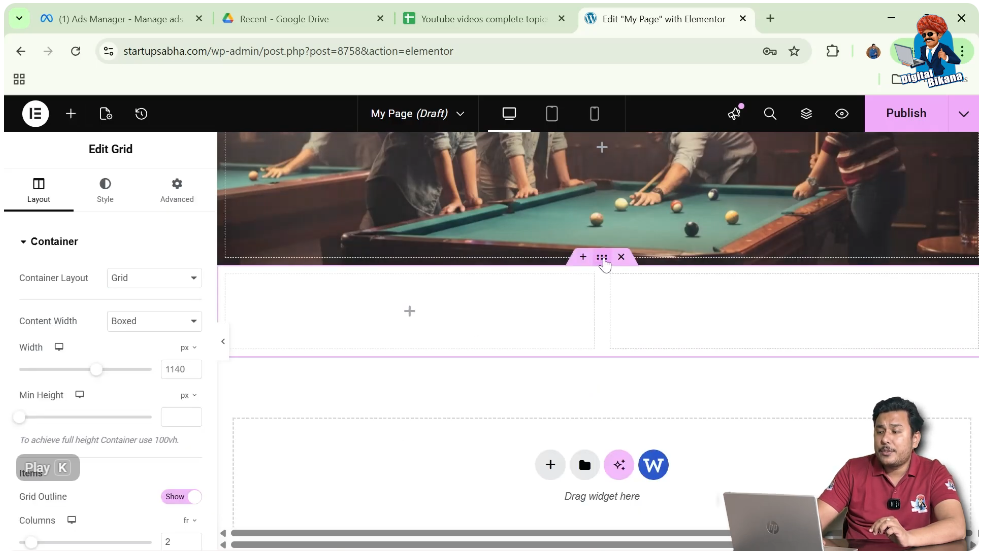
Step 5: Increase Columns
In the left-side toolbar under layout settings:
- Increase the number of columns
- You can set it to 3, 4, or even 5 columns
This changes the structure of the grid.
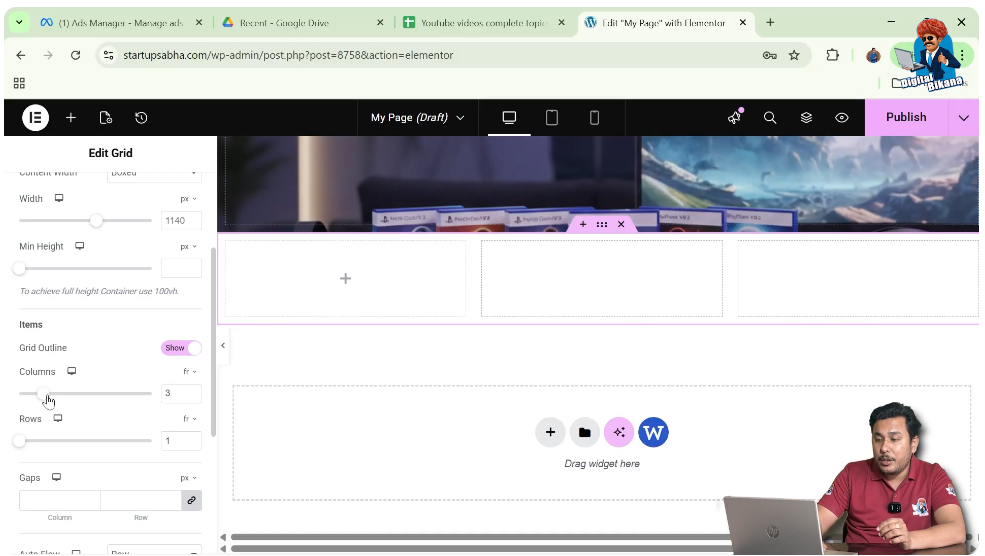
Step 6: Adjust Rows
You can also increase or decrease the number of rows as needed.

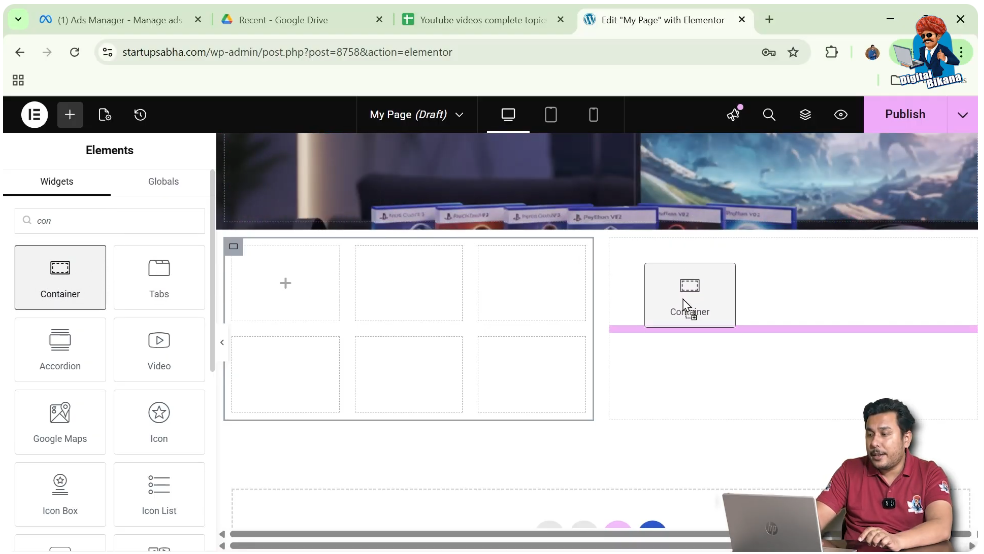
Adding Container Inside Grid
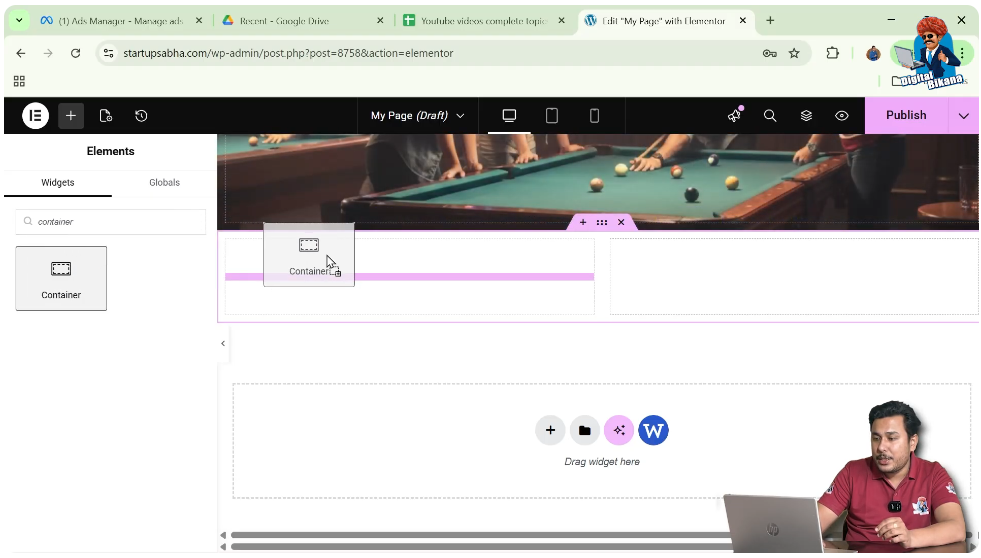
Step 7: Add Container
Click on Add Element and search for the container widget.

Step 8: Drag and Drop Container
Drag the container and place it in the desired position, such as:
- First row
- First column
Adding Columns Inside a Container
Now comes the main concept of adding new columns inside a container.
Step 9: Select Container
Move your cursor to the container and click on the gray box icon.
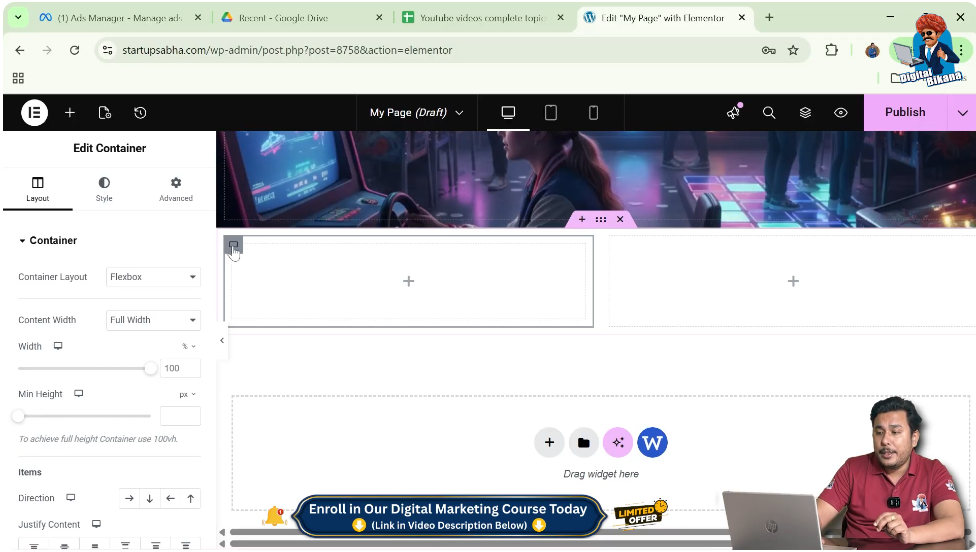
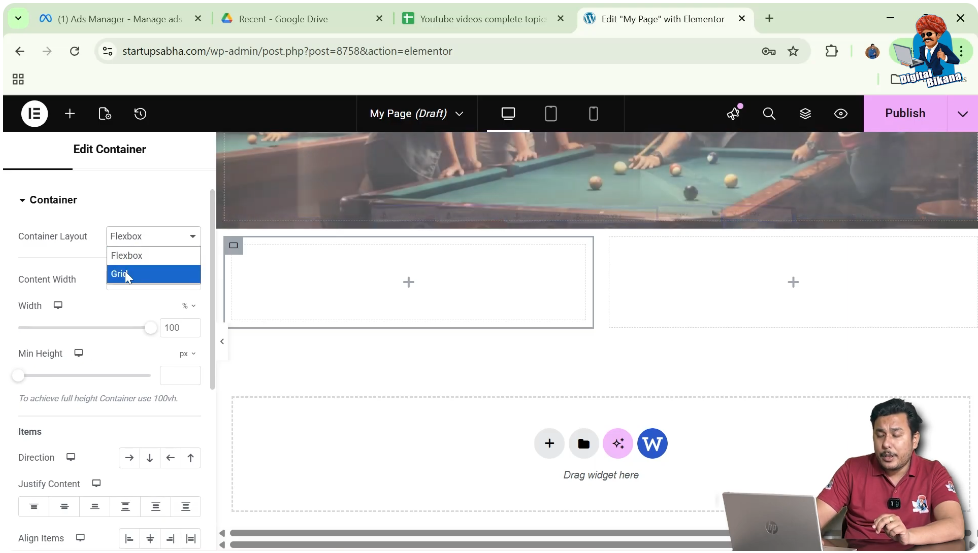
Step 10: Change Layout to Grid
In the left-side toolbar:
- Go to layout settings
- Change the container layout from flexbox to grid
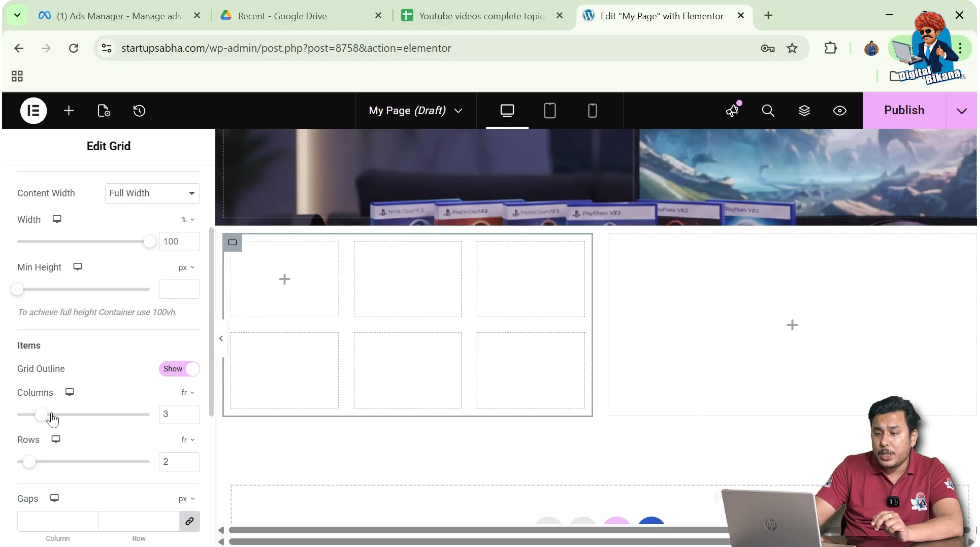
Step 11: Define Columns and Rows
In the item settings:
- Set the number of columns (e.g., 3 columns)
- Set the number of rows (e.g., 2 rows)
This creates sub-columns inside the container.
Understanding Nested Structure
Now your layout looks like this:
- Main section → 2 columns
- First column → 2 rows and 3 columns
This means:
- You can place multiple containers inside the first column
- Each sub-column acts as a separate space
Adding More Containers
Step 12: Add Container to Second Column
Click on the plus icon in the black header line.
Search for container and drag it into the second column.
Expanding Container Usage
You can:
- Add multiple containers inside a container
- Create complex layouts
- Organize content more effectively
There is no strict limit, and you can create flexible designs based on your needs.
Practical Example
In the demonstrated process:
- A grid section with two columns is created
- Columns are increased using layout settings
- A container is added to the first column
- The container layout is changed to grid
- Sub-columns and rows are created
- Another container is added to the second column
This results in a nested column structure.
Benefits of Adding Columns in Container
Better Layout Control
You can divide content precisely.
Flexible Design
Nested columns allow advanced layouts.
Organized Structure
Content becomes more structured and clear.
Common Mistakes to Avoid
Not Changing Layout to Grid
You must switch from flexbox to grid to add sub-columns.
Incorrect Column Settings
Ensure correct values for rows and columns.
Overcomplicating Layout
Avoid creating too many nested structures.
Best Practices
- Keep layout simple and clean
- Use grid only when necessary
- Maintain proper alignment
- Test responsiveness
Final Understanding
Adding new columns inside a container in Elementor involves converting the container into a grid layout and defining rows and columns. This allows you to create nested structures and design advanced layouts.
Conclusion
Creating columns inside a container is a powerful feature in Elementor that helps you design flexible and professional web pages. By understanding how to use grid layout within containers, you can create structured and visually appealing designs.
By following the steps explained in this guide, you can easily add new columns in a container and improve your website layout.
Related Posts


