
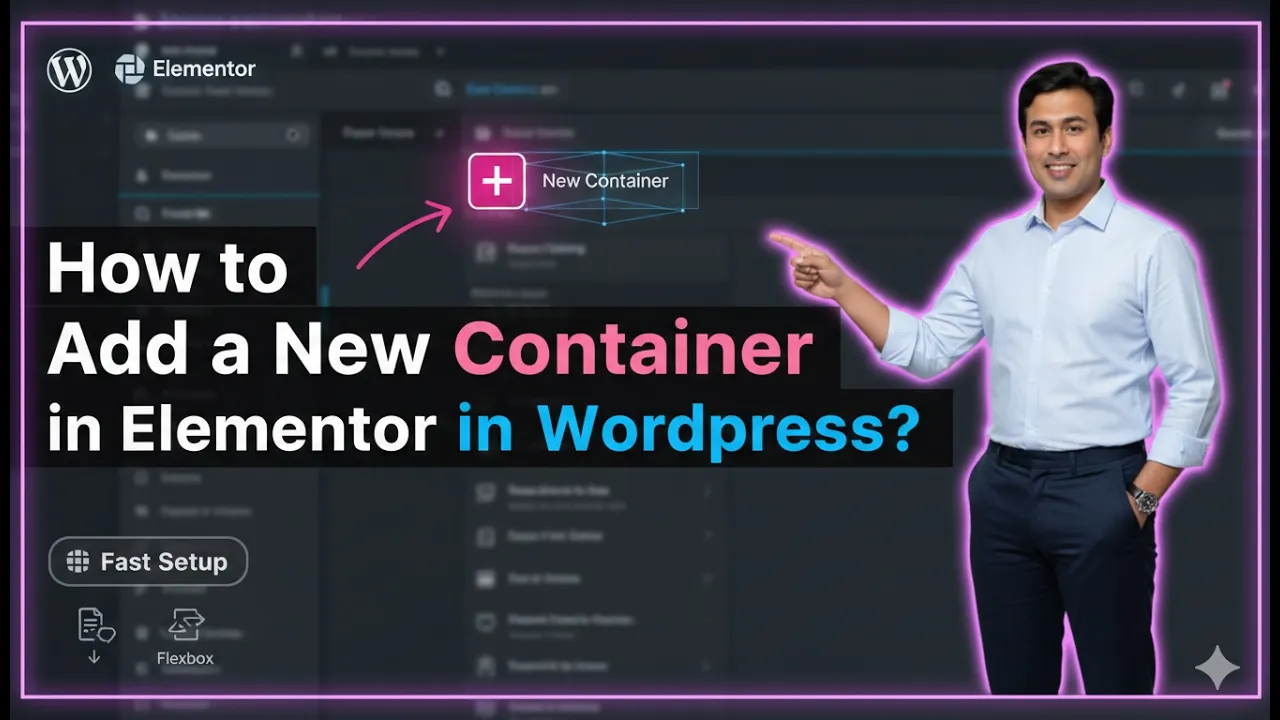
Elementor is one of the most widely used page builders in WordPress that allows users to design webpages visually without writing any code. It provides flexible layout options such as sections, containers, columns, and widgets that help create professional website designs. One important feature of Elementor is the ability to add new containers within a section or layout.
Containers are used to structure the content of a webpage. They allow you to organize images, text, buttons, and other elements in a structured layout. Sometimes while designing a webpage, you may need to add additional containers to create more columns or sections within an existing layout.
In Elementor, adding a new container is a simple process that can be done using the plus icon or by using the edit container option. By using these options, you can add multiple containers and adjust the layout structure according to your design requirements.
In this article, you will learn how to add a new container in Elementor while editing a webpage in WordPress.
Opening Elementor Editor
Before adding a container, you first need to open the Elementor editor.
When you open a webpage using Elementor, the editing interface appears on the screen. The page preview is displayed in the center of the screen, and the editing panel appears in the left side toolbar.
Inside the page preview area, you will see a plus icon (+) displayed in the middle of the screen. This icon is used to create a new section or container within the webpage.
To begin the process, you need to click this icon.
Creating a Section Using the Plus Icon
When designing a webpage in Elementor, sections and containers help define the layout structure.
Step 1: Click the Plus Icon
Click the plus icon located in the middle of the screen.
Once you click this icon, Elementor will ask you to choose the layout type.
Step 2: Select Flexbox Layout
Elementor provides two main layout options:
For this example, select Flexbox.
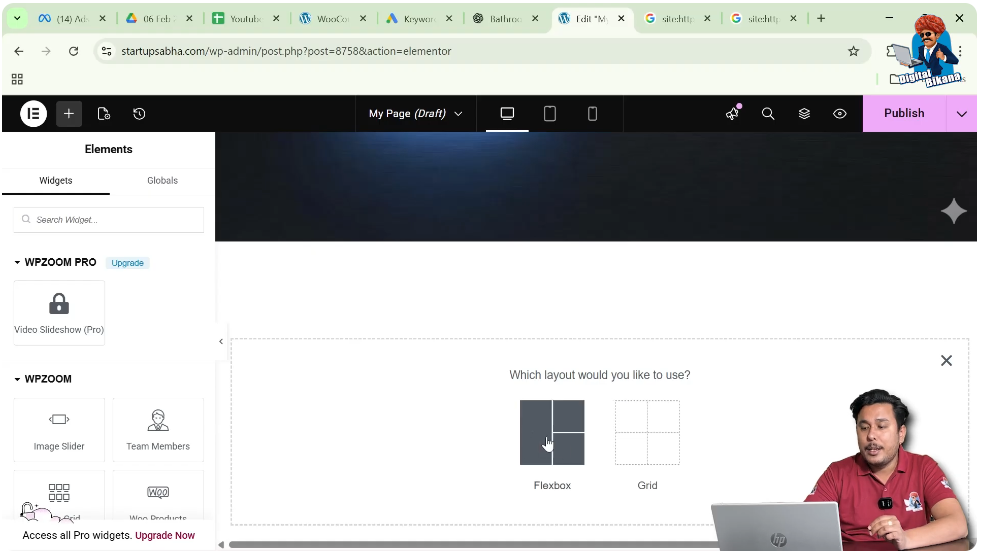
Step 3: Select Structure
After selecting Flexbox, Elementor will display several layout structures.
Choose the one row and two columns structure.
Once selected, the layout will appear on the screen.

Understanding Sections and Containers
When you create a layout in Elementor, it usually contains a section and multiple containers.
For example, when you select a one row and two column structure, Elementor creates a section that contains two containers.
Each container can hold different types of content such as:
- Images
- Text
- Buttons
- Widgets
Containers help divide the webpage into different content areas.
Adding a New Container
If you want to add another container inside the existing section, Elementor provides an option to do so.
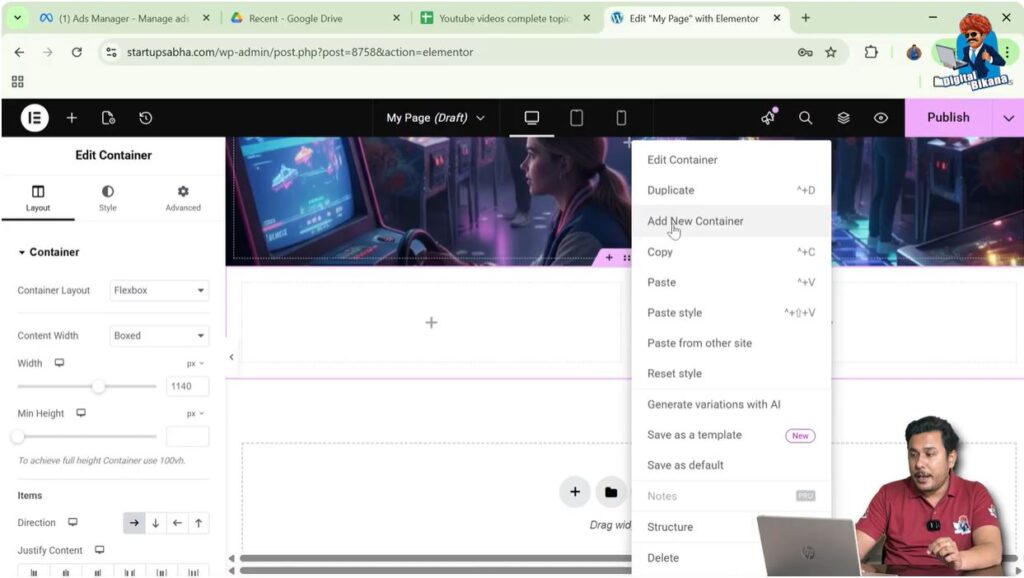
Step 1: Locate the Edit Container Icon
Move your cursor to the top of the container or section.
You will see an Edit Container icon represented by six dots.
Step 2: Right Click the Container
Right-click on the Edit Container icon.
A menu will appear with several options.

Step 3: Click Add New Container
From the menu, click Add New Container.
Once you click this option, a new container will be added inside the section.
Adding Multiple Containers
You can repeat the same process to add more containers.
Step 1: Right Click the Container Again
Right-click the Edit Container icon again.
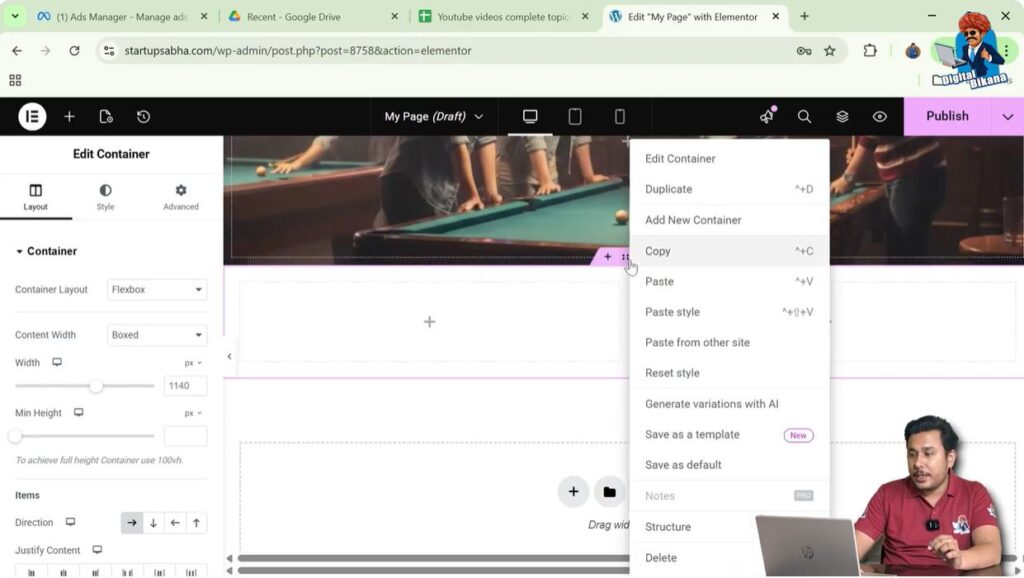
Step 2: Select Add New Container
Click Add New Container.
Now another container will appear.
For example:
- First container
- Second container
- Third container
- Fourth container
This allows you to create multiple containers within the same section.

Why Containers Appear in a Single Row
When using Flexbox layout with a single row structure, all containers appear in the same row.
For example, if you add multiple containers in a row, they will appear side by side.
This happens because Flexbox layout places containers horizontally within the same row.
If you want containers to appear in multiple rows, you need to modify the layout settings.
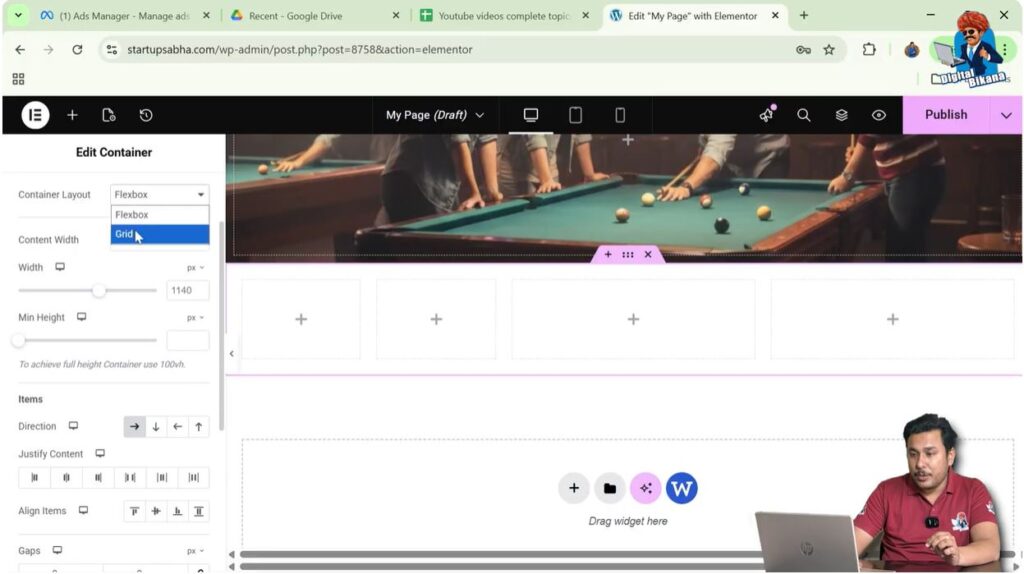
Changing Container Layout to Grid
Elementor allows you to change the container layout from Flexbox to Grid.
Step 1: Click the Edit Container Icon
Click the Edit Container icon (six dots) above the container.
Step 2: Open Layout Settings
In the left side toolbar, open the Layout tab.
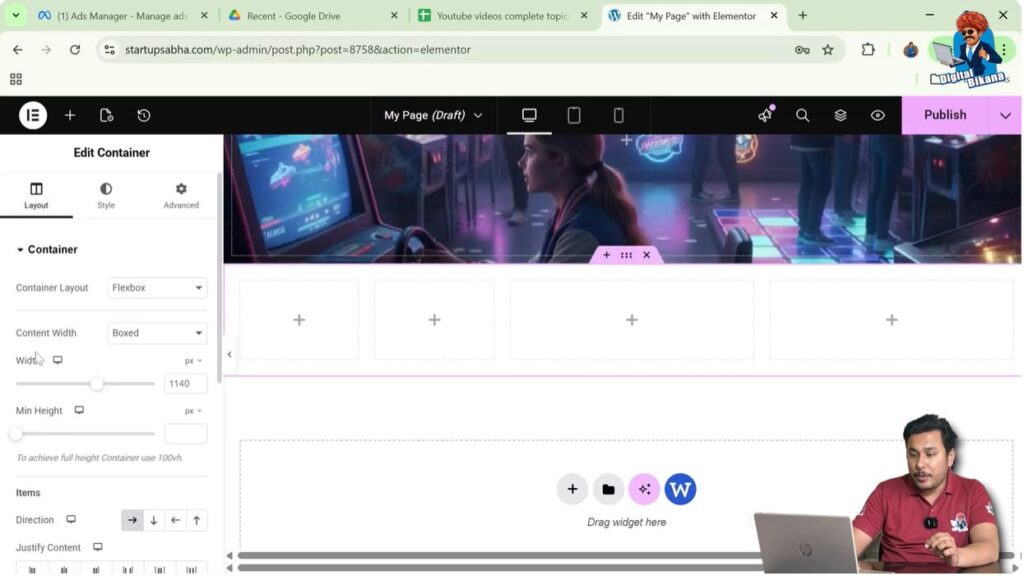
Step 3: Change Layout Type
Locate the Container Layout option.
Change it from Flexbox to Grid.
Now the container layout will change to grid format.
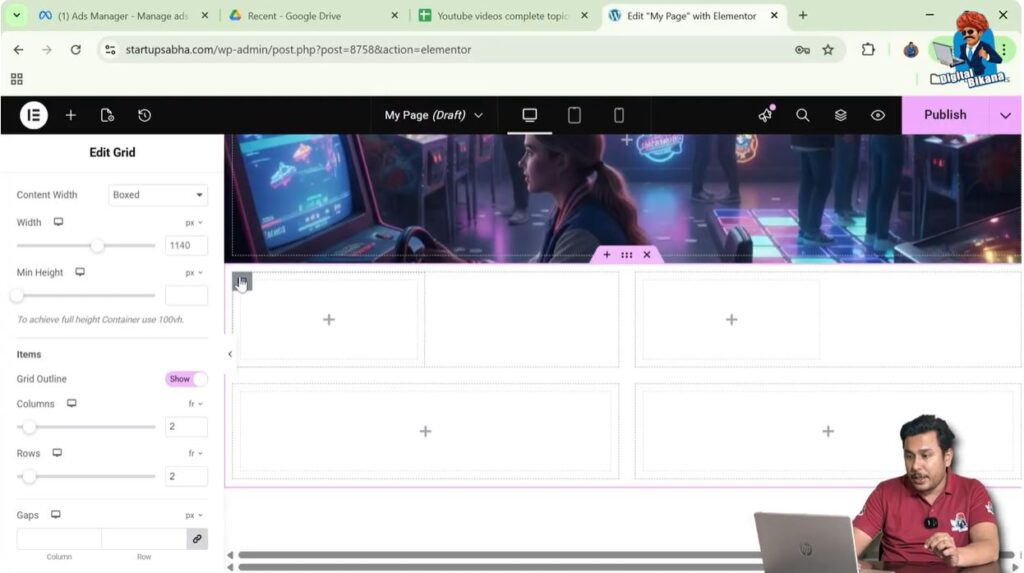
Adjusting Rows and Columns in Grid Layout
Once the layout is changed to grid, you can adjust the number of rows and columns.
Step 1: Set Number of Columns
Inside the grid settings, set the number of columns according to your design.
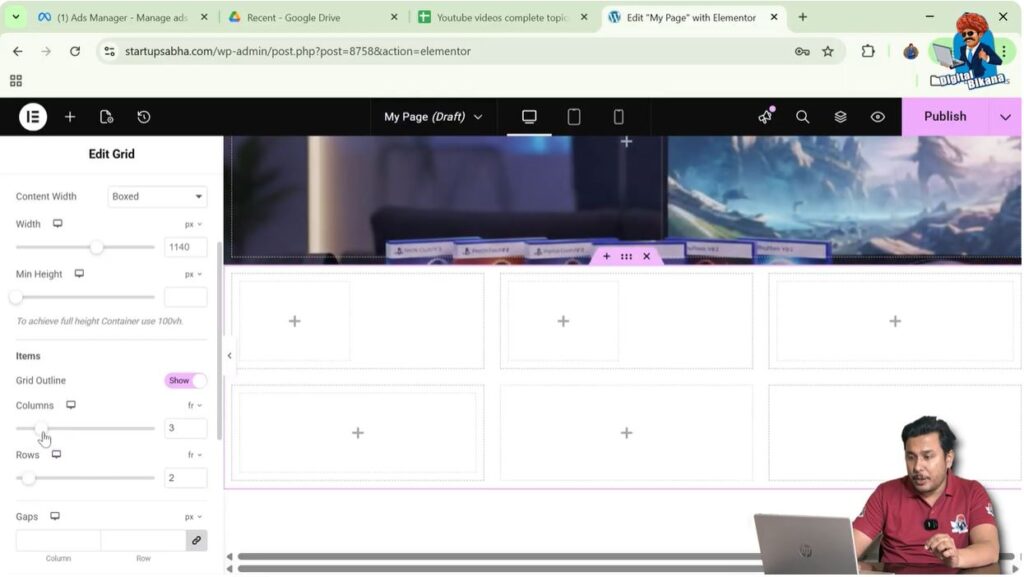
Step 2: Set Number of Rows
You can also change the number of rows.
For example:
- One row
- Two rows
- Three rows
By adjusting these values, you can create a flexible grid layout.

Adjusting Container Width
After converting the layout from Flexbox to Grid, you may need to adjust the container width.
Step 1: Select the Container
Click the container you want to modify.
Step 2: Adjust Width
Change the width of the container to 100% so that it fits properly within the grid layout.
This ensures that the container occupies the correct amount of space within the grid.

Viewing the Final Layout
After adding containers and adjusting the layout, the section will contain multiple containers arranged in rows and columns.
For example, the layout may contain:
- One section
- Multiple containers
- Different rows and columns
This flexible layout system allows you to design complex webpage structures easily.
Benefits of Using Multiple Containers
Using multiple containers provides several advantages when designing webpages in Elementor.
Some benefits include:
- Better content organization
- Flexible layout control
- Easier content alignment
- Ability to create multi-column layouts
- Improved responsiveness across devices
Containers help create visually balanced webpage designs.
Conclusion
Adding a new container in Elementor is a simple process that helps you organize webpage layouts effectively.
You begin by opening the Elementor editor and clicking the plus icon to create a section. After selecting a layout structure such as one row and two columns, a section with containers will appear.
If you want to add additional containers, you can right-click the Edit Container icon and select Add New Container. You can repeat this process to add multiple containers within the same section.
If needed, you can also change the layout from Flexbox to Grid and adjust the number of rows and columns to create more structured layouts.
By using these methods, you can easily add and manage containers while designing webpages in Elementor in WordPress.
Related Posts


