
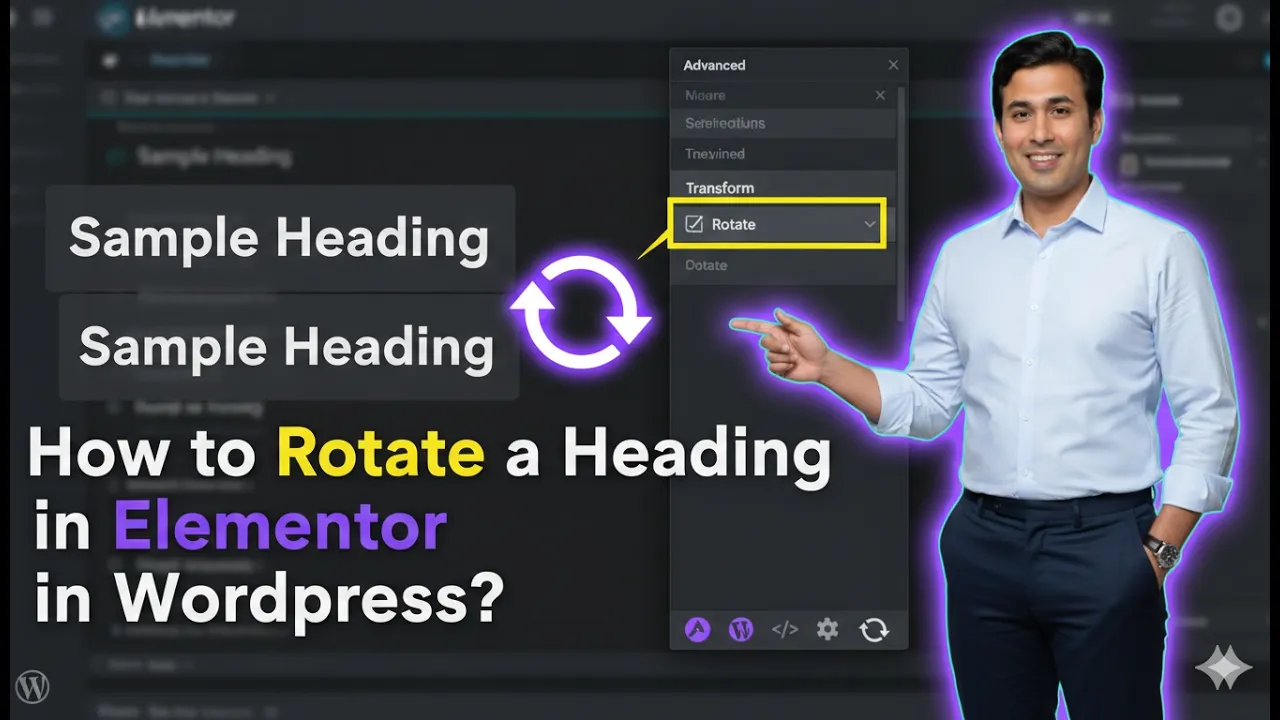
Rotating a heading in Elementor is a creative way to enhance your website design and make your content visually engaging. It helps you add dynamic effects and unique styling to your headings, which can improve user experience and draw attention to important sections.
In this article, we will explain how to rotate a heading in Elementor step by step. The explanation follows a structured approach and expands each step in detail so that you can clearly understand how rotation works and how to apply it properly.
Accessing the Elementor Editor
To begin, you need to open Elementor and start editing your web page.
As shown in the process, you are inside the Elementor editor and working on a web page. A section has already been created, and a heading widget is added inside that section.
Now the goal is to rotate this heading.
Selecting the Heading for Editing
Step 1: Hover Over the Heading
Move your cursor over the heading text.
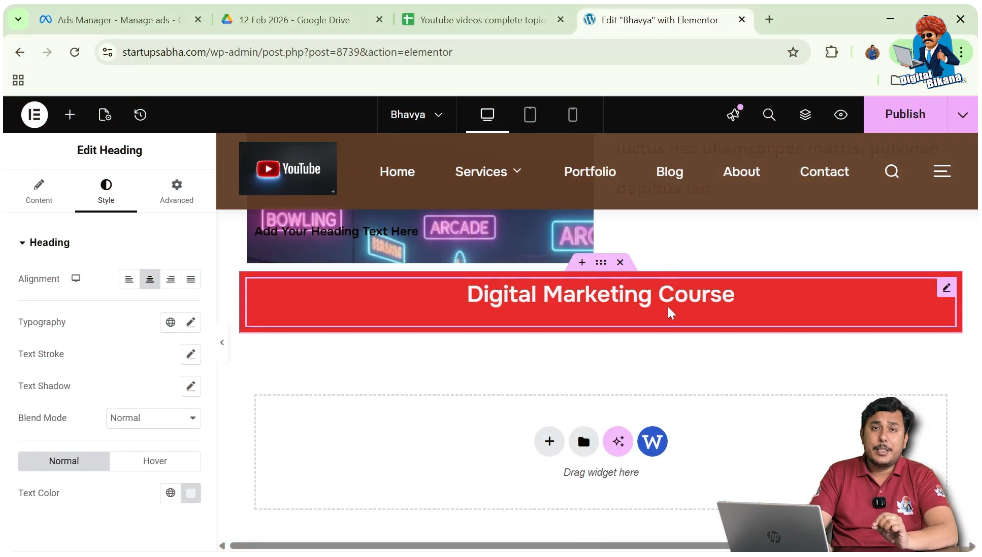
Step 2: Click the Edit Icon
You will see a pen icon in the top right corner of the heading.
Click on this icon to open the settings panel.
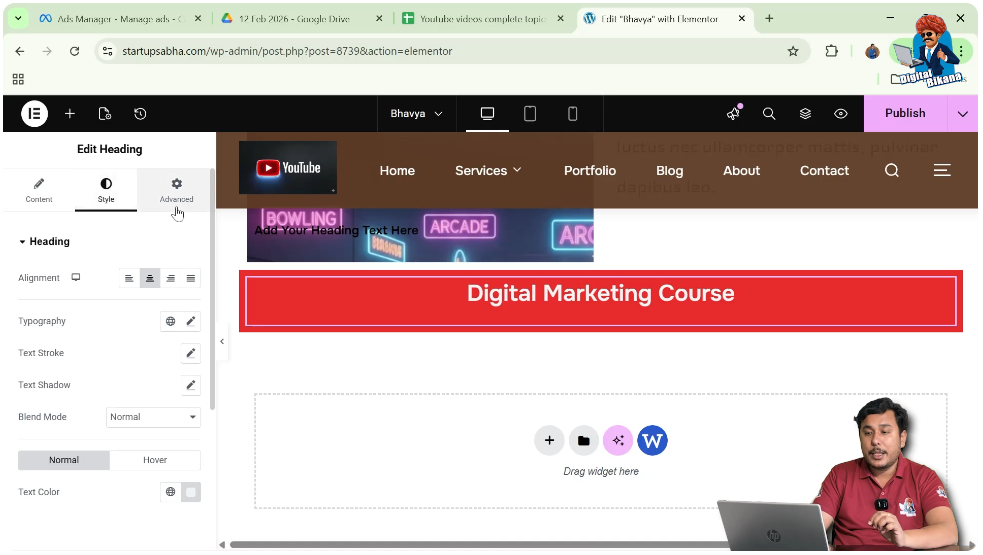
Navigating to Advanced Settings
Step 3: Open Advanced Tab
In the left-side toolbar, you will see:
- Content
- Style
- Advanced
Click on the Advanced tab.
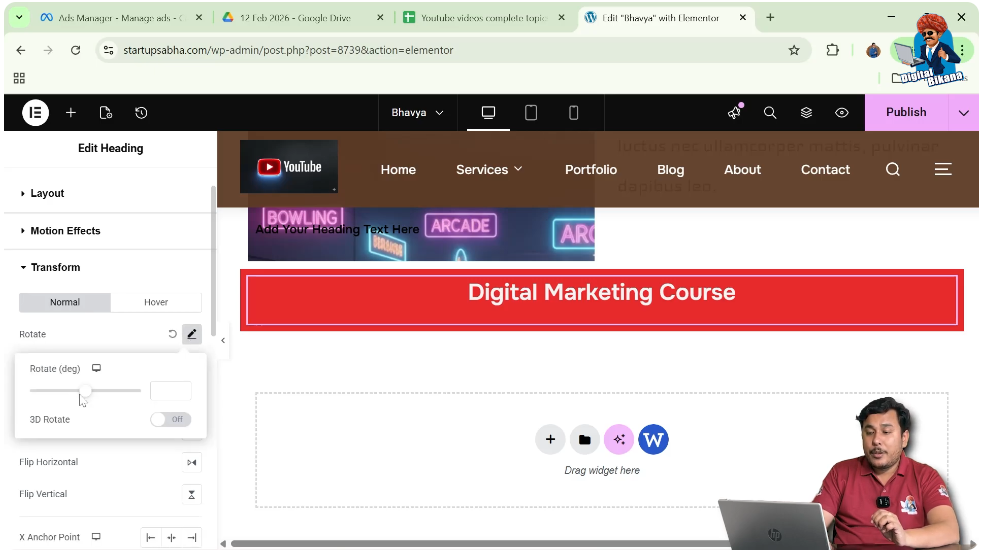
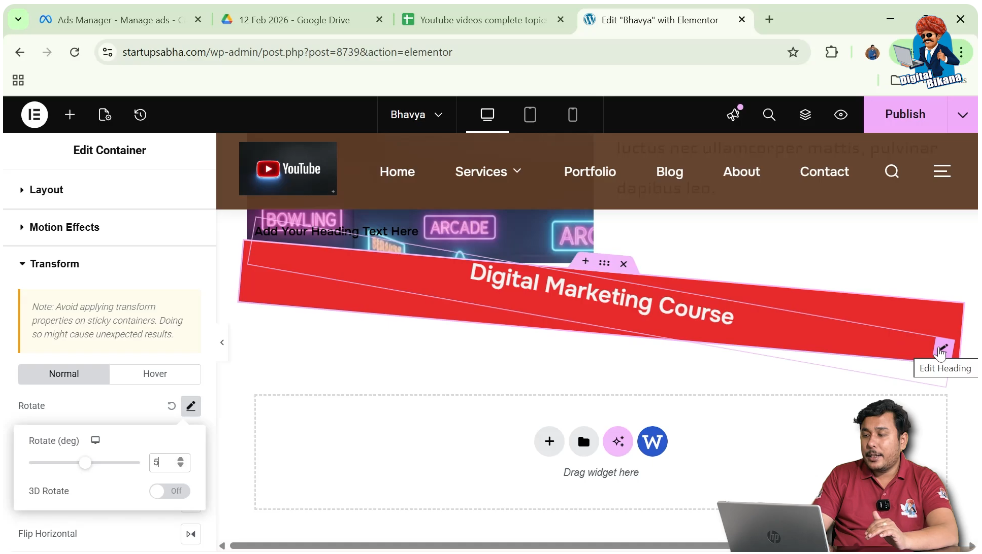
Accessing Transform Settings
Step 4: Scroll to Transform
Scroll down in the advanced settings.
You will find the Transform option under motion effects.

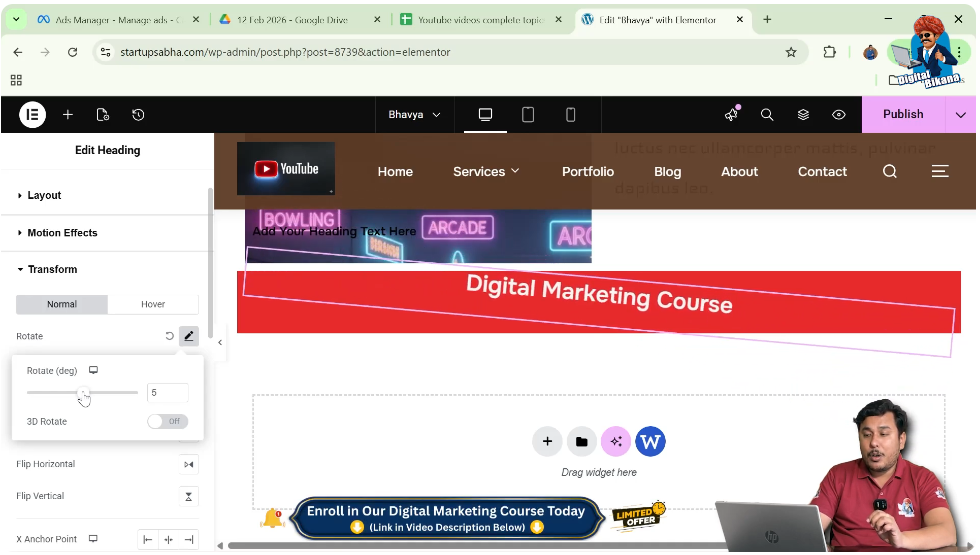
Step 5: Click Rotate Option
Click on the pen icon in front of the Rotate option.
This allows you to rotate the heading.
Rotating the Heading
Step 6: Apply Rotation
Enter a rotation value.
For example:
- Rotate the heading slightly
As you apply rotation:
- The heading tilts
- The design becomes dynamic
Understanding the Issue
When you rotate only the heading:
- The heading may move outside the section
- The layout may look unbalanced
This happens because only the element is rotated, not the container.
Rotating the Section
To fix this issue, you can rotate the section as well.
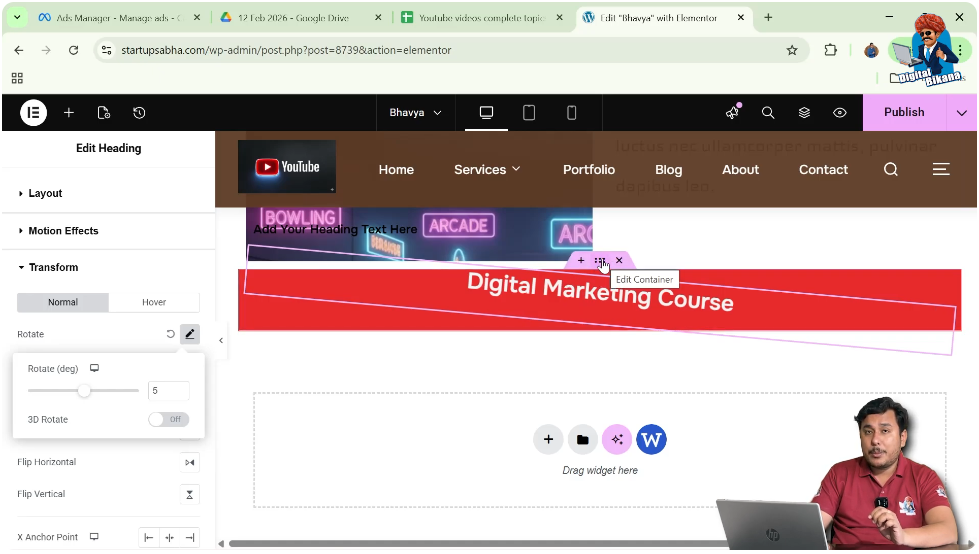
Step 7: Select the Section
Click on the edit container (six-dot icon) above the section.
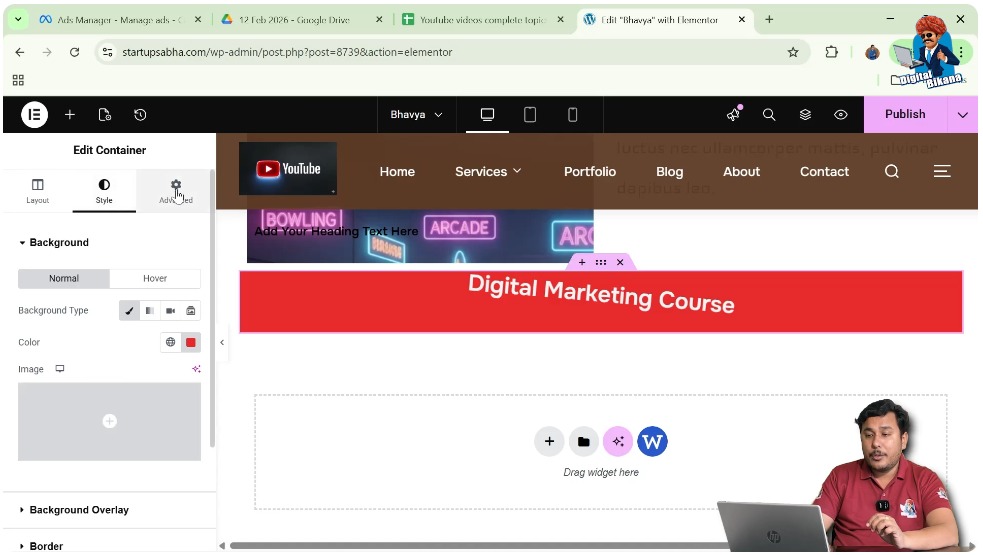
Step 8: Open Advanced Settings
Go to the Advanced tab.
Step 9: Access Transform
Scroll down to the Transform option.
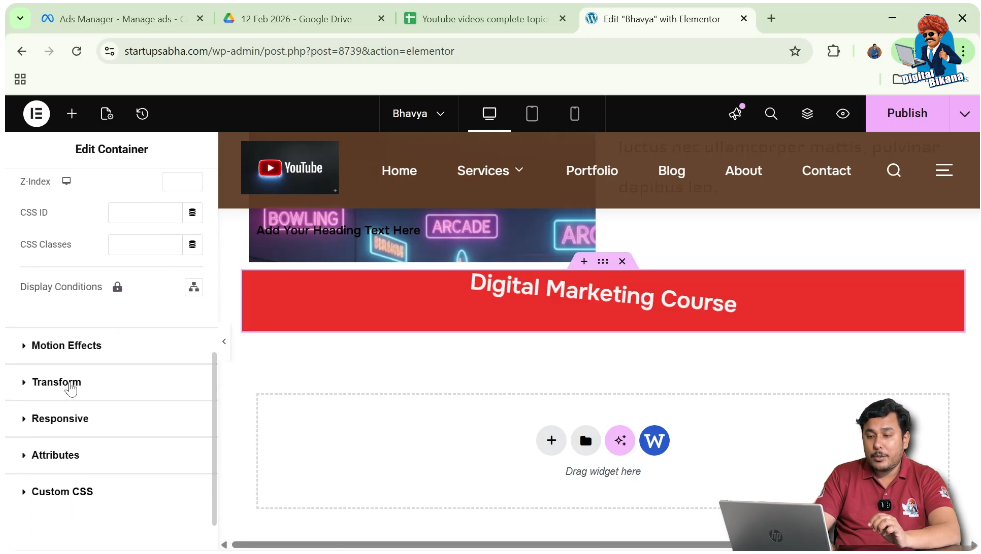
Step 10: Apply Section Rotation
Enter a rotation value, for example:
- 5 degrees
This rotates the entire section.

Adjusting the Heading Again
After rotating the section, the heading may also appear rotated.
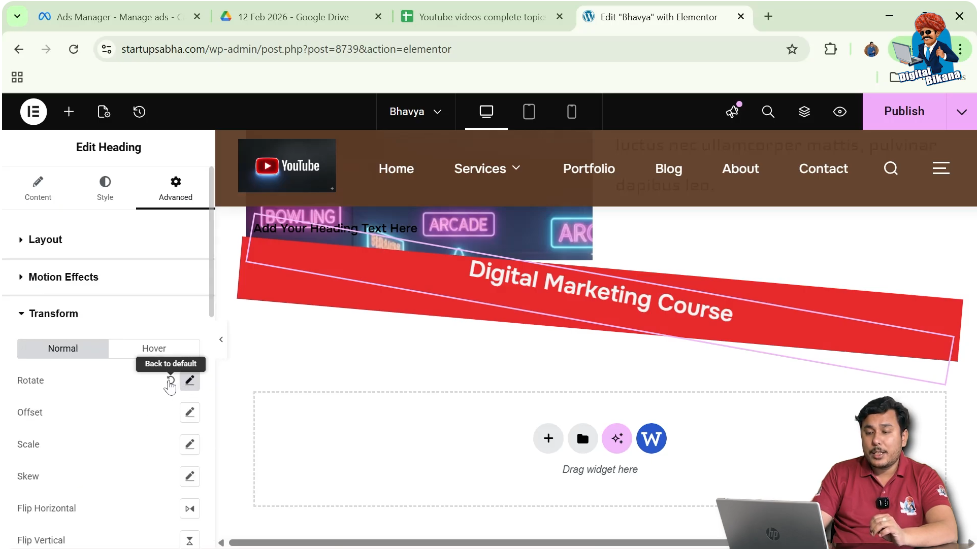
Step 11: Edit Heading Again
Click on the heading edit icon.
Step 12: Reset or Adjust Rotation
Go to:
- Advanced → Transform
You can:
- Adjust rotation
- Click Back to Default
This balances the design.
Final Result
After applying these steps:
- The section is slightly rotated
- The heading is properly aligned
- The layout looks balanced and visually appealing
Understanding Transform Feature
The transform option allows you to:
- Rotate elements
- Scale elements
- Move elements
- Apply advanced effects
Rotation is just one part of this feature.
Practical Example
In the demonstrated process:
- The heading is rotated first
- It moves outside the section
- The section is then rotated
- The heading is adjusted again
This results in a proper and balanced layout.
Benefits of Rotating Heading
Creative Design
Adds uniqueness to your layout.
Visual Attention
Highlights important headings.
Modern Look
Makes your website look dynamic.
Common Mistakes to Avoid
Rotating Only Heading
This may break the layout.
Over Rotation
Too much rotation can reduce readability.
Ignoring Alignment
Always check positioning after rotation.
Best Practices
- Use small rotation values
- Maintain readability
- Combine with proper spacing
- Test on different devices
Final Understanding
Rotating a heading in Elementor involves using the transform settings in the advanced tab. For better results, you may also need to rotate the section and adjust the heading accordingly.
Conclusion
The rotation feature in Elementor allows you to create visually appealing designs with minimal effort. By understanding how to use transform settings properly, you can enhance your website layout and make your headings stand out.
By following the steps explained in this guide, you can easily rotate headings and create a more engaging and professional design.
Related Posts


