
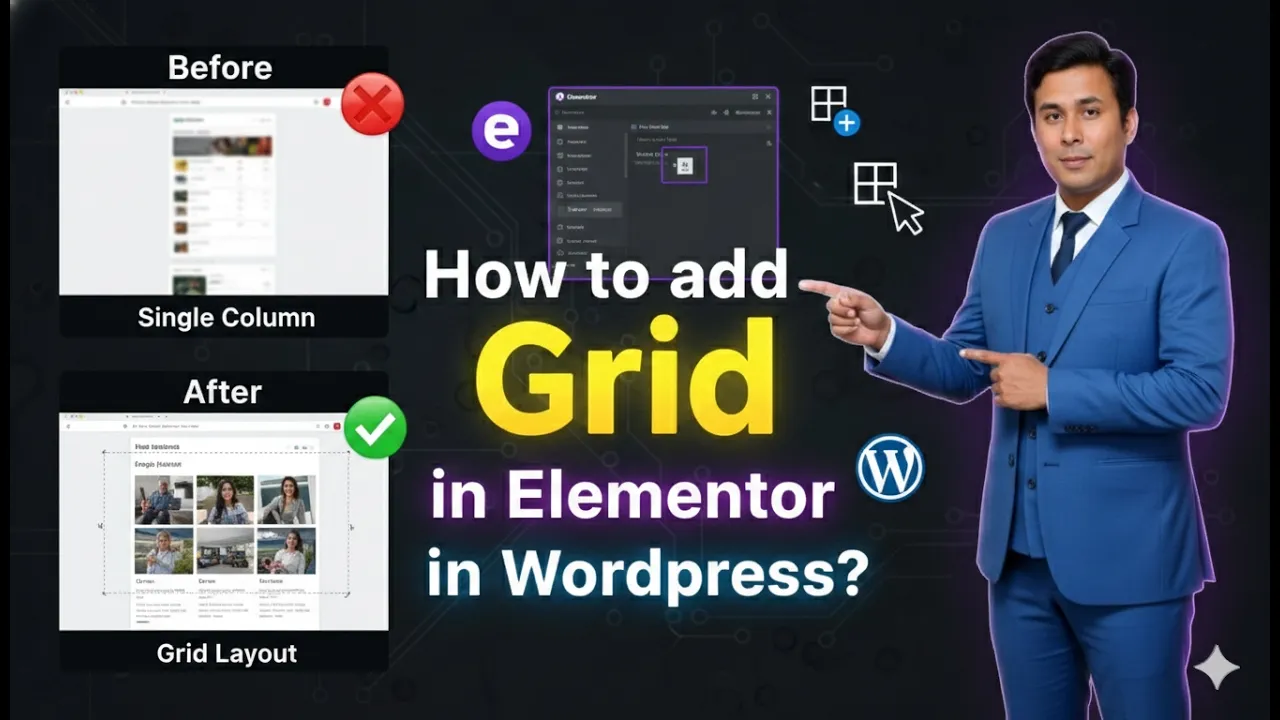
Creating structured and organized layouts is an important part of designing a professional website. Elementor provides different layout systems that help users design web pages easily. One of these layout systems is the Grid container, which allows you to organize elements into rows and columns in a flexible and structured way.
When you are editing a web page in Elementor, you can quickly add a grid layout and arrange content in different structures such as two columns, three columns, multiple rows, or combinations of rows and columns. The grid layout helps you create well-organized page sections and makes it easier to control how content appears on your website.
In this guide, you will learn how to add a grid in Elementor while editing a page on a WordPress website. The process includes selecting the grid layout, choosing the structure, editing the container, and adjusting the rows and columns according to your needs.
Opening Elementor While Editing a Page
Before adding a grid layout, you first need to open the Elementor editor for the page you want to design.
When you start editing a page in Elementor, the editing interface appears with the page preview in the center and a toolbar on the left side. This workspace allows you to visually build your webpage using drag-and-drop elements.
In the middle of the screen, you will notice a plus icon (+). This icon allows you to add a layout structure to the page. Whenever you want to add a new section or layout to the page, you begin by clicking this plus icon.

This is the first step toward adding a grid layout to your webpage.
Adding a Grid Layout in Elementor
Elementor allows you to create different layout structures using containers. The grid container is one of the layout types available for organizing content.
Step 1: Click the Plus Icon
While editing a page in Elementor, locate the plus icon in the center of the screen.
Clicking this icon opens the layout selection options. These options allow you to choose the type of layout you want to add to your page.
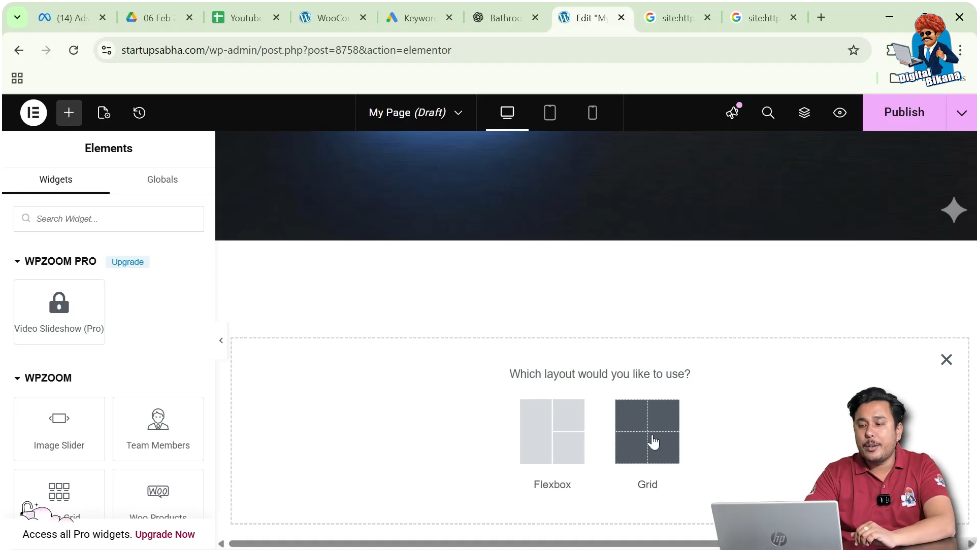
Step 2: Select the Grid Layout
After clicking the plus icon, Elementor asks you to select the layout type.
From the available layout options, choose Grid.
Once you select Grid, Elementor will show you different grid structures that you can use for arranging content on your page.
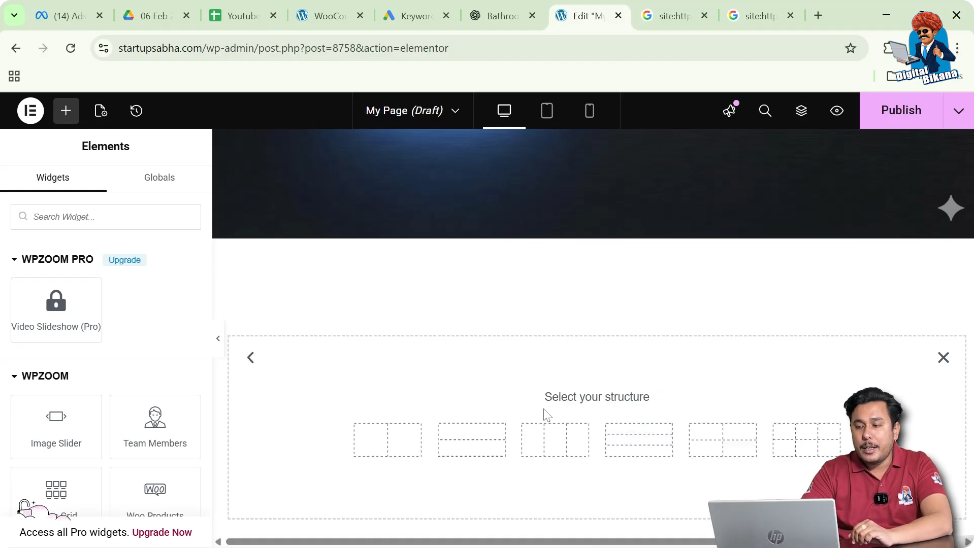
Step 3: Choose the Grid Structure
After selecting the grid option, Elementor displays different structures based on rows and columns.
Each structure represents a different arrangement of rows and columns within the grid container.
Some of the available structures include:
- One row and two columns
- Two rows and one column
- One row and three columns
- Three rows and one column
- Two rows and two columns
- Two rows and three columns
These structures help you quickly build different types of layouts depending on your design requirements.
For example:
- A two-column layout can be used for placing text on one side and an image on the other.
- A three-column layout can be used for displaying services or features.
- A two-by-two grid layout can be used for image galleries or content blocks.
Elementor provides these predefined structures to make page design faster and easier.
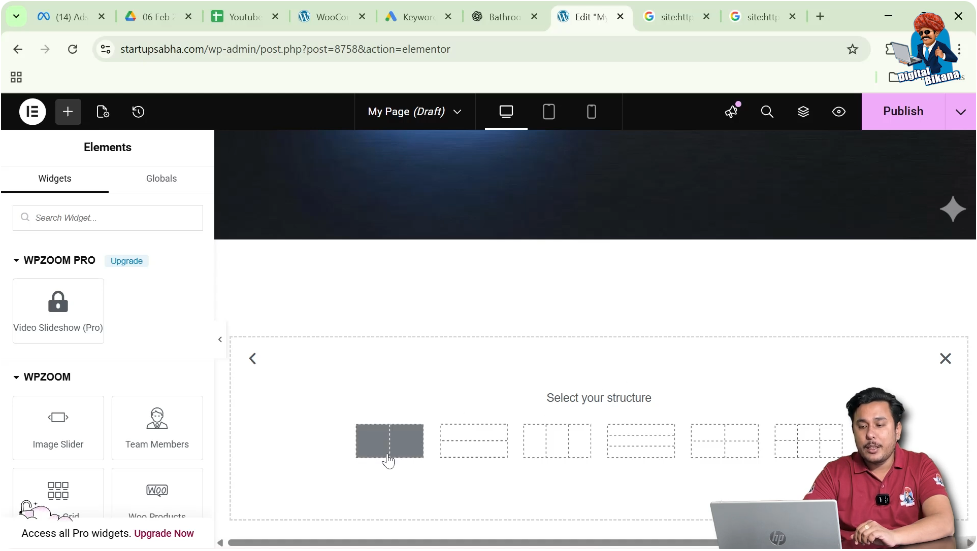
Selecting a Grid Structure
After reviewing the available options, you can select the structure that suits your design.
For example, you can choose the first structure, which is one row and two columns.
Once you click this structure, the grid container is added to your page.
You will now see the grid layout appear in the page preview area, where the selected number of rows and columns are visible.
Editing the Grid Container
After adding the grid layout to the page, you may want to customize its settings. Elementor allows you to edit the container settings to adjust layout behavior and design options.
Step 1: Click the Six Dots Icon
To edit the grid container, locate the six dots icon on the container.
When you hover over the container, Elementor displays the Edit Container option.
Clicking the six dots icon opens the container settings in the left-side toolbar.
Container Editing Options in Elementor
Once you click the container edit icon, Elementor shows several editing options in the left-side panel.
The container settings include three main sections:
- Layout
- Style
- Advanced
These sections allow you to control how the grid container looks and behaves.
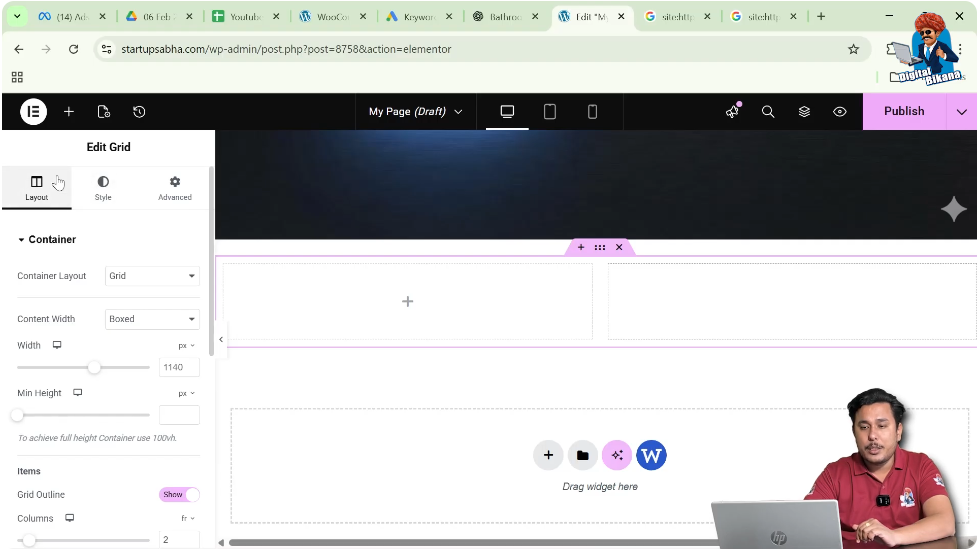
Layout Settings
The Layout section controls the structure and behavior of the grid container.
When you open the Layout settings, you will see that the container layout is set to Grid, since you selected the grid option earlier.
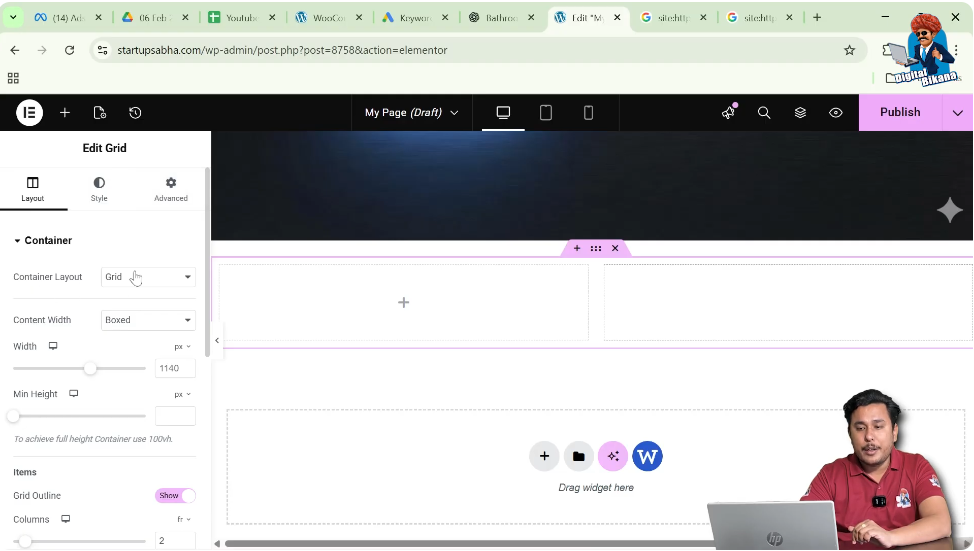
Container Layout
The container layout shows the type of layout being used.
In this case, it is Grid.
However, Elementor also allows you to switch the layout to Flexbox if needed.
This means that the same container can be changed from a grid layout to a flexbox layout depending on the design requirement.
Content Width
Another important option available in the layout settings is Content Width.
You can choose between two options:
- Boxed
- Full Width
Boxed Layout
When the content width is set to Boxed, the grid container remains within a fixed width area in the center of the page.
This layout is commonly used for maintaining a structured and clean design.
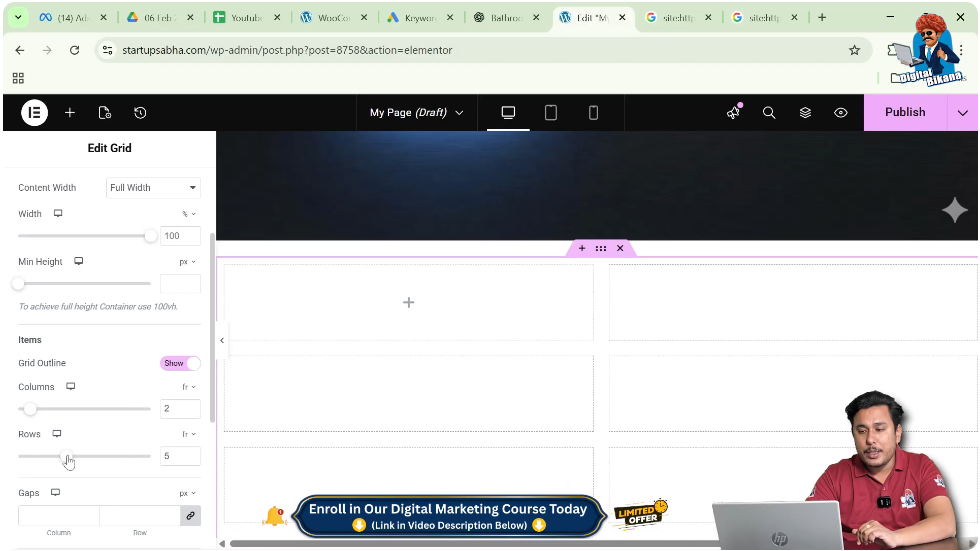
Full Width Layout
When the content width is set to Full Width, the container expands across the entire width of the screen.
This option is useful when you want large background sections or full-width content areas.
You can switch between these options depending on the design of your webpage.
Adjusting Grid Items
After configuring the container layout, you can scroll down in the layout settings to adjust the grid items.
Elementor allows you to modify the number of columns and rows inside the grid container.
Changing the Number of Columns
You can change the number of columns using the column control.
For example, if you want more columns, you can move the scroller to increase the column number.
You can also directly type the number of columns you want.
For example, if you want:
- Two columns
- Three columns
- Seven columns
- Eight columns
You can easily set the desired number using the input field or the slider.
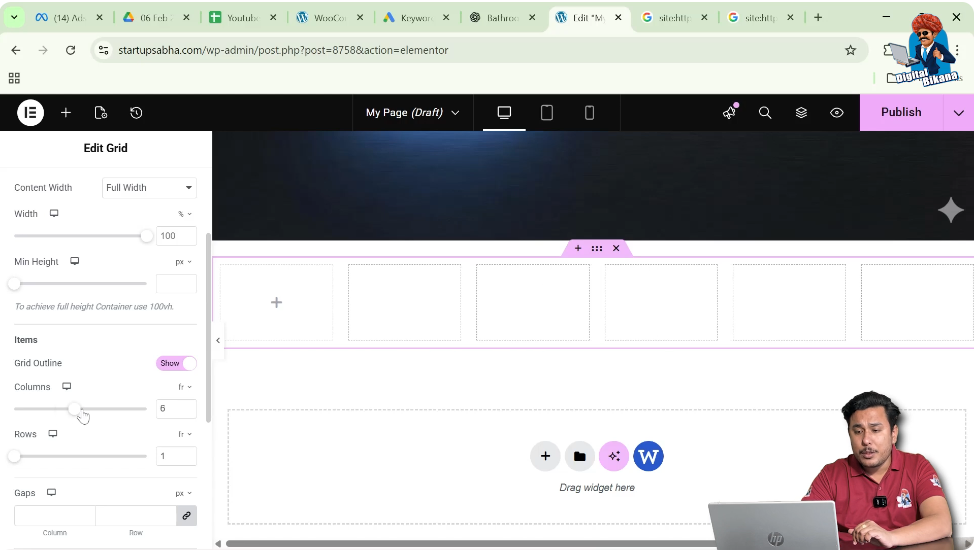
Changing the Number of Rows
Similarly, Elementor allows you to increase or decrease the number of rows.
You can adjust the rows by moving the row slider or by entering the number manually.
For example, you may want:
- One row
- Two rows
- Three rows
Depending on the design of your page, you can create a grid with multiple rows and columns.
This flexibility allows you to create complex layouts easily.
Adding Content Inside the Grid
Once the grid layout is created, you can begin adding content inside the grid cells.
Elementor allows you to drag and drop different widgets into each grid section.
Some commonly used widgets include:
- Heading
- Text editor
- Image
- Button
- Icon
- Video
Each grid cell can hold multiple widgets, allowing you to build detailed layouts.
For example, you can create sections such as:
- Service boxes
- Image galleries
- Product listings
- Feature highlights
The grid system helps you align content in a neat and organized structure.
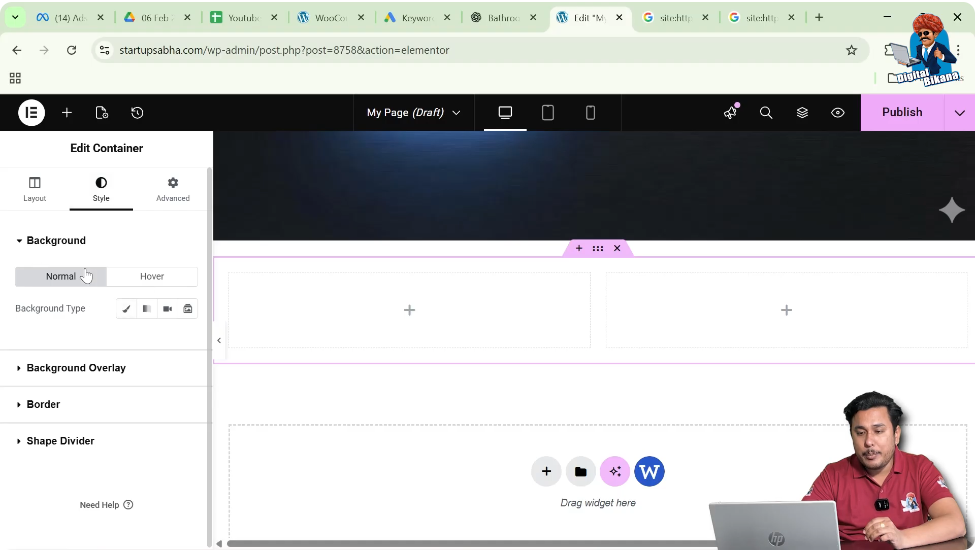
Style Settings
The Style tab allows you to customize the appearance of the grid container.
In this section, you can add visual elements such as:
- Background color
- Background image
- Background overlay
- Borders
- Shape dividers
These styling options help you enhance the design and visual appeal of your grid layout.
For example, you can add a background image behind the grid or apply a color overlay to make the text more readable.
Advanced Settings
The Advanced section provides additional options for controlling the behavior and appearance of the container.
This section includes features such as:
- Layout adjustments
- Motion effects
- Transform options
- Responsive attributes
- Custom CSS
These advanced settings allow you to create more interactive and responsive designs.
For example, responsive settings help ensure that your grid layout works properly on desktop, tablet, and mobile devices.
Custom CSS allows developers to apply additional styling if needed.

Using Grid Layouts While Designing WordPress Pages
When designing a page in Elementor on a WordPress website, the grid layout is a useful option for organizing content.
The grid system allows you to control rows and columns easily and create structured page sections.
The process of adding a grid layout is simple:
- Open the page in Elementor.
- Click the plus icon.
- Select the Grid layout.
- Choose a grid structure.
- Edit the container settings.
- Adjust rows and columns.
- Add content inside the grid cells.
By following these steps, you can design structured layouts efficiently.
Conclusion
Adding a grid in Elementor is a simple and effective way to organize content into rows and columns while designing a webpage on a WordPress website.
You can start by clicking the plus icon in the Elementor editor, selecting the grid layout, and choosing the structure that fits your design. After adding the grid container, you can edit the container settings using the six dots icon and adjust layout options such as content width, number of columns, and number of rows.
Elementor also allows you to switch between boxed and full-width layouts and modify the grid structure as needed. You can easily increase or decrease the number of rows and columns by using the slider or entering the values manually.
Once the grid layout is ready, you can add widgets and content inside each grid section to build your page layout.
This is how you can add a grid in Elementor while editing a web page on a WordPress website.
Related Posts


