Creating a Google Search Console account is a simple and straightforward process. If you want to track your website’s performance in Google Search results, Google Search Console is the platform you need. The good part is that you do not need to create a separate account specifically for Google Search Console. It automatically uses your existing Google account for sign-in.
In this article, you will learn how to create a Google Search Console account and understand the basic setup process, including adding your domain, verifying ownership, and submitting your sitemap.
Searching for Google Search Console
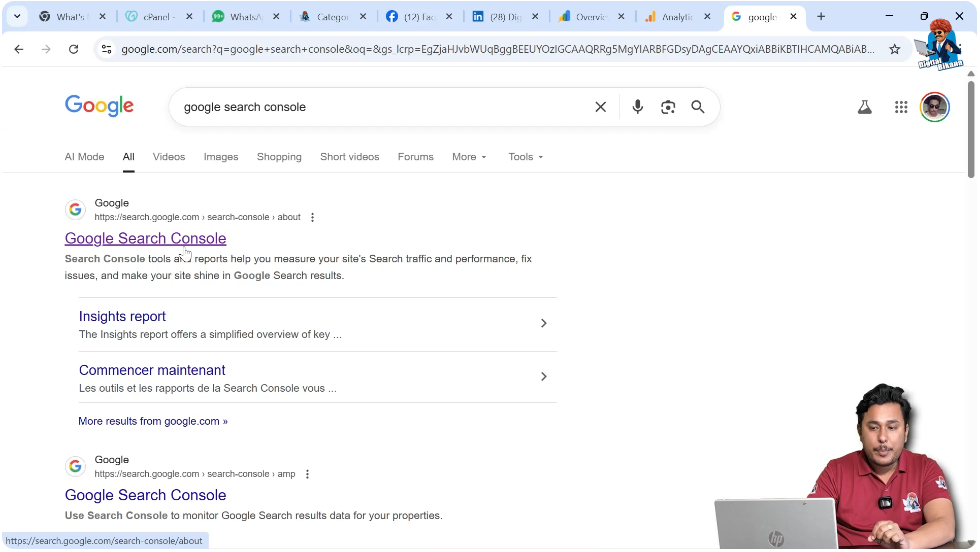
To begin, you need to search for Google Search Console using the Google search engine.
Step 1: Search for Google Search Console
Open Google in your browser.
Type Google Search Console in the search bar.
Press Enter.
You will see the search results page.
The first search result will usually be the official Google Search Console platform.
Click on the first search result to open the platform.
Signing in to Google Search Console
One of the easiest parts of creating a Google Search Console account is that you do not need to create a new account separately.
Google Search Console automatically uses your Google account for sign-in.
If you are already signed in to your Google account, it will directly take you to the Search Console platform.
If you are not signed in, you will be asked to sign in using your Google account credentials.
Once signed in, you will reach the Google Search Console dashboard area.
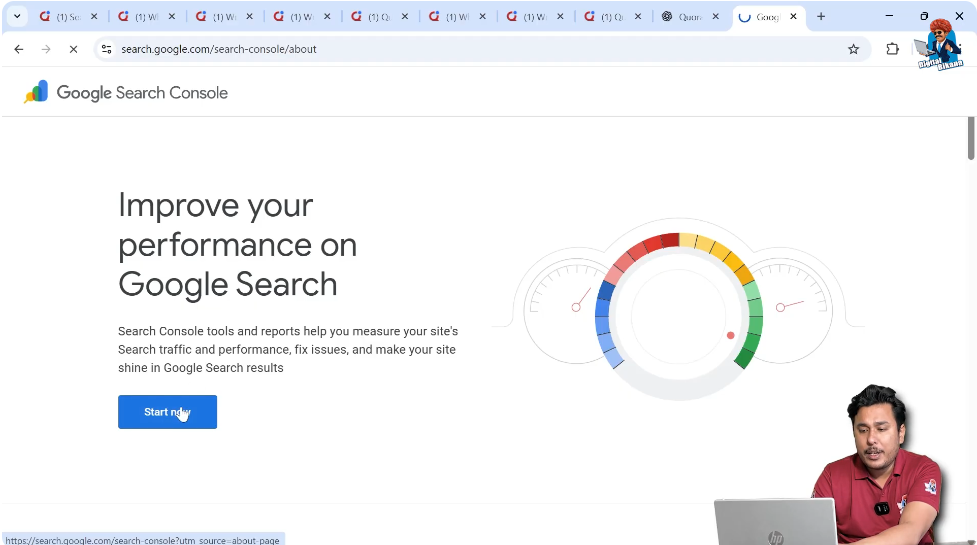
Starting with Google Search Console
After opening the Google Search Console platform, you will see the option to get started.
Step 2: Click on Start Now
On the Google Search Console homepage, click on Start Now.
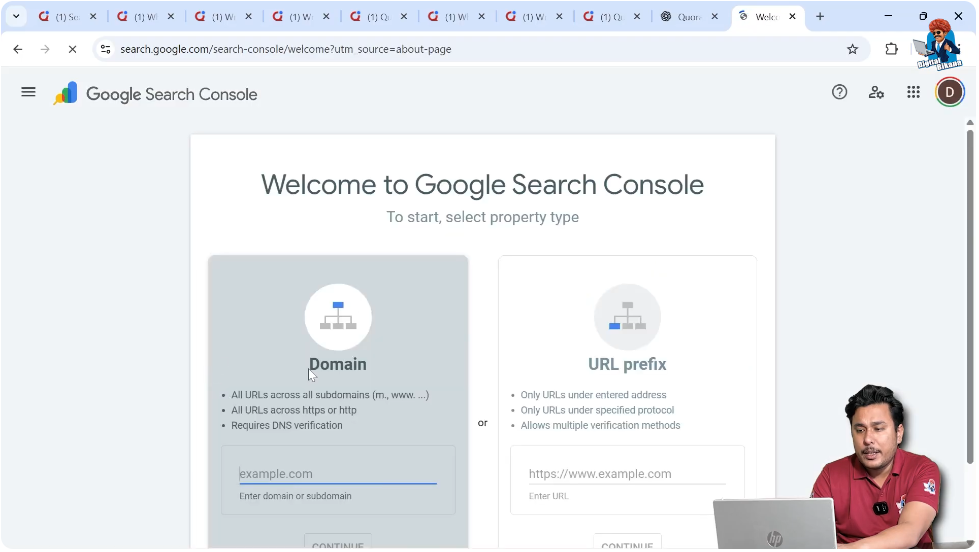
After clicking on Start Now, Google Search Console will ask you to add a property.
A property refers to your website.
At this stage, you need to connect your website with Google Search Console.
Adding Your Website to Google Search Console
To use Google Search Console for your website, you must add your domain or URL.
You will see two options while adding a property:
- Domain
- URL Prefix
Understanding Domain Property
The Domain option allows you to add your entire domain.
When you add a domain property:
- It includes all subdomains.
- It includes both HTTP and HTTPS versions.
You need to enter your domain name in the given field.
For example, if your website is example.com, you simply enter example.com.
Understanding URL Prefix Property
The URL Prefix option allows you to add a specific version of your website.
This could include:
- https://example.com
- http://example.com
- https://www.example.com
This option tracks only the specific URL you enter.
Step 3: Enter Your Domain or URL Prefix
Choose either Domain or URL Prefix.
Enter your website address.
Click on Continue.
After clicking Continue, Google Search Console will ask you to verify domain ownership.
Verifying Domain Ownership
Verification is an important step in setting up Google Search Console.
Google needs to confirm that you are the owner of the website you are trying to connect.
You cannot access performance data until verification is complete.
Step 4: Verify Your Domain
Google provides different verification methods.
Depending on your selected property type, you may need to:
- Add a DNS record
- Upload an HTML file
- Add an HTML tag to your website
- Verify through Google Analytics
Follow the instructions provided on the screen.
Once verification is successful, your domain will be connected to Google Search Console.
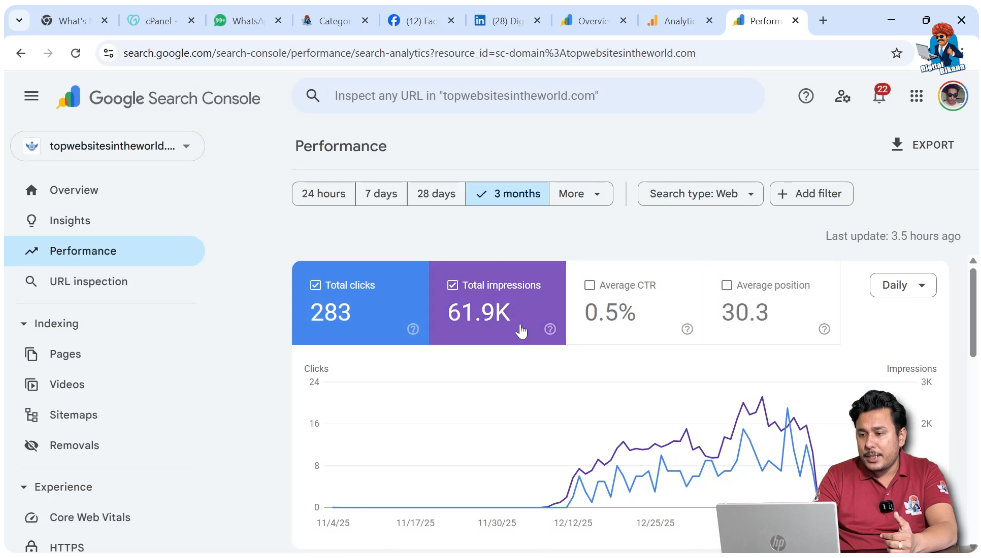
Accessing the Google Search Console Dashboard
After verification, you can access your Google Search Console dashboard.
If you click on the main menu, you will see your connected properties.
If you have already created a Google Search Console account and added websites, those properties will appear in the dashboard.
You can switch between different properties from the property selector.
Google Search Console Setup Process
Creating the account is easy because it automatically uses your Google sign-in.
However, the main setup process includes:
- Adding your domain
- Verifying domain ownership
- Submitting your sitemap
Let us understand these steps further.
Submitting Your Sitemap
After verifying your domain, the next step is to submit your website’s sitemap.
A sitemap helps Google understand the structure of your website.
It provides a list of pages that you want Google to crawl and index.
Step 5: Submit the Sitemap
Inside Google Search Console, go to the Sitemap section.
Enter the URL of your sitemap.
For example:
yoursite.com/sitemap.xml
Click on Submit.
Once submitted, Google will start processing your sitemap.
This helps Google bots crawl your website more effectively.
Why Verification Is Important
Domain verification ensures that only the rightful owner can access website data.
Without verification:
- You cannot see performance data.
- You cannot monitor indexing.
- You cannot submit sitemaps.
Verification is mandatory before using the platform fully.
Managing Multiple Properties
If you manage more than one website, you can add multiple properties to your Google Search Console account.
Each property will have its own dashboard.
You can switch between properties using the property selector menu.
Importance of Google Search Console Setup
Proper setup ensures:
- Accurate performance tracking
- Correct indexing
- Better crawling by Google bots
- Access to search performance data
Without setup and verification, you cannot use Google Search Console effectively.
Conclusion
Creating a Google Search Console account is very easy because it automatically uses your existing Google account for sign-in. You simply need to search for Google Search Console, open the official platform, and click on Start Now.
After that, you need to add your domain or URL prefix, verify ownership, and submit your sitemap. Verification confirms that you own the website, and submitting the sitemap helps Google crawl and index your pages.
Once the setup is complete, you can start monitoring your website’s performance in Google Search results. By following these steps, you can successfully create and set up your Google Search Console account.
Related Posts