
Sometimes blog posts may be deleted accidentally while managing a WordPress website. If a blog post is deleted by mistake, it does not get permanently removed immediately. WordPress keeps deleted blog posts inside the Trash section, allowing users to restore them whenever needed.
If you have mistakenly deleted a blog post and want to retrieve it, you can easily restore it from the Trash section of WordPress. This article explains how to restore a deleted blog post on a WordPress website in a simple step-by-step manner.
When you log in to the WordPress admin dashboard, you will see multiple options in the left side toolbar. One of these options is the Posts section, which allows you to manage all blog posts on the website.
Accessing the Posts Section
Before restoring a deleted blog post, you need to open the Posts section inside the WordPress dashboard.
Step 1: Open the Posts Menu
Log in to your WordPress admin dashboard.
On the left side toolbar, move your cursor over the Posts option.
As soon as you move the cursor over Posts, a submenu automatically appears.
This submenu contains different options.
Click on All Posts.
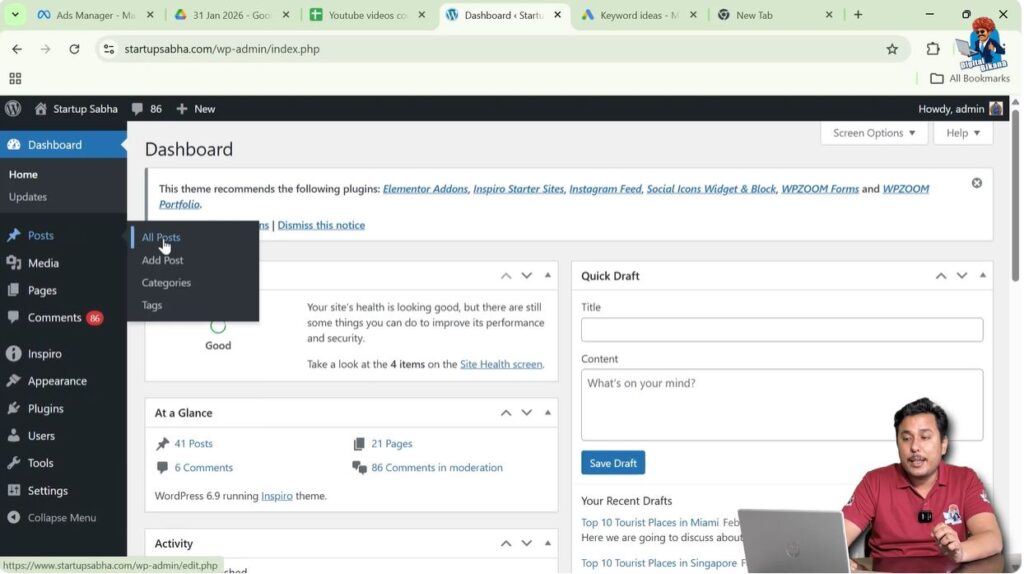
After clicking All Posts, you will see all blog posts on your website.
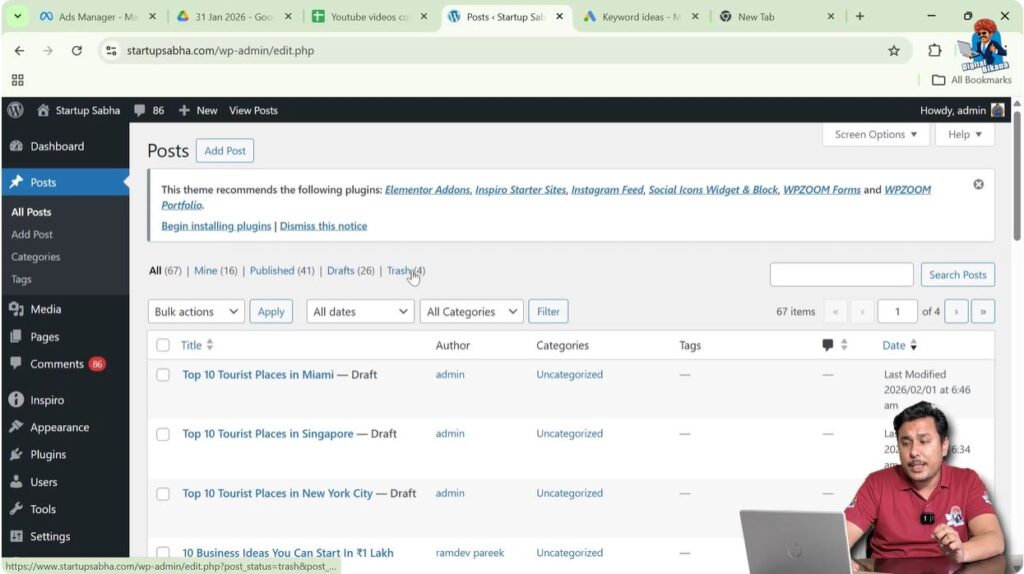
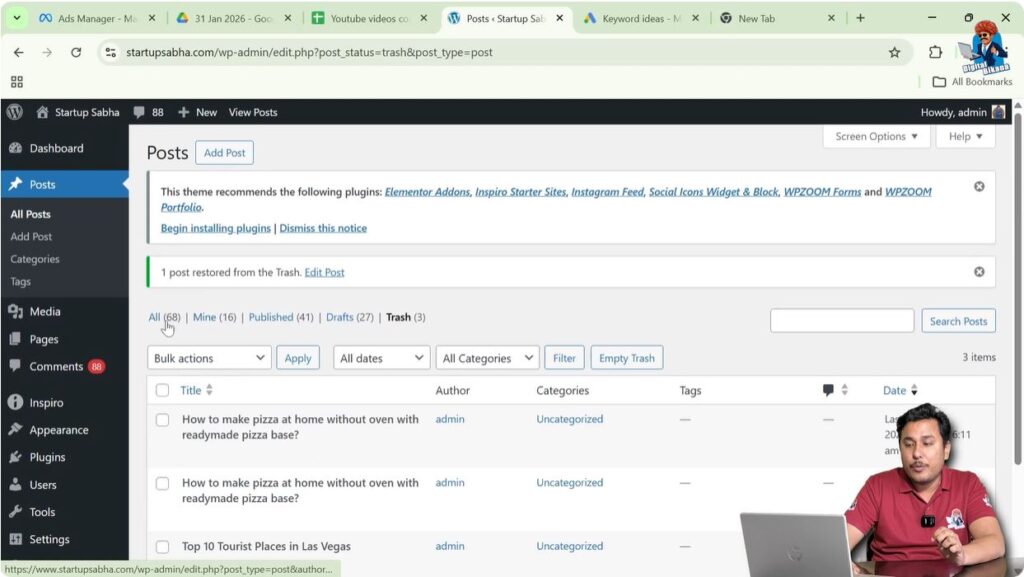
Understanding Post Categories in WordPress
After opening the All Posts section, you will see different categories of posts.
These categories help organize blog posts according to their status.
Some common categories include:
- All Posts
- Mine
- Published
- Draft
- Trash
Each category shows blog posts based on their status.
If a blog post has been deleted, it will appear inside the Trash category.

Opening the Trash Section
Deleted blog posts are stored inside the Trash section.
This section contains blog posts that have been removed but not permanently deleted.
Step 2: Open Trash Posts
Click on the Trash option.
After clicking Trash, all deleted blog posts will be displayed.
These posts can be restored easily.
The Trash section helps recover deleted blog posts whenever required.
Restoring a Deleted Blog Post
Once you find the deleted blog post inside the Trash section, you can restore it.
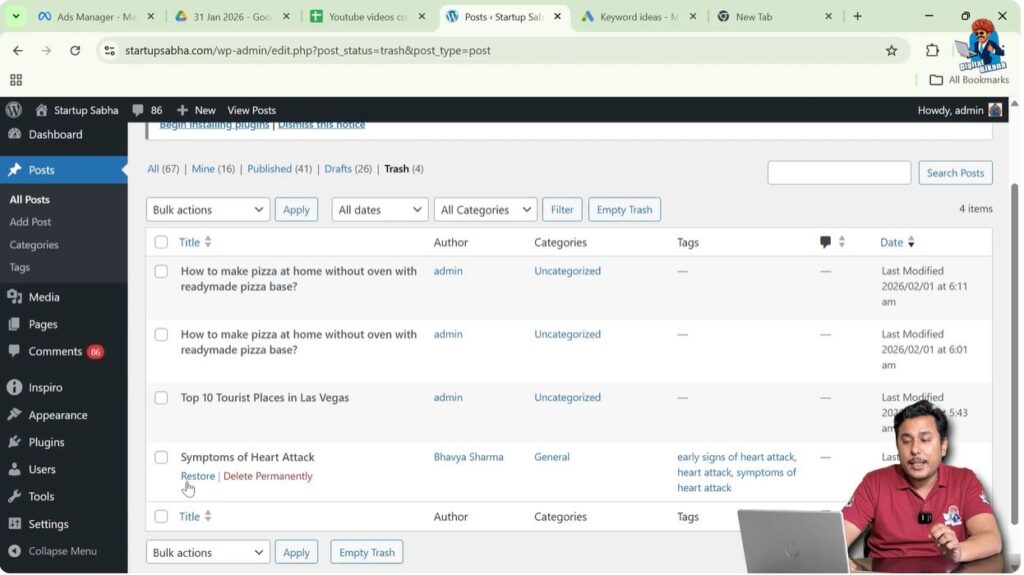
Step 3: Find the Deleted Blog Post
Scroll through the list of deleted blog posts.
Find the blog post that you want to restore.
When you move your cursor over the blog post title, different options will appear.

Step 4: Click Restore
Move your cursor over the blog post title.
The Restore option will appear below the title.
Click on Restore.
After clicking Restore, the blog post will be restored.
The restored blog post will no longer appear in the Trash section.
Checking Restored Blog Post
After restoring the blog post, you can find it again inside the All Posts section.
Step 5: Open All Posts Section
Click on the All Posts option.
The restored blog post will be displayed in the list.
You may also find the restored blog post inside the Mine section.
The restored blog post becomes available again for editing.
Editing and Republishing Restored Blog Post
After restoring a blog post, you can edit and republish it.
The restored blog post behaves like a normal blog post.
You can make changes if needed and publish it again.
Step 6: Edit the Restored Blog Post
Move your cursor over the restored blog post title.
Click on Edit.
Make the necessary changes if required.
You can update or republish the blog post.
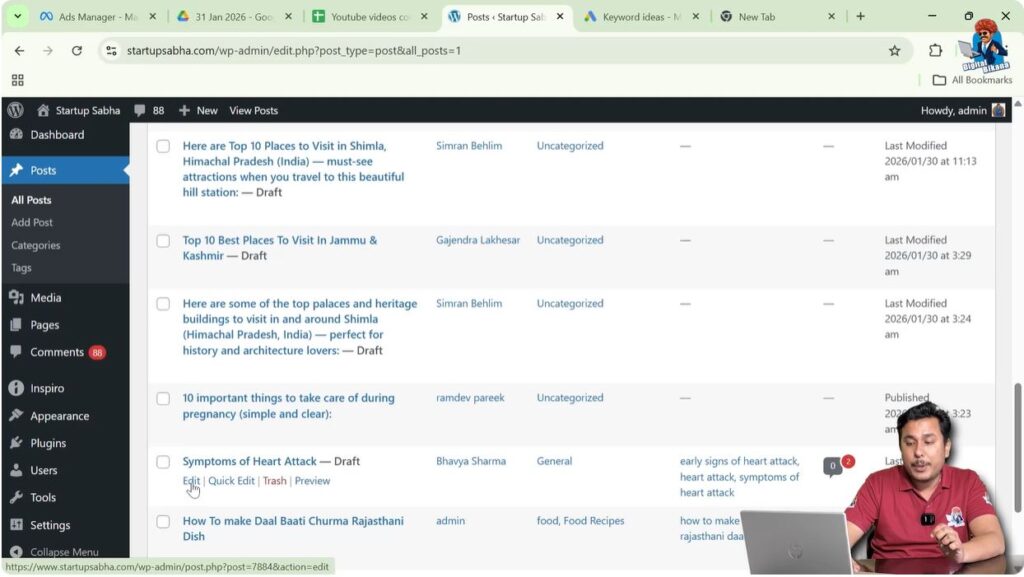
Example of Restored Blog Post
For example, a blog post titled Symptoms of Heart Attack may be deleted accidentally.
After restoring the post from the Trash section, the blog post will appear again in the All Posts section.
From there, you can open the blog post, edit it, and publish it again.
This confirms that the blog post has been successfully restored.
When Blog Posts Get Deleted
Blog posts may get deleted accidentally during website management.
Sometimes users remove posts without realizing that they might need them later.
WordPress provides the Trash feature to prevent permanent data loss.
This feature allows users to restore deleted posts easily.
Importance of Trash Feature
The Trash feature is useful for recovering deleted content.
Instead of permanently deleting blog posts immediately, WordPress keeps them in Trash.
This gives users a chance to restore posts if needed.
The Trash feature helps avoid losing important content.
Difference Between Trash and Permanent Deletion
When a blog post is moved to Trash, it is not permanently deleted.
It can still be restored.
However, if a blog post is permanently deleted from Trash, it cannot be restored from the WordPress dashboard.
Therefore, it is important to restore deleted posts before permanently deleting them.
Conclusion
Restoring a deleted blog post on a WordPress website is a simple process. WordPress stores deleted blog posts inside the Trash section, allowing them to be restored easily.
By opening the Posts section, going to Trash, and clicking the Restore option, deleted blog posts can be retrieved quickly.
After restoring the blog post, it becomes available again in the All Posts or Mine section. From there, the blog post can be edited and republished.
The Trash feature helps prevent permanent data loss and allows users to recover deleted blog posts whenever required.
Related Posts


